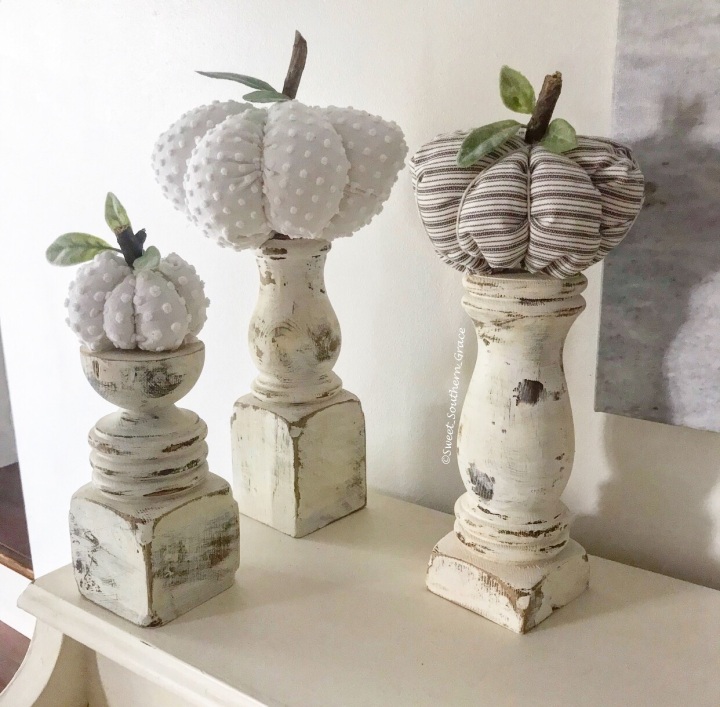
I’d like to say for this month’s Clearance Challenge that I had my shizz together but that couldn’t be further from the truth! I spent most of the day, making a fall wreath and I failed on so many different levels. I will get that wreath finished but not today. I have learned to roll with the punches so I put my thinking cap on and immediately remembered that I had just bought my fav fabric from Walmart on CLEARANCE this past Friday! It rang up for a grand total of $2.00 for 2 yards! I also had this chenille vintage quilt on hand that I purchased for $2.50 at a church rummage sale. I have been seeing the absolute cutest fabric pumpkins out at all the stores and I thought that I would whip up a few of my own! This gray pin striped fabric is from Waverly and I love it! 
Gather your supplies:
-Fabric of your choice
-Sewing machine or Hot Glue Gun
-Butcher Twine
-Embroidery Needle
-Thread or Hot Glue
-Scissors
-Measuring Tape
-Twigs (for stems)
-Optional greenery of your choice (leaves)
I made three different sized pumpkins. You basically want the width of your fabric to be over twice as wide as the height. Here’s how I cut mine: 5″ x 12″ makes a 2 1/2″x 3 1/2″ pumpkin, 7″x17″ makes a 3 1/2″x 5 1/2″ pumpkin and 10″ x 25″ makes a 4 1/2″ x 8″ pumpkin.
Fold your fabric in half so the short edges are together and right sides together. Sew down or hot glue the end with raw edges to make, sort of, fabric tube. Sew down or hot glue the edge of one side. Turn your pumpkin right side out. Begin stuffing your pumpkin and leave enough room at the open end to sew down or hot glue. After you have filled your pumpkin, sew down or hot glue the end other end closed.

Next, take your embroidery needle and twine and insert into the bottom of your pumpkin and thread to the opposite end.
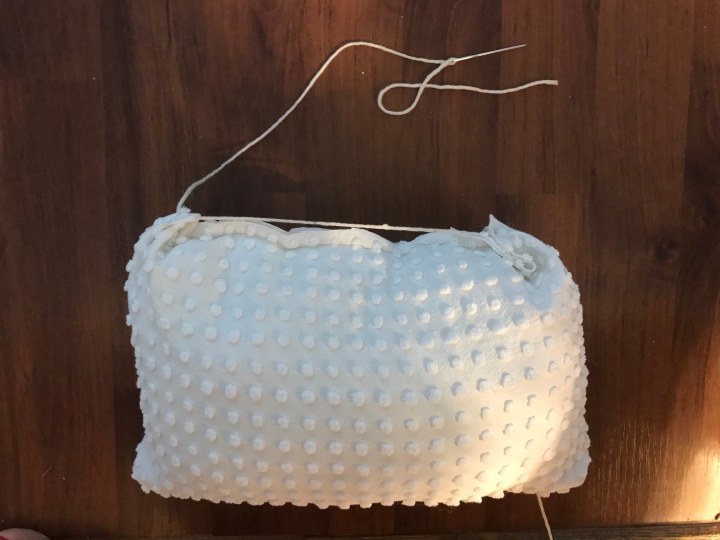
Pull the twine tightly to help gather the bottom of the pumpkin.

Now you can grab a long piece of twine and thread around your pumpkin making segments, sort of like a pie but with thread. Now you can add a cute piece of a twig for a stem or greenery or ribbon. The options are endless! I plan to make several more plus some pillows from the fabric!
Please don’t forget to check out all of my buddies on their Clearance Challenge finds for this month! You know we never disappoint!
Love, Shae


https://thisfulllife5.com/2019/09/16/dressing-up-coffee-bar

https://decorateandmorewithtip.com/vanity-stool-uodate/


Oh my goodness! These are the absolute cutest! Love them. Good job, Shae!
LikeLike
Thank you so much Jodi!!
LikeLike
Shae, these pumpkins turned out so cute!! I love that you said that you didn’t have your shit together…I rarely ever do either!! Good thing you are so creative, and came up with such a darling clearance find project! Loving these pumpkins so much!!
~Emily
LikeLike
So cute and simple. Love the gray ticking stripe just like you!
LikeLike
Thank you sweet friend!
LikeLiked by 1 person
Shae those pumpkins are the cutest and your tutorial is so easy to follow. Thanks for sharing.
I have done the same thing so many times. Have good intention to do a certain craft and it turns out to be a way different one. But it all works and the pumpkins you shared are so easy to do I bet you will get tons of follows! Happy Monday!
LikeLike
Thank you so much Terrie ❤️
LikeLike
These are so cute!!! They look easier to make than I thought they would be.
LikeLike
Shae your pumpkins turned out so cute! Love this tutorial!
LikeLike
Thank you so much Dori!!
LikeLike
Oh my are these adorable and I love the combination of fabrics. They look pretty on display. Wonderful job.
Enjoy the rest of your week
Cindy
LikeLike