Last Christmas, I wanted to try the diy dried orange garland that was all over Instagram! I couldn’t try it out because we were living in our camper, which had no oven, while we built our barndominium! This year, I knew I would be trying it! Dried orange garland is super easy, plus budget friendly as well! check out my REEL on IG!
Today, I am joining a group of blogging friends for a fun Christmas DIY blog hop, hosted by Terrie, Decorate and More with Tip !
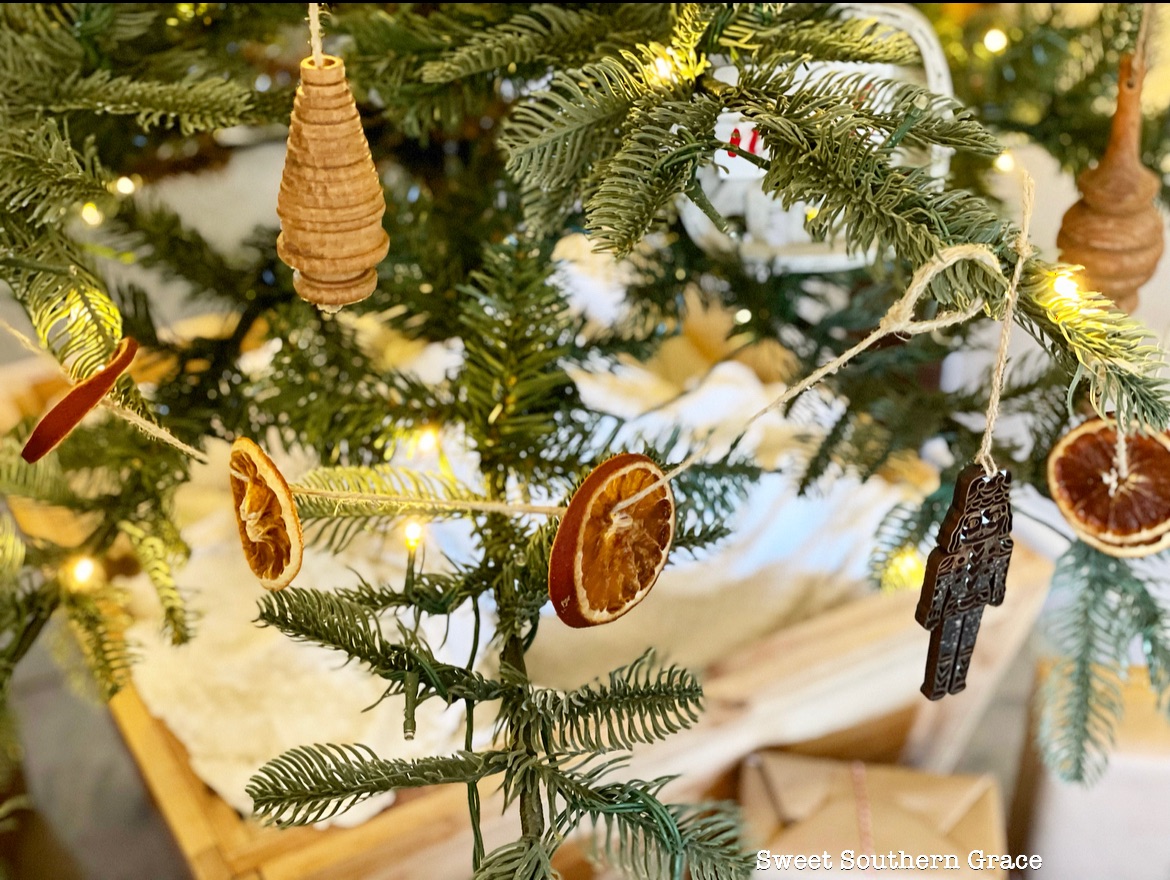
DRIED ORANGE GARLAND
This garland is perfect for hanging on your Christmas tree, mantel, on a cabinet, gathered around your window or even as trim for your Christmas gifts! It takes a little bit of time, but your house will smell amazing and it is SO worth the effort!

ITEMS NEEDED
- 10-12 Oranges
- Scissors/knife
- Twine
- Baking Sheet
- Parchment Paper
INSTRUCTIONS
1. Preheat oven to 200 degrees. Cut off ends of oranges. Slice oranges into about 1/4 inch thick in slices.
2. Place oranges, in single layer, onto baking sheet, lined with parchment paper.
3. Bake for 4-6 hours or uintil completely dry.
4. Make a knot into the end of a piece of twine and thread oranges through.

TIPS
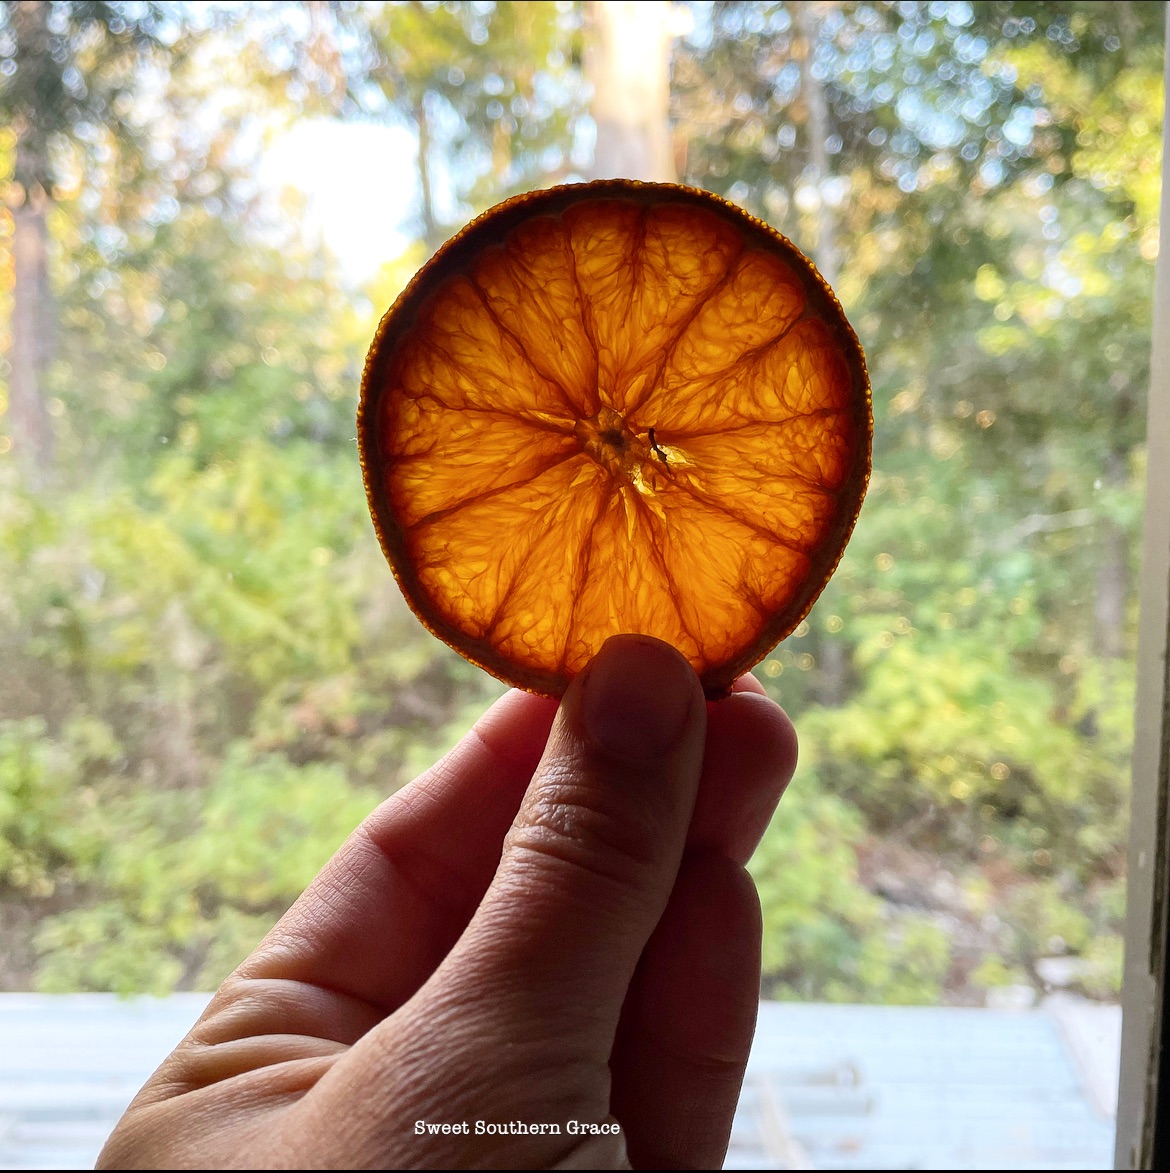
Pat oranges dry before placing in oven. This helps to take out some of the moisture. I also opened my oven occassionally to let out some of the steam. Oranges are dried when the pulp is see-through. I held mine up to a window and if the pulp was see-though, it was done!
I am so glad that I made dried orange garland this year! I love it’s simplicity during the Christmas season! You could even leave it up as winter decor through February! I may add this to my yearly traditions! Check out a few of my friends as we all have gotten together to share a Christmas DIY! I know you will love what they are sharing with you! If you have any questions, please feel free to ask!


You must be logged in to post a comment.