DIY Baking Soda Paint Ornaments

Today, I’m hosting a fun DIY Ornament Challenge! Don’t forget to check out the other bloggers, at the end of my blog!!

DIY Christmas Ornaments have commenced! It is something I look forward to every year and I think I may just make this an annual Christmas tradition on my blog!

Over the years, I have made DIY ornaments, almost every Christmas! Sharing my first DIY ornament below as a child and also sharing my DIY ornaments that I’ve made throughout the years with all four of my daughters.

I think my love of diy actually started with my mom. I always remember opening her linen closet and just looking at all of her DIY craft supplies! One year for my birthday, I had a few friends over and we made DIY stained glass ornaments. Still hang those two ornaments on my tree, every year.

I started making ornaments to be frugal in the first years of our marriage. I enjoyed it so much, I continued almost every year, for the past 25 Christmases!

This year, I decided that my youngest two daughter’s Christmas tree ornaments needed to coordinate with their room more, so…I decided to test a couple ornaments with my diy baking soda paint!

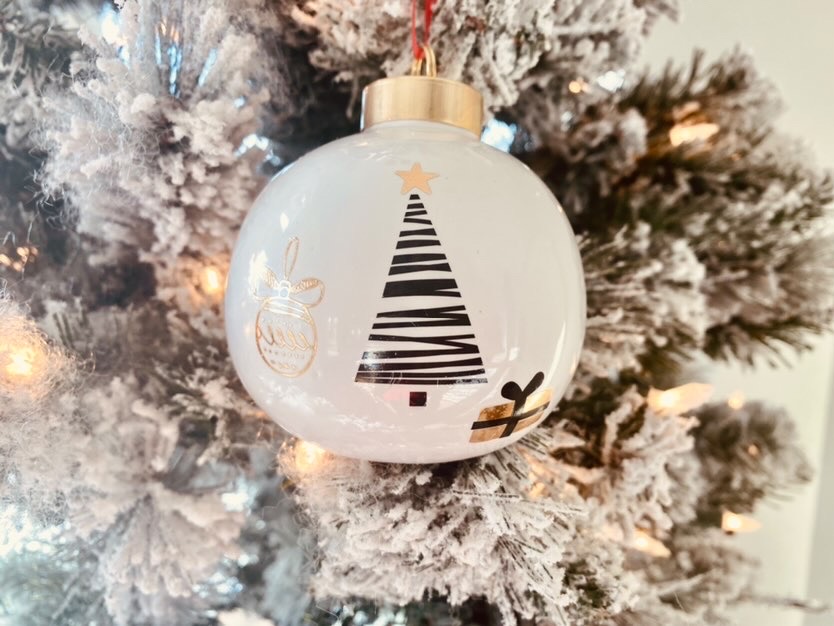
I started off with some vintage ornaments that I purchased from my friend, Sarah, who owns a small shop, Sweet Cards Shop.

I decided to use Sherwin Williams Orchid to paint on the ornaments as the base coat.

Next, while the ornament was still wet, I added baking soda, sprinkling it on and kind of tapping the paint brush around with the baking soda. If the bright pink started showing through, I just dabbed on a bit more paint! If it doesn’t look good, just wipe it off and try again!

Next, I used some leftover gold craft paint, that I had left over from our Barndominium Dollhouse, to paint the ornament cap.

Hang with a vintage ribbon like me or a velvet ribbon would be pretty too! So simple and fun to add to your Christmas tree this year! Customize your color, based on the colors you are using for Christmas this year! I bet you have left over paint that you can use too! I chose this color because I wanted it to coordinate with their room!

I hope y’all enjoyed our DIY Ornament Challenge this year! Please check out my blogging friends to see the Christmas ornaments they have created to share with y’all!

DC25F582-AAFC-4917-A82F-0D8FC30ECE80

Gail from Purple Hues and Me

Jemma from At Home with Jemma

8D252360-A765-412E-9E01-421C1421D925

Denise from Hootshack

Creative Thursday’s Christmas Craft

Creative Thursday’s Christmas Craft

This year with my collaboration with King of Christmas, I knew I would be going neutral with my Christmas decor, which meant I would need to do a complete 360 and either make or buy new Christmas stockings. I went and checked a few of my fav decor spots and they were a no go for stockings. You know when you get that picture in your head of what you want and you can’t find it anywhere? I was feeling a little defeated, until, I got the idea to make my own stockings from painters drop cloth canvases. Say what? It sounds funny, I know, but I knew I could probably make 6 stockings for under $10! I actually only spent $2.98 on the Drop cloth because it was on sale!  I mean, my entire main living area of my home, has drop cloth ruffle curtains. I already had some left over drop cloths from when I made the curtains from our eat-in kitchen or i.e. playroom for our youngest daughter.

DA6B3B7A-CA97-4D62-9592-C6F3EE173A85

I knew I wanted fairly nice sized stockings. We have had some of our Pottery Barn Kids stockings for 17 years and they are a great size for Santa to fill! I decided to use one of those stockings for a pattern.

EE69CD56-E755-4AF9-AEA6-CCD556C8D008

I basically just laid the PBK stocking on top of the canvas, that I double folded, then added about 1/2 an inch for seam allowance and cut out. I took both pieces of canvas and sewed right sides together, then turned inside out and decided on the size that I wanted the ruffles to be.

4C699DA5-62B9-4585-9513-EEC000FB76B8

For the ruffles, I decided on the size, which was   6.5 inches in width by 20 inches in length with 1/2 inch seam allowance. I sewed down the raw edge then folded over, sewed down again and began the process of ruffling the canvas. If you have never ruffled before, its not hard, you just need set your machine to the loosest stitch and the widest stitch. Once you’ve run your stitch the whole length of your fabric, gently begin pulling the bottom (bobbin) thread.

24FCF1A4-B599-4790-901E-8D34CD2CB1B8

Next, begin slowly pushing your bunched fabric towards the end of your fabric until you have the whole fabric ruffled.

E1600BA4-53E5-41CF-AFAF-F4DB5A0EBE03

Next, I made the stocking holder loop. I used a  piece of 4×6 size of canvas.

D0359952-5C13-447A-AE76-97258ECDA58E

First I folded down the fabric on one side to the middle and then did the same for the other side.

748075A7-4C6A-4082-B104-0041D526EAAB

Next, fold over the entire piece in half.

211AF05E-3964-4156-8B0C-4A36E85B3B2E

Like this…

3866A688-8E26-4692-99C1-8861CCCC02A3

Then sew down the edges.

7DC1F363-C2AF-4EC6-A8DF-39A3EDFE2E69

Next, I turned down the stocking and decided on the width of the cuff, then sewed the edge with a 1/2 allowance.

21F8638B-2FD7-41E2-A3FC-97AD3E15D238

I decided to go ahead and attach the stocking holder, then sew on the ruffles.

B4FA7B79-B19F-473D-9477-F79B8829B09B.jpeg

Next on the agenda is sewing on the ruffle!

B40B42BF-CFF7-4EDD-B42E-CFA0BC8EFB4A

I also decided that I wanted to make stocking name tags! I knew we had some pine underlayment left from our faux shiplap wall we had just completed. I asked my husband to cut out 6 that were 5.75×2.75 plus drill a small hole at the top.

A8F573EB-F462-44E5-AEEB-DBE6575140D2I decided to stain with one of my favorite colors of stain, Minwax Dark Walnut.

077D3CB0-112C-42C2-B383-69FC77047225After lightly staining the front, back and sides of the name tags, I decided to use my Silhouette to add all of our names to each tag. I chose the font bromello then welded, printed on white vinyl then weeded (removed the negative space). 

18468693-6D4F-42CC-B3FE-8CE6310697CA
After finishing with the stocking name tags, I added twine for tying around the stockings. These cost me zero to make because I already had all of the supplies!
15BA993B-DAA4-4347-85F4-5D30E438D6FF.jpeg
We are done! What do y’all think? I absolutely am loving my neutral, very budget friendly Christmas decor this year! It definitely took some time to grow on me since I’ve had traditional for the past 20 plus years but our entire family is enjoying it.

DA6B3B7A-CA97-4D62-9592-C6F3EE173A85

Please check out my friends to see what Christmas Crafts they have come up with for  our monthly Creative Thursday’s! We have some pretty amazingly talented ladies, if I do say so myself!

Love, Shae

F777CF98-2CB7-4E19-82F6-11D3EF72BFDD

https://barnhousemess.wordpress.com/2019/11/19/christmas-creative-challenge

3084573E-1589-496B-8D8B-A51A62F87114

Creative Thursday ~ easy to make candy cane garland

89365AF3-837A-4D0B-803B-3977965A206E

Creative Thursday – Christmas Craft

6675FBF9-54A9-46EA-895F-5BB7175432EF

Creative Thursday: Classic White & Gold Framed Ornaments