June Thrift Challenge Blog Hop

June Thrift Challenge Blog Hop

Hey ya’ll! I have teamed up with several blogger buddies for June’s Thrift Challenge. This month, we have changed up our challenge a bit. The rules are to purchase an item from a thrift store, yard sale, garage sale, estate sale OR revamp/upcycle a piece you already own which no longer works in our home. As always, there is no set budget but we like to keep it as budget friendly as possible.

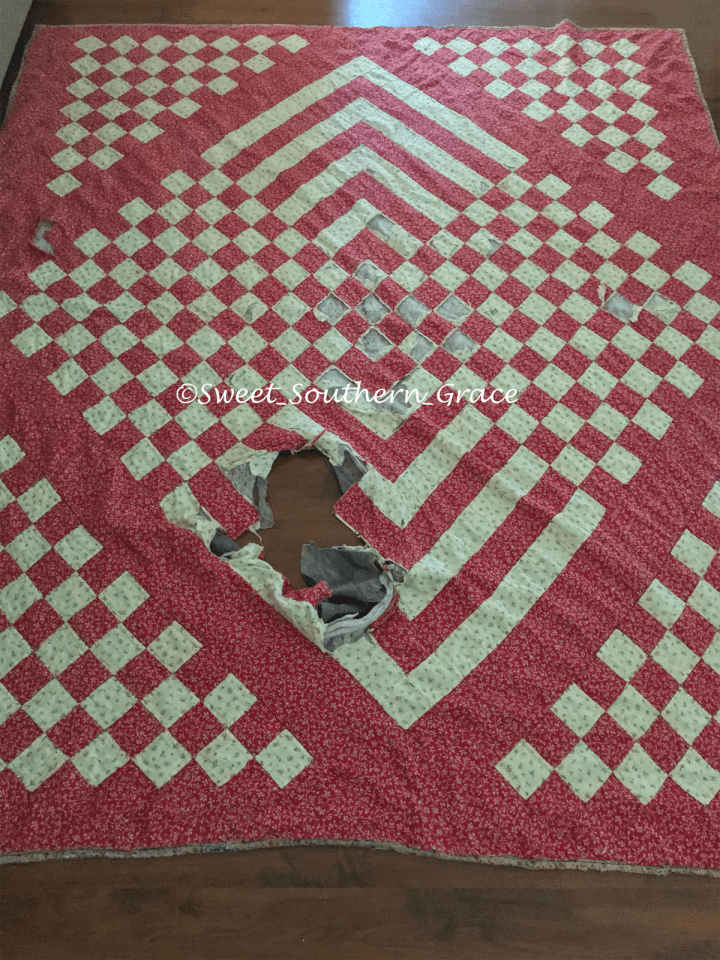
With the change in rules, I knew immediately what I wanted to do. When my Grandmother passed away, 11 years ago, I was allowed to go through her personal belongings and pick out what I would like to have of hers. One of the items I chose was this red quilt.

5E43E628-501A-410C-B8C8-053F56310215

Over the years, my own little family used it for picnics, beach trips and nap time and as you can see, it had had it share of wear. I placed it in a box in our attic to save and hopefully one day, repurpose it.

62D90185-9C47-47E5-ADC1-89B845EC5609

When the challenge rules changed for this month, I literally jumped for joy, at the idea I had to make pillows from the quilt. It was super simple!

08E7881D-79F4-4E9B-AC18-23822AB86C93

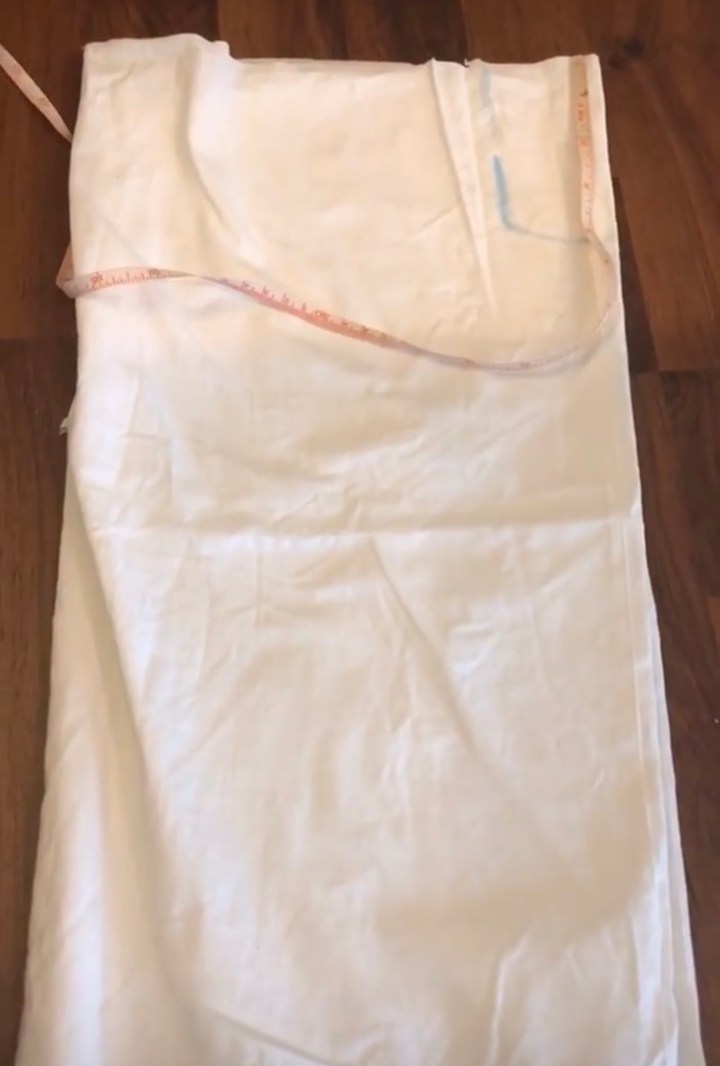
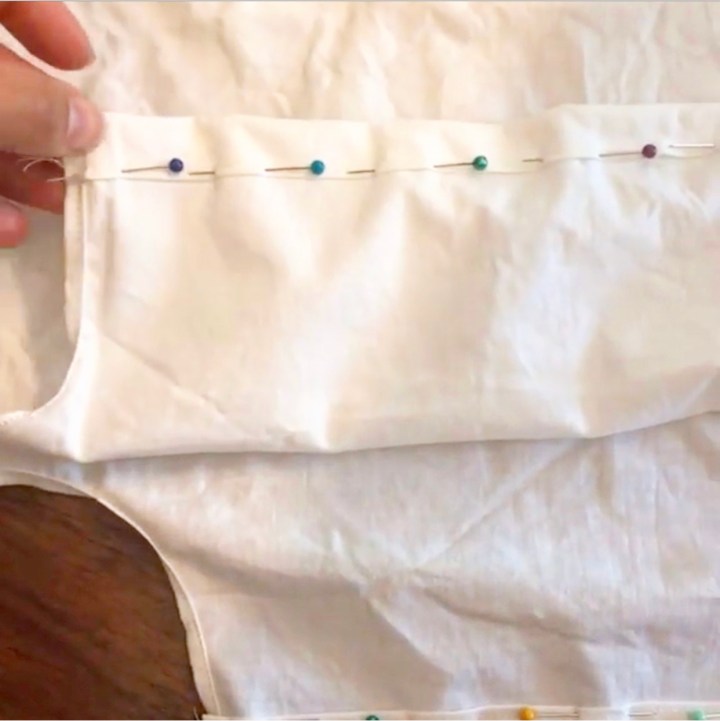
I grabbed a pillow cover that I already had and used it as the pattern for my pillows. I cut two pieces of the quilt for each pillow and sewed together, added poly-fil and wa-lah, the pillows were complete! Quick, easy and free! I had all of the supplies on hand for making the quilt pillows. The poly-fil is super budget friendly. You can grab it at Joann Fabric and Craft Store for around $5-$10, depending if its on sale or you use a coupon. You can check out my under IG highlights “DIY Pillows”.

FD2AC0EE-44A2-418A-B0E0-72DD168A4E9B

I hope you will check out my friends to see what they have found for our June Thrift Store Challenge! I promise you will not be disappointed!

Love, Shae

Thrift Store Challenge: Rustic Bench
blog

Thrifted Treasure ~ June

blog 5

MIRROR MIRROR AT THE THRIFT STORE

blog 6

https://throughavintagedoor.com/2019/06/23/thrift-store-challenge-makeover/
blog 2

Thrift Store Challenge – June 2019, Coffee Table Revamp


blog 3

http://www.clochesandlavender.com/thrift-store-challenge/

blog 4

May Thrift Store Challenge

May Thrift Store Challenge

Teaming up with a few of my favorite friends for our monthly Thrift Store Challenge! The rules are to find an item thrifted and show how you can use it in our home! This month I fell in love with a couple of matching vintage pillow cases from an estate sale and you will never guess what I paid for them?! I paid a grand ole .25 cents each! I knew exactly what I wanted to do with them! When my oldest two daughters were little, pillow case dresses were popular. I had made both of them a vintage pillow case dress and I wanted to do the same for my youngest two.

CE4FA7E5-2167-460F-A03C-FD1D4ADF0E23

I headed to my local Wal-Mart and picked up a roll of 3/8 inch offray satin pink ribbon . It was only $1.99 for one roll.

E2DBF1F9-CADE-4629-A68A-9543B075C4B7

The first thing you want to do is measure the child you are making the dress for and your going to measure from the top of the shoulder to where you want the hem to be. In this case, I want the end of the hem to be at the end of the knee. It is a little longer than I want it to be, but I know I will be able to get two years of wear from this dress. After the dress is to short, it can then become a tunic to wear with leggings! You can actually get about 3 years wear from this dress! After you get that measurement, you will add 7/8th’s of an inch to that. My measurement at the top of the knee was 25.5 and 7/8th’s, so mine will be approximately 26 and a 1/4 inch.

52C74C57-F340-4177-B249-520F00E22E3E

Take your measurement and begin at the opening of the pillow case and measure at the opening of the pillow case, mine is 26 and 1/4, cut at that measurement. The next step is to fold your pillow case in half, vertically. You will be cutting arm holes in the pillow case. By folding it in half, you will be creating two identical arm holes.

47FA51BF-CE82-4BEB-9E6C-6CB825113E8D

The shape of the arm holes should be like a letter J. For an older child, I measured out 2 inches wide by 4 inches deep. I marked the measurements with chalk. Go ahead and cut between those lines and remember your pillow case is folded in half, vertical. Once you cut, you will have two arm holes that are exactly the same.

BA018B65-DC00-49A9-B25D-EE3F604D33CC

Open up your pillow case dress and fold over the edge on the arm holes and pin. Sew down the edge. Once you have sewn down the edge, turn down for a second time, pin and sew again.

5F5CDAC3-9B85-41AE-A531-B28CACA43195

The next step is to open your pillow case and lay it out flat. Sew 1/4 inch at the top of the dress. Fold down and measure 5/8th’s of an inch, pin and sew. This will be your casing for your ribbon ties.

B0350060-7259-4353-9CA4-29356F7C88FD

The last step is to grab your ribbon and heat seal the end. Add a safety pin to the end of the ribbon and thread through the casing until you reach the other end.

3F9A5BAF-2695-4012-9C07-B1383D92E722

Make sure to heat seal or you can use ribbon fray check for the ends of your ribbon so that they don’t fray. I also tie very small knots at the end of my ribbons. You have officially made a pillow case dress! Easy, right! You could even add a monogram or an applique! Check out my my highlights section on IG for a full video tutorial, under “pillow case dress” .

0493FE11-D5DE-4B4B-BAC3-3027E46318D4

Such a simple, budget friendly way to make a beautiful keepsake for under $3.00 for both dresses! Please check out my friends to see what they have found for our May  Thrift Store Challenge. I am sure you will enjoy their finds as well!

From our family to yours, Happy Memorial Day!

Love, Shae

Tara, Stilettos and Shiplap


Shae, Sweet Southern Grace


Dori, This Full Life 5


Victoria, The Home Envy


Jodi, The House House Blog


Lindsay, Farmhouse Eclectic


Teresa, Through A Vintage Door

Clearance Challenge- Aging Terra Cotta

Clearance Challenge- Aging Terra Cotta

I have teamed up with several of my blogging friends to a Clearance Challenge. We were challenged to find a home décor item under $15. I had been eyeing the succulents at Wal-Mart for awhile. About a month ago, I noticed that they were on clearance for under $4.00 each, so I headed back to Wal-Mart  to find my succulent.

CE9509F1-F1DF-4A4A-B275-00D50DCAF3C8

Now, these succulents definitely needed some tender loving care! This one looked like it had been over watered. I am hoping I can bring it back to life! I did not like the pot that it was planted in, so I purchased a new terra cotta pot for under a dollar! I decided to “age” the terra cotta pot.

DACAB9F8-0BFC-4492-B347-07B69A04A91B

Now, y’all know I love me some chalk paint!  I decided to use my DIY  chalk paint recipe to age my terra cotta pot. My recipe is 1/2 c Sherwin Williams latex paint in Extra White, 1/4 c baking soda and 1/2 tbsp. water. Mix well until there are no lumps.

AE6E96DA-268B-4FE7-A495-4ADC1863B7A6

Apply one thick coat of chalk paint with a dry brush. With a damp rag, remove some of the paint and allow the remaining paint to dry.

26C57EFE-4DBC-4D01-9E79-FE32EC835FA7

At this point, you could leave it or add one more coat. I chose to add another coat. I painted another thick layer.

BFB2AB38-DF2F-45B2-B1C3-5B59D0DD95F9

Once the second coat is tacky to the touch, rub the paint off with your fingers. I also used the damp rag to help achieve a more chippy finish. Please excuse the black spray paint on my fingers. (Project from this morning.)

5AFBF4B6-73FB-4107-8CB6-7AEB7BF5DBC7

Here is the finished result! I love how it turned out! For this Clearance Challenge, I spent $3.50 on the succulent from Wal-Mart and $0.74 on the new terra cotta pot. The painting supplies, I already had on hand. Total spent with tax is $4.60!

FD5B55A7-40B6-45FA-A483-591522B0C124

Hope y’all enjoy our Clearance Challenge! Love~Shae

Terrie over at Decorate & More with Tip
Emily over at LeCulitivateur
Tara over at Stilettos And Shiplap
Shae over at Sweet Southern Grace
Dori over at This Full Life 5
Jodi over at The House House Blog
Lindsay over at The Farmhouse Eclectic