{This post contains sponsored links. The items featured and linked in this post were all provided by Kichler Lighting; I could receive a small commission if you purchase from one of my links; all opinions and reviews are my own.}
Home Lighting
Lighting is an essential component to a successful design palate. When designing your barndominium, lighting can be used as a design focal point.
I believe if thoughtfully placed, lighting will transform interior rooms and exterior spaces of your barndominium home. I like to think of lighting as a starting point for design, rather than being left until a last thought.
The Pier 1 Outdoor Wall Light has a bright white interior and black matte caged design. The cage is removable. This light provides ambient lighting, which provides an overall illumination to the space. It is perfect for a patio, porch or entryway!
Industrial Lighting
What is Industrial?
“Industrial has been transforming over the past few years into a more detailed and refined, aesthetic characterized by more sophisticated finishes. With fine detailed and polished surfaces that owe as much to fine furniture and high end jewelry as they do factories and industry” – Greg Martin, Kichler Lighting Creative Director
What Components Make Up Industrial Lighting?
Traditionally, these lights are made of dark-toned steel and wood that are unfinished or distressed. Features can include clean lines with exposed bulbs, metal and wire cages mixes old world charm.
How to Mix Finishes, Materials and Lighting
By incorporating different finishes and textures, you can create a warmth and cozy feel to your home. Styles do not need to be matchy in order to open the doors of design. Simply by adding just the right amount of finishes and textures, you can successfully mix modern farmhouse with rustic and refined lighting.
Take for example our master bedroom lighting of choice. We choose to go with Kichler’s Cavelli Ceiling Fan in black matte for an industrial look.
The Cavelli Ceiling Fan makes a statement in our master bedroom. I love the vintage industrial, two-tone finish. A unique ceiling fan with gorgeous fixture design on the outside with the benefit of a ceiling fan on the inside.
Cavelli is a great size for smaller spaces like our bedroom, reading nooks or gallery kitchens. It can be used for multiple installations in larger living and entertaining areas.
In barndominium design, most often you’ll see the living space, dining area and kitchen connected. It’s important in this type of floor plan to be consistent across all rooms. This doesn’t mean all finishes or styles have to match, it just means the overall flow of all three rooms should flow well together.
So yes, you can choose black matte, gold matte and glass finishes together! Want to go bold with your ceiling lighting? You can with larger spaces, as they can take more daring pieces but don’t shy away from unconventional lighting in smaller spaces!
Kichler’s Gimbal Direct to Ceiling lighting was our choice for our living room. The LED Downlight is designed to provide a 360-degree adjustable light source with a 30-degree tilt, for directional lighting to highlight architecture, walls and artwork. Easy snap-in clips for quick and easy installation!!
With that, I hope you have enjoyed stopping by! We sure have enjoyed y’all’s visit! As always, if y’all have any questions, please feel free to reach out here or on IG through DM!
[This post contains sponsored links from ZLINE. All reviews and opinions are mine.]
Today, I am ecstatic to share about how I found the best appliances for our Barndominium Kitchen. I searched for modern looking appliances that were superb quality at an affordable price. I found them at ZLINE and I am thrilled to have the high-end appliances of my dreams without all those high prices!
Modern, High Quality & Affordable ZLINE Appliances
When we began dreaming of our DIY barndominium , I had substantial plans for our kitchen in the barndominium. I was determined to find high-end, high-quality, modern appliances at an affordable price. When I found ZLINE, I knew my search was over. Their company met all of my expectations and more!
Why You Should Buy a ZLINE Appliance
On average, ZLINE appliances are 50 % less expensive compared to similar products on the market. ZLINE brings the best quality-to-price ratio in the industry. Trust me when I say that I did my research when it came to the purchase of appliances for our DIY barndominium. I wanted appliances with multiple features but also something that would stand the test of time. I wanted to have an appliance to grow old with per say. I have been cooking for over twenty years and I thought it was about time that my culinary experiences would reflect well on a quality, well built appliance. Let me not forget to mention how stunningly gorgeous these appliances are to the eye! A show stopper in any kitchen!
All ZLINE ranges use handcrafted Italian burners, which are some of the highest quality on the market and imported directly from Italy. The single-piece porcelain top is durable and easy to clean. All of the ZLINE hinges are designed to stay put and imported from Italy, along with a fluid and stable weighted action.
Range Features
• Italian brass burners provides superior heat retention and even flame distribution.
• Solid-pieace cast iron grate. Heavy duty, built to last with exceptional strenth-to-weight ratio.
• Heavy duty, no-scratch Italian made porcelain one-piece cooktop. Easy to clean with no crevices that can hold residue.
• Cooktop can be installed into counter or island.
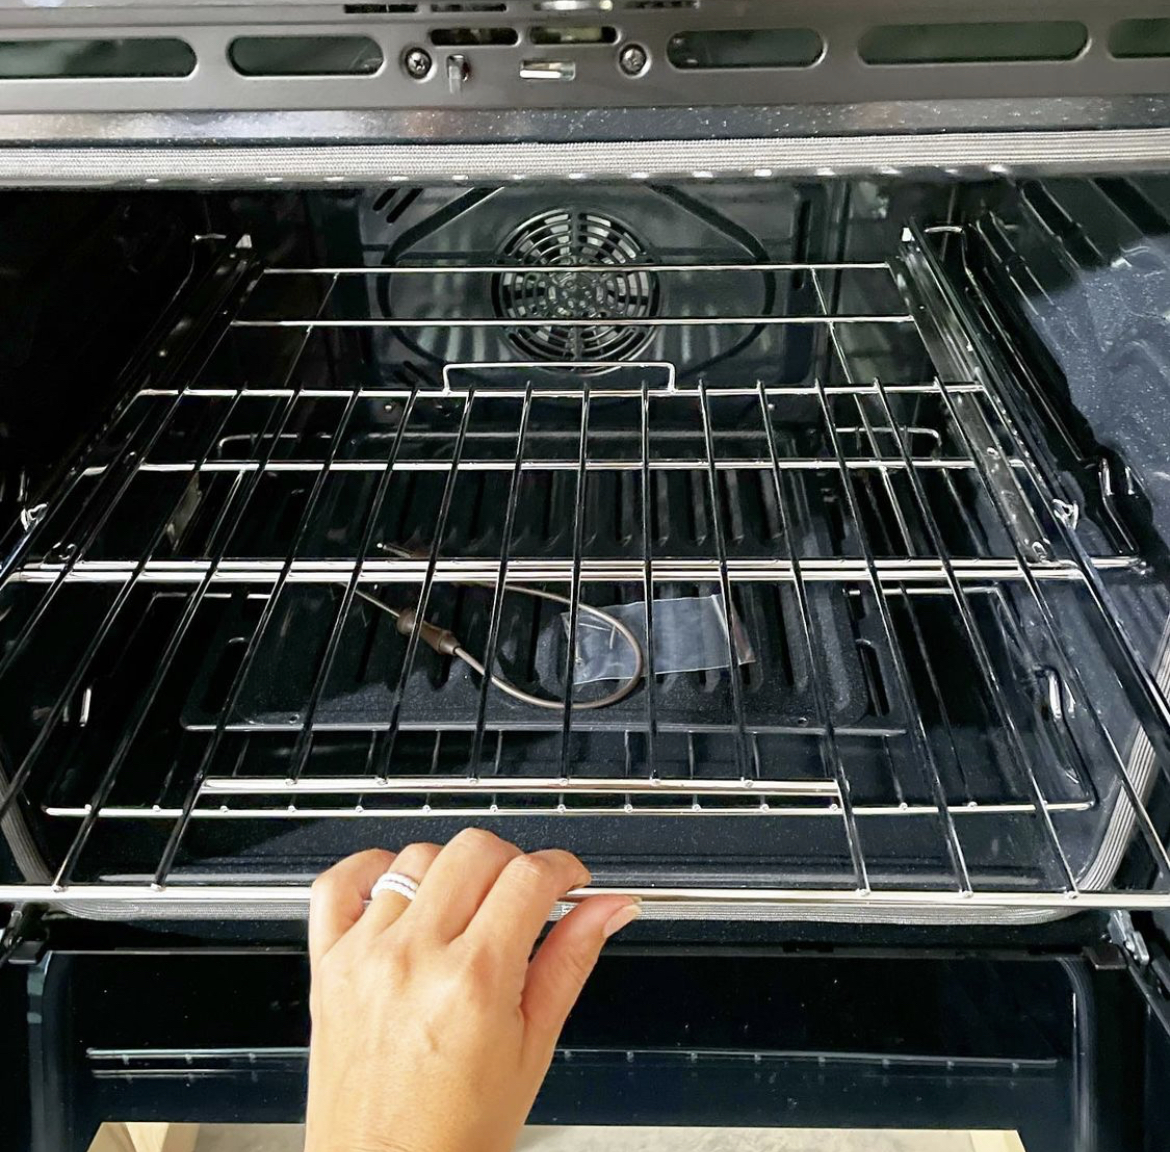
Luxury is the first word that comes to mind with our new ZLINE Convection Single Wall Oven. Experiencing the beauty of our built-in with a modern design has been surreal! I told my husband we may gain some weight with all the biscuits, casseroles and desserts I have been making!
ZLINE Professional Wall Oven has several standard and convection cooking modes, including: Standard Bake, Standard Broil, Convection Bake, Convection Roast, and Convection Broil.
Oven Features
Standard Bake and Broil modes.
Built-in design.
Temperature probe and sabbath mode feature.
Comes with one oven rack, one telescoping oven rack and a broil pan and tray.
Halogen oven light.
Self-Clean technology with delay cleaning feature to begin self-cleaning on your schedule.
Safety panel lock.
Proprietary stay-put hinges are designed to support the full weight of the oven door and hold at any place.
Upgrade is the first word that comes to mind with our new ZLINE Microwave! With 11 different power levels, utilizing regular heat, broil, or convection cooking elements. It is perfect for busy families on the go! The microwave oven’s cooking features include multi-stage cooking technology, sensor cooking, express cooking, and multiple auto-defrost settings. I also enjoy the safety of the child lock safety feature! I love the reversable wire rack that you can use facing down for baking or roasting or facing up for grilling.
Microwave Features
Ceramic made with reversible turntable. The turntable can turn clockwise or counter clockwise.
Kitchen timer feature with a crystal clear LCD display.
Multiple defrost settings.
Standard, broil and convection microwave modes.
1,000 watt cooking power to thoroughly cook or defrost any dish.
Rapide preheating-The oven reaches the set temperature very quickly to expedite the reheating process.
Sensor cooking-The microwave oven automaticall determines the required cooking time for each food item and allows you to cook foods without selecting cooking times or power levels.
Closing Thoughts on Our ZLINE Appliances
If you are looking to upgrade your appliances or install appliances in your newly built home, look no further when it comes to ZLINE appliance! Quality, luxury and best pricing for top of the line appliances. I am so pleased with our decision to purchase ZLINE appliances! We love every single detail of each appliance! If you have any questions about purchasing appliances, please don’t hesitate to reach out!
During the summer of 2020, my husband and I decided that we would place our house up for sale and move to the beach! The housing market was booming for homeowners and we decided it would be the best time to sell!
Our home sold within the first week of having it listed and thus began our plan of homeownership via paying cash! We settled on building a pole barn that we would live in temporarily while we built our forever home! The pole barn quickly became our barndominium! We chose to build our barndominium at the size of 30×40!
Researching is Key
Researching is key if you are thinking about undertaking a large project like building your own barndominium. This project has consumed us for months, but it has allowed us to build almost everything ourselves and it has been so worth it! When we would shop for estimates, we shopped until we found a price we liked!
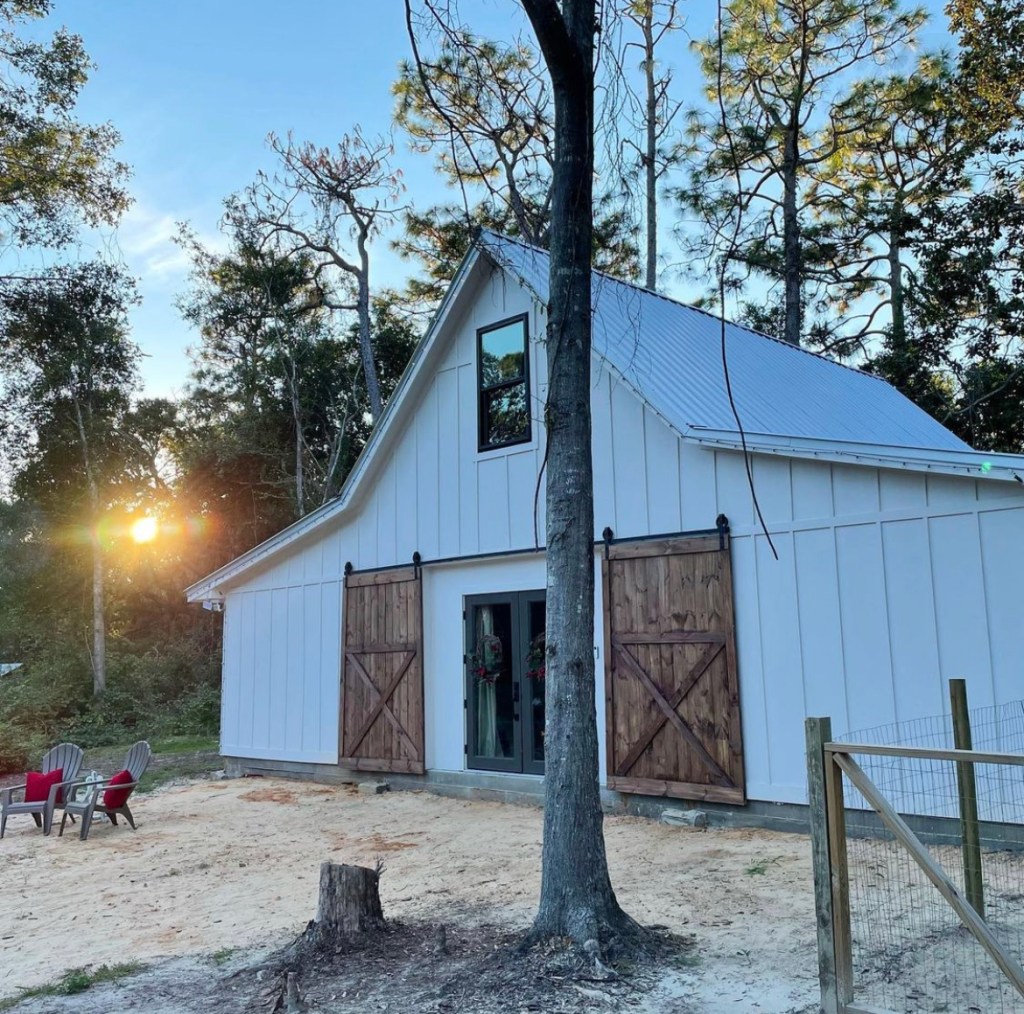
The photo below is the backside of our property and where our barndominium currently sets.
Finding Land
The very first item on our agenda was the land! We knew a quaint little beach town that we wanted to grow old in and began driving around looking at property in July of 2020.
The photo below is the beach across the street from our property!
We began looking up owners of properties in the town from the plot map, to begin writing them, asking them if we could purchase their land. We had found a couple pieces of property, when my Father-In-Law reached out to us, who happened to live in the same quant beach town and asked us if we would like his property. We were shocked and so happy! Thus began our dreams of building a Pole Barn with an attatched Guest Suite.
In this photo, my husband had begun clearing our land. This is about two days into it!
Clearing the Land
Next on the agenda was assessing the property. The property was not in the best shape. In fact, you could hardly see it with all of the overgrown trees.
This is the very first picture that I took of our property. This is the front side of our property.
There was also a older mobile home, a storage building plus seven junk cars that had been setting on the property for years, along with a boat plus a good amount of trash to clean up.
Below in this photo, my husband was removing the last of the junk cars!!! This was car number seven!
We knew we needed to rent a tractor to clear the land and make a driveway. I also wanted to learn how to operate a tractor! I actually wanted to learn about anything that my husband was willing to teach me during this process!
Neither my husband or I had never used a tractor up until this point, but we learned! I think we enjoyed it too!
It was a lot of sweat equity work with taking out trees, pulling them down and across the road and watching my husband drop trees that stood seventy feet in the air!
My parents would always be calling, when they saw our stories on Instagram and say to be careful! We also have our own portable sawmill that we plan to mill our pine and oak trees that we saved for wood countertops for our home.
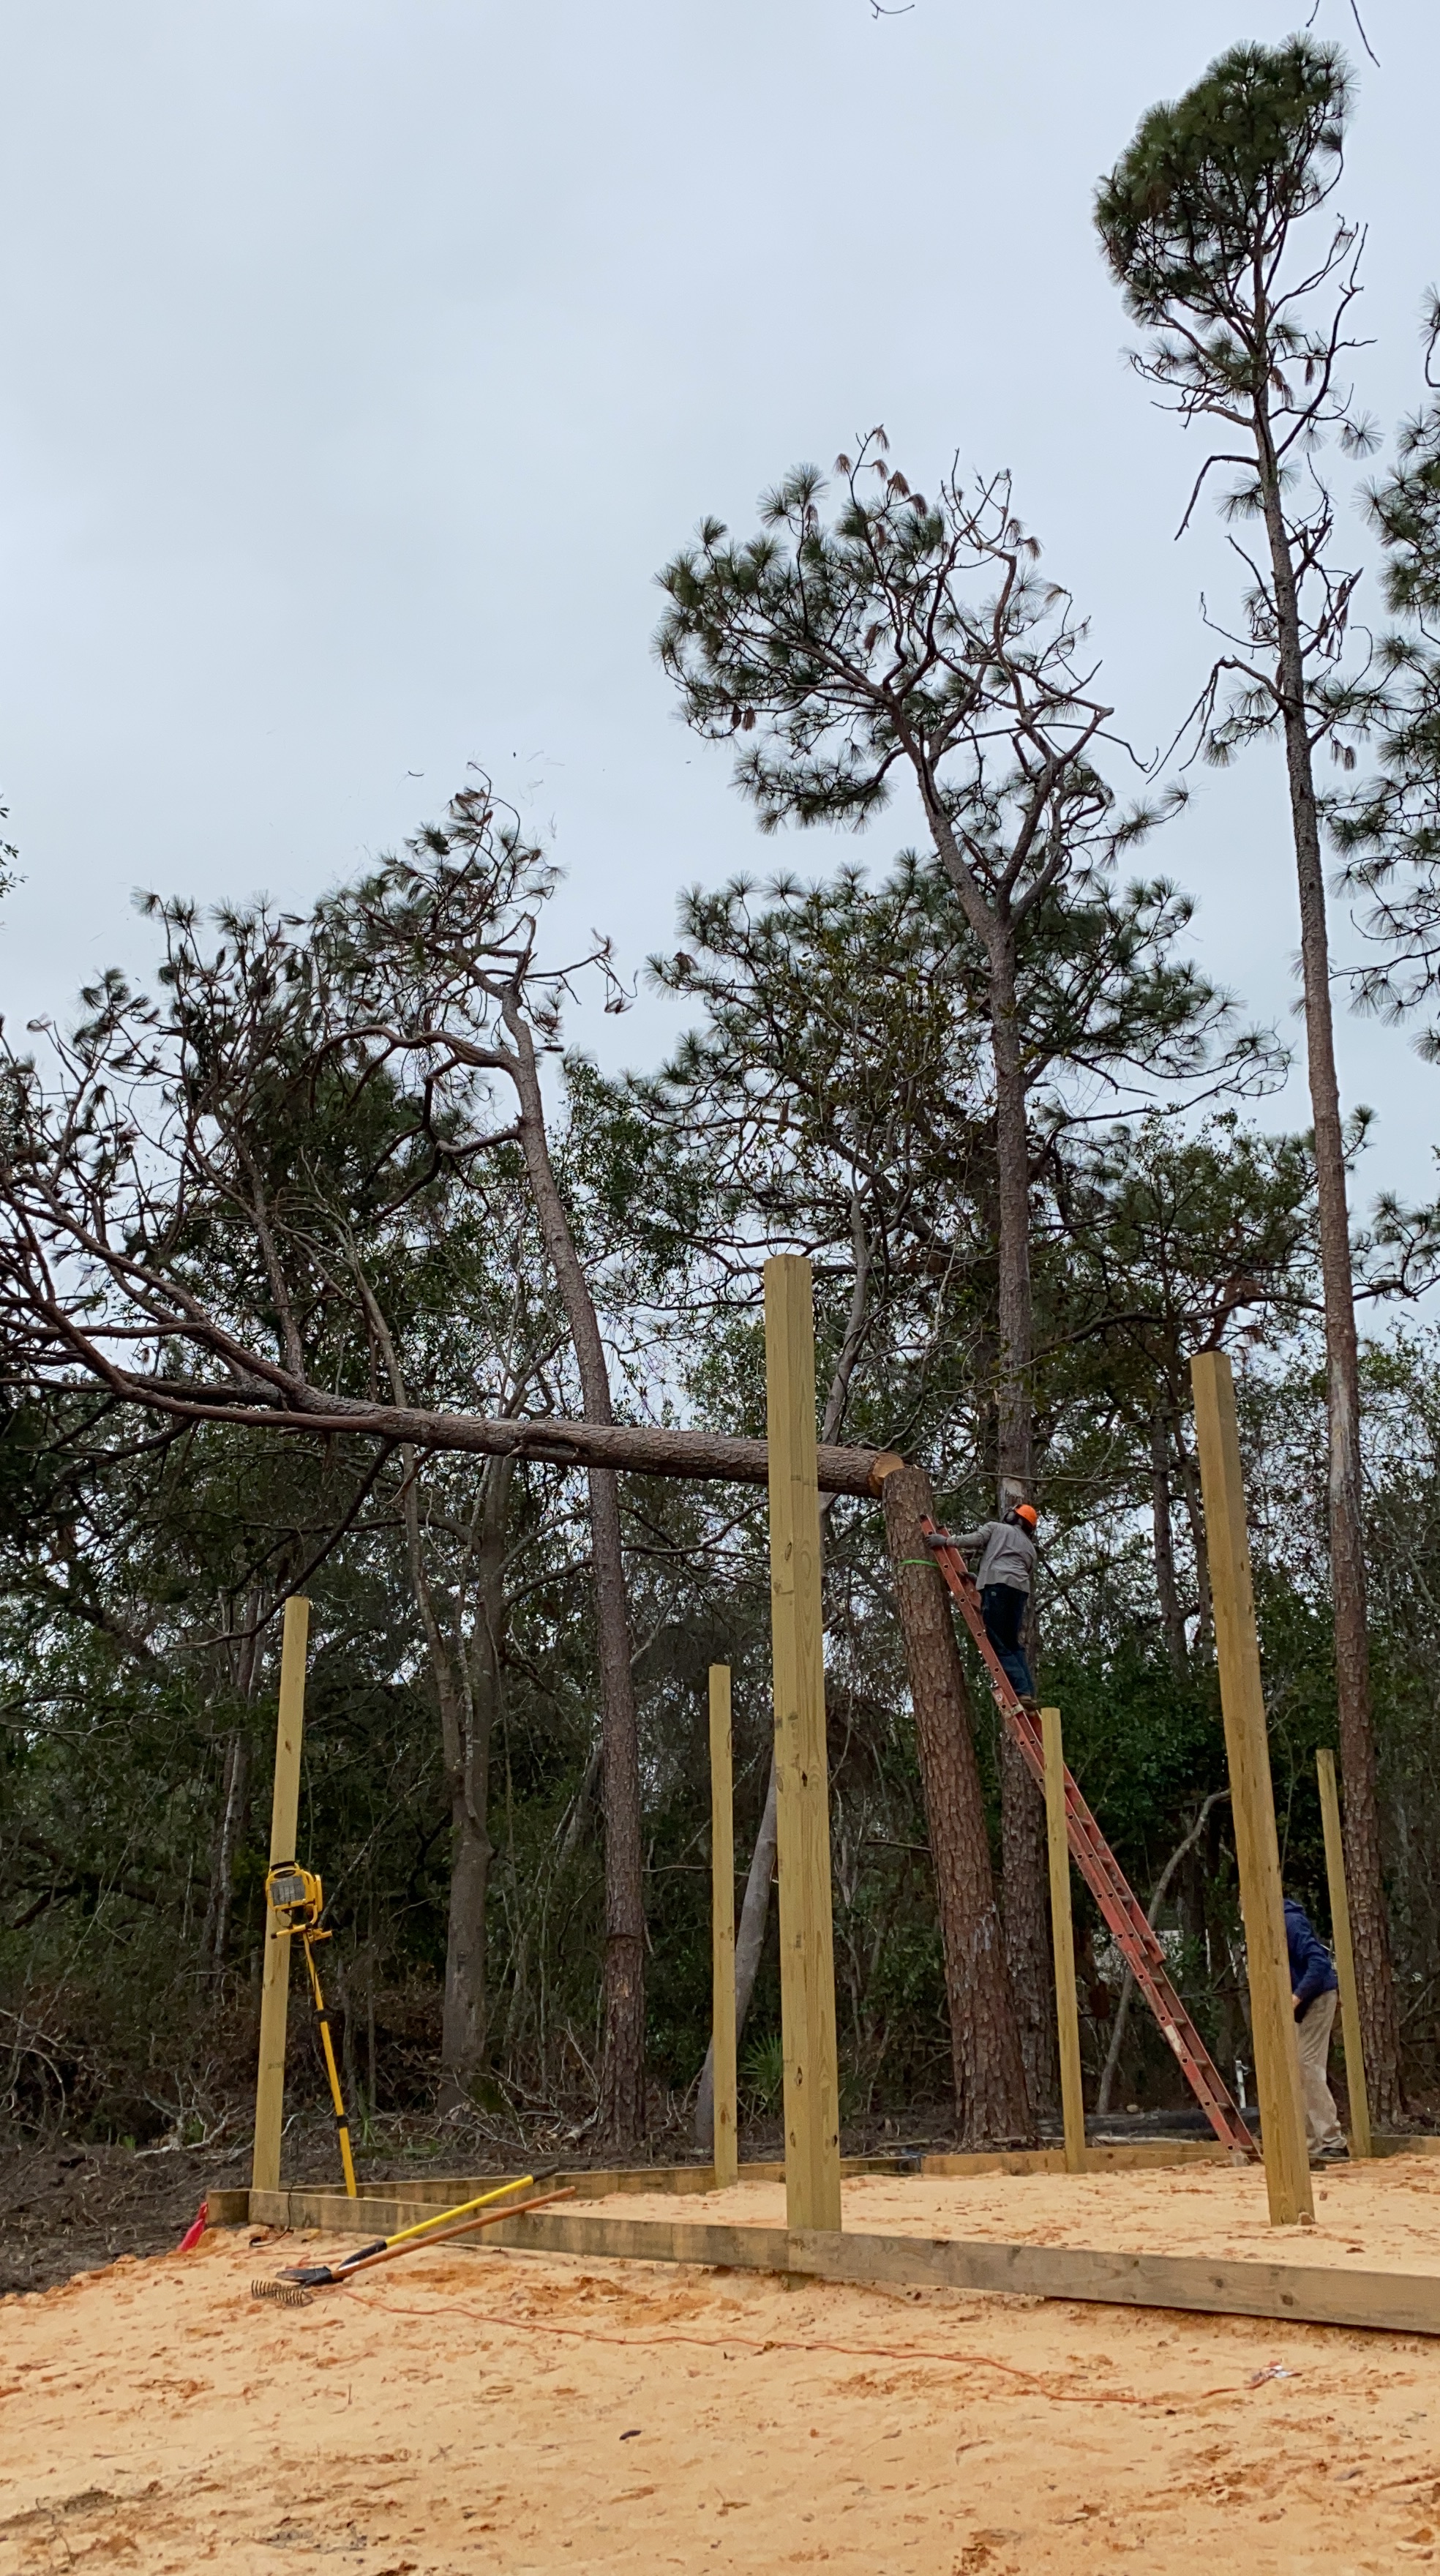
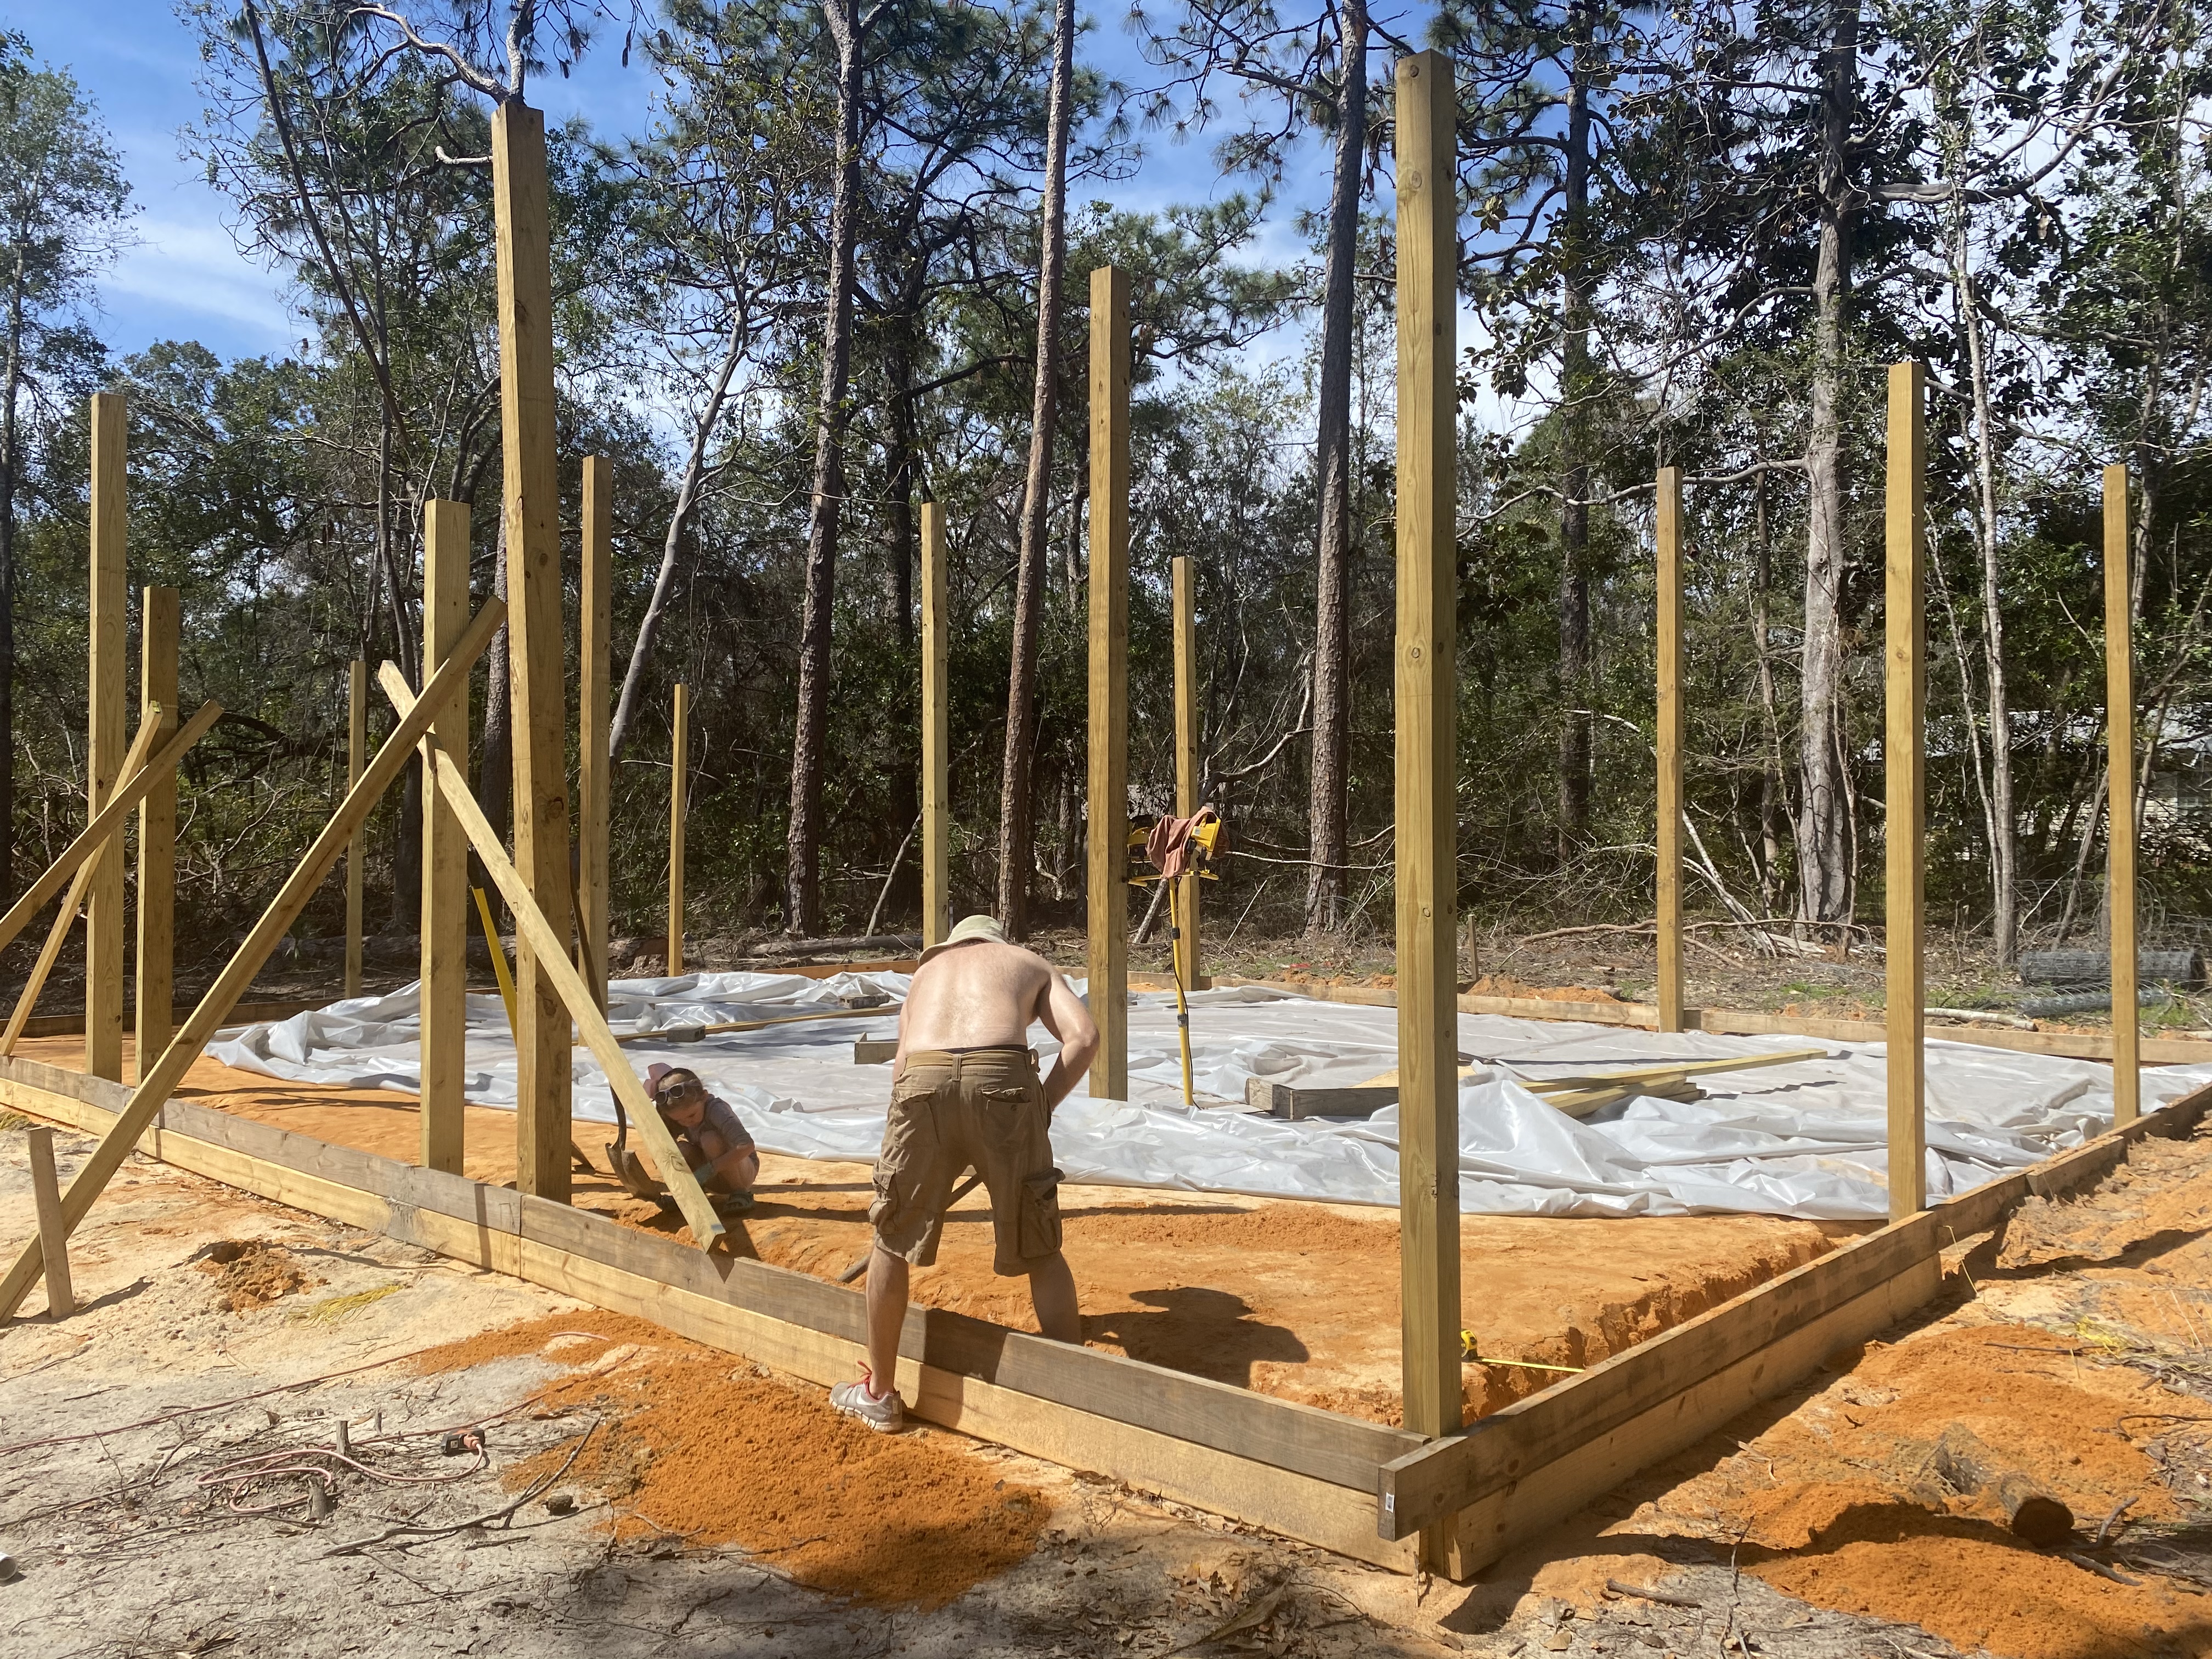
Setting the Posts and Adding Fill Dirt
The first step was setting the posts!
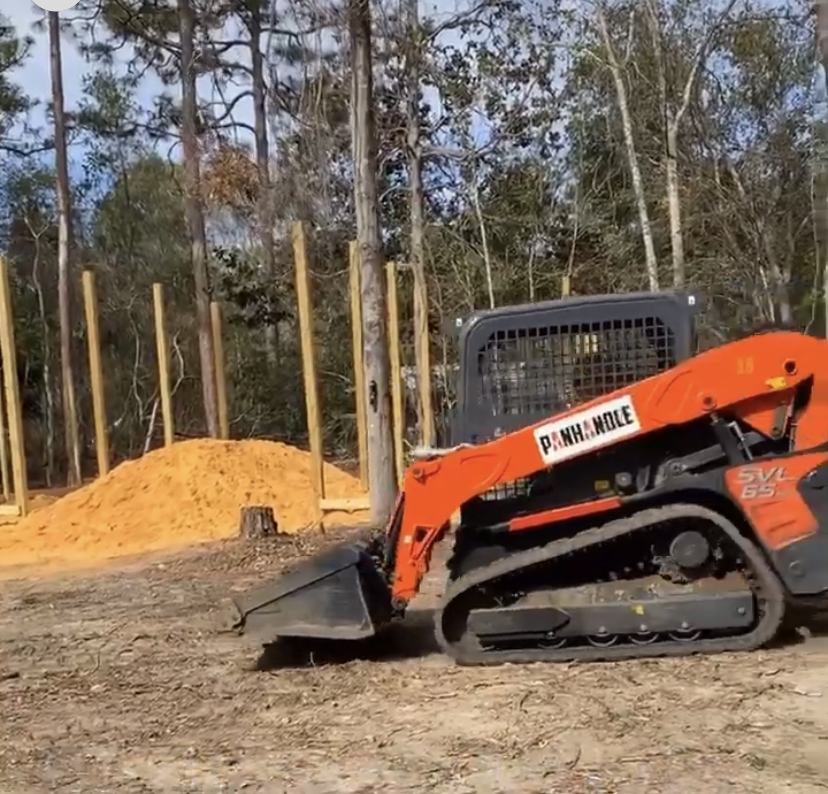
We also purchased two dumpsters of fill dirt from a local company. We rented another smaller tractor to help push the dirt out into the pole barn and help keep it evenly spread.
Leveling Out the Dirt and Adding Posts for Barn Doors
The next step was buying a laser to level out the dirt for the pole barn. We wanted to make sure we had the ground level!
We also rented a compactor to compact down the dirt. We also added two posts for the barn doors on the front!
Adding Footers and Rebarb
Next we added a layer of plastic and the footers and rebarb. We also attached concrete wire to the rebarb.
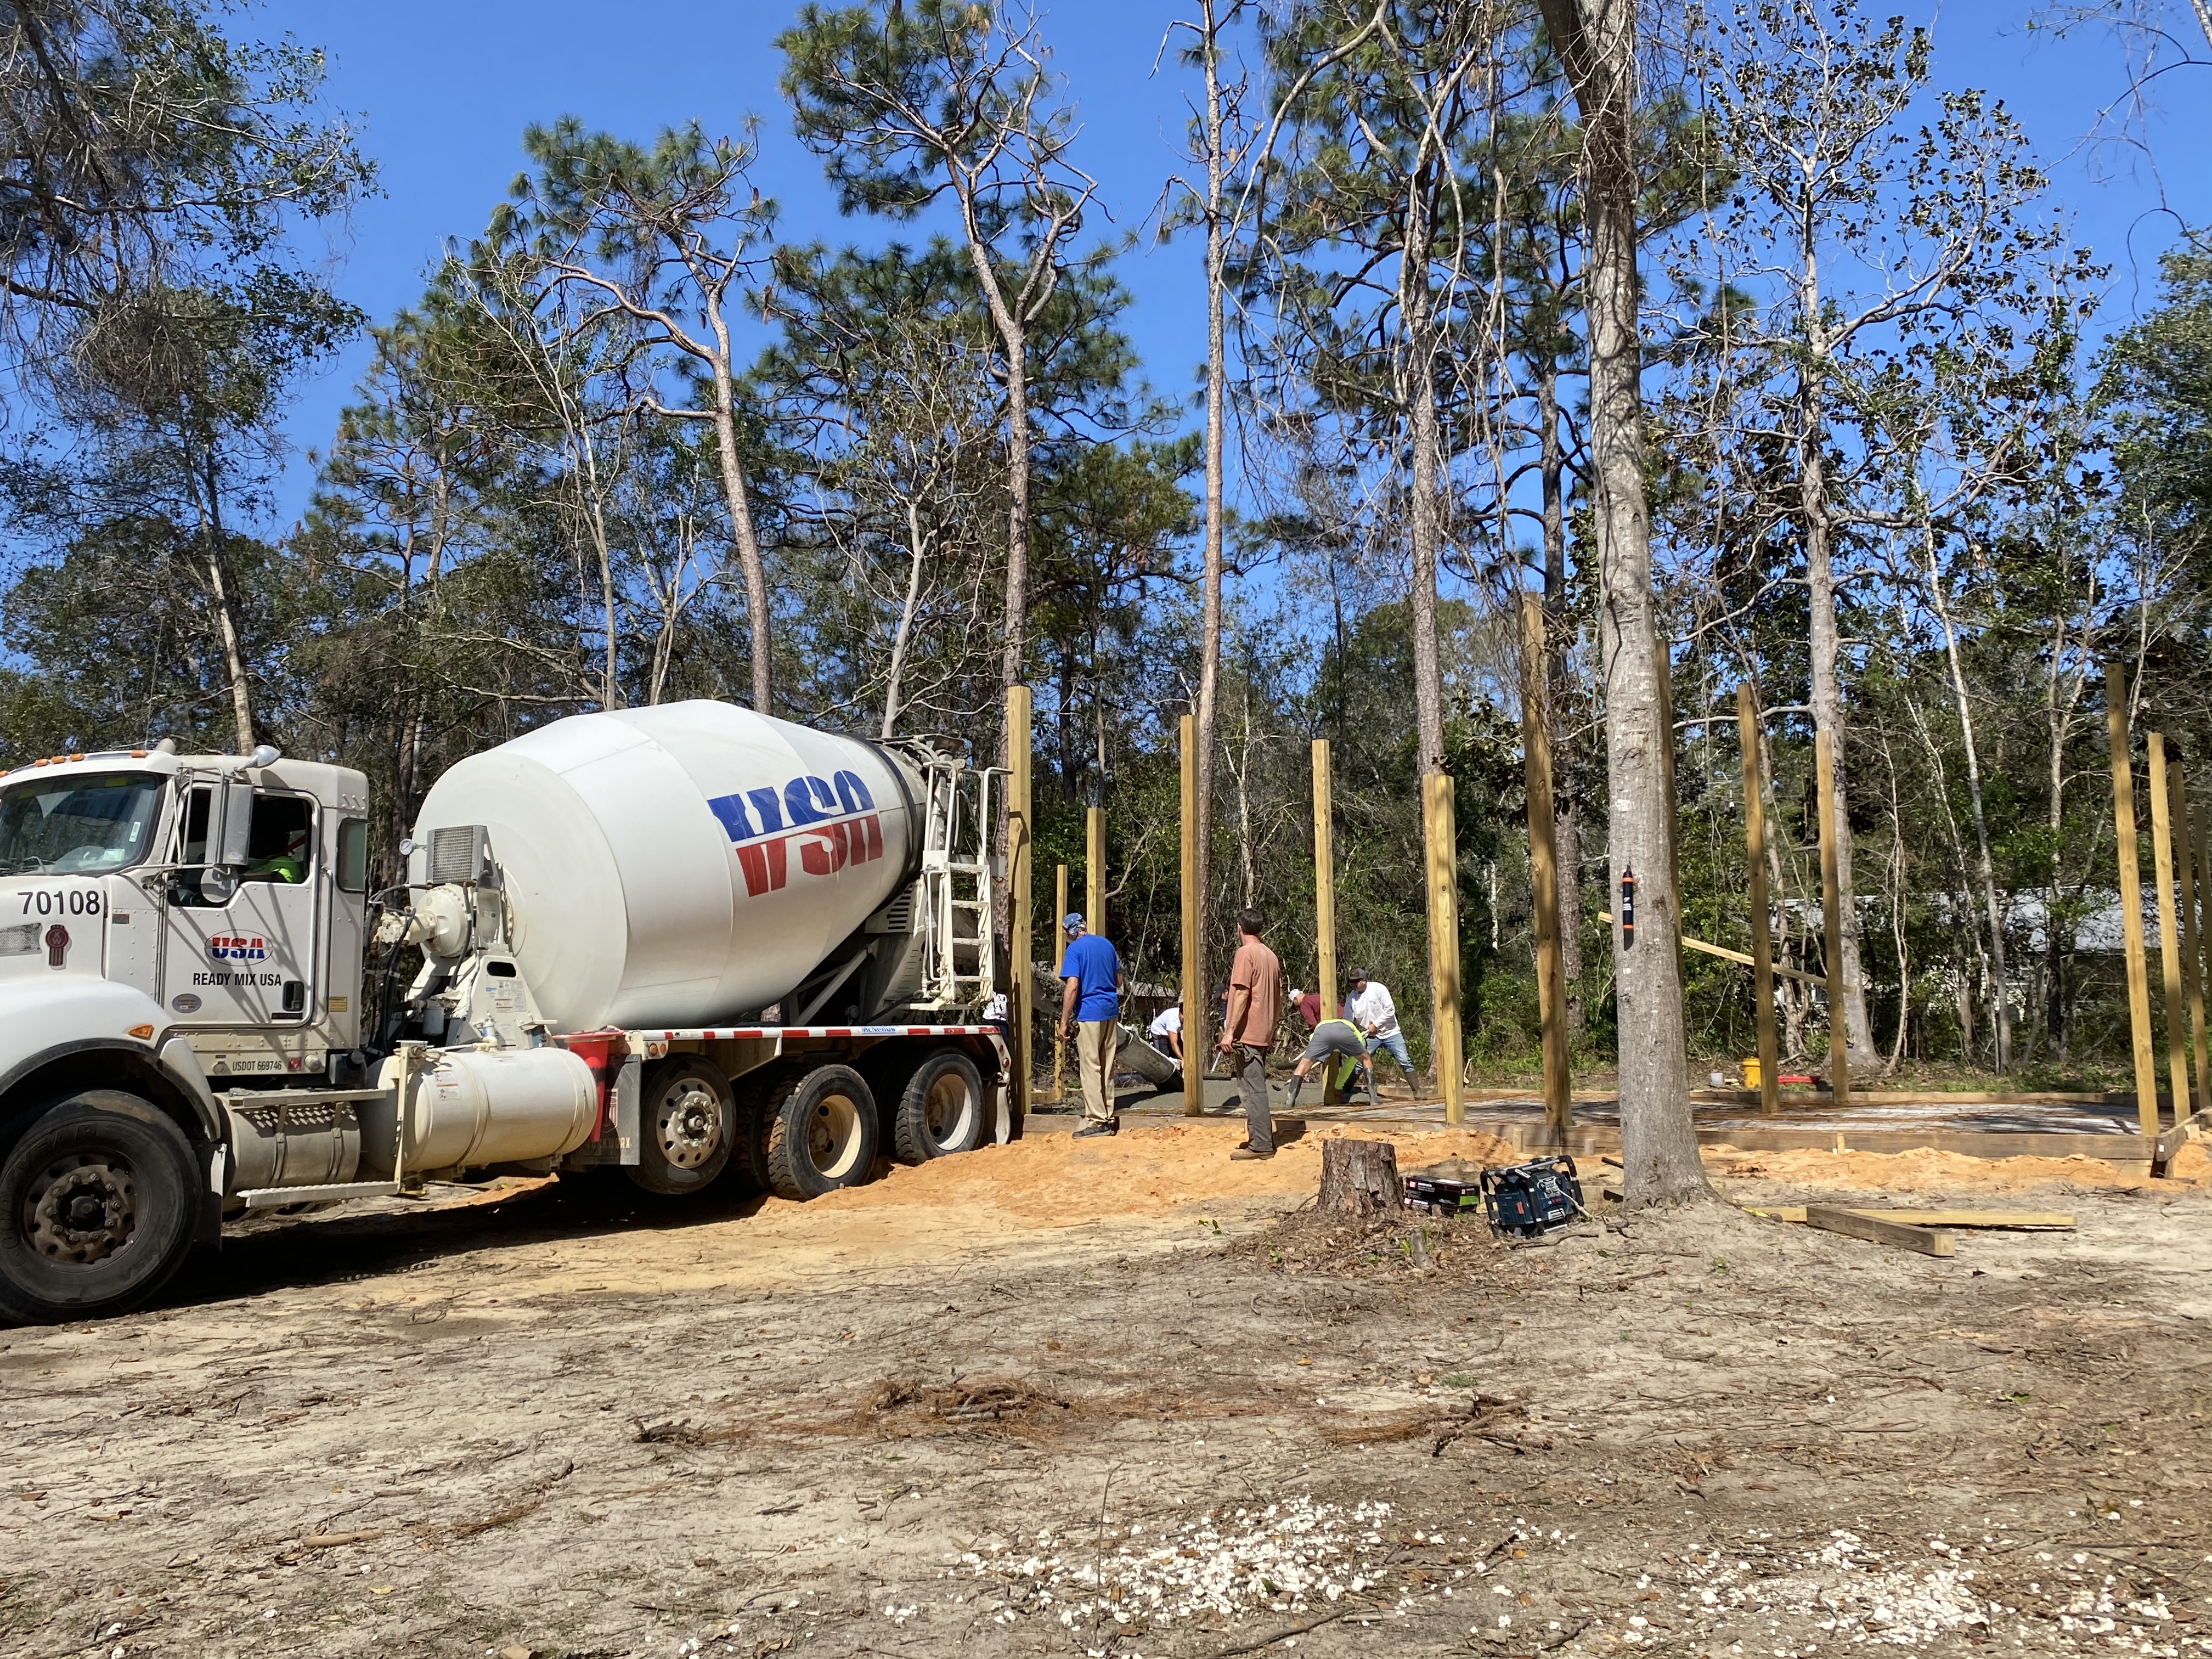
Concrete Pour for the Foundation
We did hire out this job because it was such a large job that we did not think we could handle the amount of work on our own.
Plus, if you happen to mess up concrete, well, its a hard and expensive job to mess up on!!
So glad we hired this one out! Those concrete guys worked so hard! You can watch the video of our concrete pour here!
Buying Windows and Doors
My husband wanted to go ahead and buy the windows and doors before framing, so he knew the size of the frames that he would need to be making for the pole barn. We went to Habitat for Huminity to find our windows and doors. We scored big and were able to grab almost everything we needed from Habitat for Humanity! Some of the windows and doors were used but some were new! We spent under $500 for all of our windows and doors! Check out our trip to Habitat for Humanity!
Framing the First Floor
Framing the first floor went pretty fast.
We were able to get it all done in about two to three days.
I learned to frame and framed one of the walls on my own! It is always so cool to learn a new trade!
Framing the Second Floor
We second story framing went faster than the first floor. We plan to use the two wings of the barndominium for attic storage and then the middle of the second floor as useable space. My parents came down to help us on a Saturday! Much needed!
Roof
We were able to frame the roof fairly quickly in about two weeks, then added the galvalume roof.
My parents and my brother came to help for the putting the galvalume roof on! It took about two and a half days for the install on the galvalume roof! Not to bad for two old guys (both of our Dad’s) and two middle aged guys (hubs and bro). No pun intended 🤣
My parents and my brother came to help for the putting the galvalume roof on! My mom helped me with cleaning up debris, breaking up a pile of extra concrete and making lunch for our guys! Check out our reel on the installing of the roof!
After Framing and Roofing
After our barndo was framed, the next few projects were not nearly as overwhelming. My husband had general construction knowledge and we are both hard workers, willing to do whatever it took to bring our temporary home to life!! Anything we were not knowledgeable on, we turned to You Tube, family or friends that were experts in the subject area.
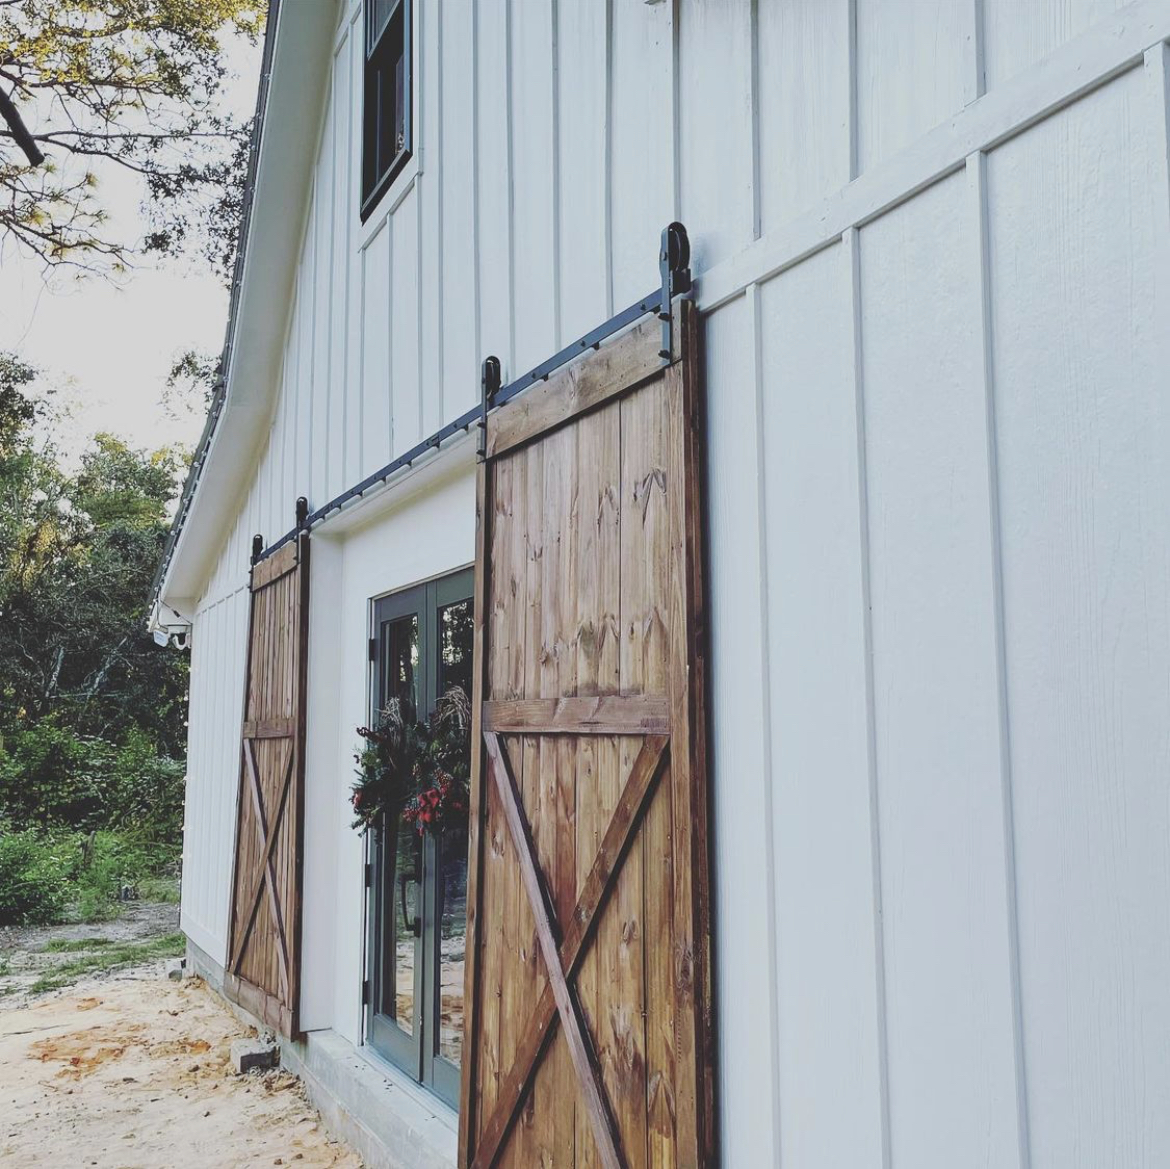
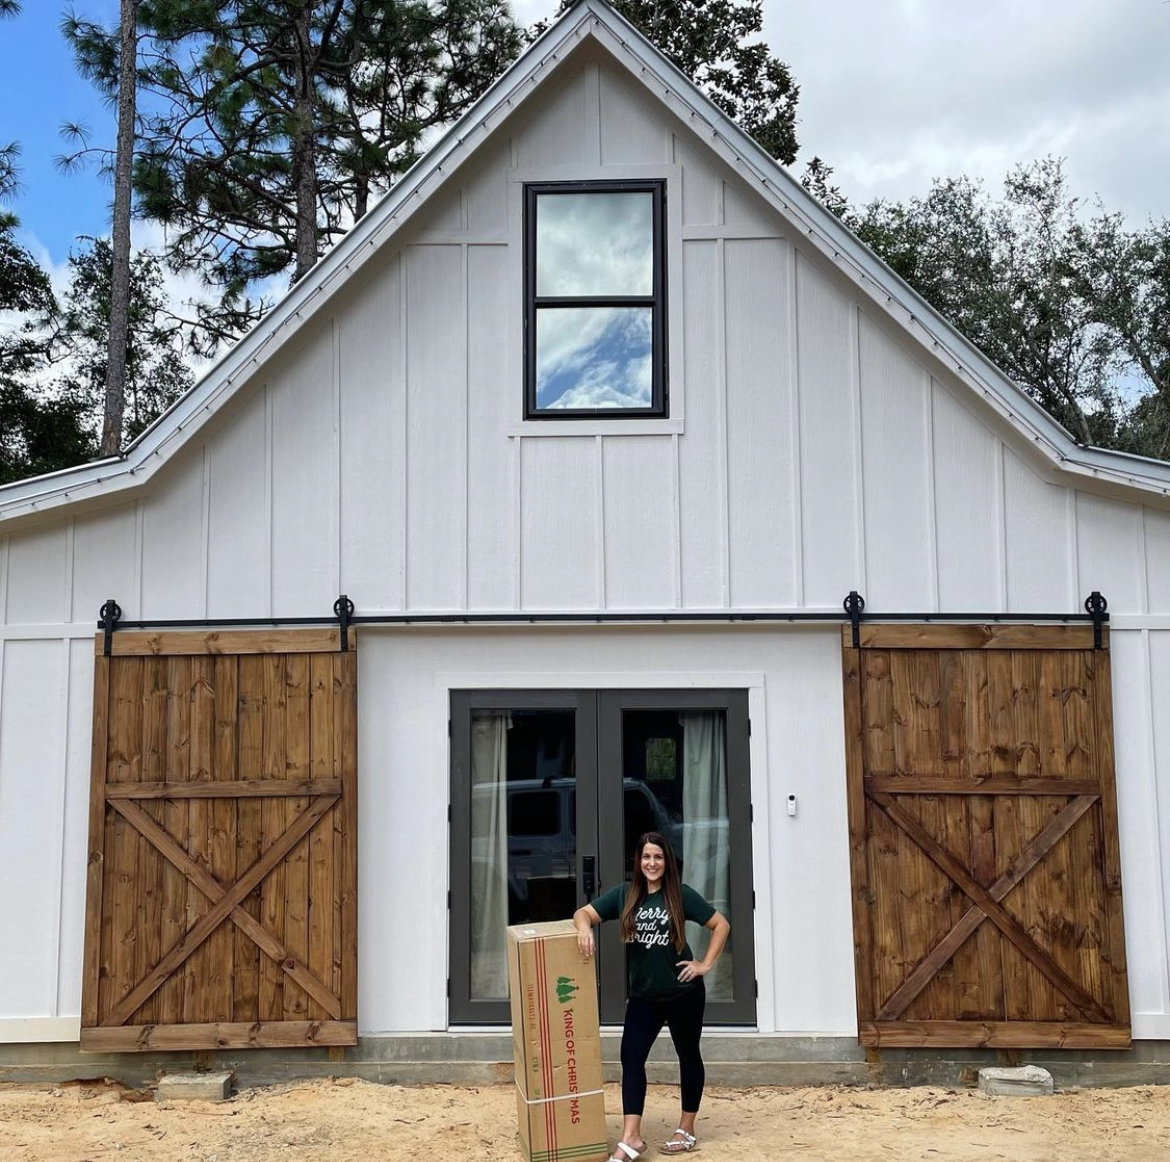
I built the exterior barn doors, myself, with the help of a couple assistants to cut and hold wood! Check out that process here! It is truly amazing what you can learn to do if you have the willingness to learn! You might may some mistakes along the way, but just start over and try again!
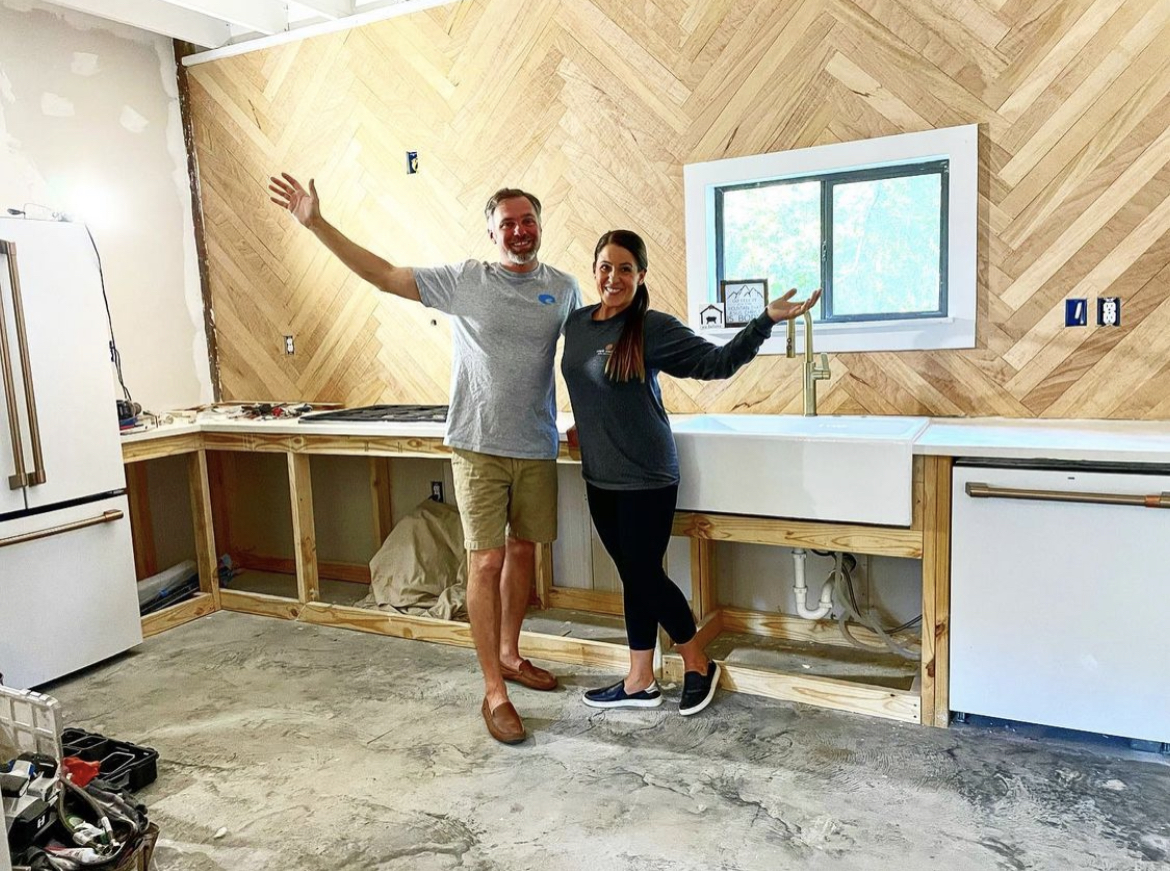
Our plan has been to do as much work that we can do on our own, to keep building costs as low as possible. This is a cash build and we had absolutely no plans to get any type of loan for our barndominium build or our forever home build! Our hope was to get the barndominium dried in and basic items checked off then take time to finish the remaining rooms.
Home Depot Gift Card
We are almost completely done with the building process. Finishing up with sheet rock and paint over the next little bit! Would you like to guess at how much we spent on our Barndominium build? The first person to comment with the correct amount, I wil send you a $100 gift card from Home Depot!
Instagram Collabs
I have been so blessed to have a job that never feels like work to me! I couldn’t be happier as a blogger and a influencer on IG! I am excited to share in a blog post, soon, our barndomium reveal and which companies I collaborated with! Any questions, please don’t hesitate to reach out!


You must be logged in to post a comment.