[This post contains sponsored links. The items featured and linked in this post were all provided by Pfister, Frame My Mirror, Marlo+Olive, Oasense, Amazon and Stencilit; all opinions and reviews are my own.]

Ok, ok, we know at first glance, an outdoor bathroom may seem unnecessary or excessive, but hear us out! We are in a coastal area with sand.
LOTS and lots of sand! We literally live across the street from the beach, we are constantly tracking in sand.
Here’s How We DIY-ed Our Outdoor Bathroom
 Step 1-Draw Up Plans
We decided a few years ago that we definitely needed some sort of outdoor bathroom. Last fall, we decided to head to Pinterest to get our juices flowing for ideas, draw up plans (Wes & I doodling designs in our notebooks) and go for it!

Step 2-Plumbing & Concrete Pad
The next step was planning out our plumbing-deciding where the sink, shower and toilet would be placed. Install plumbing.
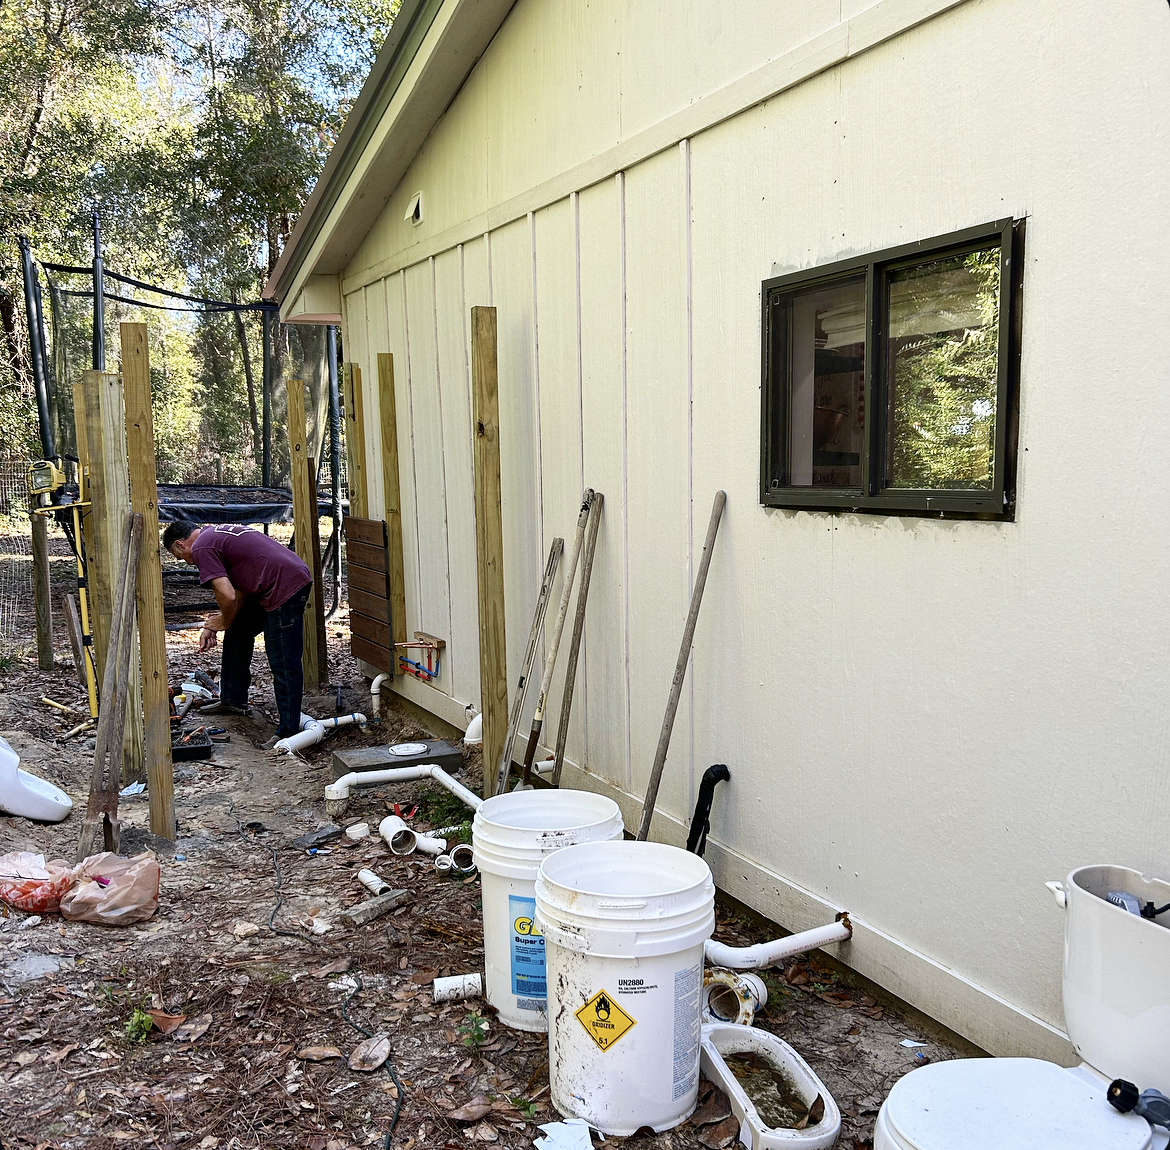
Step 3-Build Out Walls
After plumbing, it’s time to build the walls! We used 4×4’s for the corner posts, along with 2×4’s, all pressure treated. We used galvalume for the walls. One of our granddogs, Ranger, was here visiting when we began construction of the bathroom.


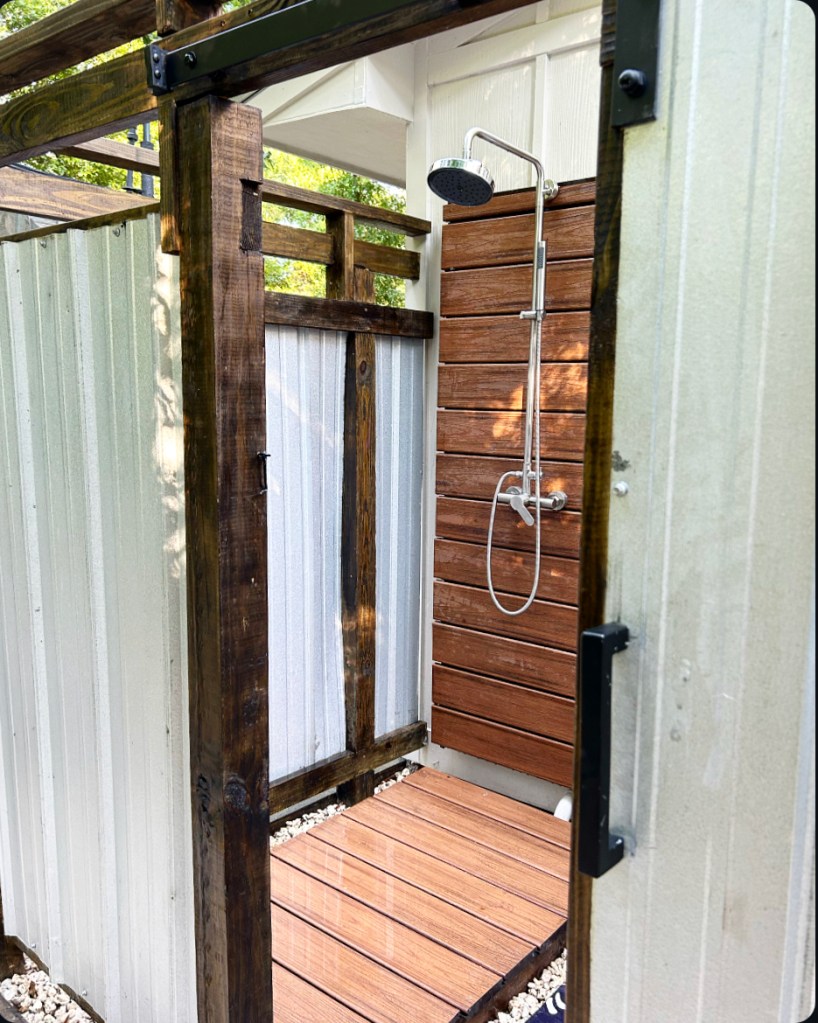
Step 4-Build Shower Wall & Floor
First we built a frame for the shower wall and shower floor, out of pressure treated 2×4’s. Covered it in 1×6 decking.

We also decided on concrete pavers to have easy access to plumbing.

Step 5-Concrete Pavers
We diy-ed the concrete pavers. Leveled out the ground. The price was a little bit cheaper to make than to purchase concrete pavers.


Step 6-Bahama Rock
We added a a tractor scoop of Bahama Rock to go in between the concrete pavers.

Step 7- Staining Wood
Our youngest two daughters helped us with staining the wood! In the picture, to the right, you can see the floor board of the shower.

I had a helper that liked to chat as we worked together. (I didn’t mind the chatting.)

Step 8-DIY Paint & Stenciled Concrete Pavers

I painted a couple layers of black paint first, allowed it to dry, then added the stencil and used white paint.

After allowing the paint to dry, I added several coats of a matte sealer to the concrete pavers.
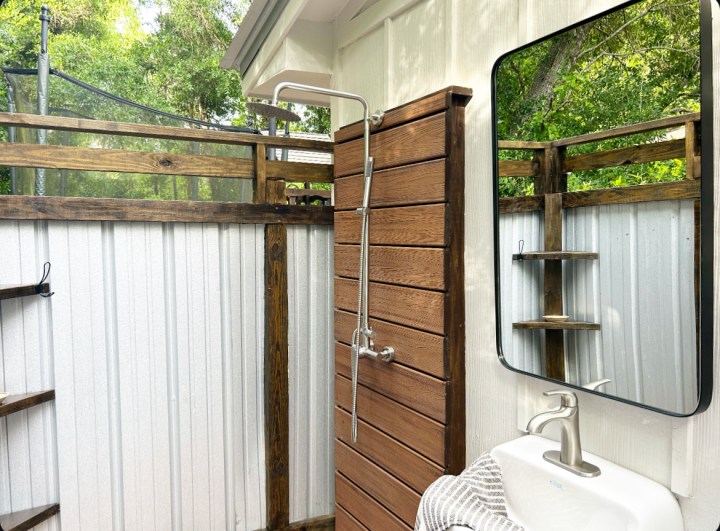
Step 9- Installing Fixtures &
Finished Result
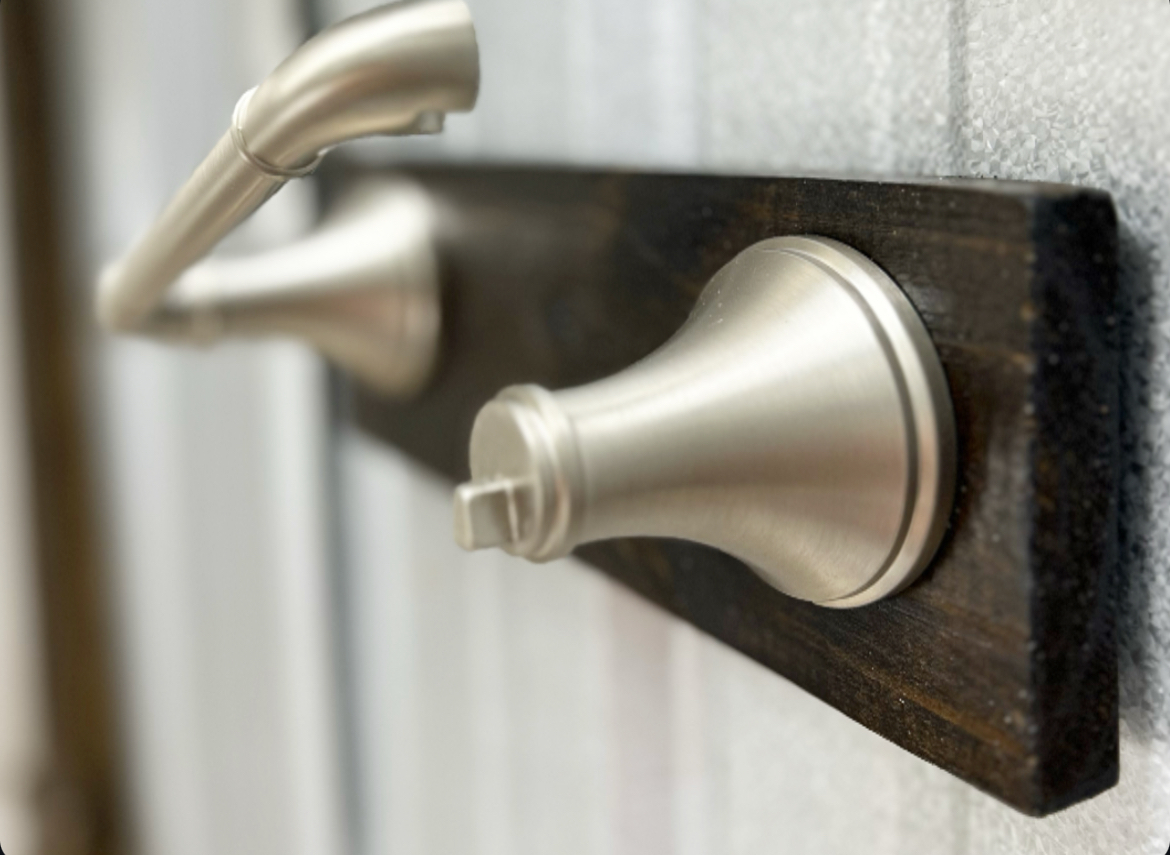
Rancho Single Control Bathroom Faucet is from Pfister. Spot Defense is a perfect for a busy Mama like me! (You , too!)

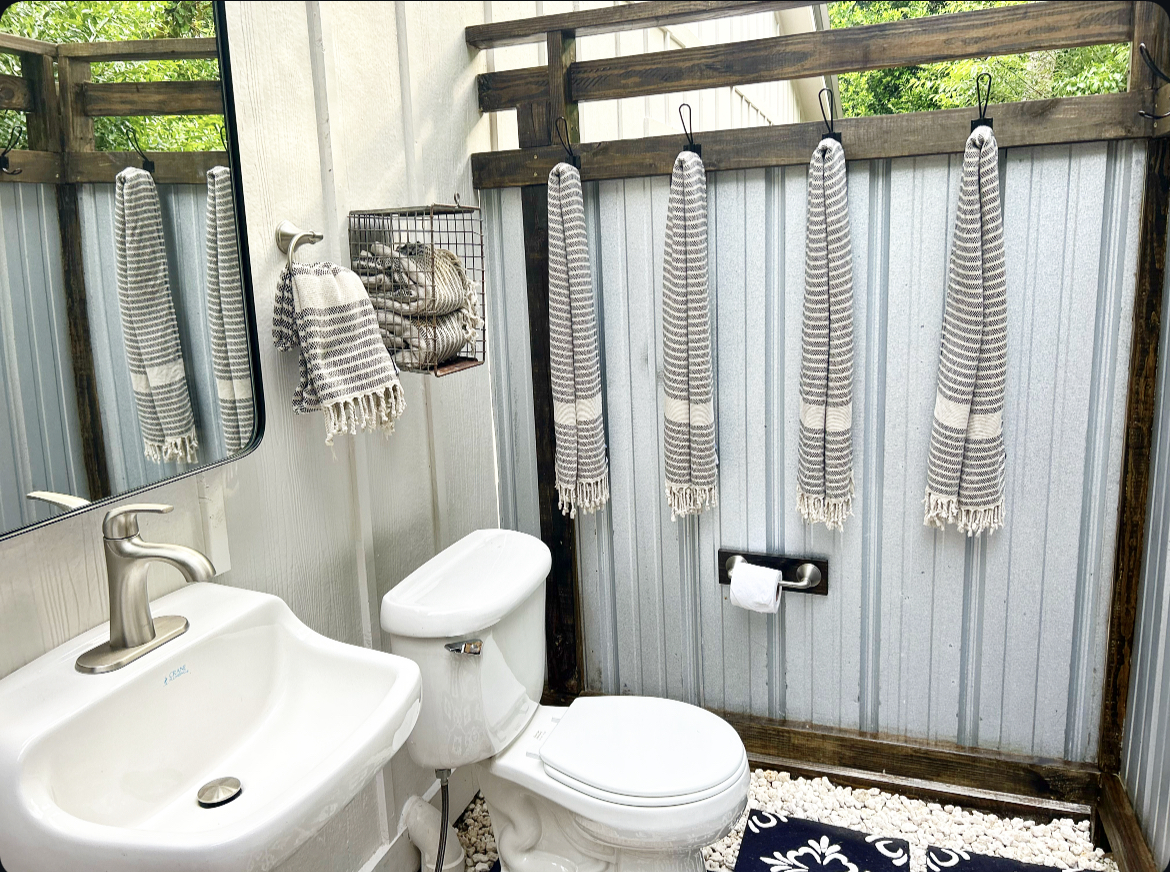
Visalia Towel Ring with Spot Defense is from Pfister. Love the sleek design!
Visalia Tissue Holder in Brushed Nickel is also from Pfister. My favorite feature is how you can just lift up and change out the roll like an easy breezy summer day!

Our Highland (Black) Decorative Mirror is from Frame My Mirror. Love it’s sleek, yet modern design! Budget friendly! You can use code sweetsoutherngrace15 for 15% off!

Our Turkish Bath Towels are from Marlo+Olive, in Haven Black. Turkish towels are compact, sand-resistant 🙌🏼, quick to dry, and hypoallergenic.
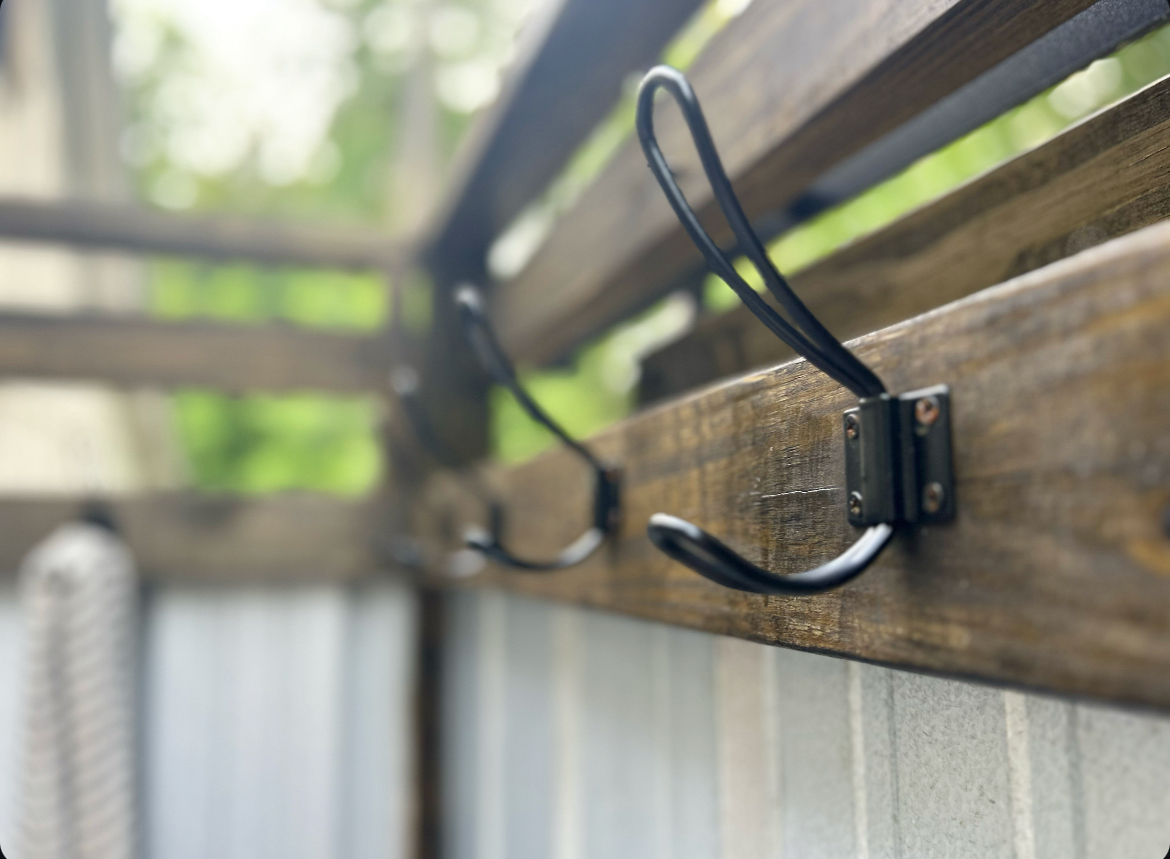
Our towel hooks are from Amazon! Budget friendly, modern farmhouse design!
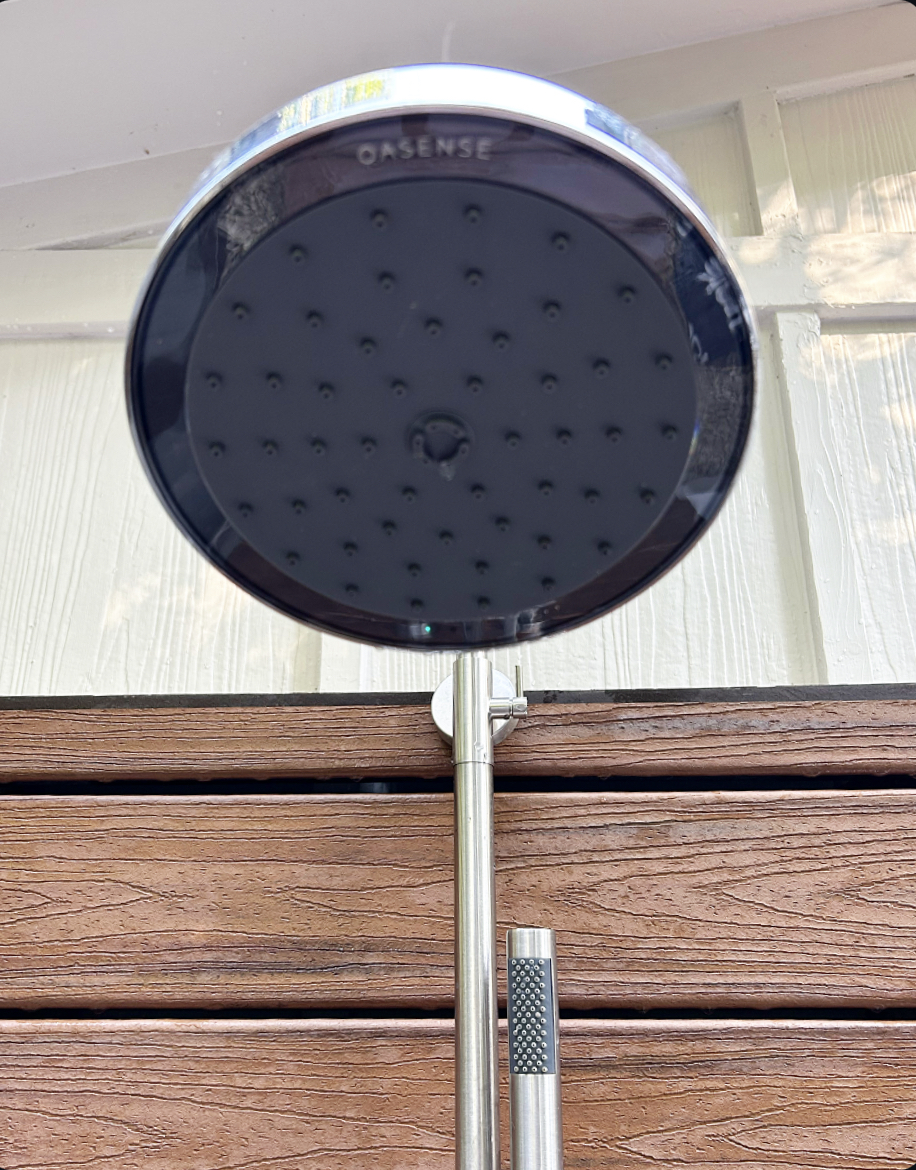
We also decided to up grade our showerhead to the Oasense Reva Showerhead. It is the world’s first sensor enabled smart showerhead-automatically reduces the water flow to 15% whenever you aren’t actively rinsing, and resumes 100% full pressure every time you step forward to rinse. The embedded sensor suite has advanced sensor fusion hardware with machine learning algorithms that automatically calibrates the sensors during each shower.

That concludes our DIY Outdoor Bathroom! Thank you so much for taking the time to read about our diy outdoor bathroom! If you have any questions, please let us know!
❤️-Shae

You must be logged in to post a comment.