How To Create a Modern Wood Feature Wall for $50

“ This post may contain affiliate links, meaning I receive commissions for purchases made through those links, at no cost to you, through Amazon Associates program, Free Form Paint Brush or Home Depot.”

Teaming up with several blogging buddies for a DIY Home Improvement Challenge. our host is my sweet friend Terrie, from Decorating and More with Tip!

I have had plenty of time to think about design elements for our barndominium master bedroom! I toyed with the idea of a geometric wood wall but I was unsure! After talking with a couple of my interior design buddies, I decided to just go for it!!

4C6841D0-C164-4E01-AF2A-26F41EB6F598

Materials

490000BC-DF79-45F1-97A2-BFC9F484D5E1

Paint 

After we installed the trim, we painted the accent wall. This will save time once the accent wall is installed. 

We painted the wall Orchid by Sherwin Williams in an eggshell finish. We use Free Form Paint Brushes. You can use SWEETSOUTHERN15 for 15% off!

Time to Install the Geometric Wall

Stick with 45 and 90-degree angles! we only used 20 furring boards! We spent less than $50 on this wall!

5E395B96-DBFE-4A00-BE8A-9877D1480B40

We decided to start with the right hand side of the wall. Honestly, we decided to just hold boards up at different angles, with various spacing ,to see what looked right. Next we leveled and nailed as we placed the boards on the wall!

B572751C-F5AC-49DE-BE67-257818BE00B1

Once we got into a groove, the install went really fast and ended up being a really fun project. It took us a couple nights because we ran out of boards! it could easily be done in a day to complete!

BD79943A-9E4E-42FF-BC91-8D6B80D7C54F

Time to Caulk 

Time to caulk the seams and wood putty the nail holes!

EBF643DC-F0C6-4639-B041-1ECD8606148E

I caulked along the seams where the boards meet the wall, using two tubes of tubes of caulk. 

DDF643E4-0DCF-4AE2-B5E3-DB0AD54BEB76

I also sanded a few of my boards as they were rough! And once the caulk is dry….

F85FFEAB-0FE3-4640-AA4A-BA69AFB3DC46

This part of the project gets a little tedious because you have to apply the rest of the paint with a brush!

80EBB05F-7EB9-476A-9DF8-0C0623F654E5

Make sure you get into every nook and cranny. I used a craft brush in the really tight spots where my boards met with an adjacent wall or the trim. You’ll definitely want to brush on two coats. 

Once your paint is dry, you’re done! Now you can style your room and enjoy!

E5A4572E-9379-41B2-82BC-B05D53061106

I hope you have enjoyed this project with us! Check out my other blogging buddies to see what DIY Home Improvement Project they have come up with for their homes to share with ya‘ll!

                  Terrie Decorating and  More With Tip

Tammy Patina and Paint

Teresa Through the Vintage Door

Shae Sweet Southern Grace

4C6841D0-C164-4E01-AF2A-26F41EB6F598

DIY Dollhouse Kitchen Backsplash

I am excited to share about a project that is near and dear to our family’s hearts. When our #3 daughter was turning 2 years old, my husband and I designed and built a wood kitchen set for her!

This is our number one, two and three daughters decorating cookies for Santa! When we built the kitchen set (far right), we also build a table and chairs set too. This photo is circa 2014.

When their baby sister came along…

Photo is circa early 2016!

…and we couldn’t wait until our youngest two were able to enjoy playing with it together! We have had this in our home for the past 8 plus years! Plus, all of their cousins have enjoyed coming over to visit and play with it too! How special!

I chalk painted the kitchen set and table/chairs set in white! Photo is circa 2018.

DB7C189D-A806-4E63-A7DC-7BACDFCADCA3

Now that the kitchen set has been outgrown, I wanted to repurpose it into something that would be enjoyed for a few more years to come! I thought it would be cool to turn the kitchen set into a Barbie ”Bardominium” Doll House. The first if it’s kind, I believe. Fitting for our family, as we’ve been building our barndominium for the past year and a half!

DIY Challenge with Glue

I’ve teamed up with my sweet friend (host) Terrie from Decorating & More with Tip, plus several other blogging buddies! Our goal is to do a diy type of project with any kind of glue. Challenge accepted! My glue of choice is hot glue!

Doll House Kitchen Backsplash 

After we reconfigured the kitchen set into a dollhouse, I knew I wanted to ask my youngest daughter, what she wanted in her dollhouse. Definitely a kitchen, bedroom and bathroom. Ok. Those are attainable.

This is during the demolition process of the kitchen set!

And this is part of the after. We salvaged every piece that we thought we could repurpose in some way.  

As I dove into all things dollhouse related-scale sizes of Barbie furniture, how to make little accessories, wood for building, ext, I thought about popsicle sticks for the backsplash in the doll house kitchen. Wait. Let me back up for a minute. If your new here, we did a wood herringbone backsplash for our barndominium kitchen. Check out our IG post here. Naturally we needed that in our dollhouse too, right?! 

Dollhouse Plans

I always roughly draw up plans for whatever project I’m working on. Here is my drawings for the front and back of the dollhouse. Also, keep in mind, this is our version of a Barbie Dreamhouse, “Barndominium Addition” and made to look like our barndominium. 

Front of the Dollhouse Rough Drawing.

Back of the Dollhouse Rough Drawing.

Dollhouse After

This is the dollhouse after we rebuilt it from the girl’s kitchen set. This is with almost two coats of paint! I had a great helper! Our youngest babe!

Supplies needed:

• Hot Glue Sticks

• Hot Glue Gun

• Wooden Popsicle Sticks

• Scissors 

Herringbone Pattern Backsplash

The task may seem daunting but it is achievable! We used the herringbone pattern backsplash in our kitchen as a reference! The herringbone pattern started at the bottom edge of where the dollhouse countertop will go and continued making it’s pattern,  all the way to the top. Then continued until both kitchen walls had been completed! 

Photo from welshdesignstudio.com. 

Measure 

Basically, whatever size herringbone design you decide to make,  which in our diagram is represented by the letter ‘W’, make your cuts based on the size of your space.

This is my very rough drawing.

It’s basically a math equation based on height and width. The dollhouse was a little different than our actual kitchen backsplash. Check out welshdesignstudio.com to follow their mathematical equation!

Cut

I suggest cutting your pieces in sections, in case of any mistakes that are made. There will be some as it was a learning curve until I figured out that we could easily do a herringbone pattern if I made a math equation from the size of the space for the herringbone pattern. It’s kind of like simple algebra!

Stain, Paint and Protect 

Stain or paint your wood. Since this was a dollhouse, we decided to leave the wood bare. Our kitchen backsplash in our home has two coats of poly in clear matte.

Lay Out Pieces

I suggest laying out your pieces first, which will help insure less mistakes! Trust me, we made some with the kitchen wall! 

Add Wood

Now we are ready to add the wood to the space! Herringbone is such a beautiful, classic pattern to add to any home or dollhouse in our case!

If you don’t succeed, try, try again!

I tried three different options for the dollhouse kitchen backsplash before the third one worked! First was to draw on shiplap with a pencil then trace with a black permanent marker. Second, I tried horizontal shiplap. Finally my oldest daughter suggested the original idea I had had, which was to make the herringbone patterned shiplap. I finally agreed we should at least try it and it worked to our liking!

Finishing Thoughts

It’s really not to hard and the impact is amazing! We still have a ways to go with our dollhouse as it’s been a learning curve for me! I am so glad we went with the herringbone pattern!

Dollhouse Completion

The best way to follow along on the completion of the dollhouse is on IG, which I will link below!

I finally have figured out that balsa wood is the best for dollhouses! I am going to add the window trim and board and batten next! Then I will build the kitchen cabinets! It’s a process but I will make sure to blog about all things related to the dollhouse build as things become finished!

I hope you have enjoyed being here! I would love for you to follow along with us on IG for our dollhouse build and for our self built barndominium as well!

Please take some time and check out the other ladies in our blog  to see what they’ve created with glue! 

DECORATE AND MORE WITH TIP
THE HOUSE HOUSE
PURPLE HUES AND ME 
SWEET SOUTHERN GRACE
PATINA AND PAINT

Trimming Our Farmhouse Christmas Tree


“This blog post is sponsored by Old Time Pottery and reflects my personal views and opinions on the products.”

038B84A9-0CBD-49CB-8C56-8E98D950D25A

Trimming our Christmas trees has always been a favorite in our home! Yes, I did say trees. We have had up to seven Christmas trees in our home! I have always enjoyed Christmas!! From trimming the trees to our youngest placing the angel on top of our family tree to baking and decorating homemade gingerbread houses together. I love it all and I really want to create those special memories with my four daughters.

Shopping for Trees and

Trimming 

One of my favorite places to shop for items to trim our trees with is Old Time Pottery! They also have so many different varities of trees to choose from as well, like my white Christmas tree! This year, they have a wonderful selection of farmhouse items like ribbon rolls, bows and wood ornaments!

2B698C7D-B711-4F00-8712-D51EF6929AE5

I was like a kid in a candy shop! I decided to use a couple different varieties of their wood snowflakes and joy ornaments .

038B84A9-0CBD-49CB-8C56-8E98D950D25A

I thought instead of garland that I would use some of their Christmas grennery picks. I found these and thought they were perfect to give contrast to the white Christmas tree. 

67DA6679-F288-4D6E-85F9-96C8DA5E9C30

I also wanted to grab three rolls of their black and white farmhouse ribbon rolls.  It is so easy to trim with ribbon! Start at the top of your tree with your ribbon and go down the tree about two to four inches and pinch the ribbon, gathering with one of the branches. You can easily make your own ribbon topper by gathering  and licking an entire roll of ribbon!

F339AF83-F6D2-401C-8336-D65FACDBB84C

Here I’m about half way through the roll of ribbon.

1922B2EA-B56E-46F1-B8F5-CC954C6744CF

Tie the end with jute twine! Now I just need to add it to my tree and fluff to my liking!

90B3C3D5-3BE5-43EE-A7C1-B9358208D20C

I also grabbed three of their pillows that you can use from Christmas through February! Add them to the floor by your Christmas tree, where it can be the perfect spot for curling up and drinking hot cocoa! Head on over to our IG and you can see a full video of the trimmings of the tree! 

7CFB98AB-85B0-46BB-B40A-D72D718C20DE

I hope ya’ll have enjoyed trimming your tree with me, this holiday season!  If you have any questions, please feel free to reach out! On behalf of Old Time Pottery and our family, we hope you and your family have a wonderful holiday season!

❤️~Shae 

DIY BOHO SOLAR LIGHTS

DIY BOHO SOLAR LIGHTS

I am so excited to team up with several of my blogging buddies for a Solar Light Challenge! My sweet friend, Terrie from Decorating and More with Tip heads us up! Did you come here from my friend, Liberty’s blog? I am loving what she came up with for our challenge!!


I knew I wanted to make some kind of outdoor light to hang outside above our boho hammock! I came up with the idea of a boho solar light to fit the bill!

CHALLENGE ACCEPTED

The rules were as follows: The rules were that we had to make a indoor or outdoor item with solar lights! Plus we needed to keep it budget friendly! Challenge accepted!

368DB247-6763-4324-8C36-2ECFC26DF6C1

SUPPLIES

Wood Embroidery Hoops 12 inches 

Spray Paint

Wire 

Twine 

Rope

Small Screws 

Drill

E9D6A0AF-9204-4FD9-9620-F631F7BEBE55

LET’S GET TO WORK

Head on over to my instagram and you can watch my reel of how my husband and I diy’ed our solar light fixtures! First, spray painted my embroidery hoops, leaving them to dry for about ten minutes. 

2710980C-0BE7-49D5-AA2D-1043B4B1E975Next, my husband drilled two holes into the sides of each of the solar lights so that we could insert the wire through to tie onto our embroidery hoops.

DAE3EDDE-3F86-4EA4-9F69-91276F0B6360Next, we drilled a small hole for a screw to insert  into the bottom of the light fixture for stability on the two pieces

Next we threaded the wire through the holes of the solar light and wrapped the light around the light fixture, several times, making sure it was secured well.

The next step is to hang the boho solar lights in your outdoor space!

It sure does help to have a husband who enjoys helping out his wife with small projects!

This was a one hour, easy, budget friendly project that we enjoyed doing together on a Sunday afternoon. We took a much needed break from building our barndominium! We spent a total of a whopping $15 on all three lights, since I had some items already on hand!

Our whole family loves this little space! The girls love the boho solar lights and the ambiance it adds to our new backyard!

I would love for you to check out my friends to see what they have come up with for their project as well! I know you won’t be disappointed! My friend Kelli’s project turned out amazing!! Don’t miss it!

❤️~Shae

DECORATEANDMOREWITHTIP | PURPLEHUESANDME | PATINAANDPAINT | THEHOUSEHOUSE

PAULASHANDMADESPACE | B4ANDAFTERS | SWEETSOUTHERNGRACE | KSOLYMPICNEST

THE BILTMORE AT CHRISTMAS

THE BILTMORE AT CHRISTMAS

We all dream of that perfect holiday season. The one filled with family togetherness, Christmas trees with lights, homemade hot cocoa and Christmas movies. Often times, the reality of the Christmas holidays can bring on endless busyness. I believe that in order to fully appreciate the holidays, taking a family Christmas vacation can really help set our sights, in perspective of a truly beautiful family holiday. This helps us to step away from the day-to-day and set it in another light.

269E25DC-43CB-491B-AB95-E611A221459D


Christmas at the Biltmore

The weekend after my fourthieth birthday, we packed the car and had our eyes set for the stunning Asheville, North Carolina, the backdrop of George Vanderbilt’s famous estate.

FC2A858B-6D59-46E0-806D-90466A993F27

This is the Biltmore’s 125 year of welcoming guests into the estate. The Biltmore begins decorating in November with more than 60 Christmas trees, 13,000 ornaments, thousands of lights, beautiful poinsettias and ribbons all adorn the majestic estate.

FEACC401-D5BA-4702-BDBE-8F051F9A07CE

On the front lawn of the Biltmore House, a breathtaking, 55-foot-tall Norway spruce with 45,000 plus lights and is lit for the candlelight evenings.

3893F37D-DFFD-4EE1-B9C9-78A6650B8D02

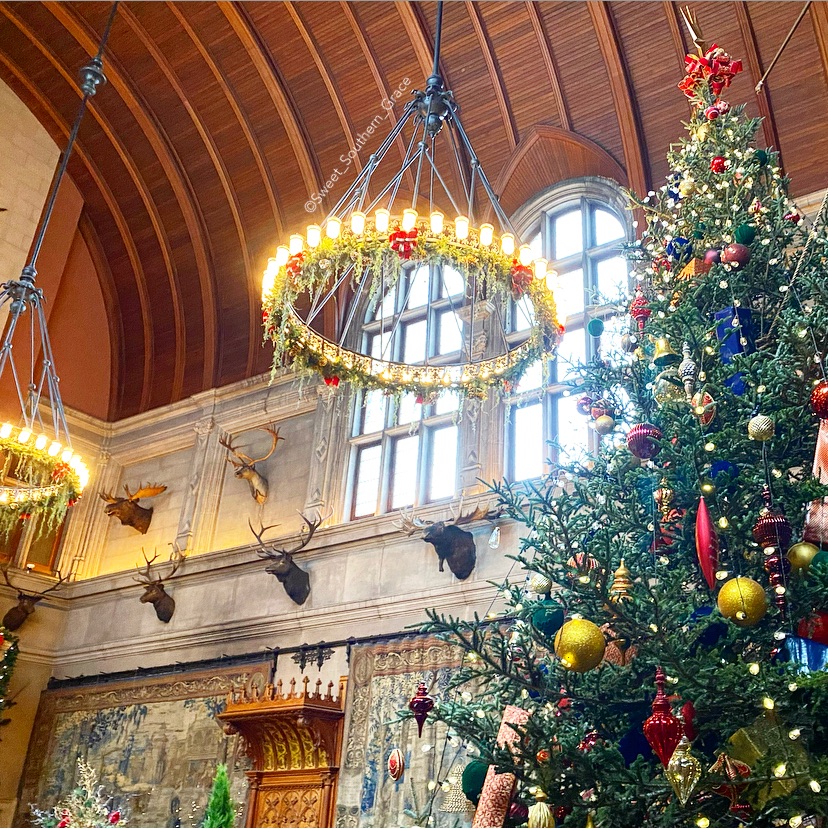
In the Banquet Hall of the Biltmore House, a 35-foot Fraser fir Christmas tree is brought in by 50 helpers! It is even replaced mid holiday season to ensure a fresh tree. The replacement tree arrives to the house by 4 AM and decorated by the time the first guests arrive by 9 AM. The tree is decorated with 500 ornament, 500 lights and 500 packages, as George Vanderbilt decorated the tree.

FE3E6E81-18B3-418D-BAF0-B96E005B18E2

History of Christmas at the Biltmore

George Vanderbilt and his wife, Edith along with their daughter, Cornelia, spent many Christmases together in the Biltmore House, creating many traditions that continue today. George Vanderbilt’s descendant s, the Cecil family, now the estate’s owners and caretakers, host the annual employee holiday party, just like the Vanderbilt’s did. The Vanderbilt’s also made sure that each employee’s child had a Christmas gift and the Cecil family continues this tradition today. Records even show that Edith Vanderbilt kept notes on what gift each child received every year to avoid repeating gift in the years to follow. The lists still exist, as well as receipts from FAO Schwartz detailing some of the toys and games she purchased. 

6F54AC3D-0129-4145-9563-43178212710F

The Biltmore at Christmas

Throughout the house and other buildings on the estate, you will find 55 plus decorated Christmas trees, each created by Biltmore designers, all with different themes each year.

B749425A-3506-4E83-80AD-E90B753F25AB

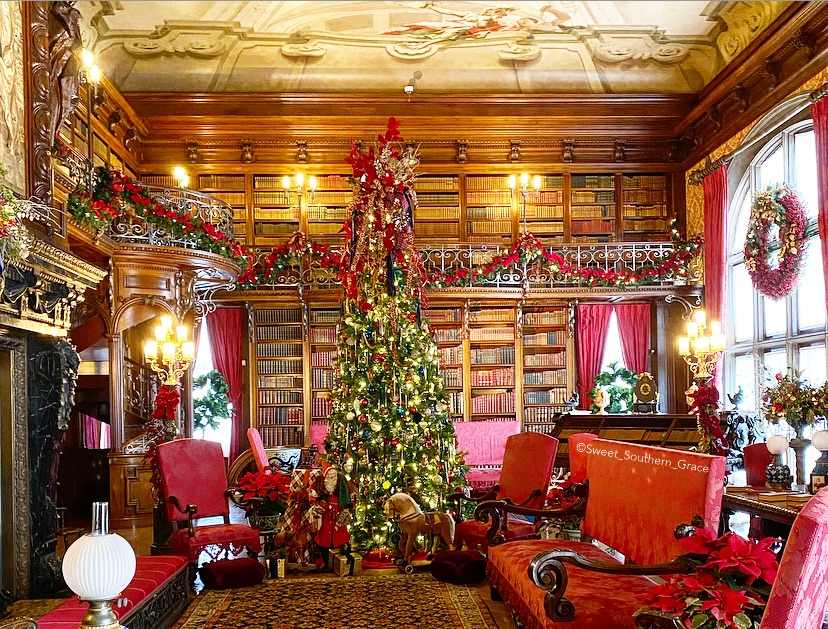
Every detail of the estate is covered in Christmas cheer and almost every room in the home has it’s own Christmas tree.

97D097F3-CB33-4B09-9EBC-6637B9F4E262

Not only is the home absolutely stunning with Christmas decor, the exquisite details of the estate will wow just about anyone!

7CDAE7F1-2594-4015-854E-48E8FEDD4464

From the medieval tapestries, some dating back to the 1500’s, the detailed wood prints, exquisite paintings, 70-foot ceilings to the 10,000 rare volume priceless library!

9A63881B-AA5B-4943-A607-AD990251ED78

Estate Shops: Carriage House Shop

After touring the Biltmore House, we walked over to the Carriage House to find our keepsake ornament of the trip. We found many beautiful ornaments such as handpainted glass, wood and porcelain.  We also picked up a book about the Biltmore and I have enjoyed reading the history of the Vanderbilts.

80A31292-D3F2-4F52-BF4A-8BDDF33FB707

Estate Shops: Toymaker’s

My youngest daughter was jumping at the chance to head to the Toymaker’s toy shop! She chose a stuffed Cedric dog, which was the family dog of the Vanderbilts! I also picked up a couple pencils and a pen as souvineers.

DE744476-B72F-465C-83DB-15B77079FB86

Estate Shops: Confectionery

Why not induldge yourself with an array of treats at the Confectionery candy shop!

730CD5D9-7A8B-434B-924F-A9941EE86EB2

Our family chose several chocolate treats and they were worth waiting in line! From cookies to truffles, our family enjoyed grabbing a few of these before heading home!

989195D8-C079-4B04-BEBF-FBF2A9A1A369


TIPS FOR VISITING THE BILTMORE

I did not wear tennis shoes but I would definitely recommend it! Purchase your tickets before you go! Purchase an audio for your visit. Allow time to get park and ride the bus to the estate.

48CB8605-6CD7-41BA-8543-D1ED2A100387

FINAL THOUGHTS

The Biltmore is a stunning place! We loved Asheville and will definitely be back! We may even make it a yearly tradition!  

Love, Shae 

79596253-29D4-4E04-86D6-5BADAD84564F

DIY CLEAR CHRISTMAS ORNAMENTS

DIY CLEAR CHRISTMAS ORNAMENTS

CHALLENGE DEETS

Today I am teaming up with several of my blogging friends to share how we each put our own spin on a clear ornament. My friend Terrie from Decorating and More with Tip is our host and always has creative challenges for our group!

I know you will love to see the DIY ornament from  my friend Tara!

FAMILY TRADITIONS

I have always enjoyed making Christmas ornaments. I started this tradition with our family, for my husband and I’s first Christmas together. He actually was recovering from major abdominal surgery and I wanted to have something fun for us to do, while he was at home. I have continued this tradition, every year in our family. I have made all types of ornaments from salt dough ornaments to hand painted ornaments!

LETS MAKE ORNAMENTS

Come follow along with me, as I show you, just how easy and budget friendly it can be to make your own ornaments! Plus it is so much fun and it will be memories that you can add on your Christmas tree, year after year!

2AE31EC9-8834-4341-9D25-7F39A83583FB

SUPPLIES NEEDED:

*Clear ornament(s)

*Fabric

*Ribbon

*Flocked Garland

*Mini Pine Cones

*Hot Glue Gun and Glue Sticks

*Jute Twine

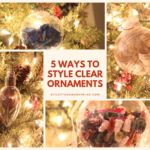
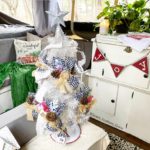
I grabbed this six count of clear ornaments in the Dollar Section of Target for $3! I wanted some smaller ornaments to put on our mini Christmas tree for our camper. Since our camper is decorated in a rustic, boho type decor, I decided to go with black checkered fabric and burlap ribbon to cover my ornaments, that I purchased from Hobby Lobby.

05461B49-4D7D-489D-ABFD-79F606D3849E

I also picked up small pine cones and some flocked greenery with red berries.

HOW TO MAKE THE ORNAMENTS

These ornaments are really simple to make. Plus, they make great gifts too!

71673469-1F30-4B1B-A16D-F8B4429469C8

I tied my jute twine around the ornament top base to my desired length, for the ribbon hanger.

9C89E04E-C604-4B2A-957E-FB4A5DA9E951

Next, I cut my fabric a few inches wider than the diameter of my ornament, then began lightly adding hot glue to the ornament and wrapping the fabric around the ornament.

4DD205CC-3619-4FC8-B831-5ECF19C383E2

I could not find any burlap ribbon at my Hobby Lobby, so I purchased an eighth of a yard of burlap to cut my own “ribbon”.

045293BF-293A-47EA-B551-AB015E78970C

I cut my ribbon in one inch strips.

A609DC5E-9419-438C-B9FA-C4D90D53886D

Next, I tied my burlap ribbon around the ornament then added a few strands of jute twine by tieing them into the burlap ribbon.

1A1B8ABC-E4E2-4A37-8D79-EE1B2F32D584

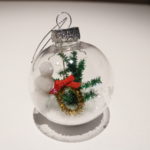
For the greenery, pine cones and berries, I just cut from the greenery and pine cones bunches that I purchased from Hobby Lobby. Add a little dab of hot glue and your good to go! You can also adjust your burlap ribbon to look neater by adding dabs of hot glue to the back of the ribbon, attaching it to the ornament. How simple are these ornaments!

A3C56761-0D71-4CA5-A7F8-5F07C1AF42C4

FINAL THOUGHTS

I hope y’all have enjoyed reading about my DIY Clear Ornamants! I love that these will be a memory on my Christmas tree, year after year! I hope you will check out the other ladies to see what they have come up with for their clear ornaments!

I know you will love to see how this ornament by Jodi turned out!

Love~Shae

FE79AFDD-0434-471C-A052-628803E2FED2

Decorate and More with Tip|Purple Hues and Me|Cloches and Lavender|Pallet and Pantry

Patina and Paint|Paula’s Handmade Space|Stilettos and Shiplap|Sweet Southern Grace

The House House|B4 and Afters

66FCA4D1-C80F-4A18-B194-892424DD96E3

Updating Door Knobs and Door Hardware with Kwikset & National Hardware

Updating Door Knobs and Door Hardware with Kwikset & National Hardware

[This post contains sponsored links. The items featured and linked, in this post is provided by Kwikset and National Hardware; all opinions and reviews are my own.]

57A2689F-E25D-4306-98B4-61B000C2CCD3

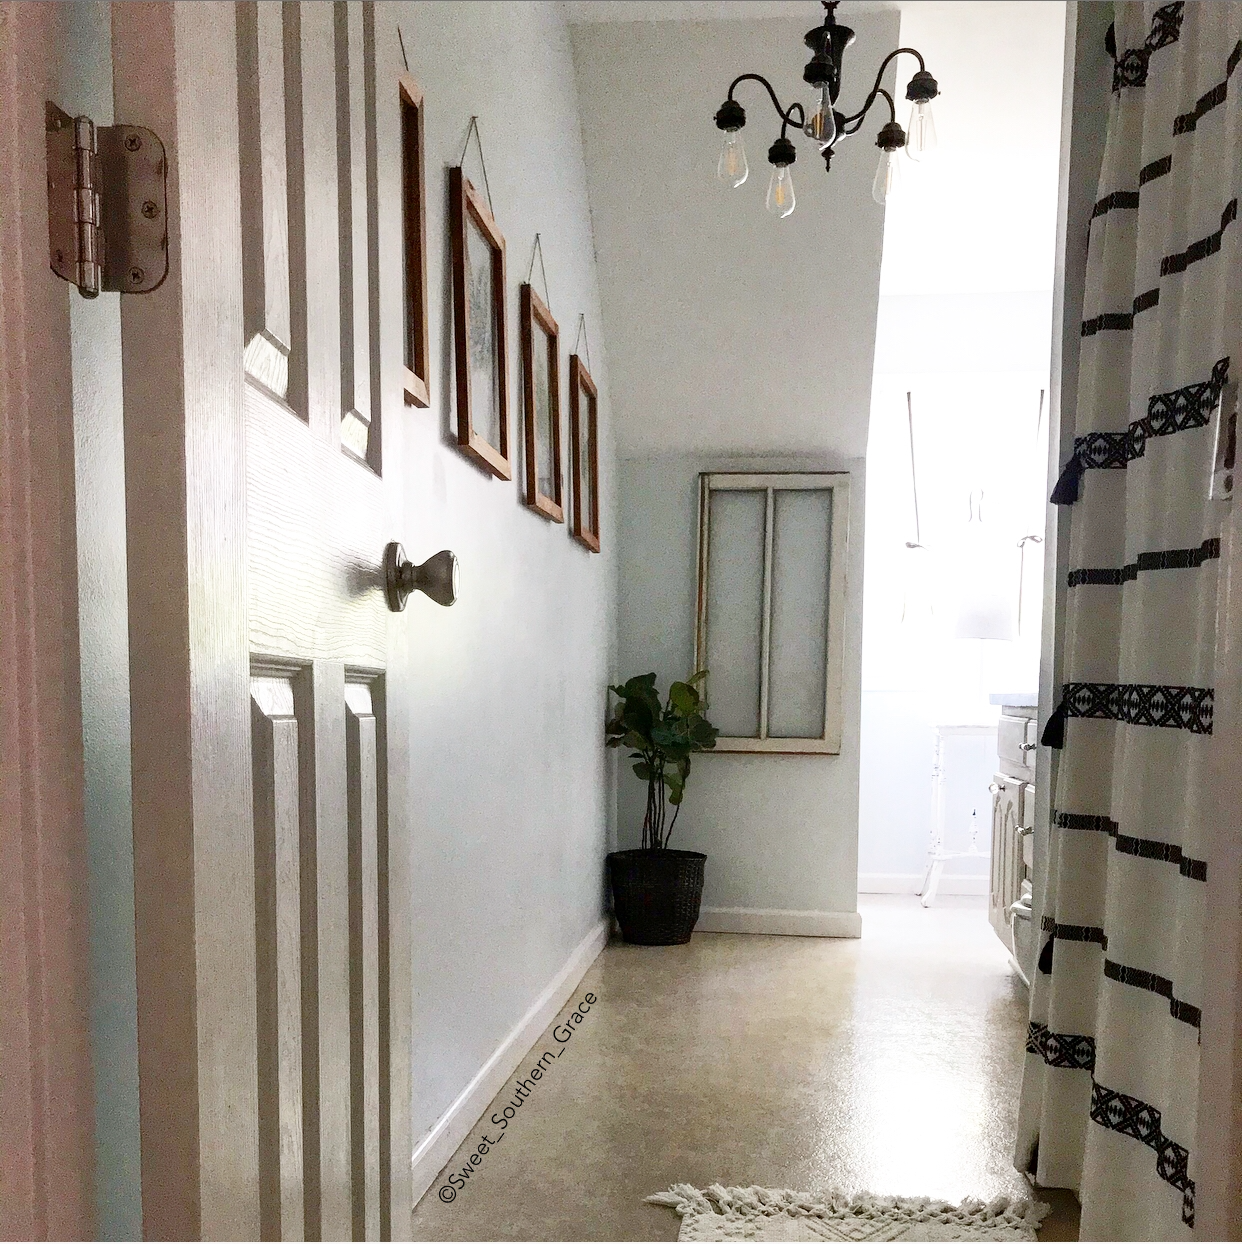
We have been working on many projects during quarantine! A couple easy and affordable ways to update your home is with door knobs, deadbolts and hinges! They may not be the first thing your eyes jump to when walking in a home but it can instantly breath new life into a home, while making it feel unified and cohesive. Take new door knobs, hinges and new paint on your doors /trim and you’ve got a winner winner chicken dinner!

Door Knobs Before 

Our door knobs were the brass door knobs from the 90’s with a mixture of updated lever satin nickel door knobs.

D1FE2281-8EE3-48A4-B3C3-E99D88E7CB4B

Now…I thought I would do a “smart” thing, several months back and spray paint my door knobs/hinges, well let me tell ya, that did not work! Complete fail! 

Kwikset

When we began the process of looking for door knobs, I researched all the companies that carried door knobs, dead bolts and all the things! What I found was a company that has been around since 1946. Kwikset is a company that is committed to delivering unmatched security features to homeowners and puts their customers’ safety above all else. Kwikset continuously improves the security features in its products to meet or exceed industry standards. Plus, with Microban and the lifetime mechanical and finish warranty, it’s a win win in my book!   

Selecting Hardware Finish 

When I began looking for what style of door knob we wanted, we knew we wanted to go with satin nickel hardware  throughout our home. We also wanted a style of door knob that we felt would be classic and timeless!

Electronic Deadbolt 

For our front door, we decided to try a electronic deadbolt.

57A2689F-E25D-4306-98B4-61B000C2CCD3

We chose the Satin Nickel 888 Smartcode Electronic Deadbolt with Z-Wave Technology for our front door and absolutely love it!!!

E80D946A-D2FB-484E-BE0C-F081E549C233

Reasons We Love Our Smartcode Electronic Deadbolt:

  • Z-Wave Plus Certified with the Z-Wave 500 chipset
  • Extended wireless range and superior 128-bit wireless encryption
  • Up to 30 user access codes for family and guests to use at the door
  • Secured keyless entry convenience
  • One touch locking
  • Dramatically reduced interior size and sleek metal design
  • 30 user codes plus master code feature for added security
  • 5 digit keypad with dedicated lock button
  • SmartKey® technology – the lock you can re-key yourself in seconds in three easy steps
  • 30 user codes plus master code feature for added security

Exterior Doors

For our other exterior doors we chose Cameron Security Set in Satin Nickel. One of the best features about these sets is the Smart Key feature, which allows you to re-key your lock with any KW1 Keyway Key!!

21C4EC68-DAE9-4DB1-8E75-74E077E080A9

Bedroom & Bathroom Door Knobs 

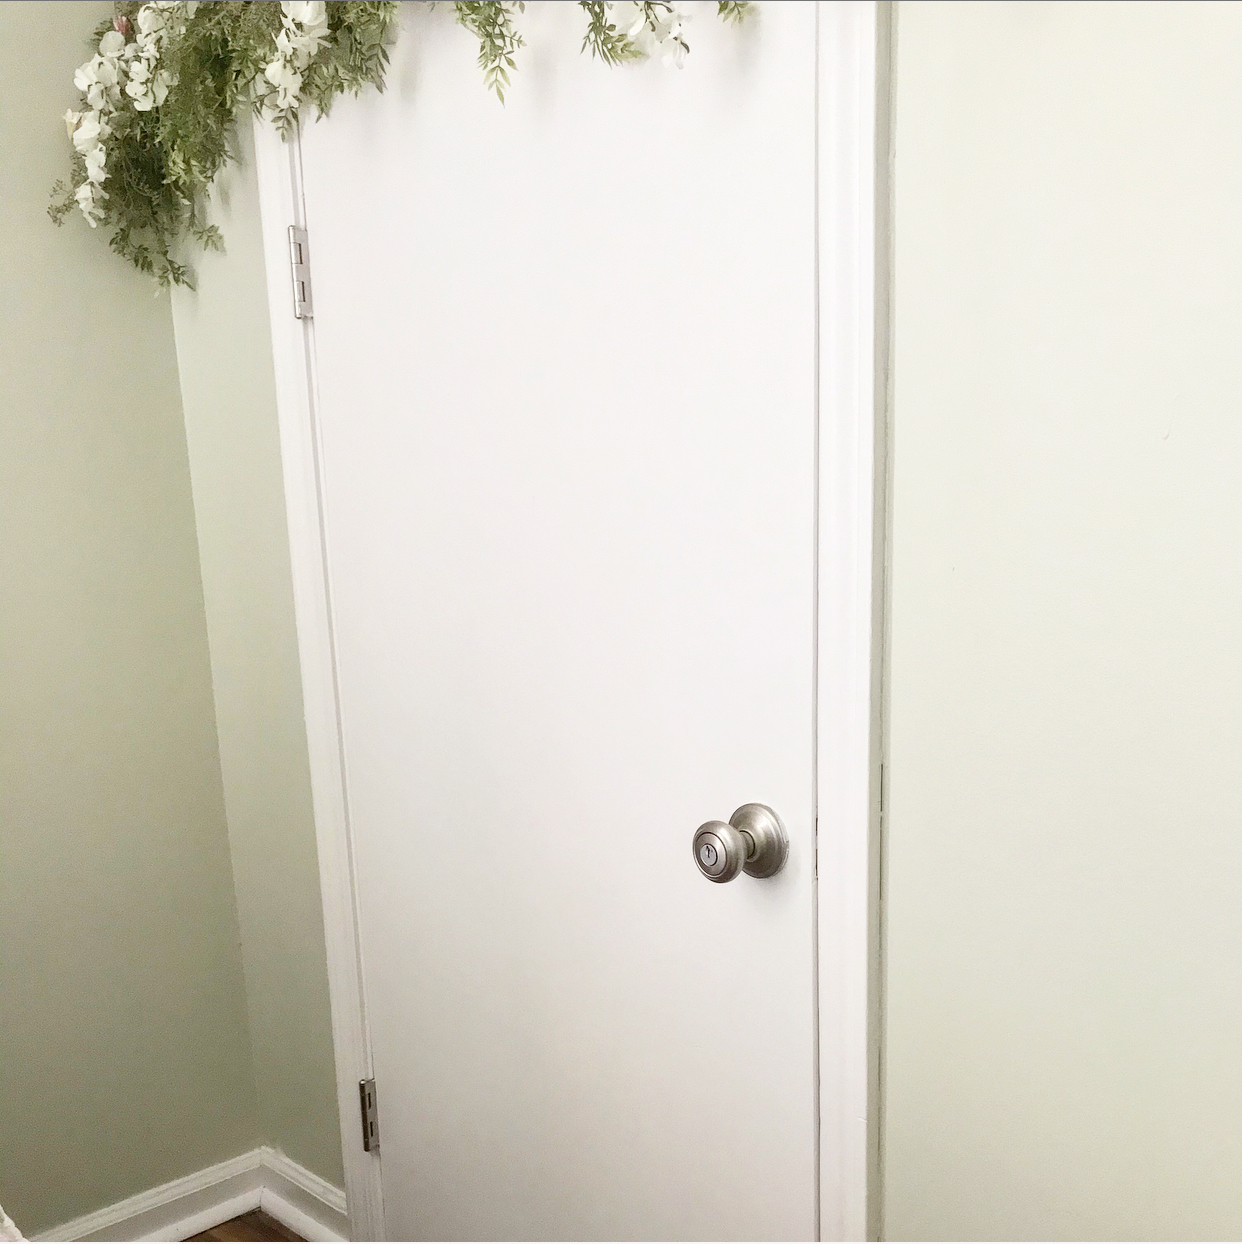
We choose the Satin Nickel Cameron Knob  for our bedrooms and bathrooms.

3E1A8521-DEDC-4164-A30C-711274FAE763

Love the finish and it also installs so easily!

01553DA5-4924-4104-83AC-D85A48510C03

Beautiful quality for your home!

67C77502-11D7-486E-8486-B66A71D5AFF5

”I feel like hardware is like the “jewelry” to your home! It adds just the perfect finishing touch!” ~ Quote from my friend,  Cindy .

DE5929F3-1482-43C5-88E0-F5AA1290E02B

Close up!

D1F5C752-D5EA-4701-9510-EC26DD0A1EC5

With Microban, germs are scared to hang around on our door knobs!

F4C2DF1F-0284-4073-B661-F79074F7207C

I feel like the Cameron line flows seamlessly throughout our home!

0C74E11D-DD1E-4B7A-A8FE-1B12924E3A59

Last bedroom (full view).

4B0A02E0-8F59-4CEE-A605-6C311F3AC49D

Girls Bathroom

5803BA7D-6DF2-4683-851E-40B411C93795

Close up!

637EE203-F587-4AAD-9115-467DE2EC7AAB

Closet/Hall Knobs 

We also chose the Satin Nickel Cameron  line for our Closet Knobs. I love the Cameron line so much!!

7F943A6F-95B2-4FBA-8EE8-D27D2888A25A

Walk-In Attic Door Knobs

For the attic doors, we wanted to make sure we had a door that locked with a key. With little ones still running around, we didn’t want them to get into a space that they didn’t belong!

7DECC90E-E289-402F-AF88-A6431C3399F6

We chose the Satin Nickel Cameron Knob Keyed featuring SmartKey for all three of our walk-in attic doors!!

818F98EE-3B8A-4919-9FCB-6A20FBDC007E

Close up!

E0210A2D-BE75-40E2-942E-77D451B107C8

National Hardware 

National Hardware prides itself on being an industry leader, continuing to launch high quality, innovative products that exceed industry standards. Their products are meant to withstand the harshest weather elements with WeatherGuard™protected products. WeatherGuard™ provides superior long-lasting corrosion protection – 3x more than standard zinc.

Security Latches

One other item we knew that was needed since our youngest child likes to open exterior doors, is security latches on all of the inside of the exterior doors.

8D33DA1C-9F6E-4C99-8BE9-0A39B0D56EDC

We chose the Security Guards  in Satin Nickel.

A1F4729B-B82A-424E-BF7B-26BE4A3416F7

Satin Nickel is my favorite finish! Can you tell?

Hinges: Interior 

Updating the hinges were a breeze!

FEB62F4A-7C91-437A-B3AA-289B631FDBFC

In fact, our oldest adult daughter actually installed all of the interior door hinges & knobs! Girl power!

D0F41D99-2D9D-4756-B2E0-50BA606A5D53

We chose the 512rc Door Hinges  in Satin Nickel.

42A7F645-C6F9-4C8F-95AB-E2C46F9C4FFF

Hinges: Exterior 

For the exterior hinges, we chose the 512rc Door Hinges  in Satin Nickel.

C95ACC11-3B9C-40A1-91DF-22EE65436677

All of our doors and trim received a fresh coat of paint as well! I just feel like these updates make a huge impact on our home’s appearance, overall! I truly love making our house into a home!! Thank you so much for taking your time to read today! If you have any questions, please reach out!

P.S. If you can spot the “blooper” or the item (s) out of place, comment here and if your correct, I will send you one of our handmade wood cutting boards!

❤️-Shae


How to Style Around Your TV

How to Style Around Your TV

[This post contains a sponsored link. The item featured and linked, the “better together” sign in this post is provided by A Simple Place on Main; all opinions and reviews are my own.]

48F0D0A7-AB0D-42AA-A289-5F0DB4128CCE

Today, I was invited on a blog hop with my friend and host, Terrie plus a few of our blogging friends! We want to share how we style around our tv! Lots of people struggle with decorating around their tv, I, myself, am included!

A Little Decor Background:

When we decided to get out of our 90’s decor style vibe, not knocking it because I will always have a heart for 90’s decor style, we decided to go the farmhouse decor route. The farmhouse decor style reminded us a lot of yesteryear and of simpler times, like of those that our grandparents had as children. A lot of the vintage decor you see in our home will be from one of our grandparents. We feel so blessed that they wanted to give us something of their own that meant so much to them!

Farmhouse Style:

BF9354C2-000D-4604-90B0-D6EF384B99A8

Farmhouse TV Cabinet:

One of the very first pieces of farmhouse style furniture we built was our farmhouse tv cabinet. I originally stained the wood a gray color but recently painted it with my diy chalk paint. Styling the inside of those shelves and styling above the tv has not been my strong suit but I love how everything has turned out in this space! I don’t usually have a vision, my ideas usually just come to life with some changes here and there!

White Shiplap:

94D2C9A8-82CA-4AFE-8AC6-F9312942B4ED

Next we added vintage shiplap to our wall. What made it even better is it was fo’ free 🙌🏼  I started off by painting one coat of white paint but a year later, decided to remove the white paint with Citristrip. Since all of the paint would not come off, it gave the wood and white wash look, which we loved! It gave the space such a warm feeling! 

D0A9DAA5-82B6-4B1D-ACAF-99F61B62E9A7

Styling Plus Functionality In Your TV Cabinet:

Styling inside the tv cabinet, I wanted decor plus functionality. Vintage books from a local thrift shop along with Target’s line of Hearth & Hand Faux Fern Arrangement  and Faux Locus Arrangement .

8F9A64E2-8B23-475C-A9BC-10D356DEE74B

Very budget friendly at a couple dollars per book and $5 for the Target arrangements. On  the bottom shelves is where my functionality comes in with Hobby Lobby’s Wire & Metal Galvanized Baskets .

4F58A7F2-D0E6-4081-B37F-47BF26B87DE3

If you catch them on their 50% off sale, they are only $12.50 each! In those baskets, we store games and controllers for the Nintendo.

A21B9CCB-6D40-4B85-ABEB-3C023524B024

 The middle of our tv cabinet is the boring stuff like the cable box, ect that I wanted to hide. The bottom basket holds a basket I purchased from Target about 15 years ago which stores dvds and remotes, so hence the sliding (or should I say “hiding”) doors.

39B8FB84-43EE-43AE-BFA8-A45A50D0D38F

Now, above the tv is my most favorite space!! My sweet friend Linda from A Simple Place On Main makes the most absolutely BEAUTIFUL wood word signs!! I actually met her at our local Vintage Market Days and we chatted for at least 30 minutes or more, along with my friend Cindy .

DD23FC62-343A-469F-9537-35447C5ADB5A

Each wood sign is made with baltic birch that is 1/2 inch thick, then it is custom cut, painted and shipped to you! Linda even has an Etsy Shop where you can purchase your wood word sign and right now there is free shipping with orders over $35!! Can y’all tell how much I love her signs?! Now I need one for our newly renovated master bathroom!

D0A9DAA5-82B6-4B1D-ACAF-99F61B62E9A7

I hope that I’ve been able to inspire you on How to Decorate Around Your TV! Please check out my friends to see how they’ve decorated around their tv’s as well!

❤️-Shae

Spring Brunch Table with Kirkland’s

Spring Brunch Table with Kirkland’s

  Spring Brunch Table

3603689D-A897-4595-9FE3-961325AB6343

[This post contains sponsored links. The items featured and linked in this post were all provided by Kirklands; all opinions and reviews are my own.] 

      SIMPLE SPRING TABLE

Tablescapes are one of my favorite ways to be creative! With spring right around the corner, I wanted to create a tablescape that would be neutral, casual with a farmhouse touch.

389FF4A5-60F2-4C3A-B498-84AAA5DCDA74

I already had most everything on hand like the dishes, table runner, crystal glassware, chargers and greenery. I picked out this beautiful  White & Mango Wood Cake Stand  from Kirkland’s. I wanted to use it as my centerpiece for my Spring Table Brunch. With a cake stand, I feel that it is versatile from serving foods to adding a candle or a plant!

F301C3FC-8B27-4ED8-A618-782B5BDC775C

The next item I chose from Kirklands for my  tablescape was their beautiful Charcoal Plaid Napkins  . The napkins add a simple touch of charm and  complete Spring Table Brunch.

LET’S GET STARTED ON CREATING THE TABLESCAPE! HERE’S HOW:

I like to add my table runner first, then begin layering with my chargers, adding in a dinner plate and lastly, the smaller bunny plates. I also added the crystal glassware that was a gift from my mother. On top of the layered plates, I added the Charcoal Plaid Napkins from Kirklands.

0A0F90CD-9E11-4B45-BA4B-F0C42F816D79

Now it’s time to add some height to the tablescape. I began with the White & Mango Wood Cake  from Kirklands. I decided to add a faux fern in a planter for even more height. Next, I grabbed a couple of my vintage & mason jars, along with a couple smaller new mason jars. I added fresh baby’s breath flowers to those jars for an added element of height as well! One thing I love about creating a tablescape is using all the greenery! I love adding frosted eucalyptus while mixing in a few cut pieces of lambs ear.

1A6833F6-DDE2-419C-A70C-DE9BB00A49E9

These decorating ideas are sure to create a neutral and bright table for spring! I enjoyed sharing these tips with you, as well as the pieces I found at Kirklands to create this look. If you have any questions about creating this look, please let me know!

❤️-Shae


Antique Bottle Collection

Antique Bottle Collection

It’s that time again for our monthly Thrift Store Challenge where we are challenged to find something from a thrift shop, antique shop, estate sale, yard sale, rummage sale, Craigslist or FB Marketplace and make it our own by styling in our home. Hosted by Tara from https://stilettosandshiplap.com/  and Emily from https://lecultivateur.com/   .

A7842C88-97FD-41F6-BD34-7414D5EBDF56

Over the course of about a year, I have been collecting antique bottles of all variety! I found a couple of larger antique mason jars, antique milk bottles & antique ink or medicine bottles (I believe). I paid .10 cents each for the mason jars and the milk jars were .25 cents, at two separate estate sales. Then I found the small glass bottles at my local antique shop for $2 and $3 each. We also like to drink Boylan Bottling Co glass cane cola’s. I like to collect those bottles too!

1CDE241F-3C1B-4E84-BFFD-9881C7B74E08

I love styling antique glass jars and bottles in my home! The options are endless! This year for spring, I decided to incorporate my antique bottles and jars with lavender! Lavender is one of my favorite flowers to style in my home for the spring and summer months!

582BA670-3C1C-40DC-AE04-5181980C0FE0

I have a small buffet hutch that I style differently each season, in my dining room. I chose to use my flower market sign that my husband and I made, along with eucalyptus, a couple hanging white flowers, lavender and of course those antique jars! Simple, yet I love it! I’m am beginning to fill my home with touches of spring!

0B345E86-182D-41C1-BCC5-83EB57B3DE59

I hope that y’all have enjoyed our Thrift Store challenge for the month! Please hop on over to the other ladies blogs and check out what they’ve found this month on our Thrift Store Blog hop!

❤️-Shae

9785249A-C70A-4A4B-B900-85FA6067A35F

https://lecultivateur.com/2020/02/17/thrifted-treasure-candelabra/

365C3483-C52F-4579-AE8E-FA6734386ED8
https://thisfulllife5.com/diy-pallet-wood-shelves/

B5159738-AF7F-46BE-8636-4C3E11CF4716

http://jessicabsimmons.com/thrift-store-transformation:-nursery-shelves/

25795751-B205-4D0F-93DF-9C8FE149A979

https://decorateandmorewithtip.com/my-little-thrift-store-find-rocking-horse-makeover/

22F815BB-6473-42C6-A8A1-4B8F9BDF8D4B

https://stilettosandshiplap.com/thrift-store-challenge:-roses-are-red,-violets-are-blue/4680/