Exploring St. Augustine, Florida: History and Culture

Exploring St. Augustine, Florida: History and Culture

This post contains sponsored links. The item featured and linked, in this post is provided by St. Augustine Lighthouse (six admission tickets); all opinions and reviews are my own.]

F0E130D6-F451-43D0-8550-3B35D1A44E7D

St. Augustine: History 

In June of this year, we had the pleasure of visiting St. Augustine, on the Atlantic cost of northeastern Florida. St. Augustine is a gem situated neatly along the shores of the Matanzas River and holds heavy historical significance! The Southern and Spanish-influenced St. Augustine, Florida was founded in 1565 by Spanish explorers and it is the oldest inhabited European-established settlement in the United States. When you are walking around on its centuries-old cobblestone streets, you will instantly feel like you are either in Europe or Old Florida, depending on which street you’re on! It’s a charming escape for anyone wanting to take a vacation!

Bridge of Lions; St Augustine, FL; Plate Girder; Painted, Metali


St. Augustine: Arrival

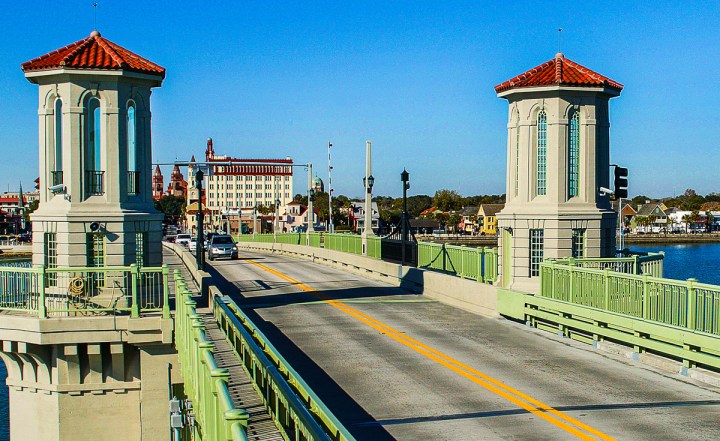
The Bridge of Lions will take you across the Matanzas River to the heart of the historic old town. Once across the bridge you have the choice of turning left on Avenida Menendez to the marina and sight-seeing cruises or right to the Castillo de San Marcos. You can also continue straight ahead on Cathedral Street into the heart of downtown.


26BD8663-9172-4F45-8F93-404A9A394388

St. Augustine: Beaches 

One of the reasons we wanted to travel to St. Augustine was for the beaches! The beaches are so pretty! With a historic city being one of its main attractions, don’t forget about the  beaches near St. Augustine! From their sunrises to sunsets, they are stunning!

DAF9FA30-0B10-49DC-A09E-4631951C97C0

Located on Anastasia Island, a barrier island off the mainland, St Augustine Beach has a natural feel with a wide beach and lots of good surf and shorebirds!

762CE7A3-1D03-4237-B9BD-B94A139B20BC

St. Augustine: Lighthouse & Museum 

While traveling, one of our family goals is to visit every lighthouse we come by! The St. Augustine Lighthouse & Museum was a highlight for our entire vacation! When we arrived at the St. Augustine Lighthouse & Museum  , we were greeted by Daniel Lee, who  took us on a tour of the property and we learned quite a bit of history about the lighthouse. He was very welcoming and informative on the history of the lighthouse.

9500D6D7-E4B1-4D27-A9E1-F05328413540

History: Pre-1862 

The story of the the current lighthouse in St. Augustine is not the original St. Augustine Lighthouse. The Spanish constructed the tower that became the first lighthouse in 1737. They used a naturally occurring stone called coquina to construct the original tower. The coquina tower replaced wooden watchtowers the Spanish built dating back to the beginnings of Spanish Florida.

30C46964-8825-4BEC-AB1D-E3AA7146D06C

A map of Francis Drake’s 1586 raid on St. Augustine reveals the presence of a small tower on Anastasia Island. The map refers to the tower as “a Beacon or high scaffold standing on the sand hills, wherein the Spaniards did use to discover the ships at sea.” In 1823, John Rodman, Collector of St. Augustine, wrote to Stephen Pleasonton, Fifth Auditor of the U.S. Treasury, that despite the tower’s presence, “…it was never built for a lighthouse or used as one, but merely a look-out-house. The location is well suited…but a great proportion of the tower, nearly one half, is not sufficiently strong to bear any greater elevation either if wood or stone work.” 

John (Juan) Andreu became first keeper of Florida’s first official U.S. lighthouse in St. Augustine. Not only is he one of the first, he also holds the distinction of being the first Hispanic-American to serve in the Coast Guard and the first to oversee a federal installation of any kind.

Juan Andreu served as keeper until 1845 and the records are unclear as to who took over and served as lighthouse keeper from 1845 to 1849. John (Juan) Carrera served as keeper from 1849 until his death in 1853. Joseph took care of the lighthouse until his death, which he fell, while painting the lighthouse.

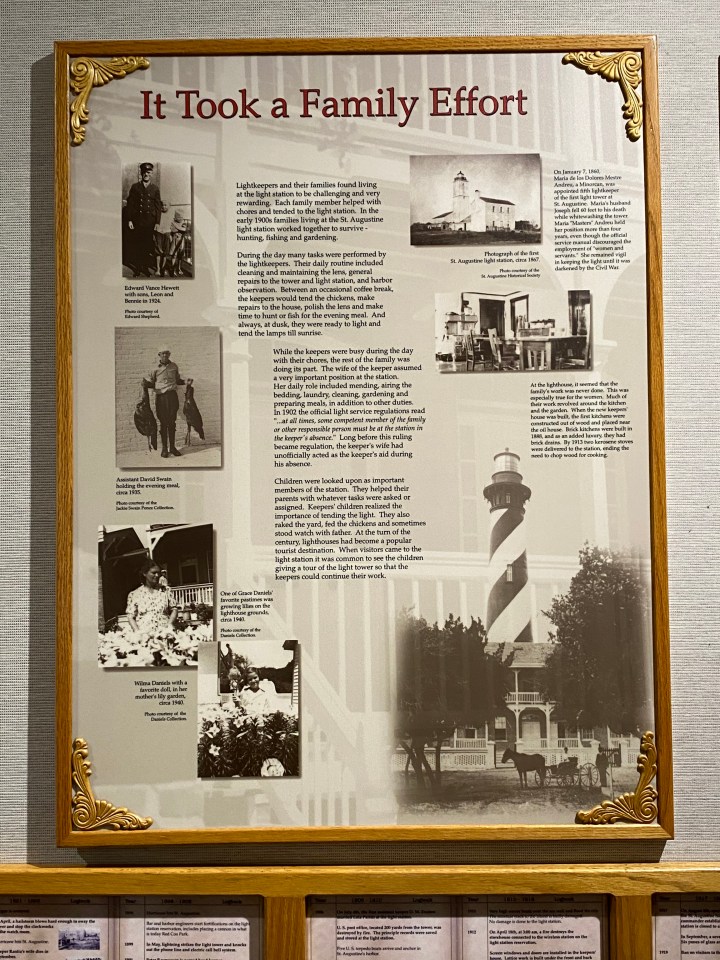
Joseph’s wife Maria Mestre de los Dolores Andreu was appointed keeper in place of her deceased husband. The Coast Guard recognizes Maria Andreu as the first Hispanic-American woman to serve in the Coast Guard. Maria was the lighthouse keeper from 1859-1862.

History: Current 

5105B3B9-BD1B-49FD-8D65-FE3B926721BB

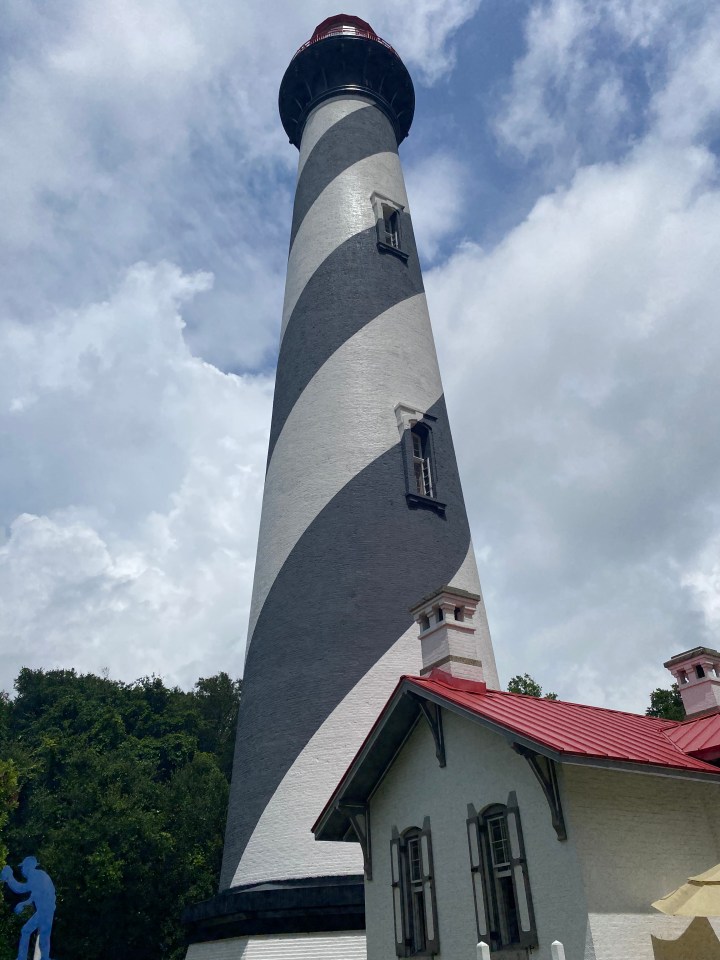
The current St. Augustine Lighthouse is nestled among live oaks and beautiful Spanish moss making a stunning nautical canopy. Also located on the property is Maritime Museum, along with the light keepers house.

D235C3CA-E9D5-48F5-B4D9-62BF3D4F0BC0

There is also the Maritime Hammock which is a natural area that the coastline formed when it receded, creating stabilized beach dunes that allowed for larger growth trees.

8C7C3493-A43B-4DB9-924D-58B0CA04DB20

There is even a cute gift shop located on the property as well!

CBD5316E-E4EF-492E-8015-0481DDD8DF19

St. Augustine Lighthouse: Climbing the lighthouse

To climb the lighthouse, you will need to climb 219 stairs! Trust me when I say that is is worth it! There are eight landings and even one with a bench. Plenty of space for others to walk past you and if needed, space for a break!

959D2900-F465-4326-85E3-99E1E397C9F4

When you walk into the lighthouse, walk to the first set of stairs, go to the very middle and look up! This is the view that you will see!

A1372989-1B5C-4671-8641-EE5C0DA6090F

The view from the top is amazing! We had a couple that were a little nervous to be up so high, yet is not our first time on the top of a lighthouse either!

60EE4098-A5E2-4ABA-8562-B8203F752DE7

Amazing view of St. Augustine from the top of the St. Augustine Lighthouse!! If you decide to come to visit St. Augustine, don’t forget to stop by the lighthouse!

B98A3E64-07FE-4191-8A89-030F09A60CD7

St. Augustine: Downtown Old City Gates & St. George Street 

The Old City Gates are a site to behold toward the north end of St. George Street. The Old City Gates were at one time the only entrance into St. Augustine. The two ancient columns made of coquina were built in 1808 as a line of defense for the city.

89B84589-FCF5-4723-84ED-632AB57DC397

After visiting the Old City Gates, walk through to enter St. George Street, which is a historic street, that is filled with galleries, shops, restaurants and popular St. Augustine attractions.


FDFD5C36-8878-4C00-8125-0141DF429460

St. Augustine: Castillo de San Marcos

The Castillo de San Marcos is the largest masonry fort in the continental United States and was built to protect Spain’s claim to the New World!

Unfortunately due to the Covid-19 pandemic, the fort was closed on the inside. We did walk around the exterior of the fort!

St. Augustine: The Fountain of Youth  

1C6A0D5C-086E-4CC3-8751-88ADF53903C9

The Fountain of Youth was believed that anyone who drank from the fountain would have their youth restored. In 2,400 BC, the Native Americans, a tribe known as, Timucua, were amount the first to inhibit the land. Ponce de Leon was the first Spanish explorer to find the Fountain of Youth. The grounds at the Fountain of Youth are beautiful and you will also find several peacocks throughout the property!

B2F0DBEE-33DA-450A-8FDF-B89D289C2E7D

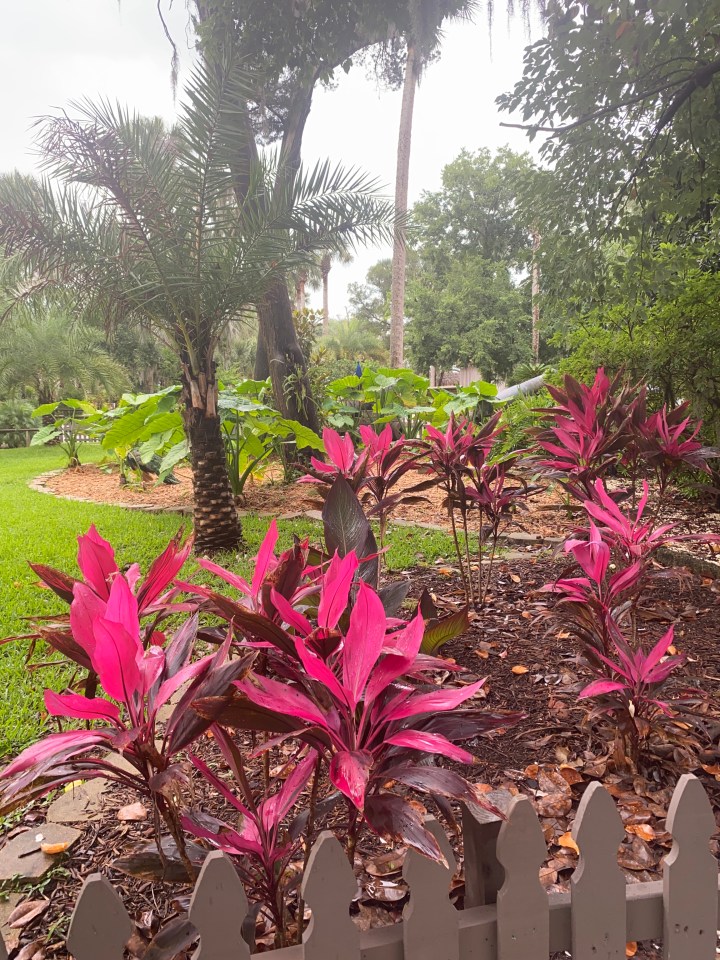
Drinking from the Fountain of Youth is wonderful experience that our family will never forget!

C82A31E8-DD50-47CA-8214-5BBB8843C20A

I could honestly go on and talk about St. Augustine for a long time! We love this city so much!  It is such a pleasure to visit the historical St. Augustine and we know we will definitely be back!

❤️~Shae


Spring Outdoor Space with Kirklands

Spring Outdoor Space with Kirklands

This post contains sponsored links. The items featured and linked, in this post is provided by Kirklands; all opinions and reviews are my own.]

8A1980E6-4C82-42FC-B759-CB0DB2110D54

Styling a Outdoor Space with Kirklands

I love creating beautiful outdoor spaces to enjoy in the warmer months with my family. With just a few decorating hacks, you can make your space feel more stylish!

056BFA1F-C5A5-4726-AE43-BA5CE70E0716

Outdoor Seating

Add a couple chairs in for seating. I love the metal and wood look right now! You can find these chairs just about anywhere online!

4715834B-682B-429C-AD81-65F55AF43223

Outdoor Mat 

Add in a cute welcome mat! Kirklands has so many stylish welcome mats for your home to fit almost any budget! Mine is the Home is Where We Gather  Mat and it was under $15!

FBF14293-E267-4D66-96D2-4839B566D62A

White Wood Metal Planters 

I am really enjoying my Kirklands White Wood Planters on Black Metal Stands . I love the distressed wood and the geometric flair they add to our back deck. The large pyramid planter is 11L X 11W X 19.75 H inches. The small pyramid planter is 9.5L x 9.5W x 15.75H inches. I chose to add a couple Everest plants to my planters. It’s similar to monkey grass.

E09A1350-5C06-4522-B3FC-F4B3DB66C2A5

Plants

Add in your plants! I love plants! They are a labor of love, after all! I always have ferns in the spring through fall months in my outdoor spaces! Ferns are pretty easy to take care of, with watering small daily in the summer months, here in the south!

8A1980E6-4C82-42FC-B759-CB0DB2110D54

Outdoor Space

It really is easy to create a budget friendly outdoor space with Kirklands! Create that space that you and your family can enjoy during the warm summer months! I hope I have inspired you with our outdoor space!

❤️-Shae

DIY Grapevine Magnolia Wreath

DIY Grapevine Magnolia Wreath

DIY Grapevine Wreath:

It’s always a pleasure to team up with my friend Terrie from  Decorating and More with Tip for one of our decor challenges! This week we are challenging ourselves along with several other bloggers to make our own version of a grapevine wreath!

Gather Your Supplies-

I started off with a plain grapevine wreath that I found from a local thrift store, back a few months ago. You can also order online from any craft store. Micheal’s has this one for $4.99!

170807FD-EA79-4BFD-88D8-5D4574F3B6F6

Next, I purchased these magnolia leaf bushes from Hobby Lobby for $8.99 when they were half off. Just wait for the sale!

929DEBD6-DB67-4FF3-965B-E7887F420097

I also decided to paint a few of my leaves to take away some of that brighter green in the wreath and just tone down the overall look of the leaves. I purchased three paints colors from Wal-Mart in the Apple Barrel brand acrylic craft paint, in the colors, Melted Chocolate, English Ivy Green and Kings Gold. These colors are just fifty cents each.

547EAA18-9F21-4817-B412-833E48121B6F


Creating Your Wreath-

To create my wreath, I began taking apart the magnolia leaves and hot gluing them to the grapevine wreath, angling the leaves in different directions, to give dimension to the wreath.

3EB81776-AF49-4200-A4D6-9AC3406D92FA

After I had all of my leaves placed into my wreath, I went around the entire wreath and painted a few leaves of the Melted Chocolate  ,  English Ivy Green  and Kings Gold .

ADD5BB7D-993E-42B2-8290-4FB91549AD57

This is the wreath with just the Melted Chocolate brown leaves painted.

6E06A962-7FC2-48F1-9836-2E3CD1FA0D4D

This is the wreath with the Melted Chocolate brown and the English Ivy green painted on the leaves.

ECB0D687-ED11-449D-9716-8E7E4006E4F7

For the lighter green, I mixed Kings Gold and English Ivy Green, both with equal parts.

CE5DA9E7-38D2-46F5-AC96-1D8C2AEF2E6F

After painting the leaves, here is the finished product!

ECB0D687-ED11-449D-9716-8E7E4006E4F7

Now to style in my home!

D10E9349-AA72-4B08-8E2E-8297F084FE12

I decided to style on my antique door in my dining room! I love how my wreath turned out!! It’s perfect for my space!
469D032C-C83D-4D94-A876-5DE1DAA36BE7

Please hop over to my blogging buddies to check out what they designed for their grapevine wreaths!! My friend, Mary from Shady Oak and Sassafras  has the cutest wreath so please check her out! I am also loving my friend Pamela from DIY Vibing  .

❤️-Shae

993E13CE-D9E5-4674-A03A-457C076A2D67


DIY Dollar Tree Christmas Challenge

DIY Dollar Tree Christmas Challenge

I always enjoy a good decor challenge on a budget, so when my friend Terrie, from Decorate and more with Tip  invited me to her DIY Dollar Tree Challenge, I knew I would love it!!

DIY Dollar Tree Challenge:

Rules: Purchase an 18 inch tree from The Dollar Tree and decorate it as budget friendly as possible!! Challenger accepted ✅

96ACC62C-58D0-4E3B-9843-20DD698F67DBI started off with this white Christmas tree  from The Dollar Tree. I decided to use some of my leftover painter’s drop cloth canvas to make a bow topper and ribbon for the tree. All you do is cut a small cut at the top of the canvas then make a second cut, depending on your width you want of your “ribbon”.  I decided my bow ribbon and ribbon cascading down the tree would be 2 inches in width and around 20 inches long. I like my ribbon to sort of bunch into the branches. A drop cloth is only $3 for a small one.

7DEA40CF-F925-47BC-B854-E9E05598B13E
Next I decided to use my wood star garland from one of my fav shops, 302 Wood Works  .

A7EEF860-DB4A-4CC6-8F6E-7CE658ABF9BALastly, I went to Hobby Lobby and purchased these little pink mini ornaments for $1.99 at 50% off!

EE4AAABB-5EC3-4EE4-98FF-B80EB03EE673

 Along  with these mini ornament hooks  for .99 cents at 50% off. For the tree skirt, I used a piece of canvas drop cloth! I only spent $3 and some change on the supplies for decorating the tree. My total cost for decorating my tree was $4.32!!

B25C1A81-A452-41FF-97D2-9E11BA08BB2D

I wanted to style the tree in our girls bathroom upstairs, which is decorated in a boho theme. I wanted the tree to reflect that, with a pop of pale pink for color and a fun flair! What do y’all think?

C4D51528-E922-4BD7-B0F7-8E0146094732.png

❤️-Shae

Please don’t forget to head on over to each of my friends, as they show us what magical transformation they made to their Dollar Store Christmas tree!!

283E1363-7112-4789-8391-97E7B314EE6D

Terrie – Decorate and More with Tip

https://decorateandmorewithtip.com/dollar-tree-table-top-christmas-tree/

Kelli – K’s Olympic Nest
https://olympicnest.com/blog/dollar-tree-christmas-tree-hack-creating-a-farmhouse-buffalo-check-christmas

Shae – Sweet Southern Grace
https://wordpress.com/post/sweetsoutherngrace.blog/1001

Rebecca – Rebecca Anne Home
Dollar Store/Dollar Aisle Tree Ideas

Dayna – Just Another Farmhouse
https://barnhousemess.wordpress.com/2019/12/02/diy-christmas-tree

Christine – CD’s Country Living
https://cdscountryliving.com/diy-rustic-mini-christmas-tree-centerpiece/

Dani – Welcome to the Taborhood
http://www.thetaborhood.com/blog/mini-tree-diy

Tammy – Patina and Paint

DIY Challenge: Dollar Tree Mini Tree

Carol – Bluesky at Home

3 Ways to Style a Dollar Tree Christmas Tree

Mary – Shady Oak and Sassafras

Dollar Tree/Thrift Store Christmas Tree Challenge

Jessica – Jessica Welling Interiors

15 Mini Christmas Tree Decorating Ideas!

Teresa – Through a Vintage Door
https://throughavintagedoor.com/03/12/diy-dollar-tree-challenge/

Michelle – Blessings by Me

Christmas Swag Using 2 Dollar Tree Mini Christmas Trees

Jessica-Jessica Simmons

Decorating a Mini Dollar Tree Christmas Tree

Painting Kitchen Cabinets

Painting Kitchen Cabinets

If you have noticed the cost of all new kitchen cabinets, renovating your kitchen can be one of the most expensive projects when renovating your home. When deciding to turn our kitchen into our dream, we knew we would be on a budget. I did not have a set budget in mind, but let’s just say my budget goes a little something like this…as cheap as possible. You can see the full kitchen renovation blog Here . I knew I wanted to keep the cabinets because they were made of real wood. I chose white kitchen cabinets with light distressing. I also wanted to paint the inside of my cabinets as well. When we moved into our home, 5 years ago, the cabinets were painted a latex white on the outside but not painted on the inside. Below is the before photo of our kitchen, the day we purchased our home!

9935CE6D-C66B-4EE8-ACC2-4EAFC7D6BA96

If you have followed along with me for awhile, you can see throughout my blog, my love for chalk paint. As durable and hardy that chalk paint is, I knew it would be a great choice for kitchen cabinets.

First things first, we removed all of our items from the inside of the cabinets.

9014877D-B5AF-482D-A42F-A0F8DD8119A7

Next, we began removing all hardware, doors and drawers.

247ABCF1-A66A-41E3-A80F-C8FC2B59230E

I gave all of the cabinets a good wipe down with soap and water. Next, I mixed up my homemade chalk paint recipe. I always use Sherwin Williams brand paint. You can find that recipe here .  I painted the inside of all the cabinets with one coat then lightly sanded and wiped with a damp cloth.

4EDE87E8-557B-46E6-9CE2-DEE7E52BD17E

I repeated these steps until I had three coats of paint on the inside of all the cabinets.

F849200E-9CDD-4F3B-B3A6-93BF709ABCA6

The next item of agenda was to paint the outside of all of the cabinets with two coats of paint, with light sanding in between and a wipe down with a dampened cloth.

I only needed two coats of paint on the outside of the cabinets because my cabinets were already painted white before I began painting.

2D2F7440-DB37-4D06-8C71-4EEA66E74E66

Next we painted the cabinet doors and drawers. We set up an assembly line in our garage. We used 2×4’s to lay the doors on to help make sure we didn’t get drips.

3F550F75-FDF6-407E-8AA3-B392089E2621

If you do come back and found that you’ve gotten a few drips, you can sand it down and paint over that spot. It’s not a big deal but does make a little more work for you. After the first side of the cabinet doors were painted with two coats of paint, light sanding in between and wiped down, I waited 24 hours before flipping over the the second side of the cabinet doors. The second side received the same treatment as the first side.

C4BF814C-7D05-4A12-A0D8-08D30F42777C

After finishing the cabinet doors, we moved on to the cabinet drawers. The inside of the drawers had never been painted, so they received three coats with light sanding in between and a good wipe down, after each coat. Next, we moved on to the outside of the cabinet drawers.

EA4A0D8C-1E85-45EF-882D-76F7BC1010FD

They received two coats of paint with light sanding and a wipe down in between coats.

At this point, I felt like I could finally begin to see the light 🙌🏼 It took us about two weeks for myself, the hubs and our two adult daughters,  to all work on the cabinets! Much longer than I anticipated!

974BD376-C2CB-400A-9614-7F94EA1F448B

Here came the fun part! I wanted to go ahead and place all of the cabinet doors and drawers back on, so I could precisely decide where I wanted to distress. I used my orbital sander to lightly sand on the inside of the cabinets. Then I used 120 grit to sand all the edges of the cabinet doors and drawers, where it would naturally wear. I don’t like super heavy distressing but I would say this is light to medium distressing.

Before (The day we purchased our home.)

9935CE6D-C66B-4EE8-ACC2-4EAFC7D6BA96

After (Current view with Christmas decor.)

E890B69C-D6F4-4853-BA5E-A3AC92ABE407

We are absolutely loving how our cabinets and entire kitchen has turned out!! We absolutely get so much JOY from our home DIY renovations. I hope you have enjoyed reading and we hope to inspire you!

❤️-Shae