Farmhouse Word Stacked Books

Farmhouse Word Stacked Books

When my friend Terrie from Decorate & More with Tip asked me if I would like to join a blog challenge for word stacked books, of course I would agree!! My first thought was that I would love to make a set of these books for my sister-in-love, who just built a new home with her husband, last year. We had not given them a house warming gift, so I thought this would be perfect!

4143331E-A0A9-4E9B-BCF3-8999D84836C6

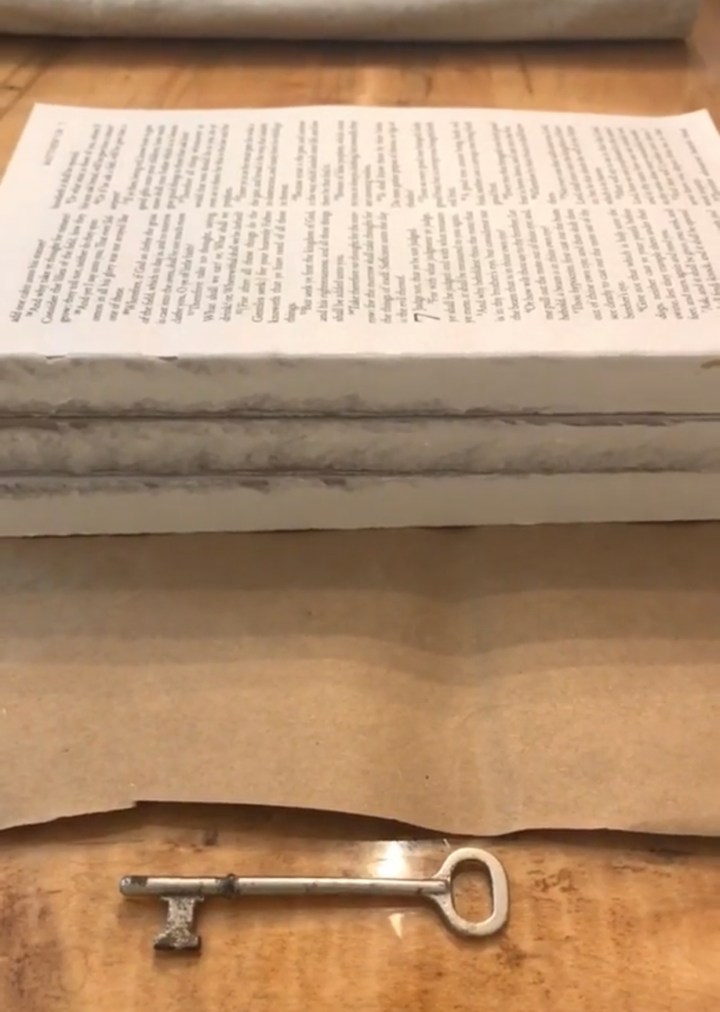
A little bit of family history with this key. This key was found by our oldest two daughter’s when they were little in their Grandmother’s home. She is my husband’s Grandmother, whom we called Big Grandma & who is our youngest daughter’s namesake. We were cleaning out her home, getting ready to renovate it and we were allowed to take things from her home that we thought we would like to have. One of the girls found this key and I’ve had it in my jewelry box now for around 14 or 15 years.. not knowing really what to do with it, but I knew one day an idea would come and I could have a way to honor this key, per say. I am not sure what this key went to or any significance behind it. I am thinking it went to…maybe an armoire or hope chest.

86D74D28-73F9-46F5-807D-E9E171BC2935

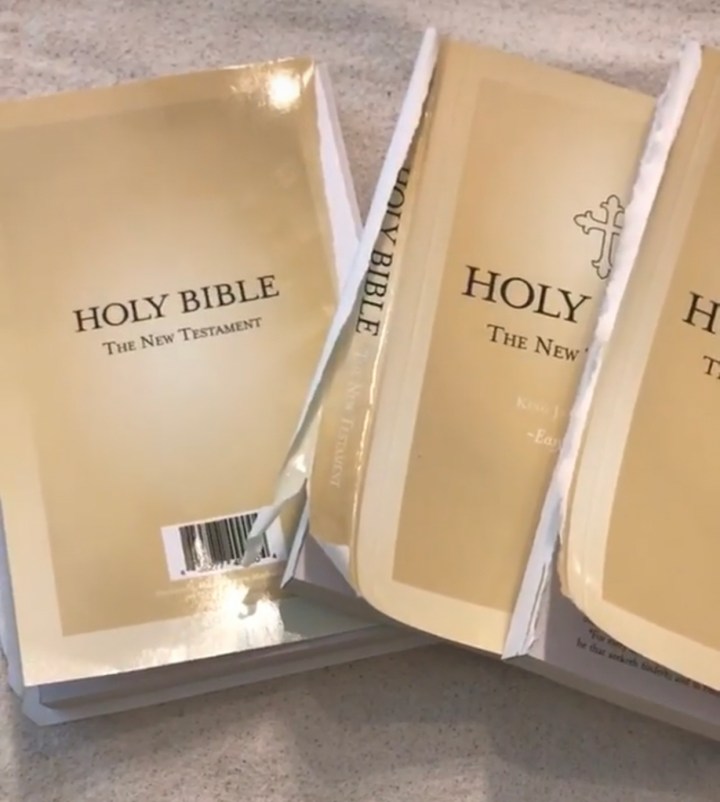
I headed to our local Dollar Tree for the books. When I make a set of these books, I like to tear off the front and back covers of each book, along with several pages as well.

AF5EC47B-9C48-4694-A073-9880E98FB506

I used my homemade DIY chalk paint recipe that you can find on our youtube channel. I did a light layer of paint on the spine of each book. I did not saturate my paint brush with paint, but I didn’t dry brush it either. I wanted some of the spine to show through. I did a heavier paint layer in between each book, to help adhere to each other, acting as “glue”. On the top and bottom of the book set, I painted a light layer so that some of the wording would show through.

EE56EDFC-B001-483F-B1EE-DFCA9240B345

After the books are dry, I grabbed my stamps and black ink that I purchased from Hobby Lobby. Don’t forget to purchase when they have those for 50% off or use your 40% coupon.

CD7C3317-422D-4631-BEFF-5636A9BBAC01

I decided I wanted to stamp the words, “Home Sweet Home”, onto the spine of the books. I thought it was a fitting saying for a house warming gift.

CB1582A4-03DB-4B5C-ACAB-3D7EC9AC5D9E

After my stamped letters where dried, I headed to my ribbon stash and I used this light khaki colored ribbon from Hobby Lobby and added the twine.

5063B44F-1F8F-454F-A497-750D7F9A7420

I decided to tie the ribbon, a little off centered and incorporate the key with the ribbon. After I tied the ribbon, I made sure to heat seal the edges of the ribbon.

E4B37E0D-5855-40E7-94F6-E66375F75E9A

I can’t wait to give this set of stacked books to my sister-in-love. I hope she can find a place in her home for it and every time she looks at it, she thinks of their Big Grandma.

464F0F10-8FCC-4B5B-87F3-86C7B7ABA1CB

Please check out all of my friend’s and how they made their own diy stacked books! We are a diverse group with many talents! I know you will not be disappointed!

Love, Shae

Terrie over at Decorate and More with Tip
Kelli over at Olympic Nest
Patti over at Pandora’s Box
Jessica over at Jessica B Simmons
Sheri over at Sheri Martin Interiors
Dani over at The Taborhood
Danya over at Just Another Farmhouse
Teresa over at Through a Vintage Door
Hollie over at Heyitshod
Shae over at Sweet Southern Grace
Dori over at This Full Life of 5

How to Decorate with Books in Your Home Decor

DIY Anthropologie Basket Challenge

I love teaming up with my blogging friends when they ask if I’m up for a challenge! Terrie from @decorateandmorewithtip asked if I would like to be involved with her Anthropologie challenge and I knew I couldn’t say no! Today, I want to share with you a challenge for a DIY Anthropologie basket! I wanted to try making mine look slightly different from the one in the picture.

E3E8DAB4-BE8C-4692-89C5-AC90DE55274F

I used this rope from the Dollar Tree and a crochet yarn from Hobby Lobby. I only used two strands of the rope and a very small amount of the crochet yarn.

61E982AA-750E-4342-A963-B8958611237C

I started the basket by winding the rope around and wrapping the yarn around the rope, two layers at a time. I used my crochet needle to push the yarn through the rope.

C18B5AA9-4B6E-458B-9466-E0080FB381AC

It was relatively easy to make and I could have easily made it a lot larger. I have enough rope and yarn to make another basket!

BFB49622-5D77-4C12-A216-44034FB2CAE6

I think that it definitely did not turn out how I envisioned but it is definitely a start and something to work with or build on in the future! I added my Christmas cactus to my basket and styled it in our newly renovated pop-up camper! I hope y’all enjoy checking out my friends and how they each made their own version of this basket!

Love, Shae

EB7EADFC-1EB0-4610-9D71-E7A7743E0698


Decorate and More with Tip ¦ Pandora’s box ¦LeCultivateur

This Full Life 5 ¦K’s Olympic Nest¦Barnhousemess

Uncommon Designs¦Savvy in the Suburbs¦Chasing Quaintness

Sweet Southern Grace¦Bluesky at Home¦Through a Vintage Door


Jessica Simmons


DIY Flower Market Sign

12C063AB-0040-4AFA-BC7D-7568CBF88A90

I have been planning for months to make a mini flower market display in our entry way. I asked my husband to make the sign double sided and around 30×20 in size. He cut a sheet of plywood, in the size I needed, for the front and back of the sign. For the trim, he used a 1×1 pine board.

E60F79A1-550E-4BBA-B09C-8FF4452171CD

I painted the inside of the sign with Rust-Oleum Chalk Board Paint in School House Green. It reminds me of the color of the chalk board from when I was in school!

D224BCB0-2ED2-4D65-972E-3D36702D9E66

Next, I applied a white wash to soften the green up, just a bit. My technique for the white wash is to add a little water and a tad bit of paint. I use a rag and swipe over the paint in a rainbow pattern!

E6EFD7AB-988A-4E5D-80E1-0079BD814B55

For the wording on my sign, I purchased a file from the Silhouette Store called Fresh Flower Market. I cut, weeded and applied the design to my sign.

898C91BF-4576-4848-BF29-01412A27C8A6

This is a simple diy and I love how it turned out! I have even used the sign on my front porch for décor!

Happy Spring y’all! Love~Shae

C403ADE0-1C1D-4A31-A021-B59739FDBBCE


Farmhouse Half Bath Makeover Under $180!

img_2077

Last weekend, my husband and I decided to do a mini makeover on our half bath. Shiplap, shiplap and give me all the shiplap!!

41B9BD40-8108-401F-8913-BB96981B9C84

To make this a budget friendly makeover, I used faux shiplap called pine underlayment. It is sold by the sheet for $15 for a 4×8 sheet. My husband ripped the boards into six inches wide and we got eight boards out of each sheet.

9090418A-6CA3-4247-90F1-F824044B635E

We needed five boards for this bathroom and installed them with a nail gun.

Home Depot Stock Photo

C4531C76-3DC0-44FF-8FF8-AD3FAC911C31

For the corner, we used a strip of corner moulding.

8CEBC92F-66A2-430E-9DBB-FAB6C0978B5E

I also left all of the nail holes after installing because I loved the character and charm that it gave to the room!  After installing the boards, I painted with Sherwin Williams in Base White. The total cost of the wood we used was $80!

img_2080

Since this was such a small space, I was having a hard time finding a mirror that was the right size and that was in my budget.

Home Depot Stock Photo

49B0A340-9FB6-4ADE-BA5E-84F6A53F4F40

I had an idea to buy just a plain builders grade mirror with no trim and I found one at Home Depot for $25! We then used leftover antique wood  for the mirror frame. It was the same wood we used for our table and the shelves.

img_2078

We decided to purchase a light fixture along with a towel and tissue holders. This entire project cost us right around $180! Look below for the before shot!

img_2083

Thank you for taking the time to stop by and read! I would love to know your thoughts or answer any questions you might have! Have a fabulous day!

ABOUT ME

Hey y’all! My name is Shae and I grew up in sweet home Alabama! I graduated high school at sixteen and began going to college to study child psychology. (Years later, decided to study to become a pediatric neurosurgeon.) I met my husband at work, so I essentially married my high school sweetheart, at the tender age of seventeen. A year later we had our first daughter and I guess, as they say, the rest is history. We have been married for TWENTY-FIVE years with four daughters, two Son-In-Loves, two grands, two pups and a slew of FARM animals. My husband and I are a powerhouse when it comes to working together on our DIY’S for our home. I love to design and he loves to build! We are currently working on a dream of ours-SELF-BUILDING our barndominium! Currently on year two! Follow us on TikTok or IG link below!

BFDCD94F-6205-4412-8C62-5F04AB5E97AF

MY VISION FOR SWEET SOUTHERN GRACE

My vision for Sweet Southern Grace is a dream of mine, one that I truly love sharing with you! This site will combine so many of my passions. A few of those are faith, family and farmhouse décor. Sweet Southern Grace is a place for me to share to my home, recipes, decorating tips, inspire others, DIY’S and much much more! I am honored that you have taken the time to stop by Sweet Southern Grace. Let me know if I can do anything to help you in any way!

Sweet Southern Grace is on Instagram. Link below.

https://www.instagram.com/sweet_southern_grace/