Ok, ok, we know at first glance, an outdoor bathroom may seem unnecessary or excessive, but hear us out! We are in a coastal area with sand.
LOTS and lots of sand! We literally live across the street from the beach, we are constantly tracking in sand.
Here’s How We DIY-ed Our Outdoor Bathroom
Step 1-Draw Up Plans
We decided a few years ago that we definitely needed some sort of outdoor bathroom. Last fall, we decided to head to Pinterest to get our juices flowing for ideas, draw up plans (Wes & I doodling designs in our notebooks) and go for it!
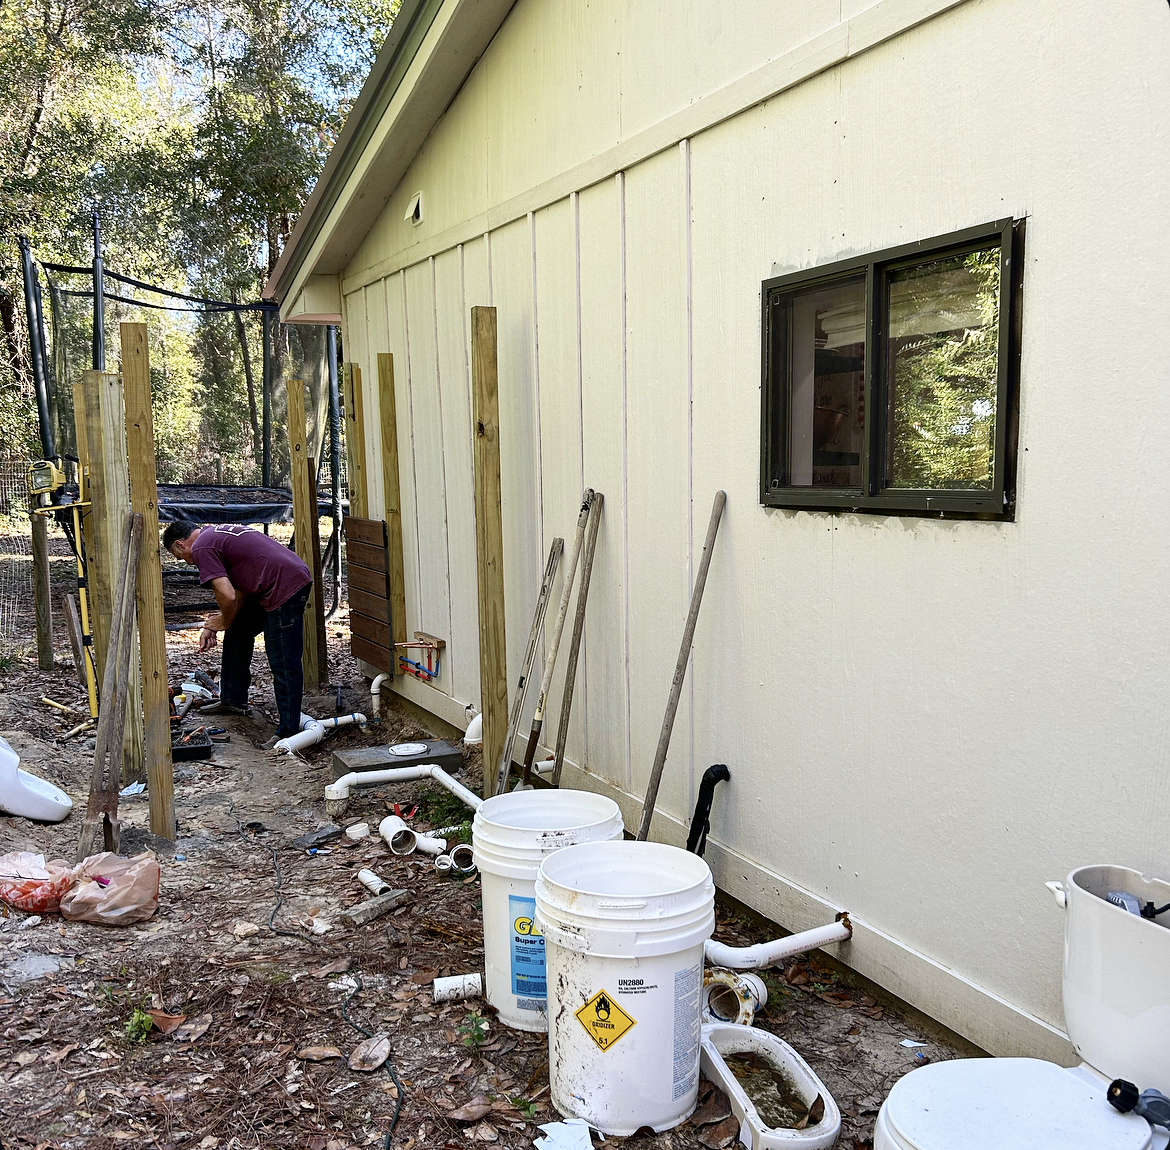
Step 2-Plumbing & Concrete Pad
The next step was planning out our plumbing-deciding where the sink, shower and toilet would be placed. Install plumbing.
Step 3-Build Out Walls
After plumbing, it’s time to build the walls! We used 4×4’s for the corner posts, along with 2×4’s, all pressure treated. We used galvalume for the walls. One of our granddogs, Ranger, was here visiting when we began construction of the bathroom.
Step 4-Build Shower Wall & Floor
First we built a frame for the shower wall and shower floor, out of pressure treated 2×4’s. Covered it in 1×6 decking.
We also decided on concrete pavers to have easy access to plumbing.
Step 5-Concrete Pavers
We diy-ed the concrete pavers. Leveled out the ground. The price was a little bit cheaper to make than to purchase concrete pavers.
Step 6-Bahama Rock
We added a a tractor scoop of Bahama Rock to go in between the concrete pavers.
Step 7- Staining Wood
Our youngest two daughters helped us with staining the wood! In the picture, to the right, you can see the floor board of the shower.
I had a helper that liked to chat as we worked together. (I didn’t mind the chatting.)
Step 8-DIY Paint & Stenciled Concrete Pavers
I painted a couple layers of black paint first, allowed it to dry, then added the stencil and used white paint.
After allowing the paint to dry, I added several coats of a matte sealer to the concrete pavers.
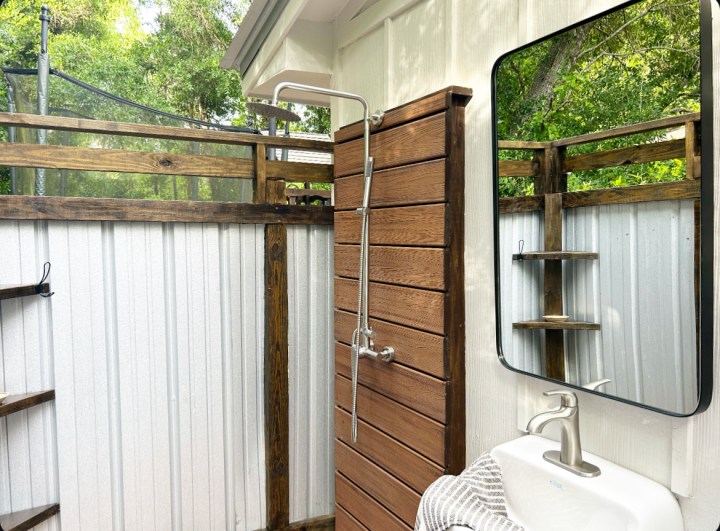
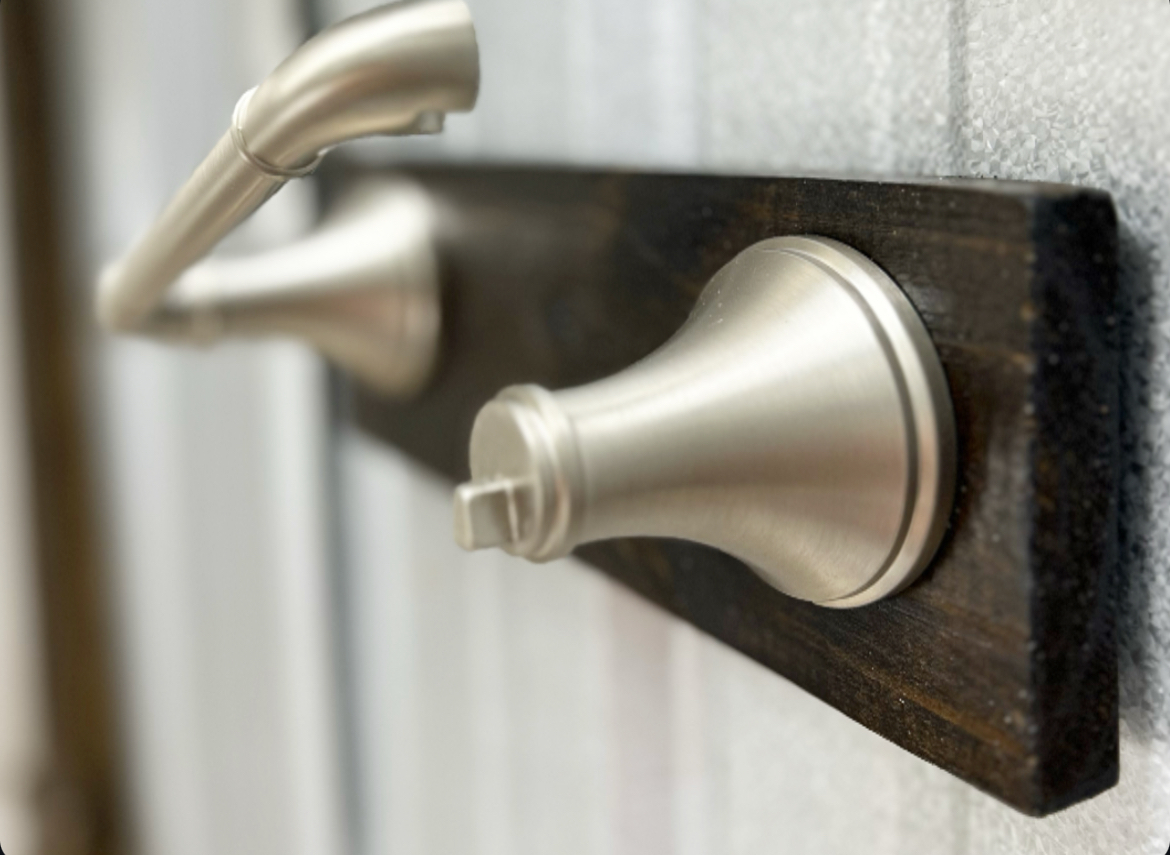
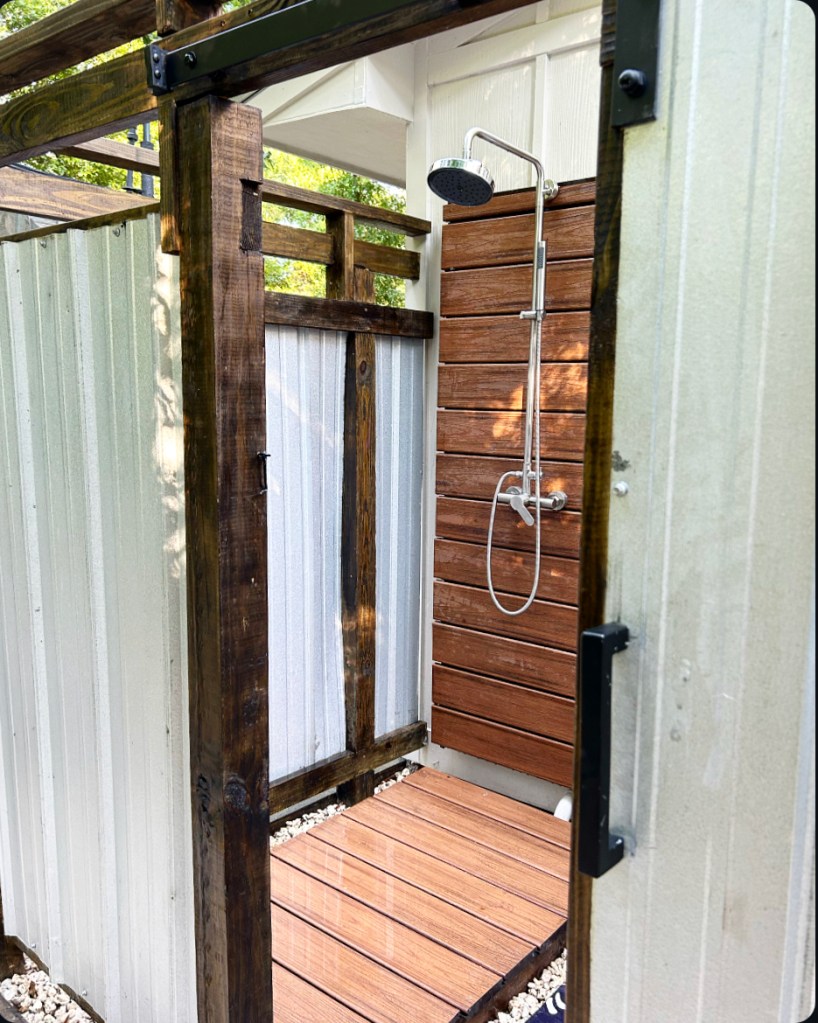
Step 9- Installing Fixtures &
Finished Result
Rancho Single Control Bathroom Faucet is from Pfister. Spot Defense is a perfect for a busy Mama like me! (You , too!)
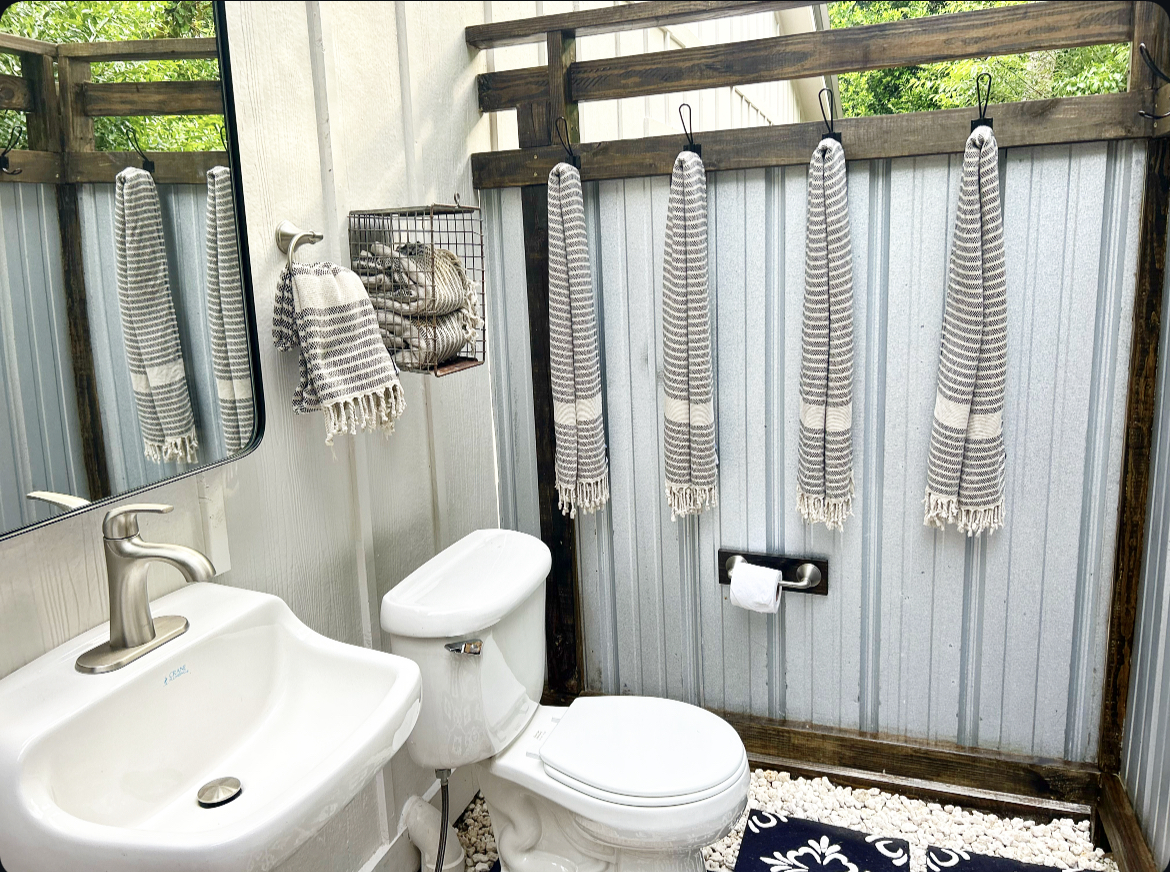
Visalia Towel Ring with Spot Defense is from Pfister. Love the sleek design!
Visalia Tissue Holder in Brushed Nickel is also from Pfister. My favorite feature is how you can just lift up and change out the roll like an easy breezy summer day!
Our Highland (Black) Decorative Mirror is from Frame My Mirror. Love it’s sleek, yet modern design! Budget friendly! You can use code sweetsoutherngrace15 for 15% off!
Our Turkish Bath Towels are from Marlo+Olive, in Haven Black. Turkish towels are compact, sand-resistant 🙌🏼, quick to dry, and hypoallergenic.
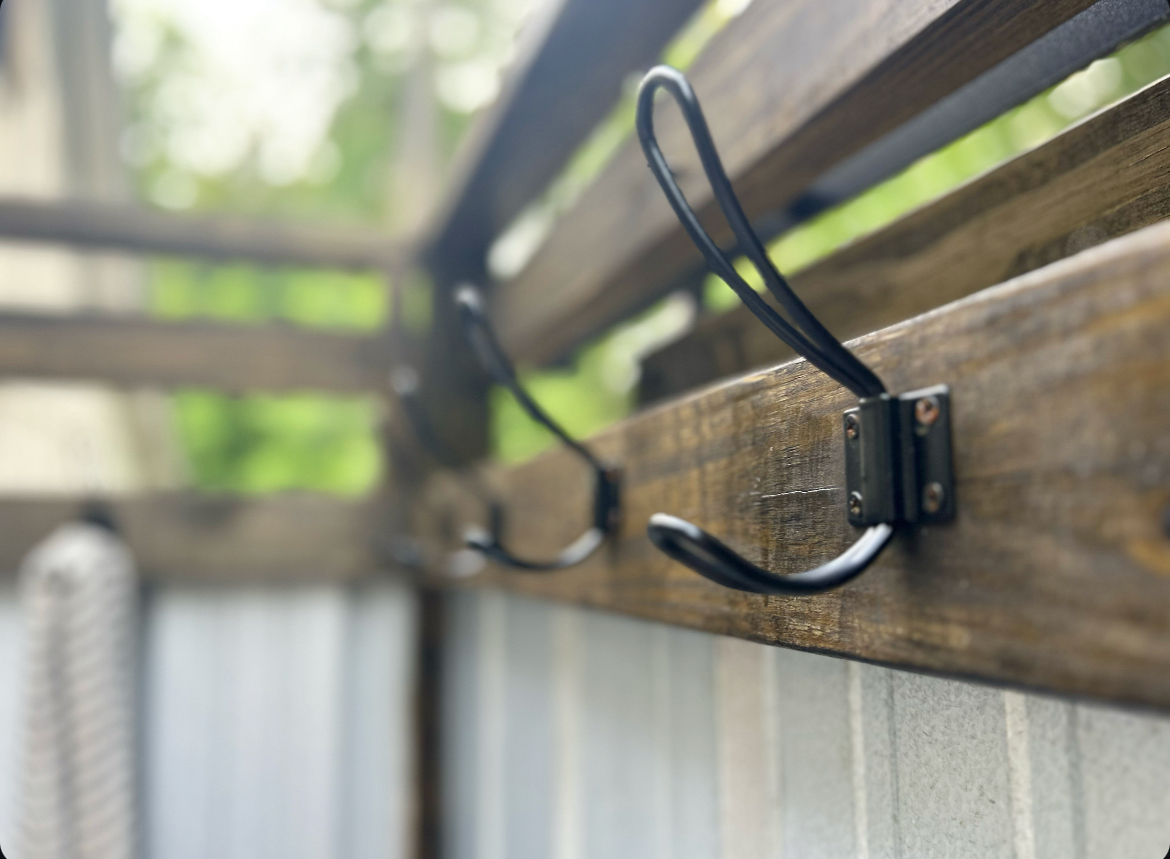
Our towel hooks are from Amazon! Budget friendly, modern farmhouse design!
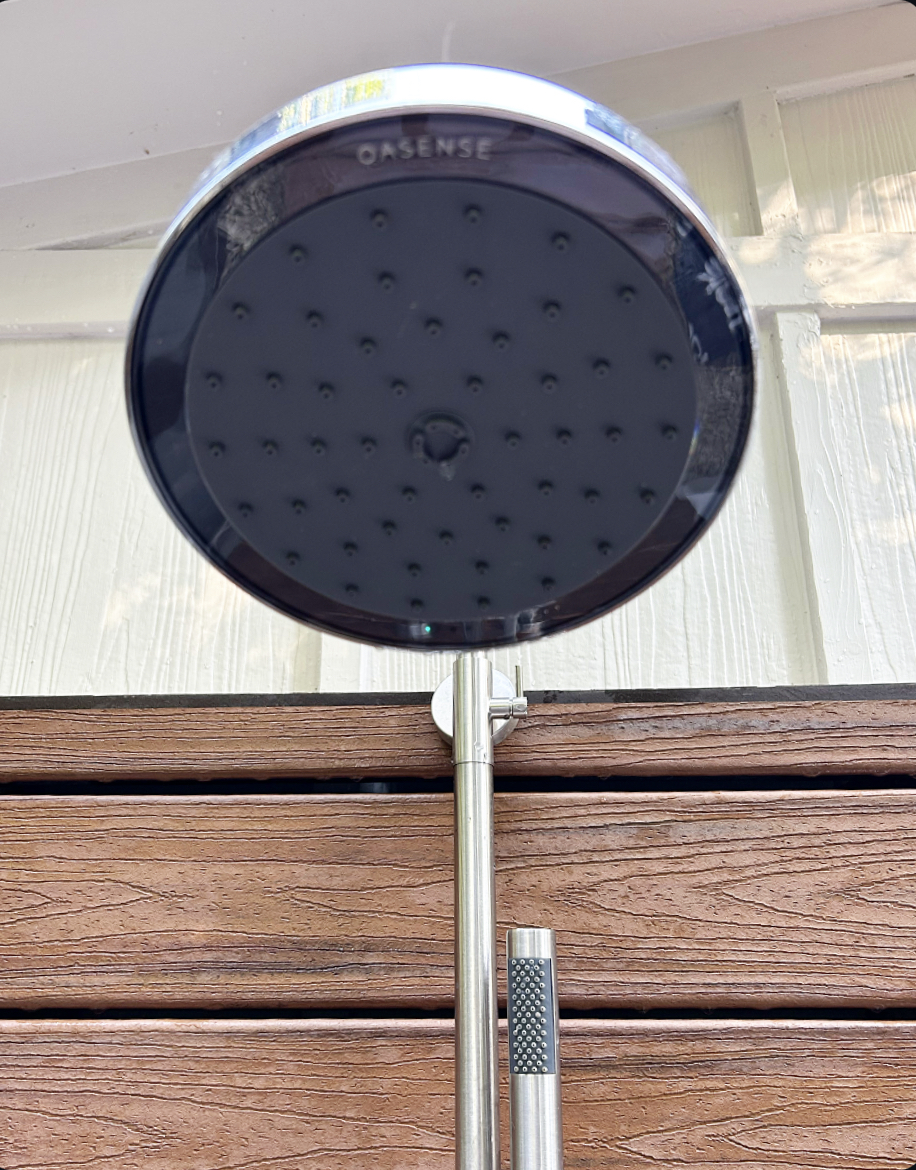
We also decided to up grade our showerhead to the Oasense Reva Showerhead. It is the world’s first sensor enabled smart showerhead-automatically reduces the water flow to 15% whenever you aren’t actively rinsing, and resumes 100% full pressure every time you step forward to rinse. The embedded sensor suite has advanced sensor fusion hardware with machine learning algorithms that automatically calibrates the sensors during each shower.
That concludes our DIY Outdoor Bathroom! Thank you so much for taking the time to read about our diy outdoor bathroom! If you have any questions, please let us know!
During the summer of 2020, my husband and I decided that we would place our house up for sale and move to the beach! The housing market was booming for homeowners and we decided it would be the best time to sell!
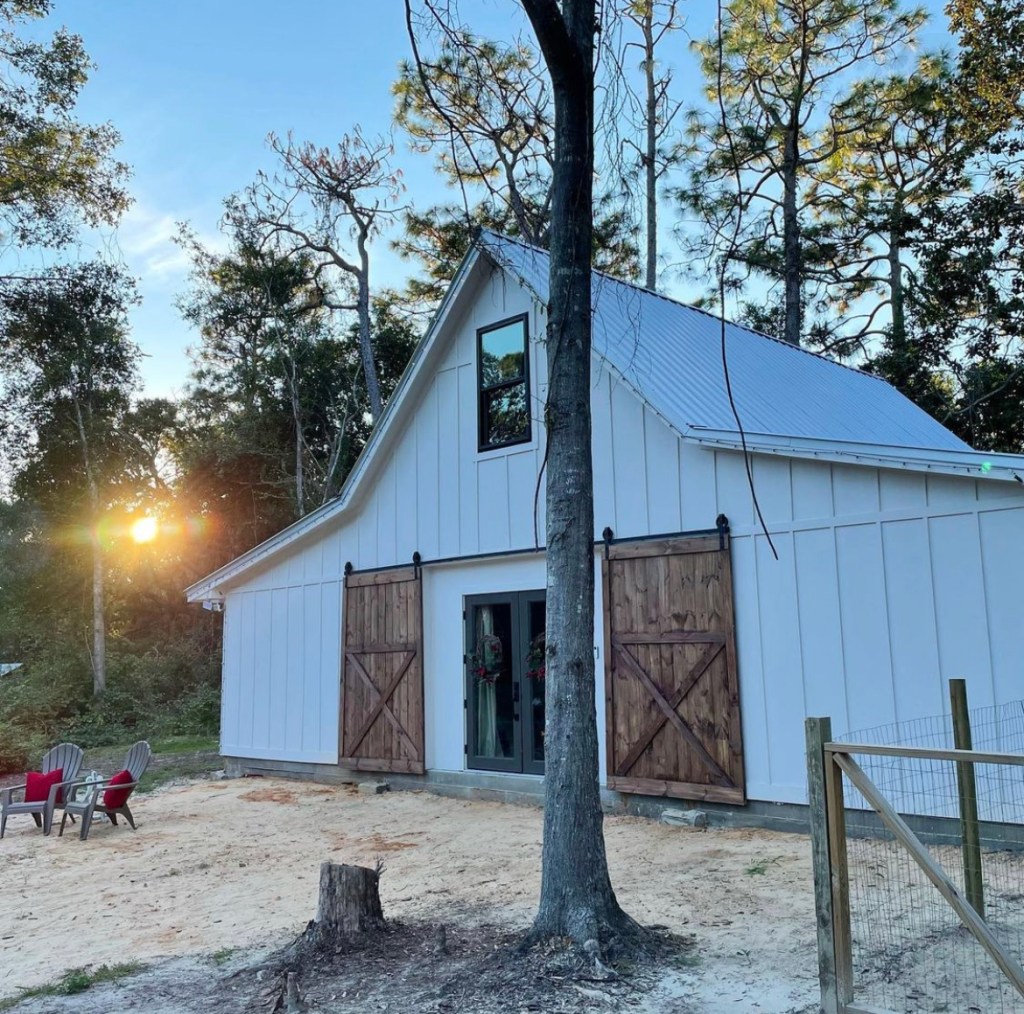
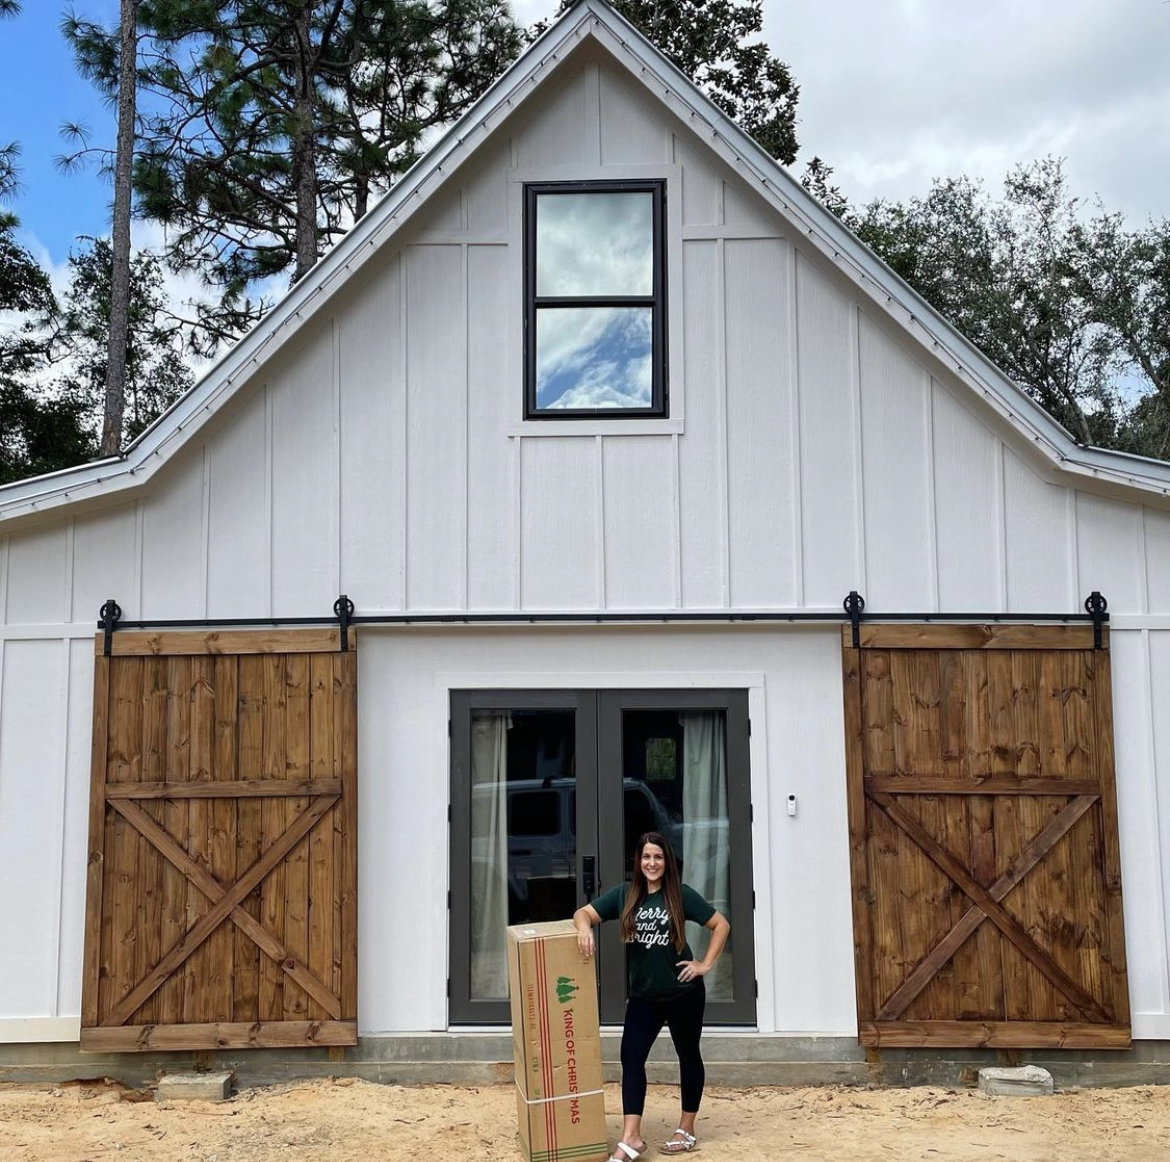
Our home sold within the first week of having it listed and thus began our plan of homeownership via paying cash! We settled on building a pole barn that we would live in temporarily while we built our forever home! The pole barn quickly became our barndominium! We chose to build our barndominium at the size of 30×40!
Researching is Key
Researching is key if you are thinking about undertaking a large project like building your own barndominium. This project has consumed us for months, but it has allowed us to build almost everything ourselves and it has been so worth it! When we would shop for estimates, we shopped until we found a price we liked!
The photo below is the backside of our property and where our barndominium currently sets.
Finding Land
The very first item on our agenda was the land! We knew a quaint little beach town that we wanted to grow old in and began driving around looking at property in July of 2020.
The photo below is the beach across the street from our property!
We began looking up owners of properties in the town from the plot map, to begin writing them, asking them if we could purchase their land. We had found a couple pieces of property, when my Father-In-Law reached out to us, who happened to live in the same quant beach town and asked us if we would like his property. We were shocked and so happy! Thus began our dreams of building a Pole Barn with an attatched Guest Suite.
In this photo, my husband had begun clearing our land. This is about two days into it!
Clearing the Land
Next on the agenda was assessing the property. The property was not in the best shape. In fact, you could hardly see it with all of the overgrown trees.
This is the very first picture that I took of our property. This is the front side of our property.
There was also a older mobile home, a storage building plus seven junk cars that had been setting on the property for years, along with a boat plus a good amount of trash to clean up.
Below in this photo, my husband was removing the last of the junk cars!!! This was car number seven!
We knew we needed to rent a tractor to clear the land and make a driveway. I also wanted to learn how to operate a tractor! I actually wanted to learn about anything that my husband was willing to teach me during this process!
Neither my husband or I had never used a tractor up until this point, but we learned! I think we enjoyed it too!
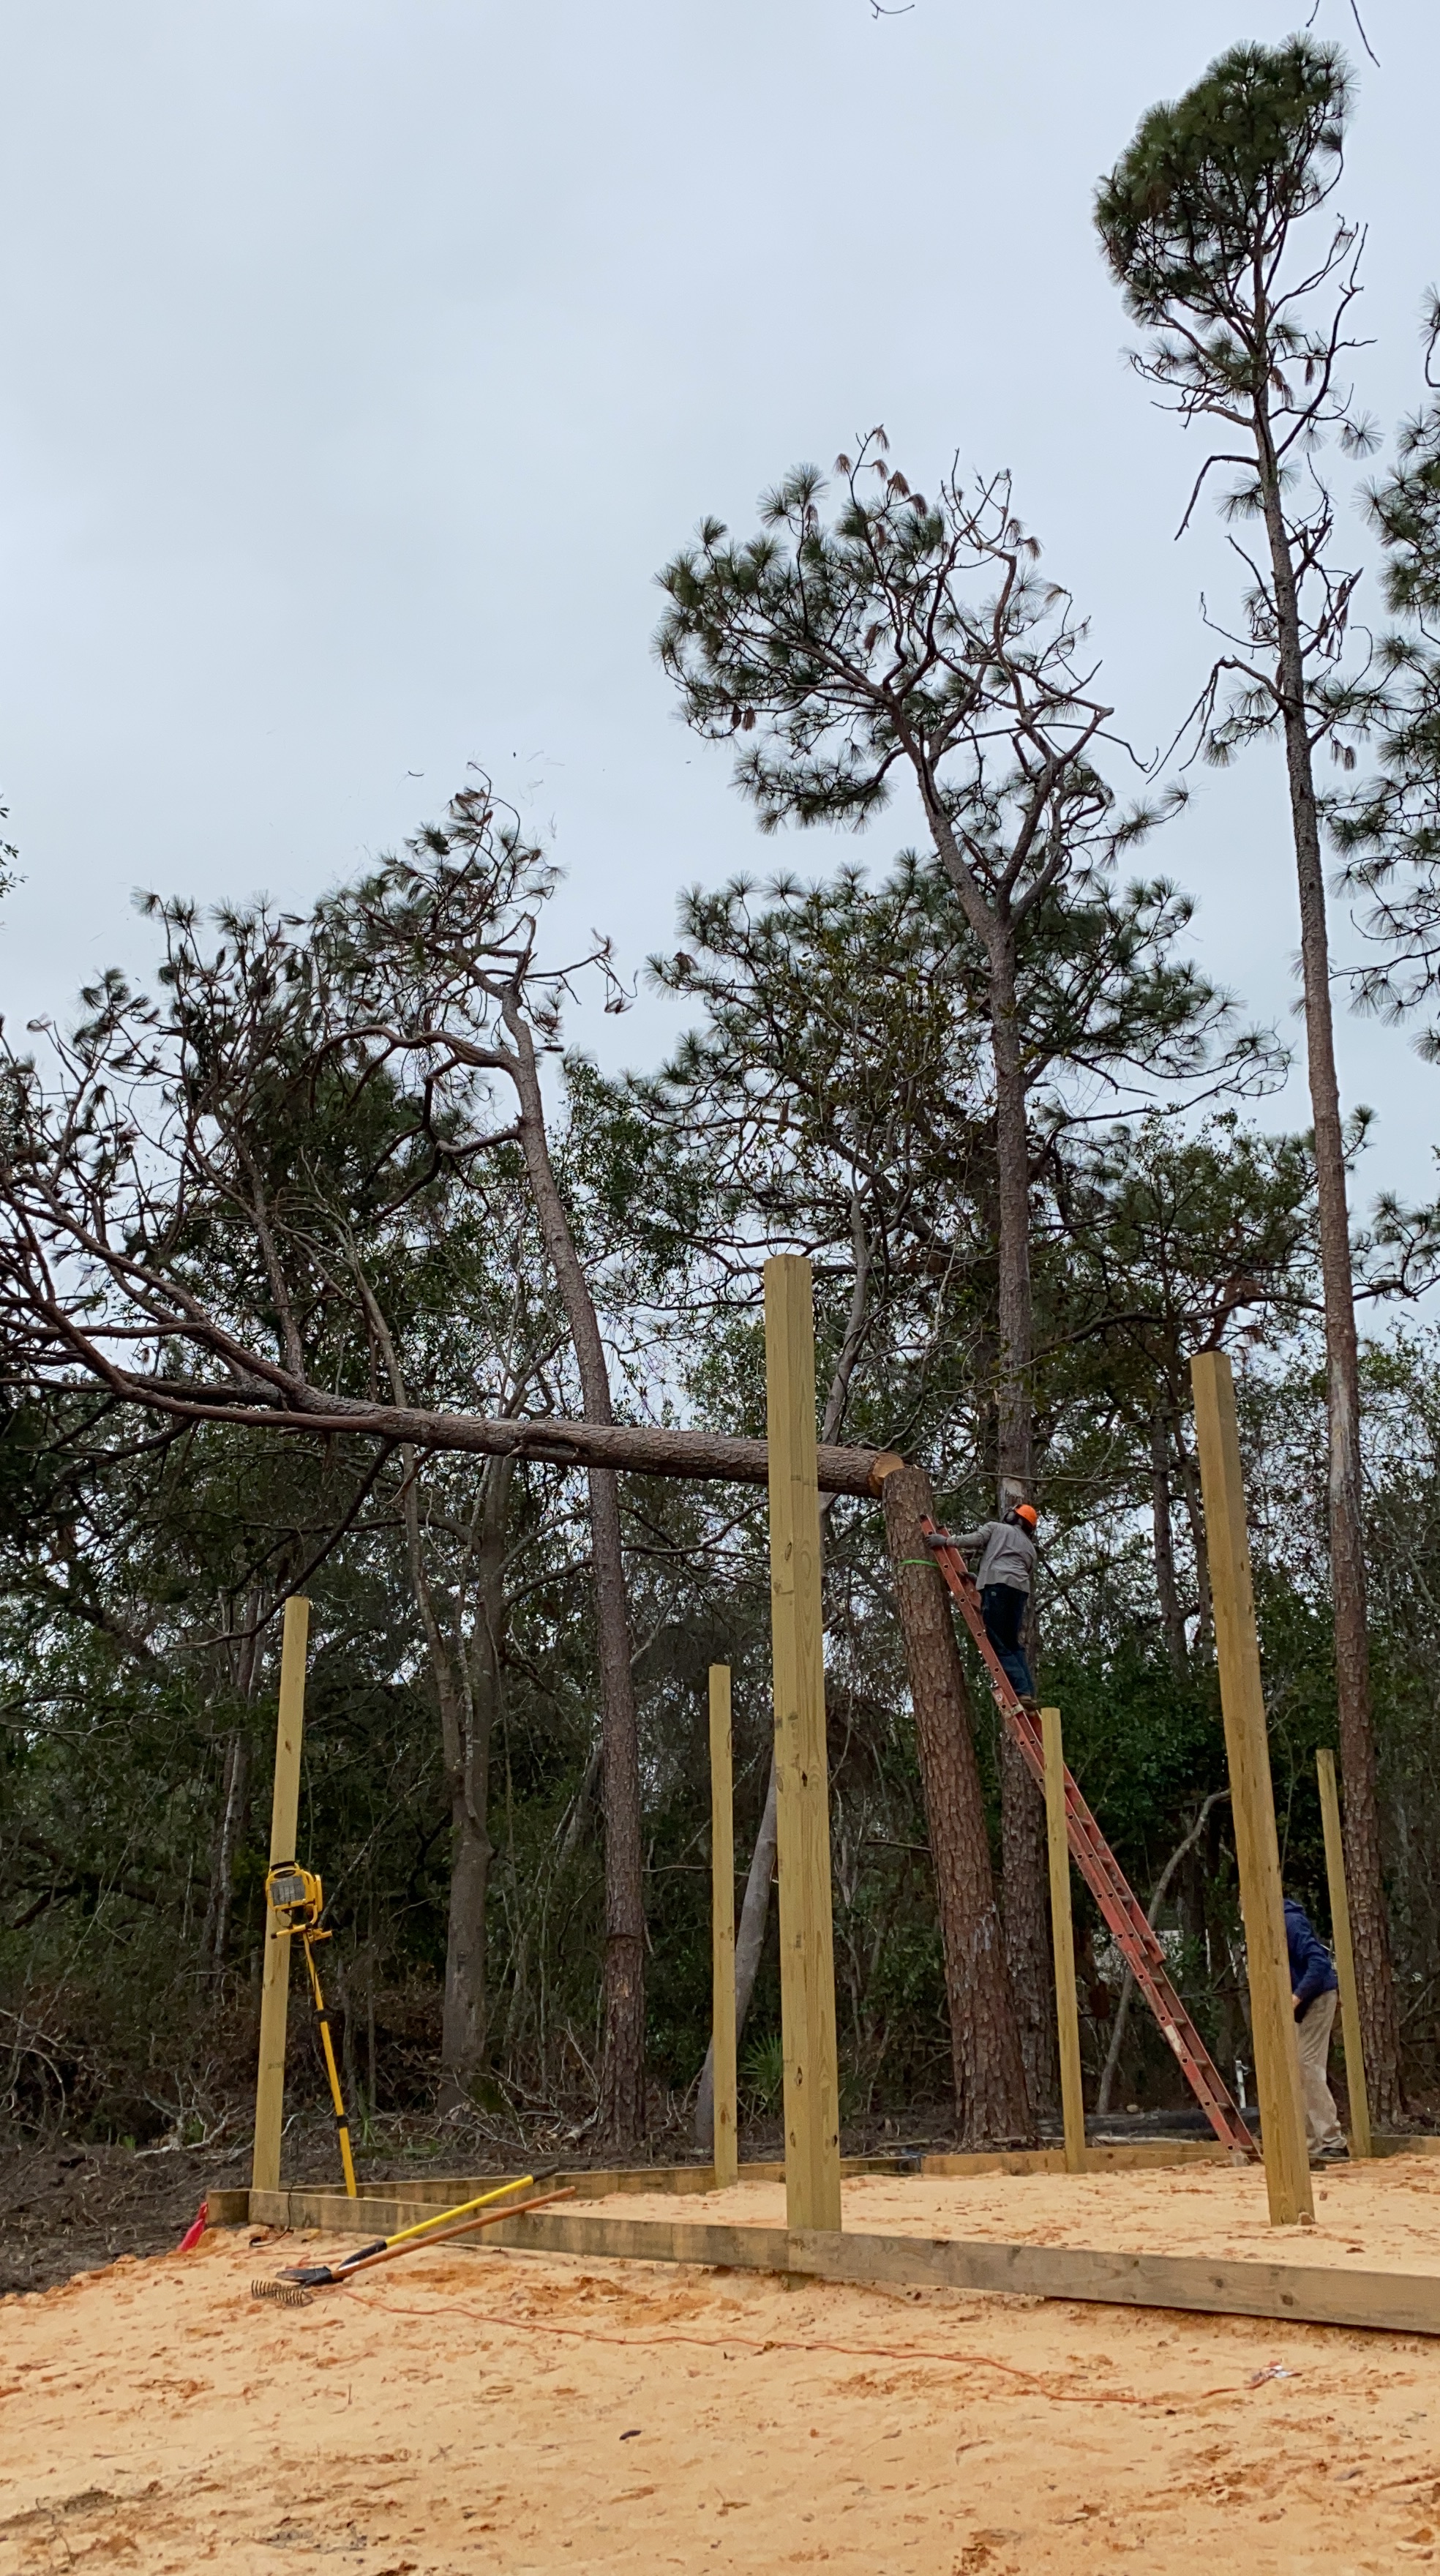
It was a lot of sweat equity work with taking out trees, pulling them down and across the road and watching my husband drop trees that stood seventy feet in the air!
My parents would always be calling, when they saw our stories on Instagram and say to be careful! We also have our own portable sawmill that we plan to mill our pine and oak trees that we saved for wood countertops for our home.
Setting the Posts and Adding Fill Dirt
The first step was setting the posts!
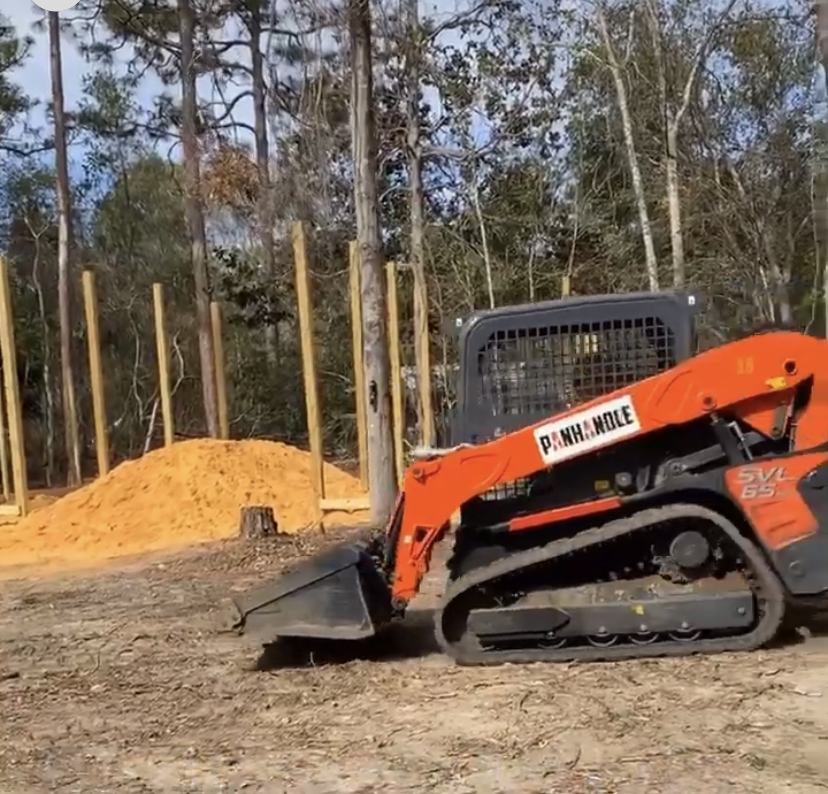
We also purchased two dumpsters of fill dirt from a local company. We rented another smaller tractor to help push the dirt out into the pole barn and help keep it evenly spread.
Leveling Out the Dirt and Adding Posts for Barn Doors
The next step was buying a laser to level out the dirt for the pole barn. We wanted to make sure we had the ground level!
We also rented a compactor to compact down the dirt. We also added two posts for the barn doors on the front!
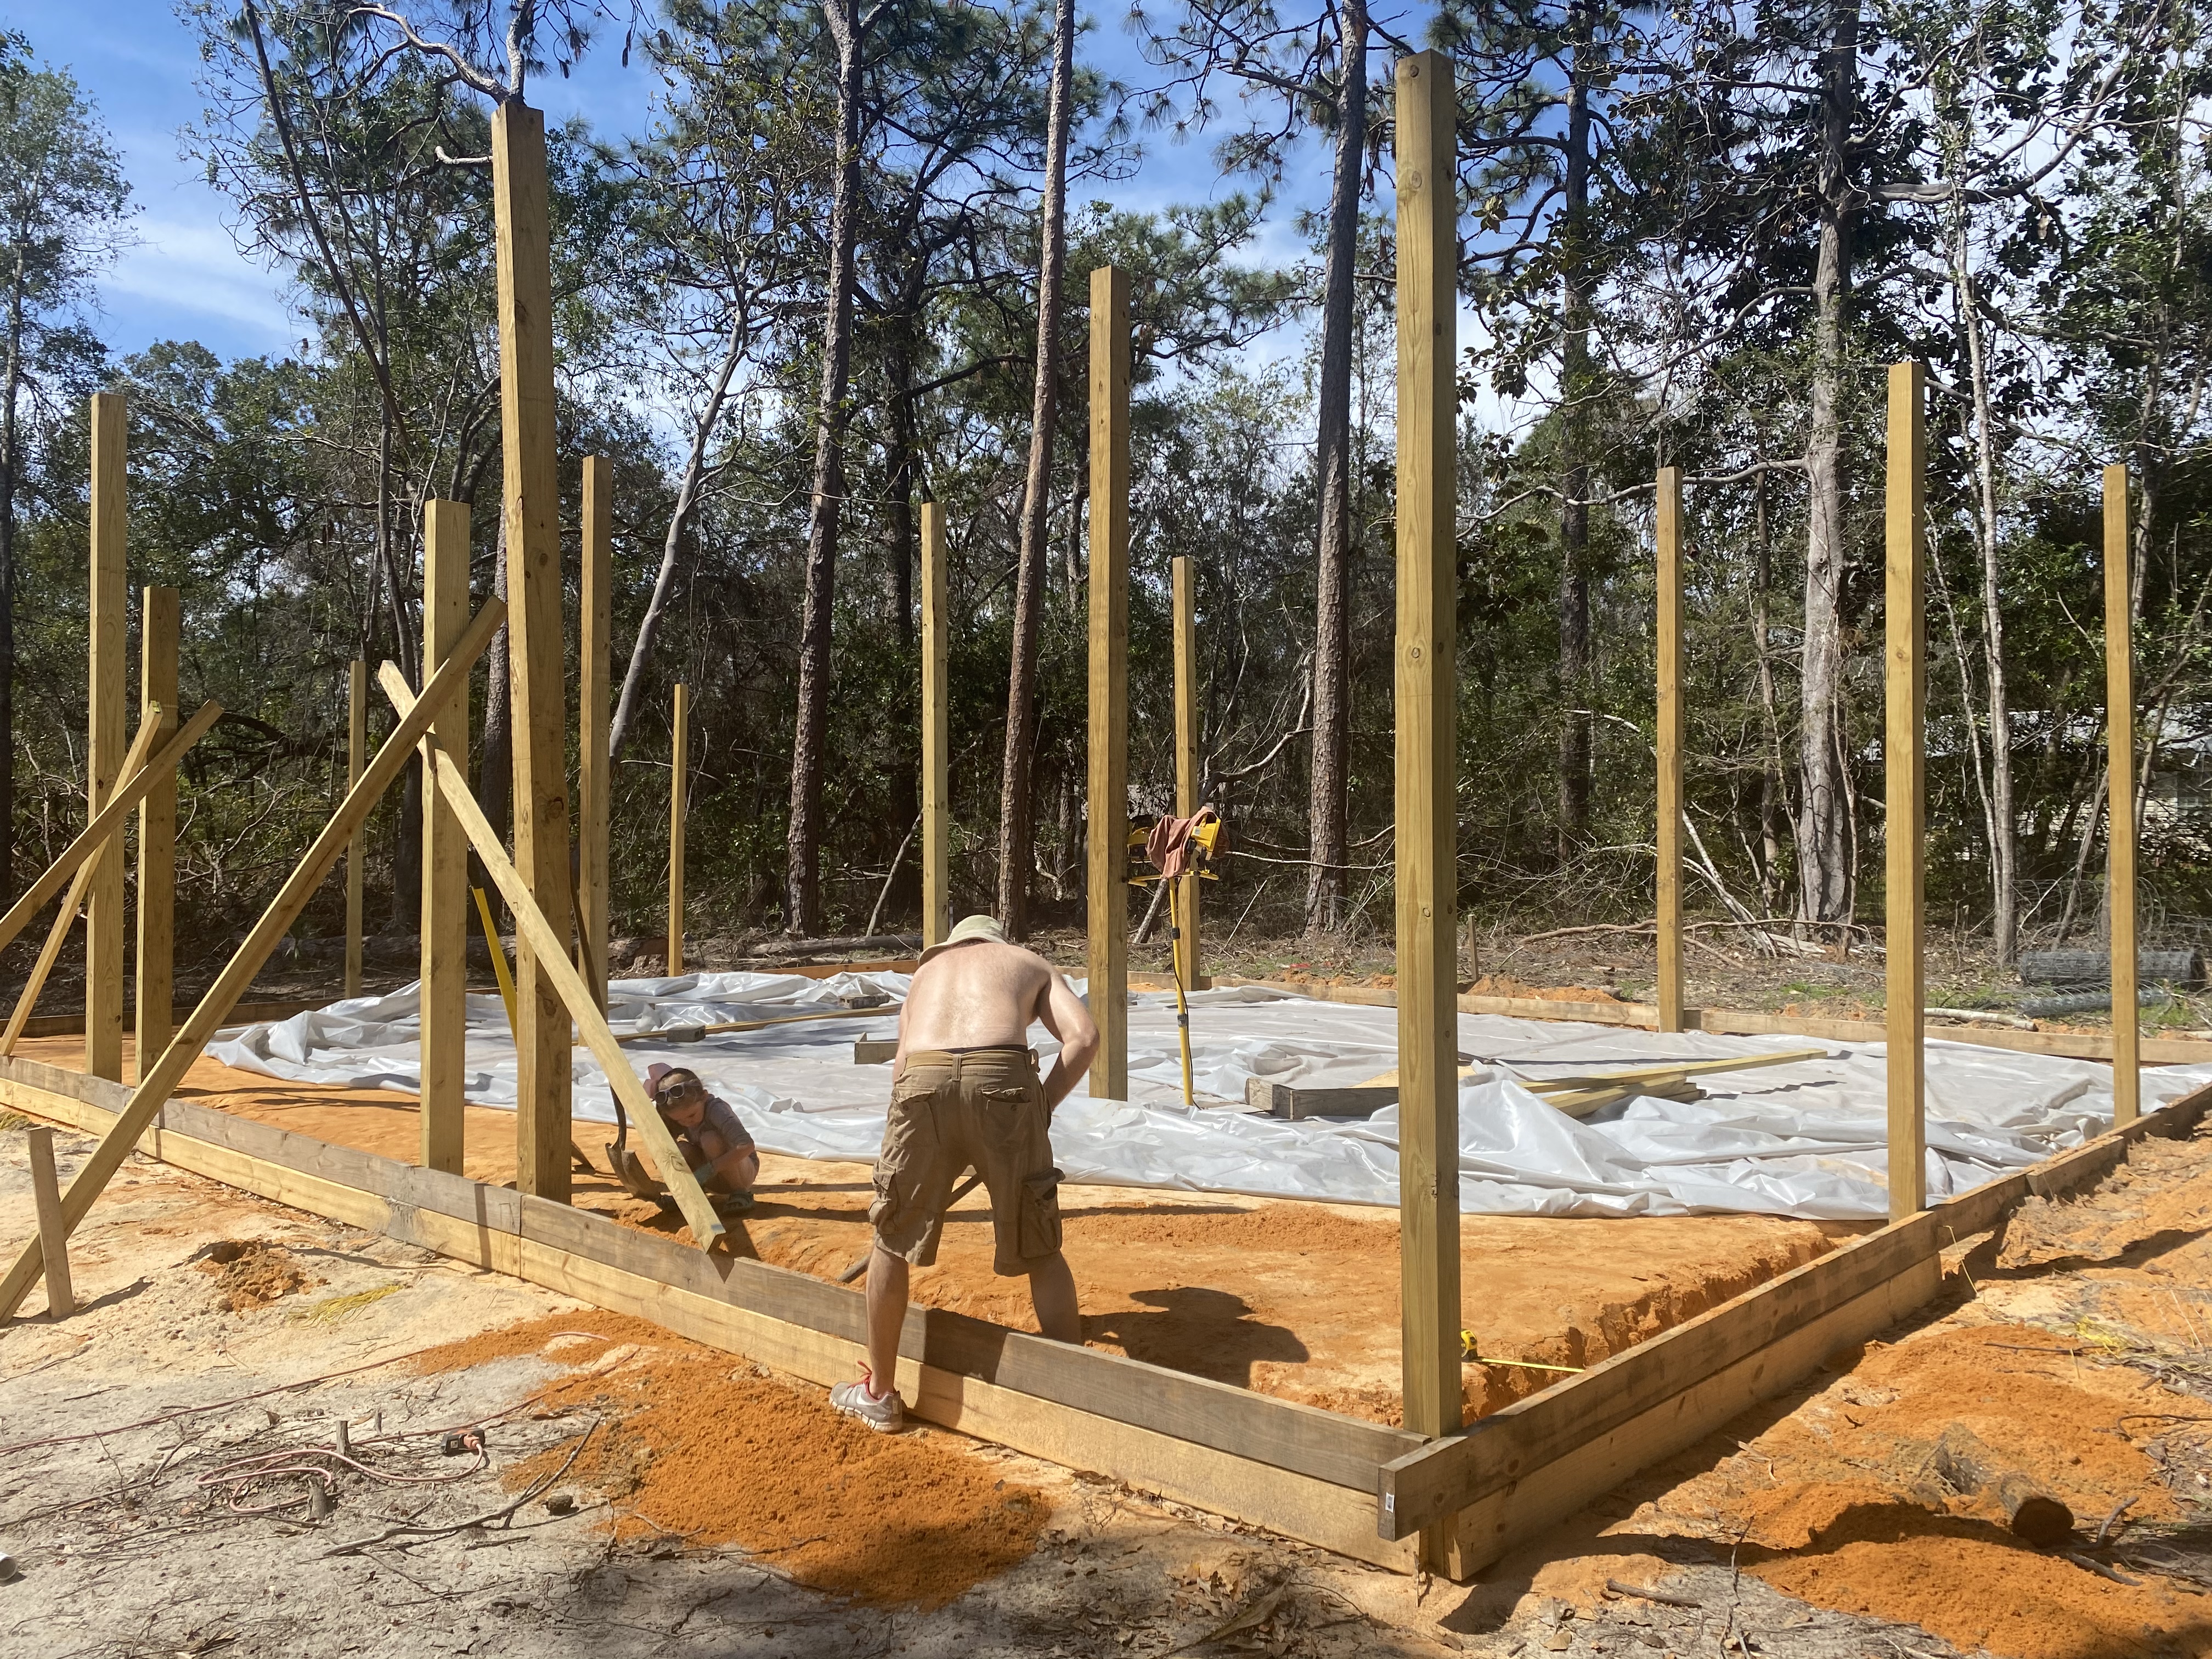
Adding Footers and Rebarb
Next we added a layer of plastic and the footers and rebarb. We also attached concrete wire to the rebarb.
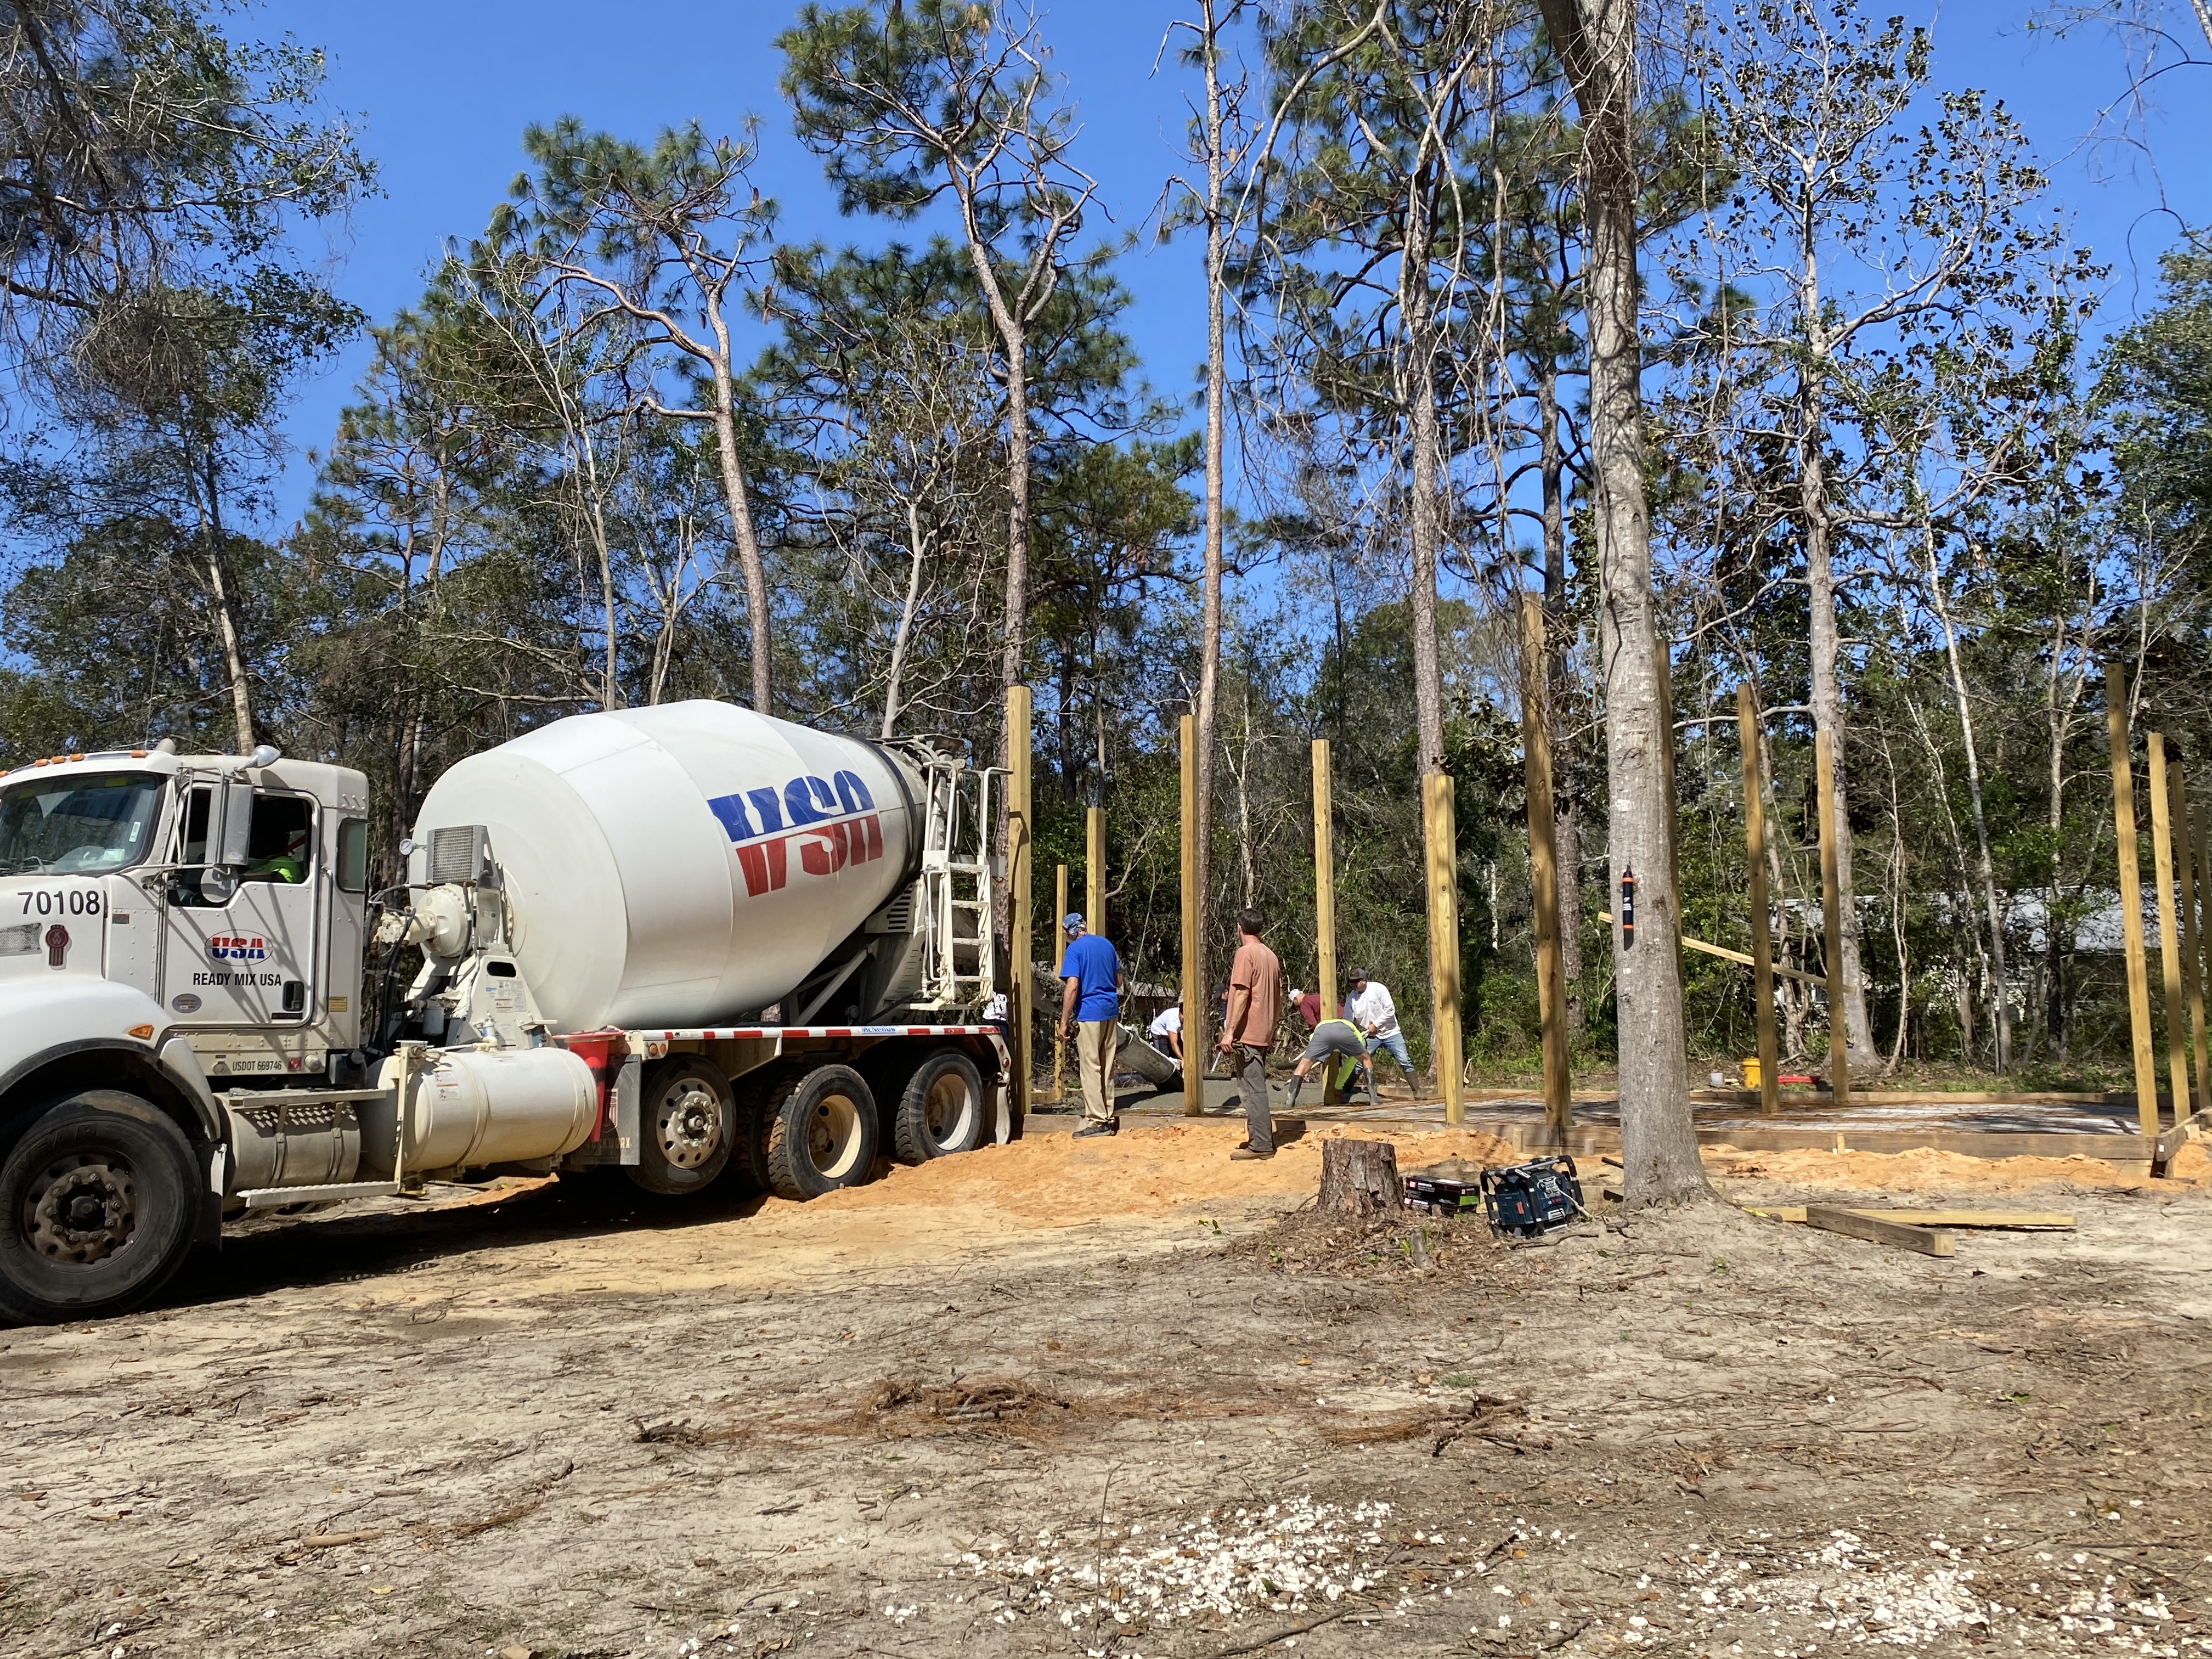
Concrete Pour for the Foundation
We did hire out this job because it was such a large job that we did not think we could handle the amount of work on our own.
Plus, if you happen to mess up concrete, well, its a hard and expensive job to mess up on!!
So glad we hired this one out! Those concrete guys worked so hard! You can watch the video of our concrete pour here!
Buying Windows and Doors
My husband wanted to go ahead and buy the windows and doors before framing, so he knew the size of the frames that he would need to be making for the pole barn. We went to Habitat for Huminity to find our windows and doors. We scored big and were able to grab almost everything we needed from Habitat for Humanity! Some of the windows and doors were used but some were new! We spent under $500 for all of our windows and doors! Check out our trip to Habitat for Humanity!
Framing the First Floor
Framing the first floor went pretty fast.
We were able to get it all done in about two to three days.
I learned to frame and framed one of the walls on my own! It is always so cool to learn a new trade!
Framing the Second Floor
We second story framing went faster than the first floor. We plan to use the two wings of the barndominium for attic storage and then the middle of the second floor as useable space. My parents came down to help us on a Saturday! Much needed!
Roof
We were able to frame the roof fairly quickly in about two weeks, then added the galvalume roof.
My parents and my brother came to help for the putting the galvalume roof on! It took about two and a half days for the install on the galvalume roof! Not to bad for two old guys (both of our Dad’s) and two middle aged guys (hubs and bro). No pun intended 🤣
My parents and my brother came to help for the putting the galvalume roof on! My mom helped me with cleaning up debris, breaking up a pile of extra concrete and making lunch for our guys! Check out our reel on the installing of the roof!
After Framing and Roofing
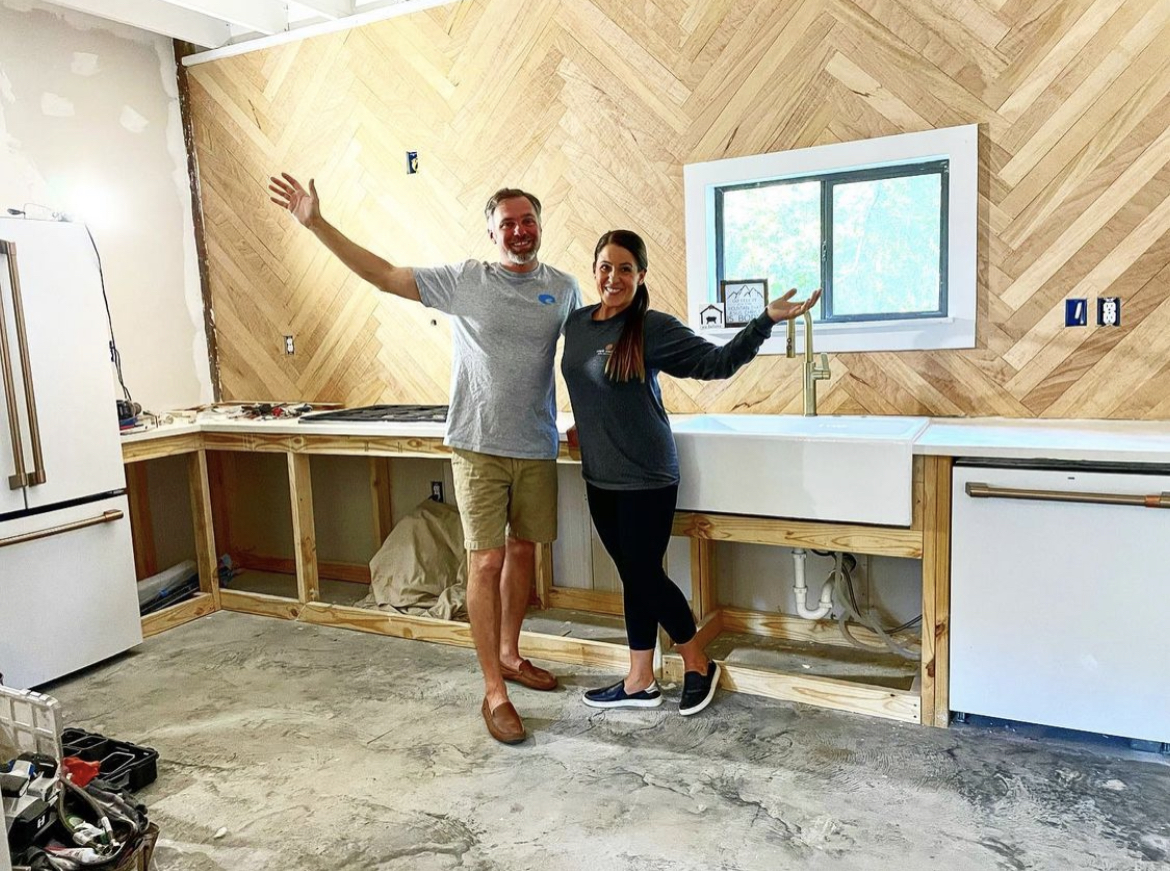
After our barndo was framed, the next few projects were not nearly as overwhelming. My husband had general construction knowledge and we are both hard workers, willing to do whatever it took to bring our temporary home to life!! Anything we were not knowledgeable on, we turned to You Tube, family or friends that were experts in the subject area.
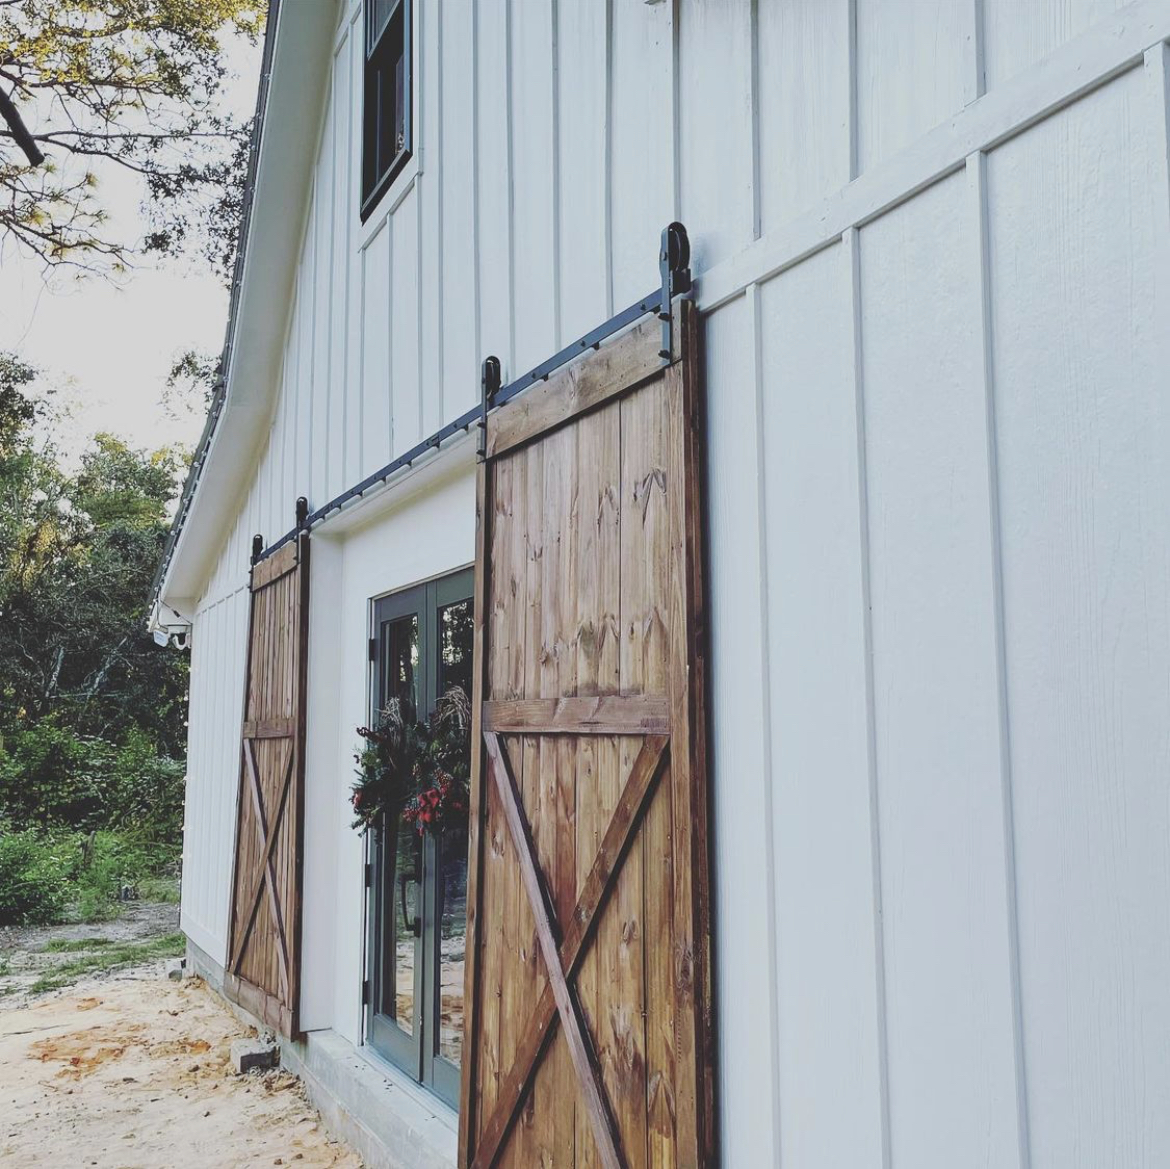
I built the exterior barn doors, myself, with the help of a couple assistants to cut and hold wood! Check out that process here! It is truly amazing what you can learn to do if you have the willingness to learn! You might may some mistakes along the way, but just start over and try again!
Our plan has been to do as much work that we can do on our own, to keep building costs as low as possible. This is a cash build and we had absolutely no plans to get any type of loan for our barndominium build or our forever home build! Our hope was to get the barndominium dried in and basic items checked off then take time to finish the remaining rooms.
Home Depot Gift Card
We are almost completely done with the building process. Finishing up with sheet rock and paint over the next little bit! Would you like to guess at how much we spent on our Barndominium build? The first person to comment with the correct amount, I wil send you a $100 gift card from Home Depot!
Instagram Collabs
I have been so blessed to have a job that never feels like work to me! I couldn’t be happier as a blogger and a influencer on IG! I am excited to share in a blog post, soon, our barndomium reveal and which companies I collaborated with! Any questions, please don’t hesitate to reach out!
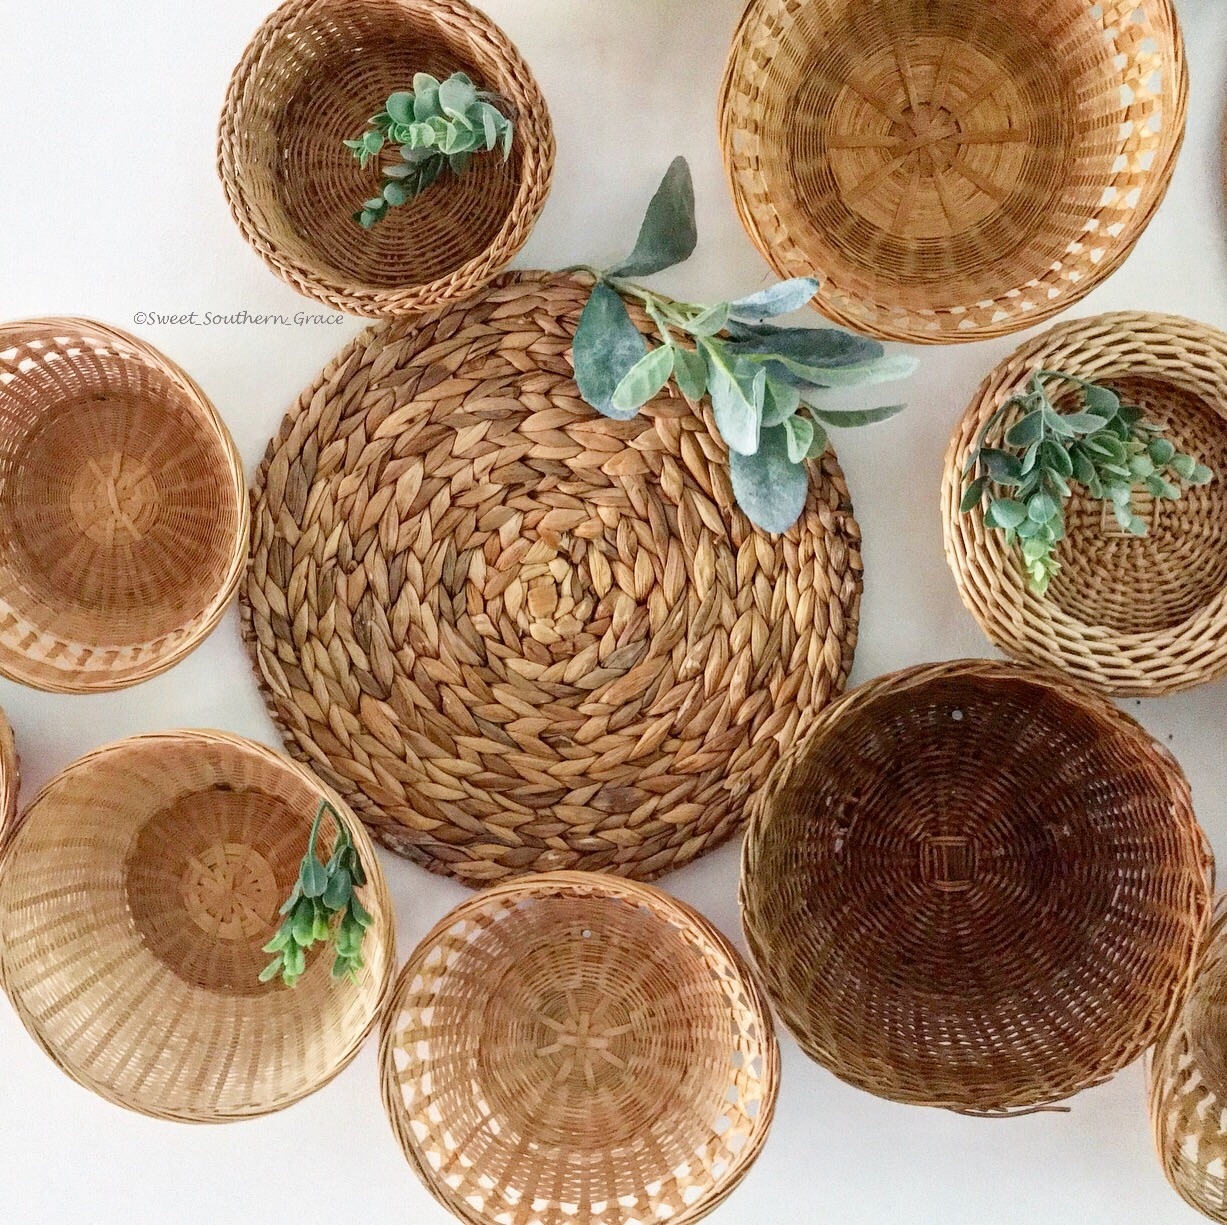
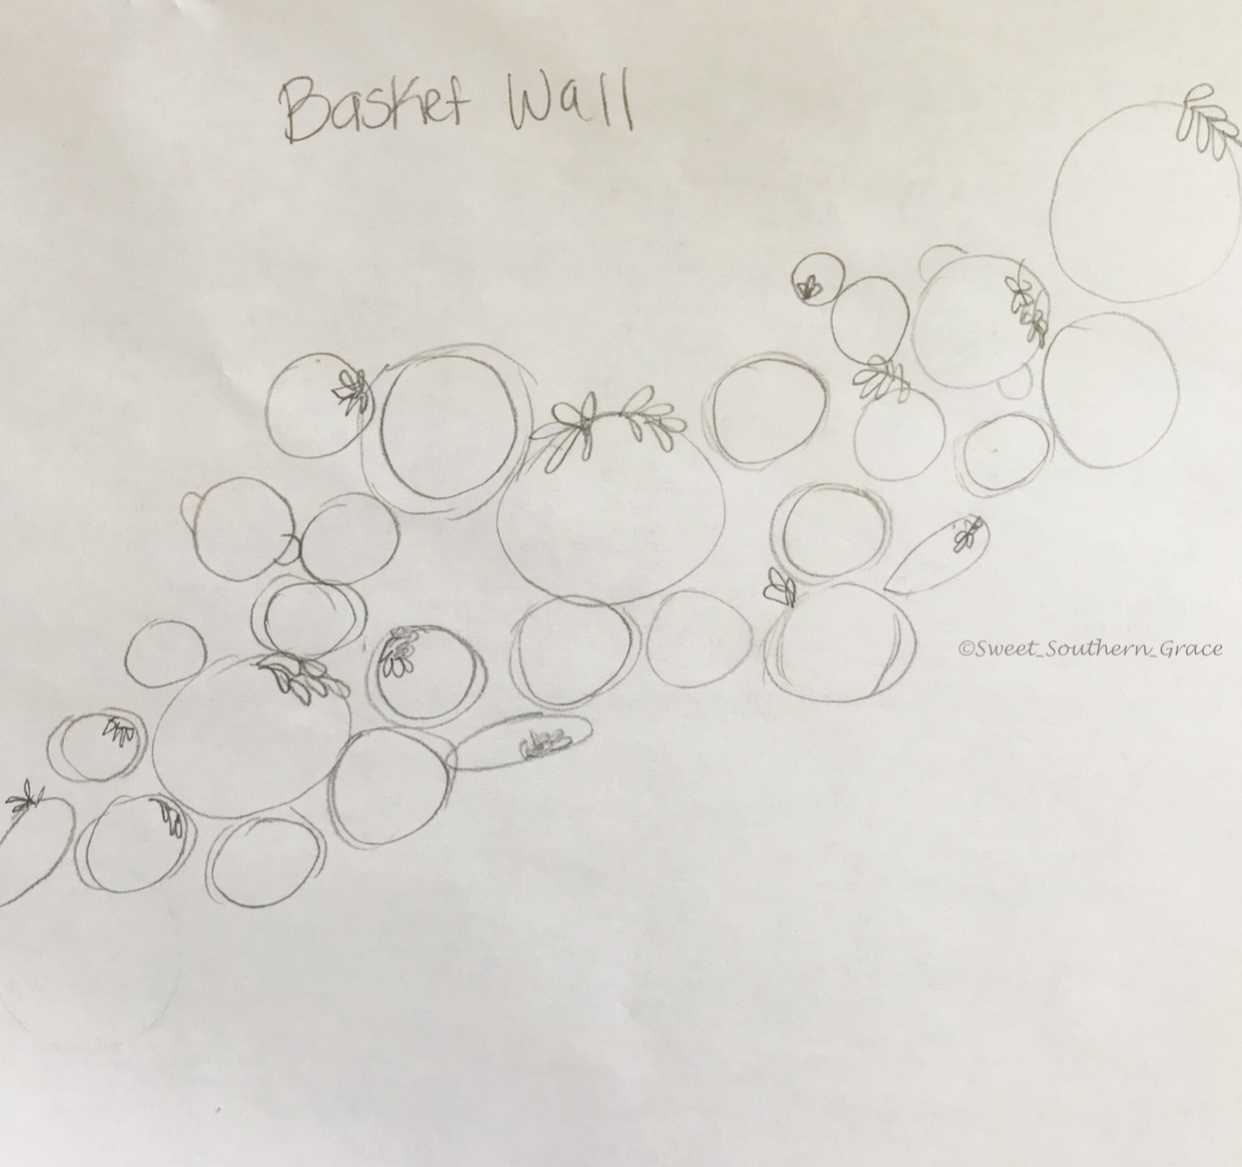
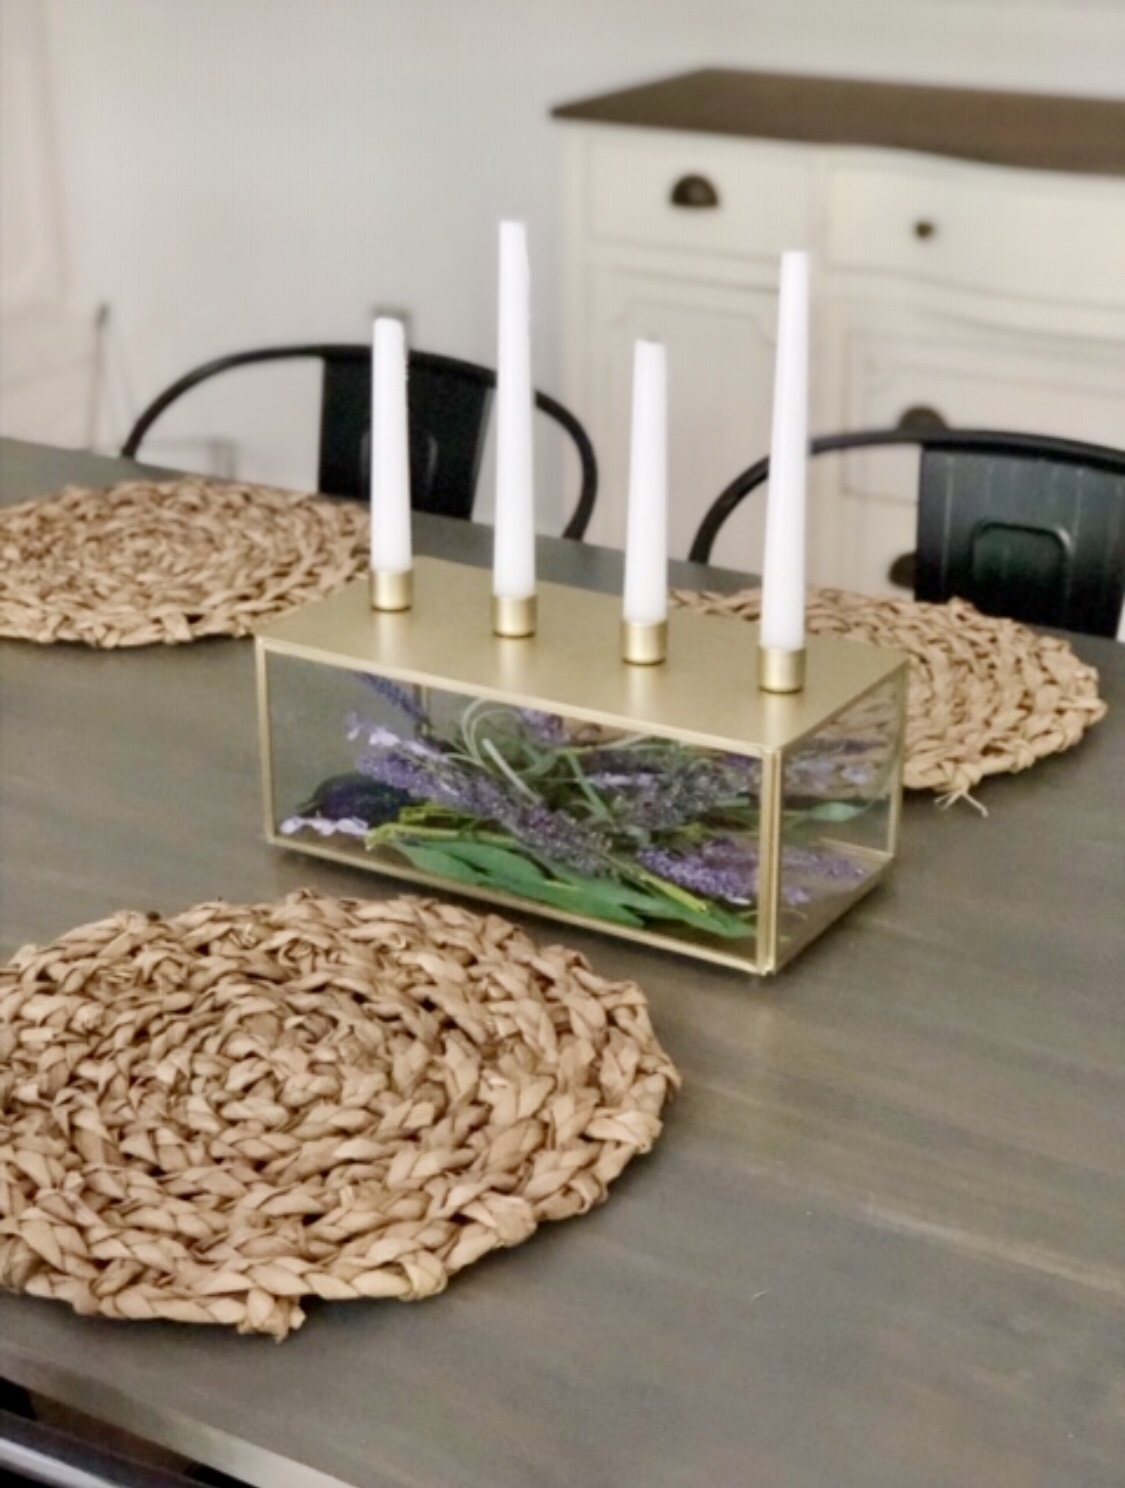
Today, I am teaming up with several bloggers for a Thrift Store Blog Hop! Y’all know how much I love a good budget friendly DIY! This basket wall cost me under $15 and took me about an hour to create! Baskets are a great way to add decor to your wall for cheap!
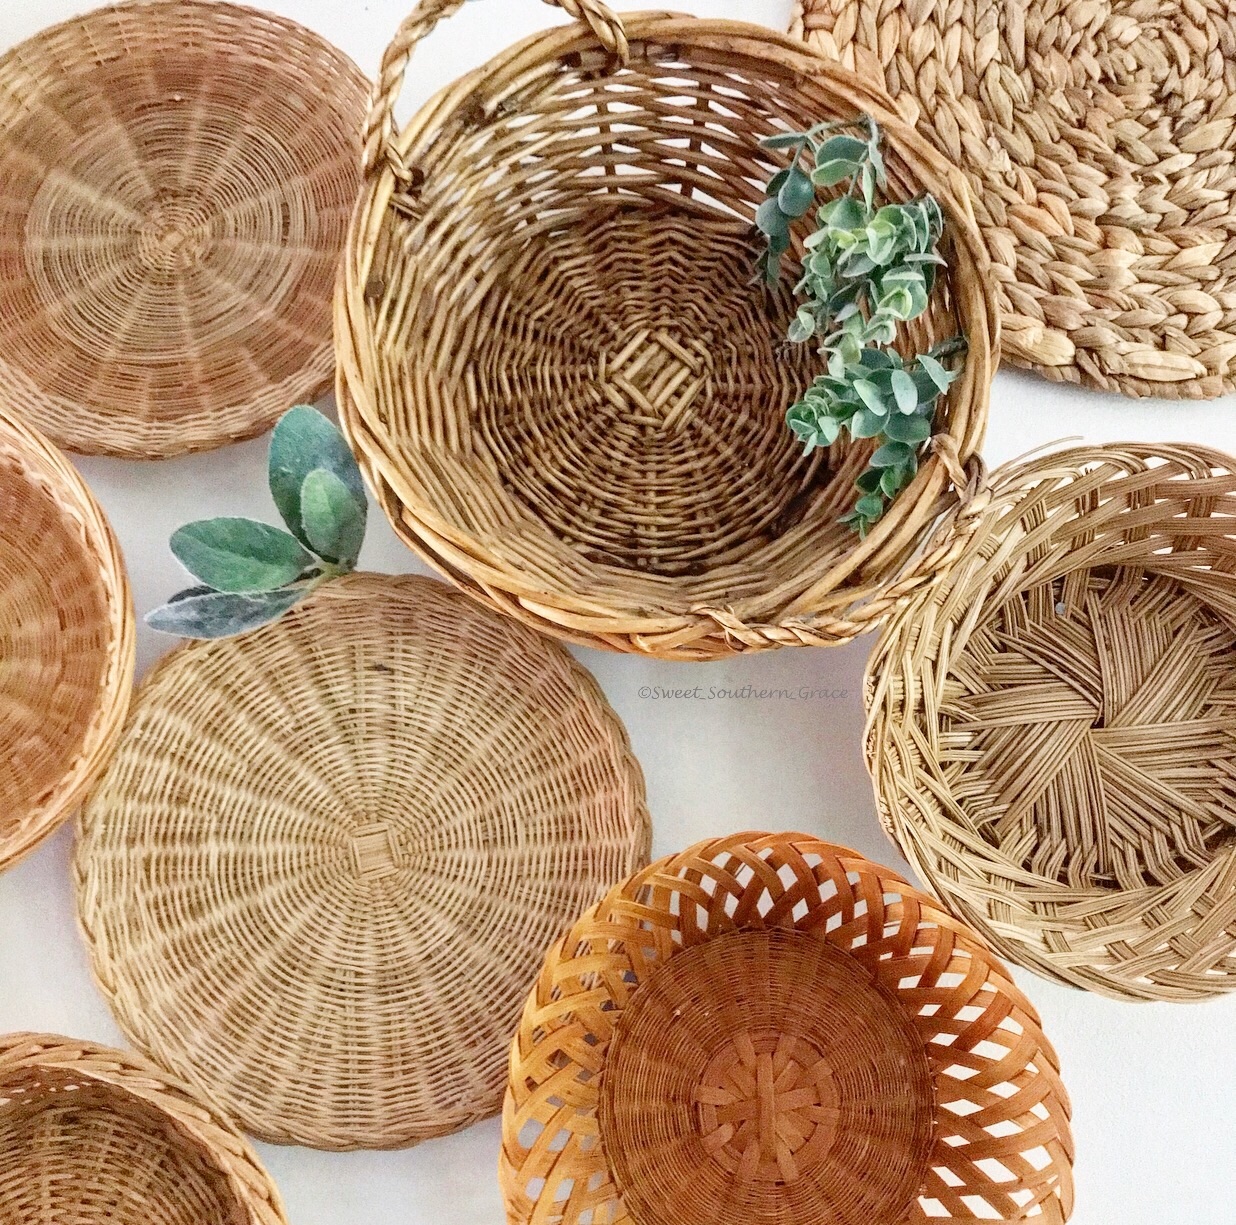
First things first! I found all of the baskets at my local thrift shops or rummage sales. All of the baskets were .10 cents to $1 each except for the large round placemats. The trick to finding these baskets is finding different colors, textures and patterns.
The colors do not need to be the exact same but similar in tone, to create a cohesive basket wall. One other thing to consider is to using an odd number of baskets on the wall. It will help balance with an odd number.
Next is to decide how you want to place your baskets on the wall. You can draw out a pattern on paper or lay them out in the floor first.
I chose to go at a diagonal pattern with the three large placemats as my focal point.
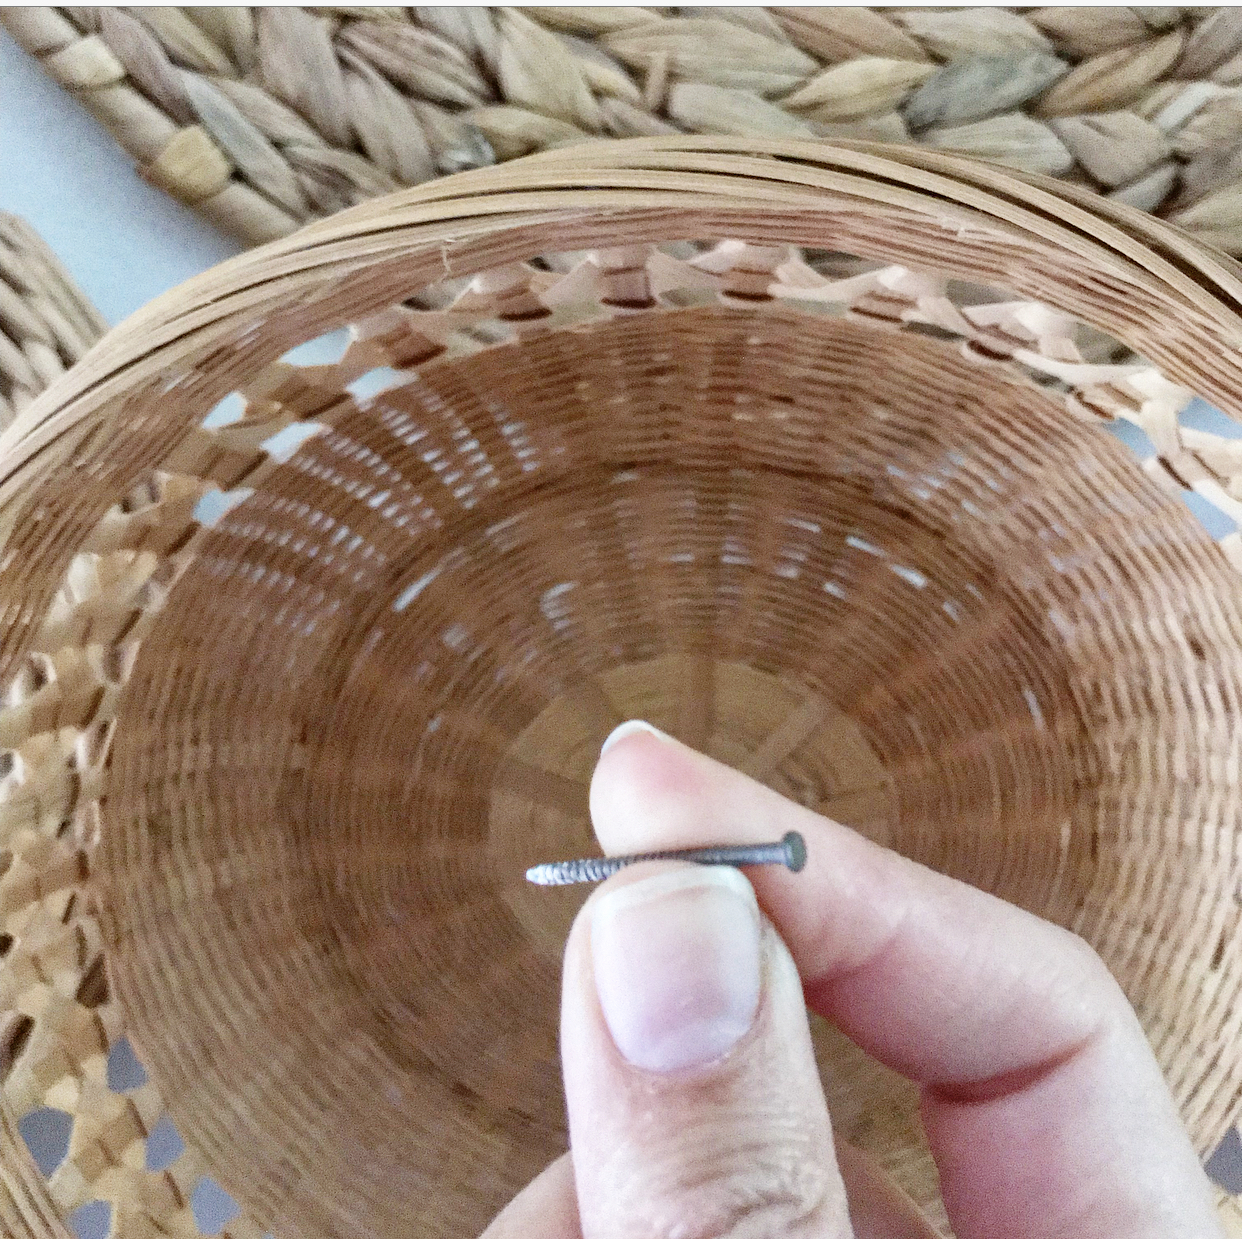
You can also lightly draw with pencil to mark where to hang each basket. I like to use very thin nails, called finishing nails, to hang the baskets with. They are small enough that the basket can hang on plus they won’t be an eye sore because they will be hidden by the baskets.
I also enjoy adding touches of greenery throughout my basket wall. Now, be honest, what do y’all think? Do you have a basket wall?
I hope you hop on over and visit my friends to see what they have found on their thrift store finds this month!
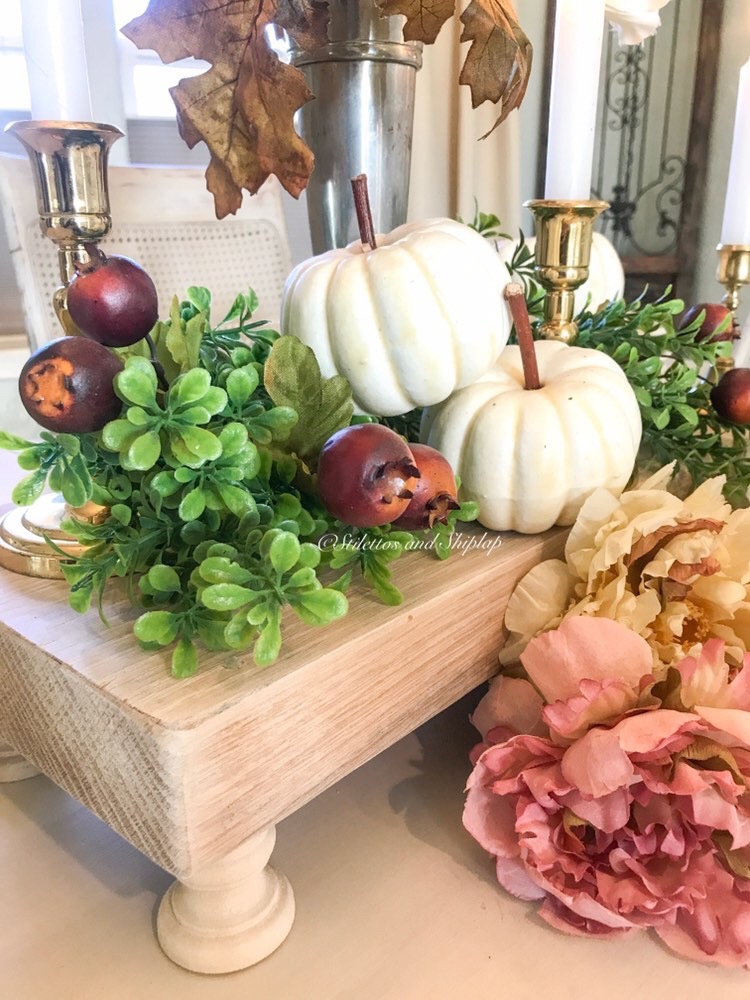
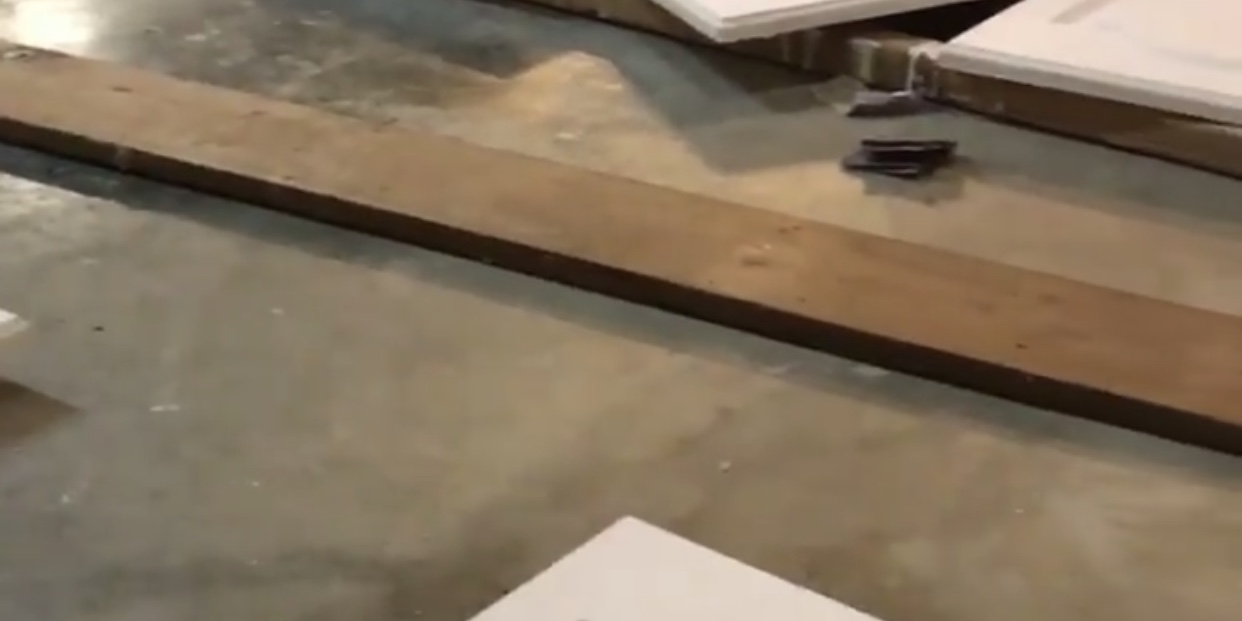
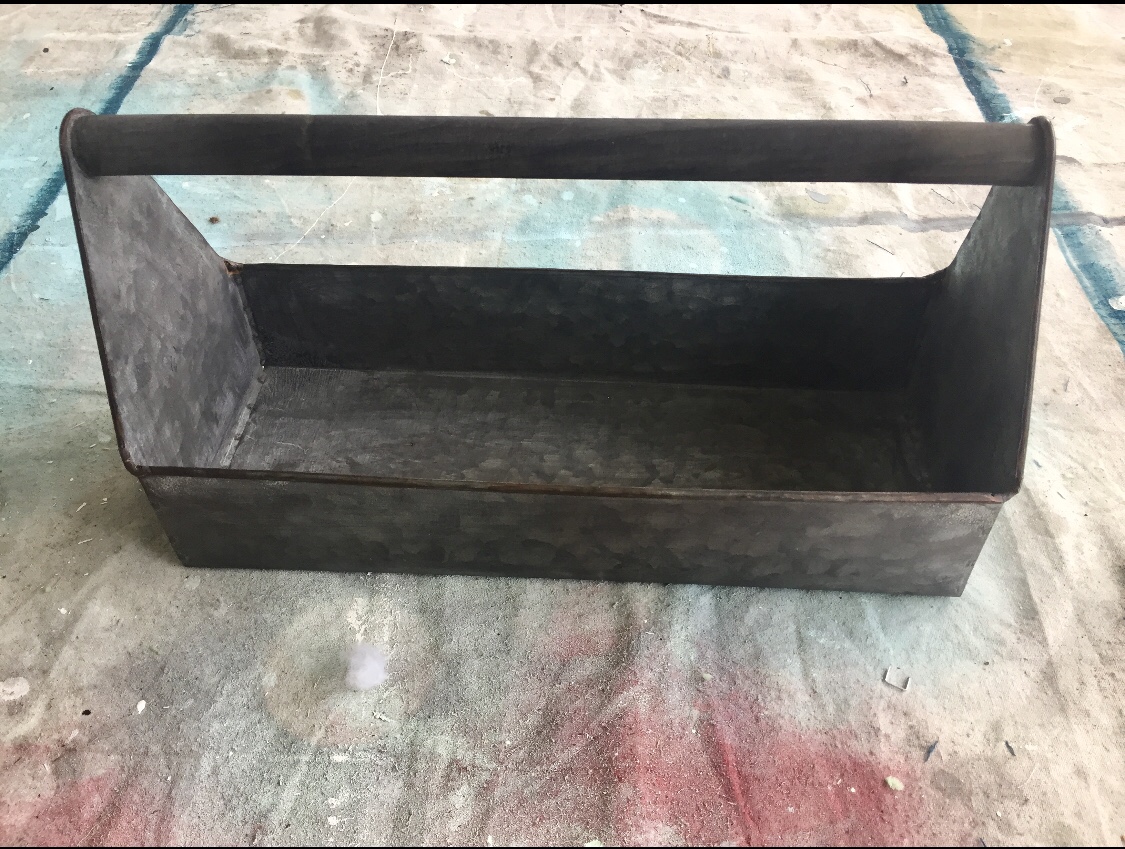
Hey ya’ll! I was invited to team up with several talented ladies for a challenge this month that is hosted by Terrie from Decorate and More with Tip . The challenge rules were to take a piece of wood and make anything fall décor related. I knew the perfect piece of scrap wood that we had leftover from the tv accent wall. This wood is 100 plus years old and just stunning!
I have been wanting a cute wood picket fence type fall sign for awhile, so when Terrie invited me on this challenge, I knew I had the perfect piece for the project! I gathered all of my painting supplies and got to work!
I used craft paints and small brushes from Hobby Lobby that I already had on hand.
I also lightened the colors I had with Ibis White that I had on hand from Sherwin Williams. I accented everything in black to bring out all the pumkins cute-ness. I also highlighted with white.
I am so blessed that God has given me the ability to paint! When our oldest two daughters were younger, I painted canvases to make extra money, along with wall murals.
I hope you enjoy our blog hop! Check out my friends too! They have amazing talent!
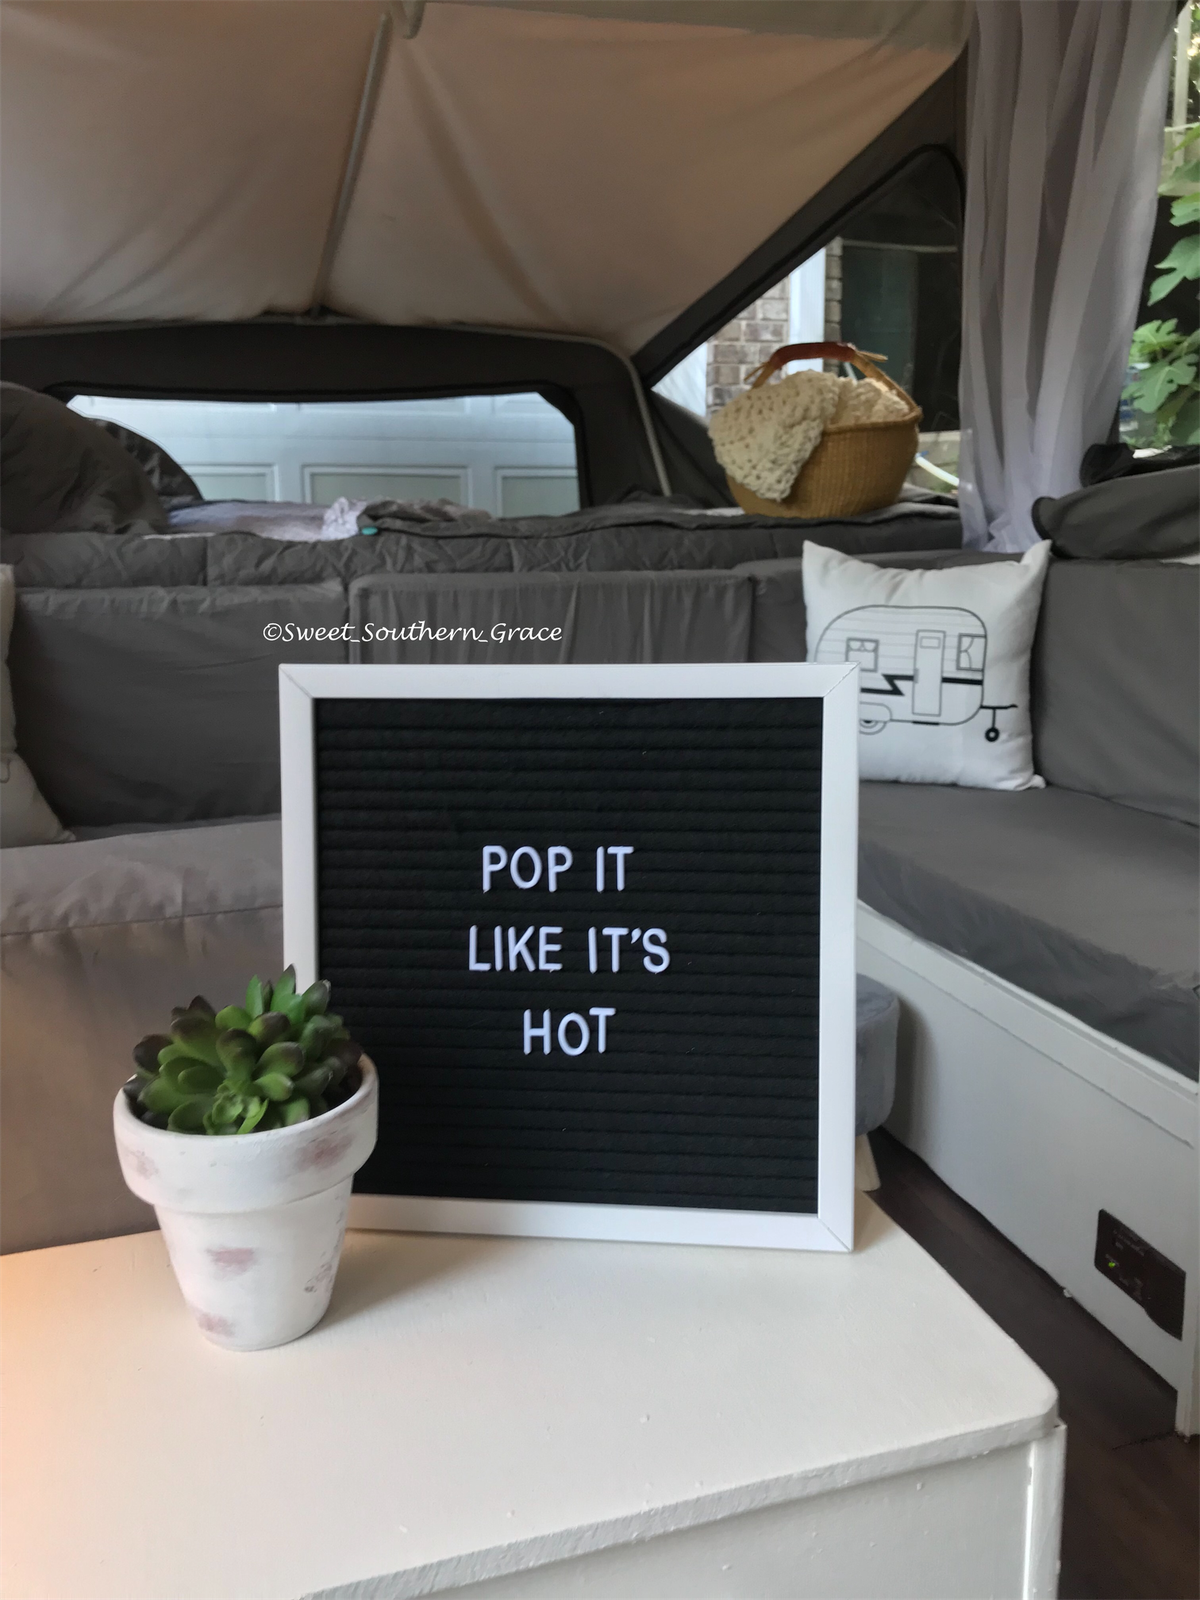
For this month’s Clearance Challenge, I knew exactly what I was going to use for the challenge. I headed to our local Five Below store before our vacation (check my IG highlights/posts) to grab a few items for our newly renovated pop-up camper. Do y’all know what amazing items they have in this store and all for under five bucks?! Ok, ok, let me show you! I bought a black and cream boho chic rug and a cute little gray fuzzy foot stool for the camper. Both were $5 each!
I also purchased a gray and white plastic outdoor mat for $5. It worked perfectly for our “front porch” area on the outside of the camper.
But, perhaps the best bargain of all was the felt letter board that I found on clearance for $1! It was regularly priced for $5, but when I got to the register, it was on clearance for $1!
See? You really can decorate your home or camper, while being budget friendly. I hope you take a moment to hop on over to each of my friend blog’s and see what these creative ladies have found on clearance. I promise you will not be disappointed!
Lots of summer vacation vibes from our family to yours!
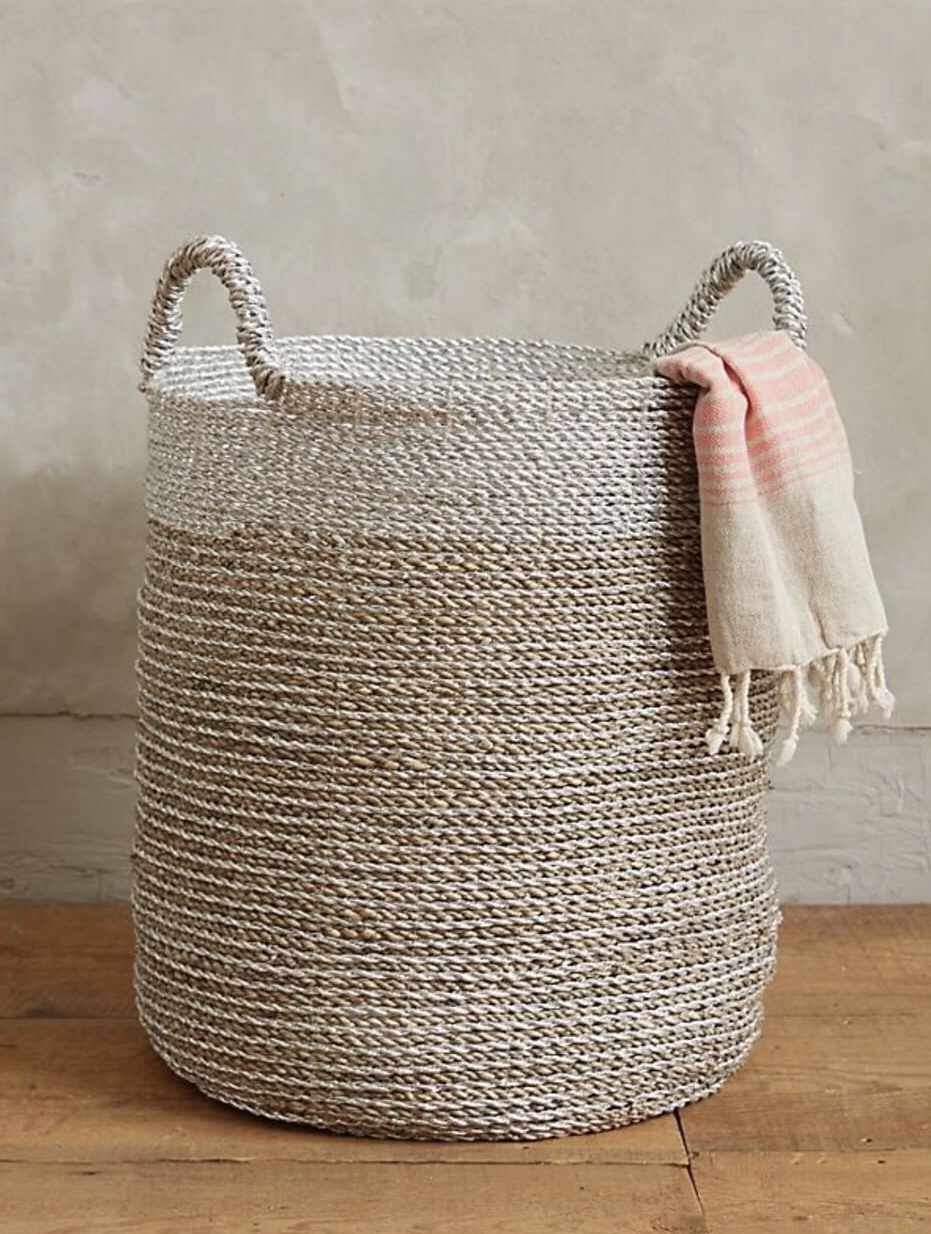
I love teaming up with my blogging friends when they ask if I’m up for a challenge! Terrie from @decorateandmorewithtip asked if I would like to be involved with her Anthropologie challenge and I knew I couldn’t say no! Today, I want to share with you a challenge for a DIY Anthropologie basket! I wanted to try making mine look slightly different from the one in the picture.
I used this rope from the Dollar Tree and a crochet yarn from Hobby Lobby. I only used two strands of the rope and a very small amount of the crochet yarn.
I started the basket by winding the rope around and wrapping the yarn around the rope, two layers at a time. I used my crochet needle to push the yarn through the rope.
It was relatively easy to make and I could have easily made it a lot larger. I have enough rope and yarn to make another basket!
I think that it definitely did not turn out how I envisioned but it is definitely a start and something to work with or build on in the future! I added my Christmas cactus to my basket and styled it in our newly renovated pop-up camper! I hope y’all enjoy checking out my friends and how they each made their own version of this basket!
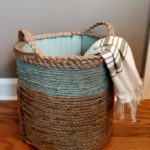
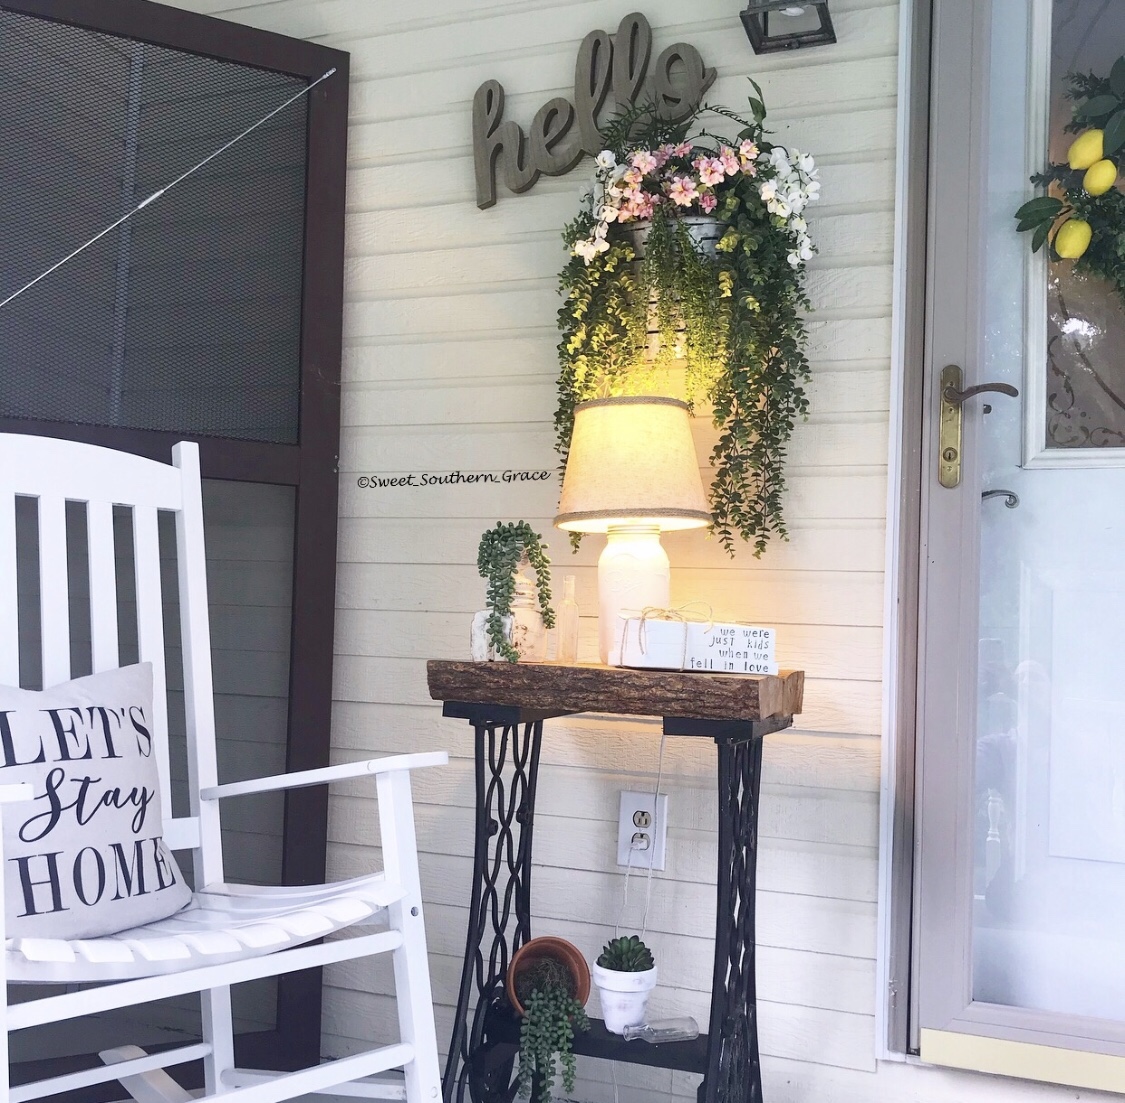
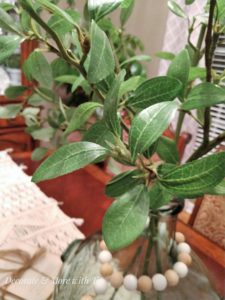
I have been wanting to add more touches of summer to my front porch décor. I decided to head to my local Hobby Lobby and browse to see what I could find! It didn’t take long for my creative juices to start flowing! I just happened to see this galvanized wall planter for $9 and thought, by adding greenery and flowers that it would be the perfect touch for welcoming guests into my home.
I knew I had several hanging eucalytpus bushes from Hobby Lobby that I could use in my planter. I always buy them when they are on sale for 50% off or use a Hobby Lobby 40% off coupon, which will make them $7-$8.60, depending which coupon you use.
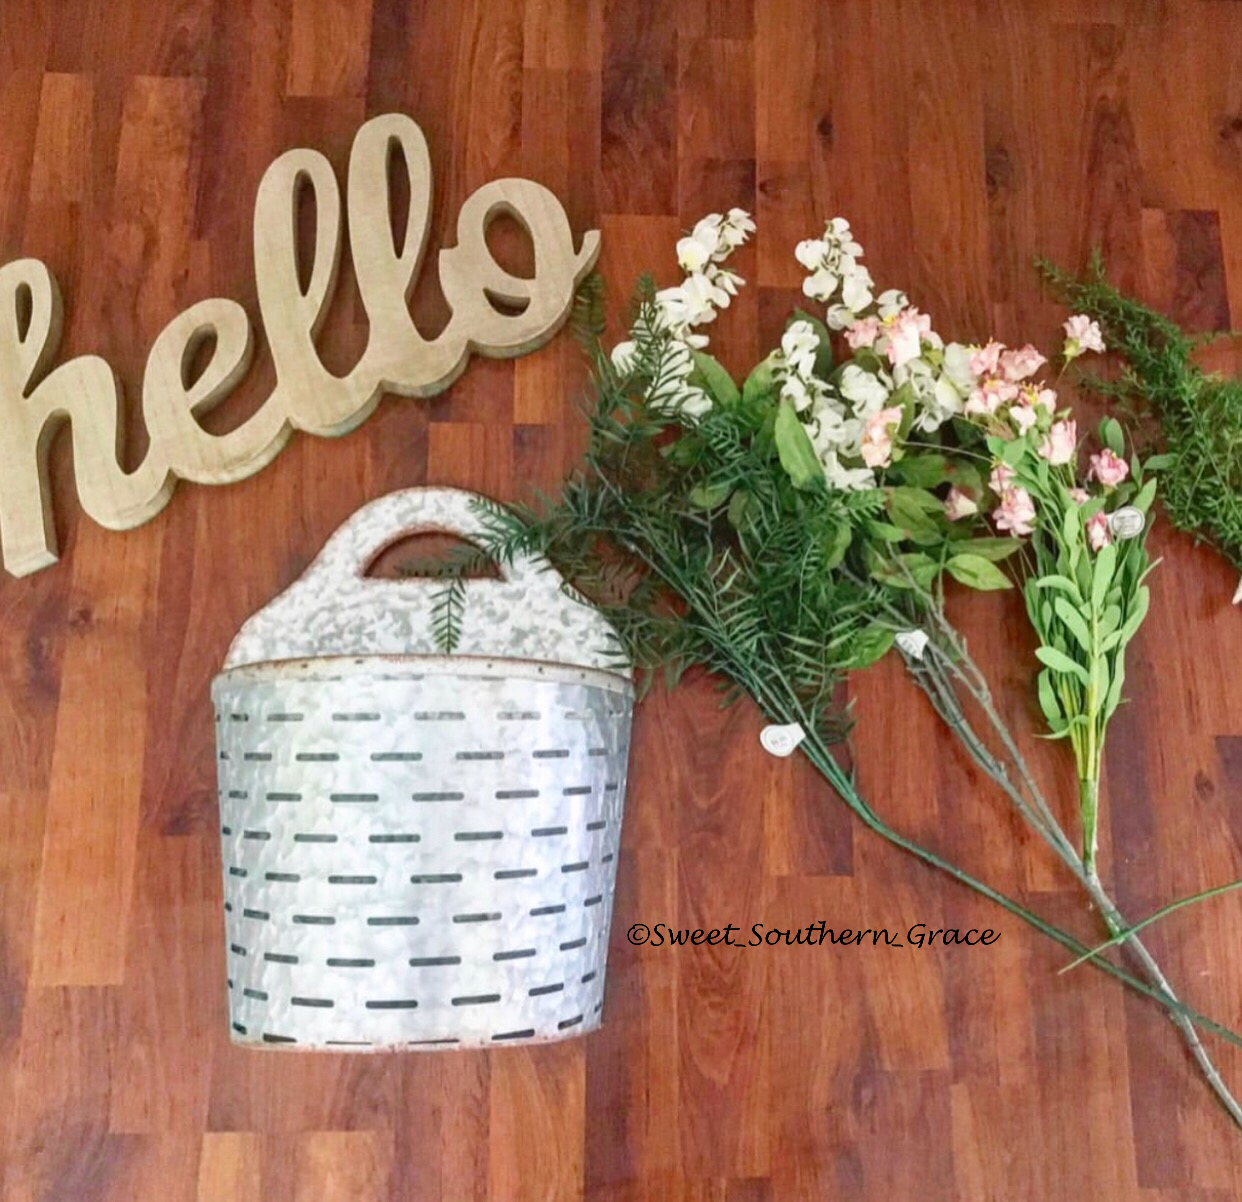
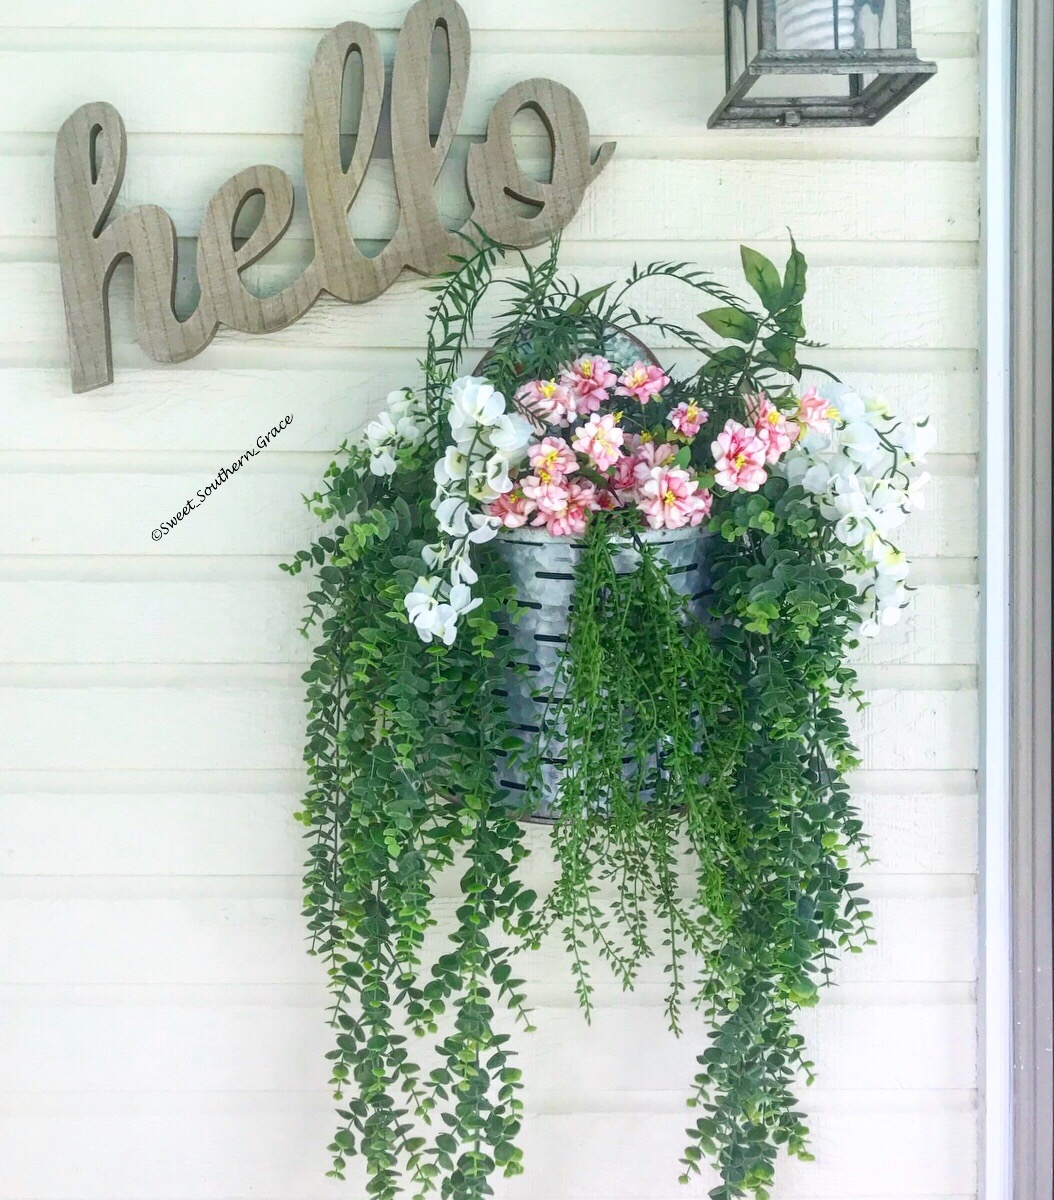
I also grabbed one cream wisteria stem , along with a pink flower stem set and one columnea bush . I also purchased a green weeping willow hanging bushes. Remember, all of the greenery and flowers were all 50% off or items i already had on hand! The “hello” sign caught my eye and it was also 50% off and for $12, I thought it would look great above the planter! I actually took apart the wisteria and pink flowers to spread throughout the planter.
I spent around $35 dollars to update a beautiful spring/summer look to our front porch. Before shopping, I always check my décor to see what I have on hand, before purchasing any other items. A lot of times, I can “shop” my own décor in my home!
Check out my friends below to see what they found on their Clearance Challenge for the month of May! I hope y’all have a wonderful week!
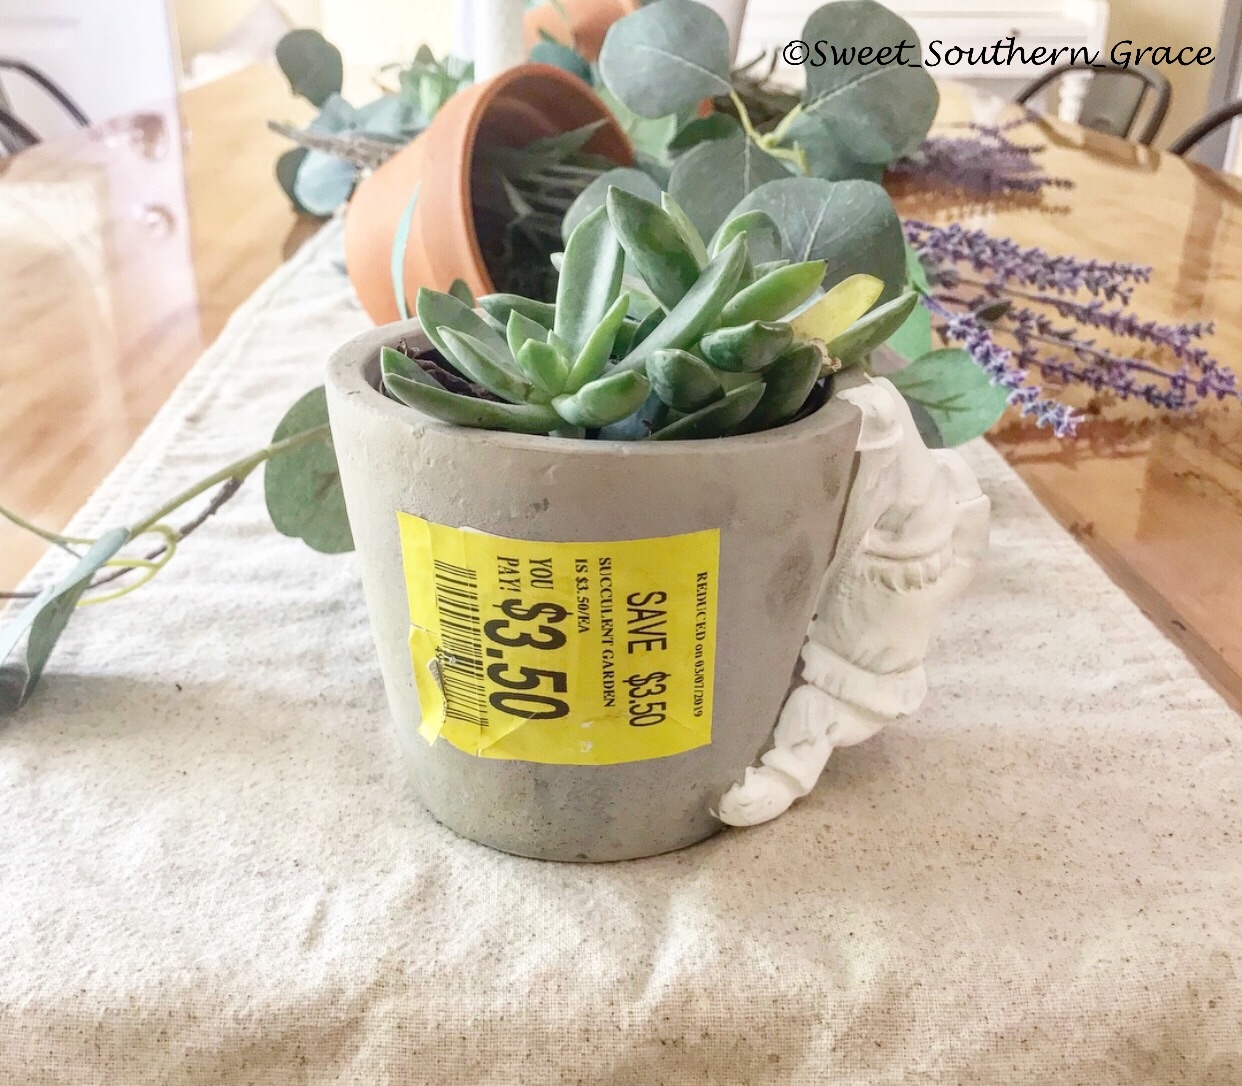
I have teamed up with several of my blogging friends to a Clearance Challenge. We were challenged to find a home décor item under $15. I had been eyeing the succulents at Wal-Mart for awhile. About a month ago, I noticed that they were on clearance for under $4.00 each, so I headed back to Wal-Mart to find my succulent.
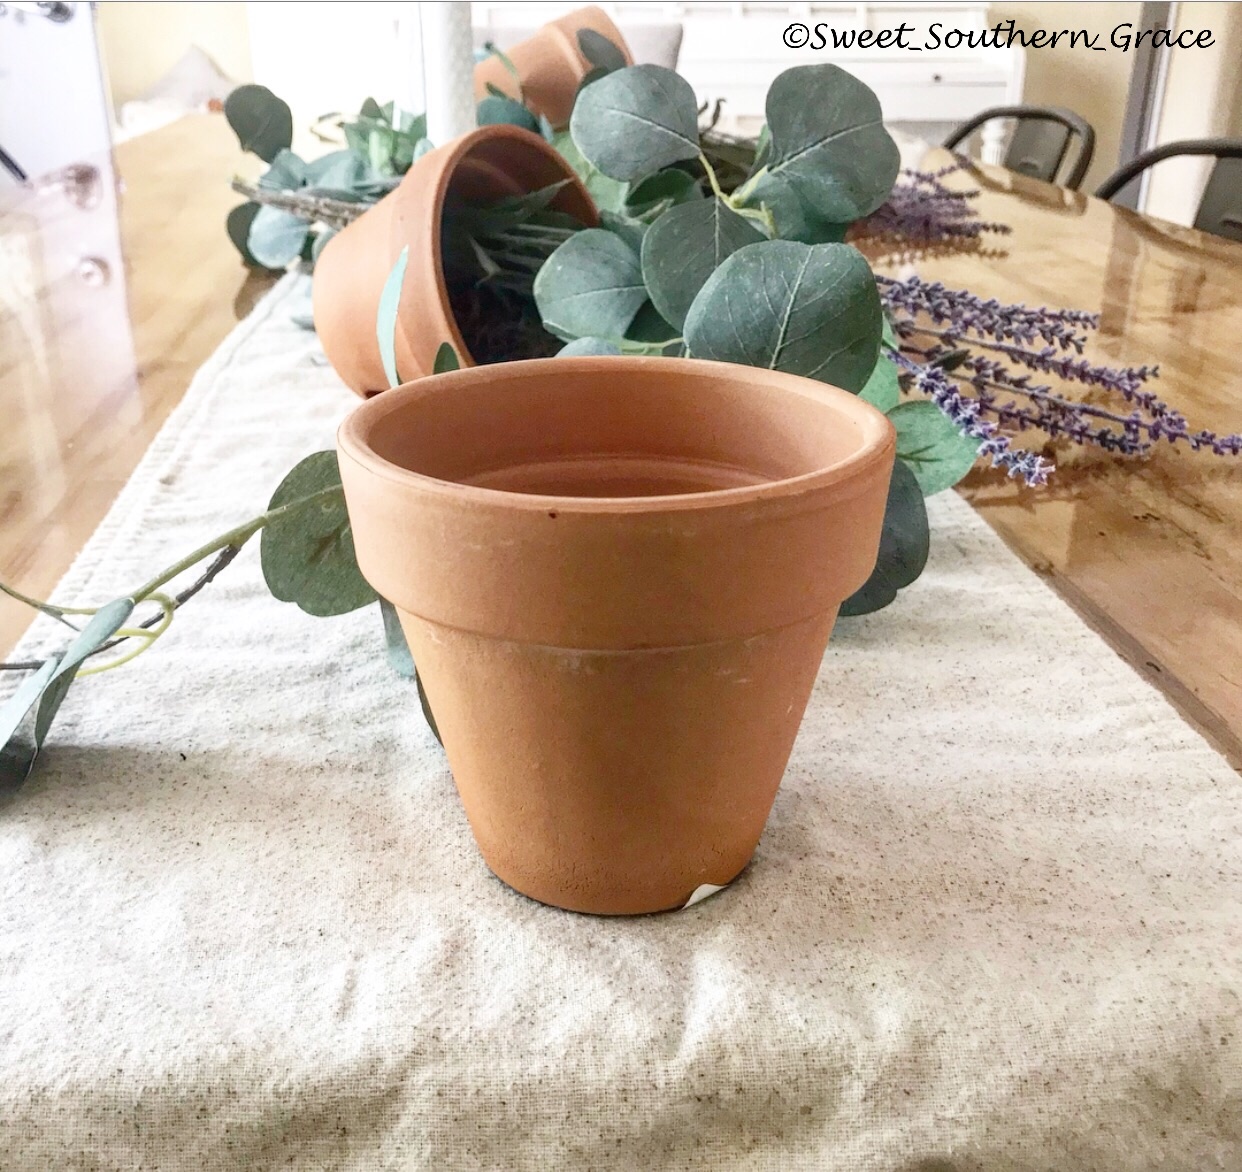
Now, these succulents definitely needed some tender loving care! This one looked like it had been over watered. I am hoping I can bring it back to life! I did not like the pot that it was planted in, so I purchased a new terra cotta pot for under a dollar! I decided to “age” the terra cotta pot.
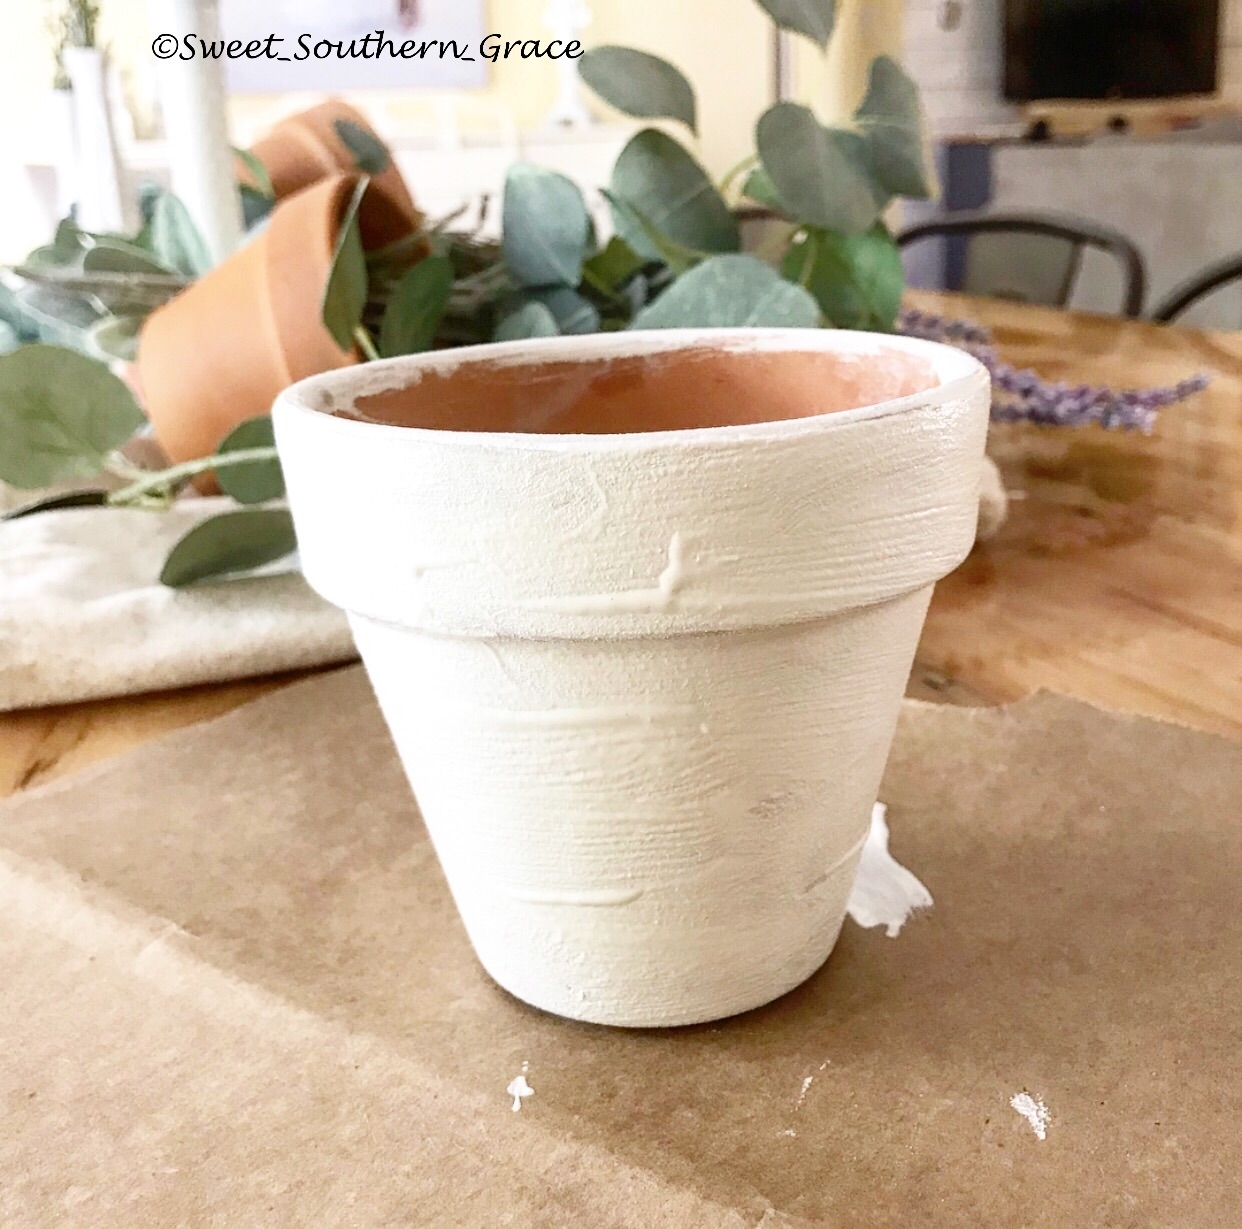
Now, y’all know I love me some chalk paint! I decided to use my DIY chalk paint recipe to age my terra cotta pot. My recipe is 1/2 c Sherwin Williams latex paint in Extra White, 1/4 c baking soda and 1/2 tbsp. water. Mix well until there are no lumps.
Apply one thick coat of chalk paint with a dry brush. With a damp rag, remove some of the paint and allow the remaining paint to dry.
At this point, you could leave it or add one more coat. I chose to add another coat. I painted another thick layer.
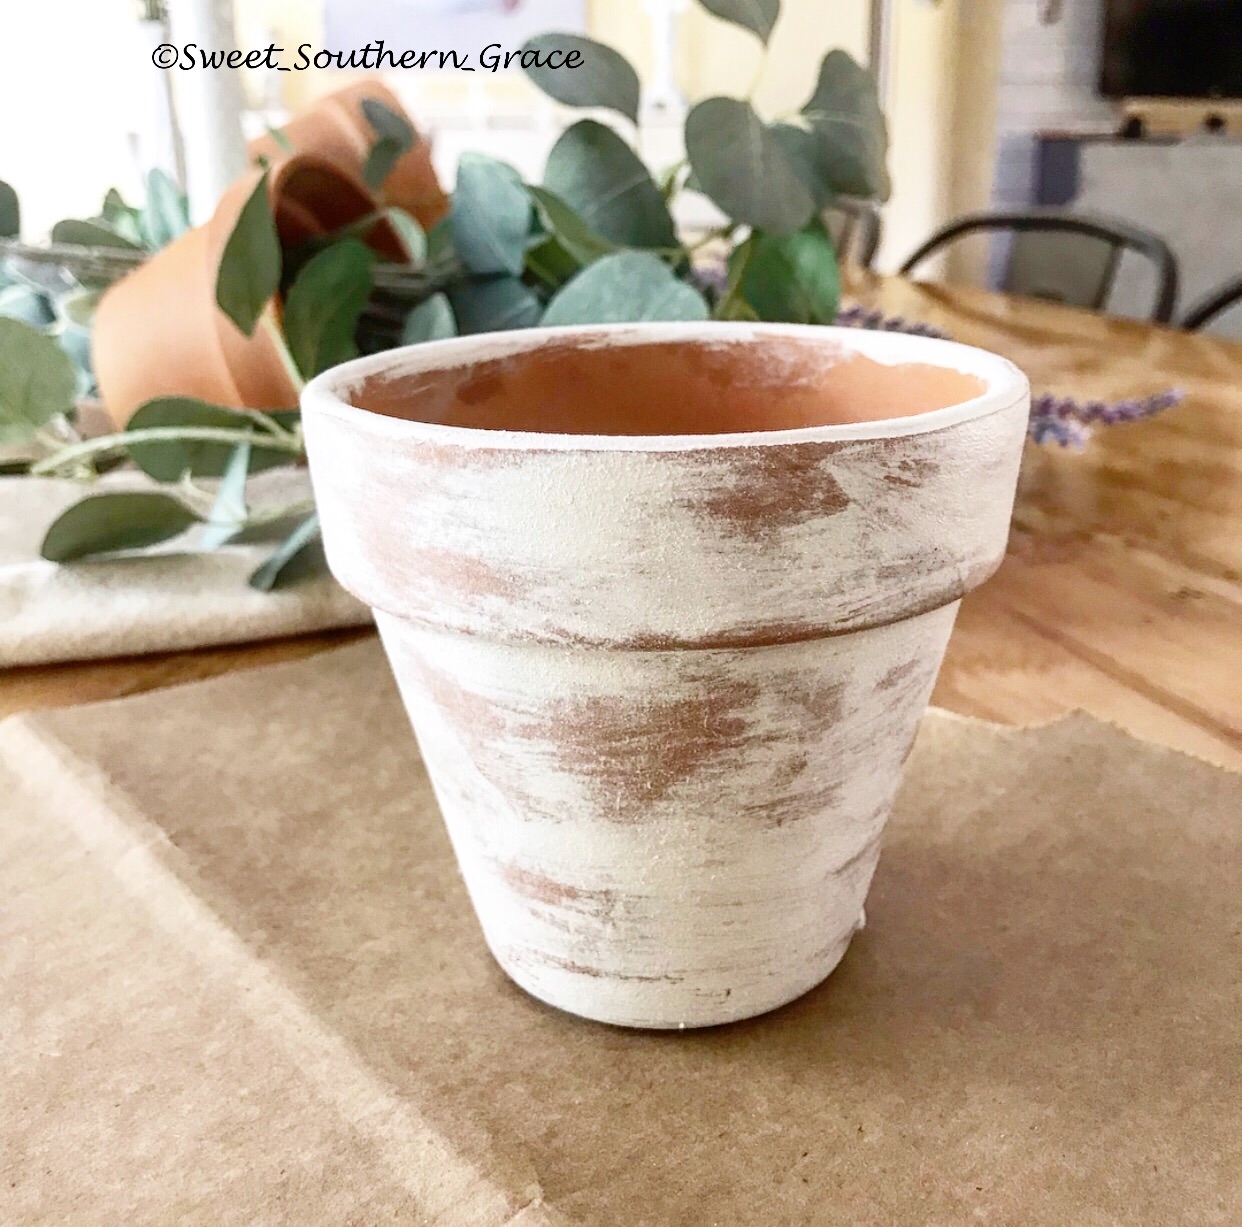
Once the second coat is tacky to the touch, rub the paint off with your fingers. I also used the damp rag to help achieve a more chippy finish. Please excuse the black spray paint on my fingers. (Project from this morning.)
Here is the finished result! I love how it turned out! For this Clearance Challenge, I spent $3.50 on the succulent from Wal-Mart and $0.74 on the new terra cotta pot. The painting supplies, I already had on hand. Total spent with tax is $4.60!
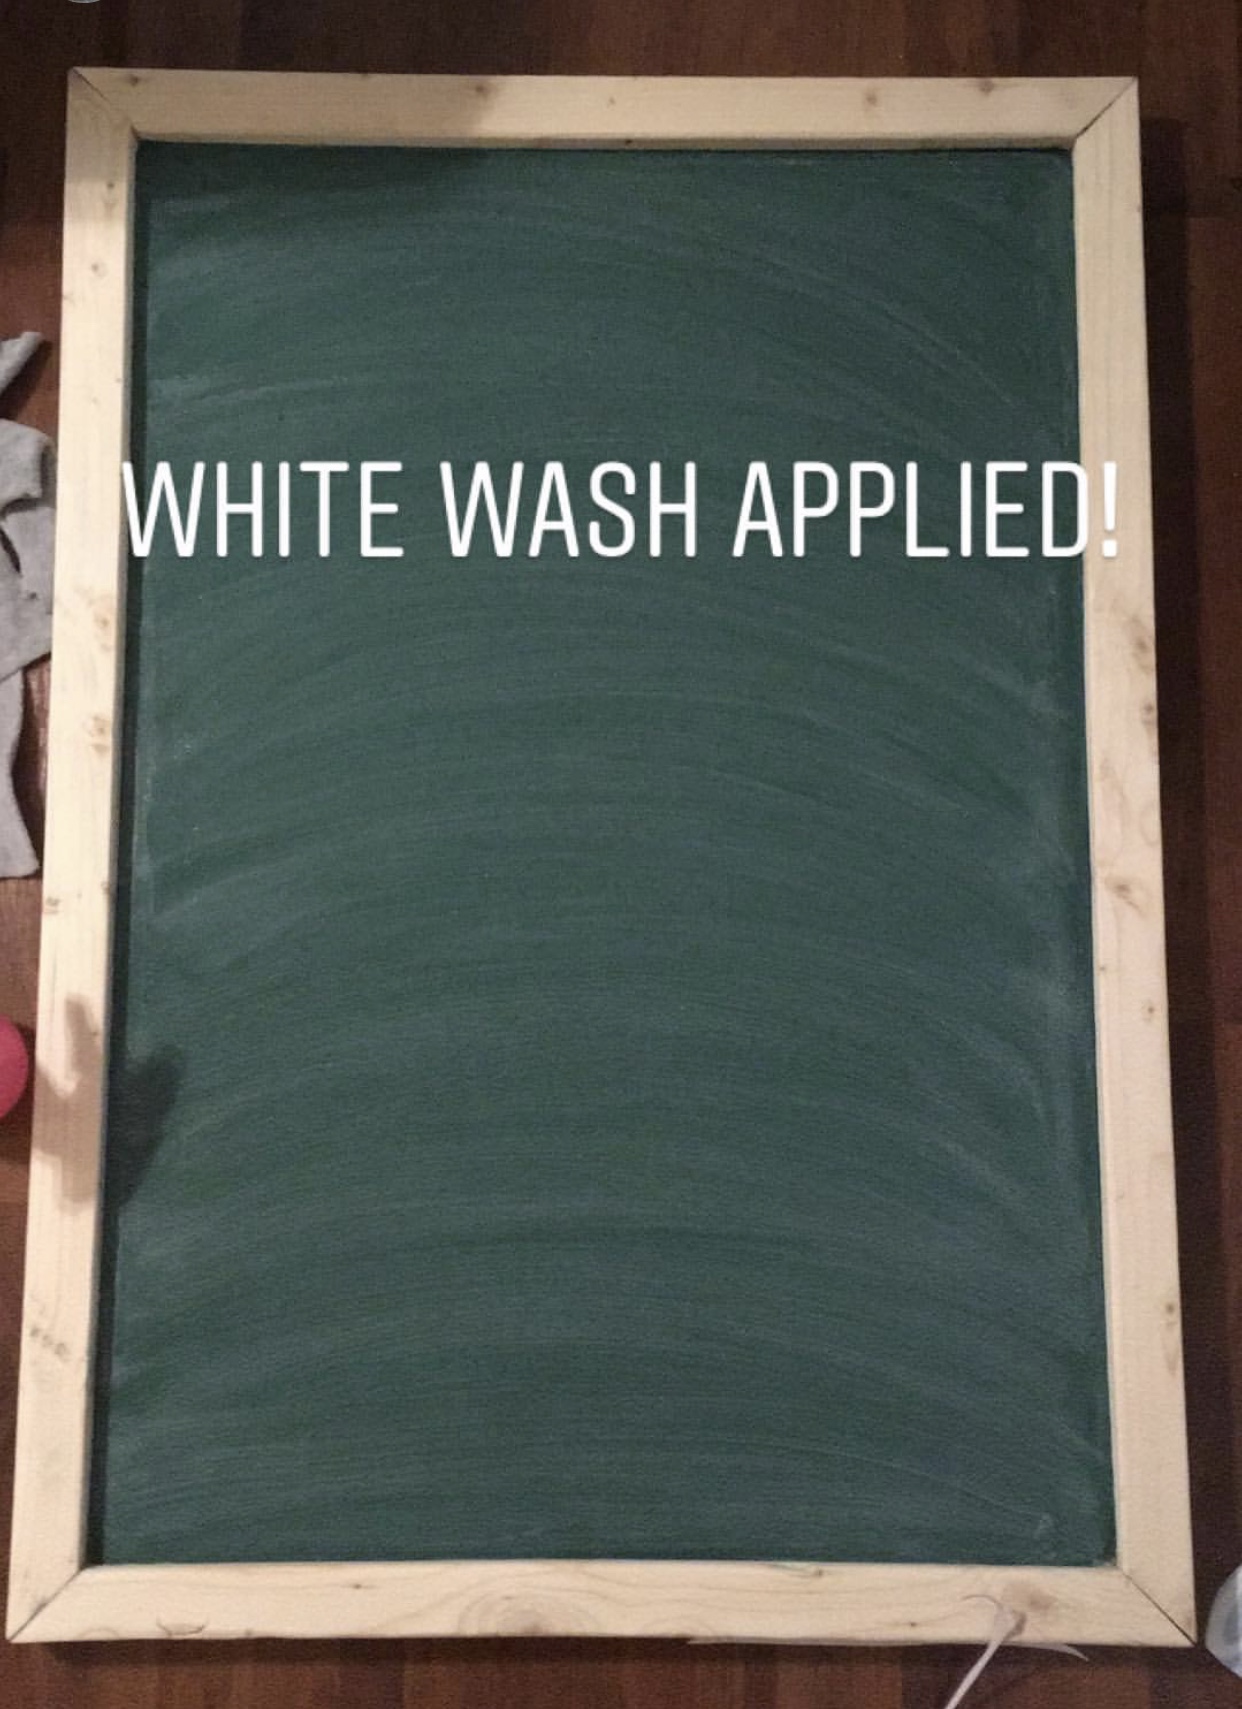
I have been planning for months to make a mini flower market display in our entry way. I asked my husband to make the sign double sided and around 30×20 in size. He cut a sheet of plywood, in the size I needed, for the front and back of the sign. For the trim, he used a 1×1 pine board.
I painted the inside of the sign with Rust-Oleum Chalk Board Paint in School House Green. It reminds me of the color of the chalk board from when I was in school!
Next, I applied a white wash to soften the green up, just a bit. My technique for the white wash is to add a little water and a tad bit of paint. I use a rag and swipe over the paint in a rainbow pattern!
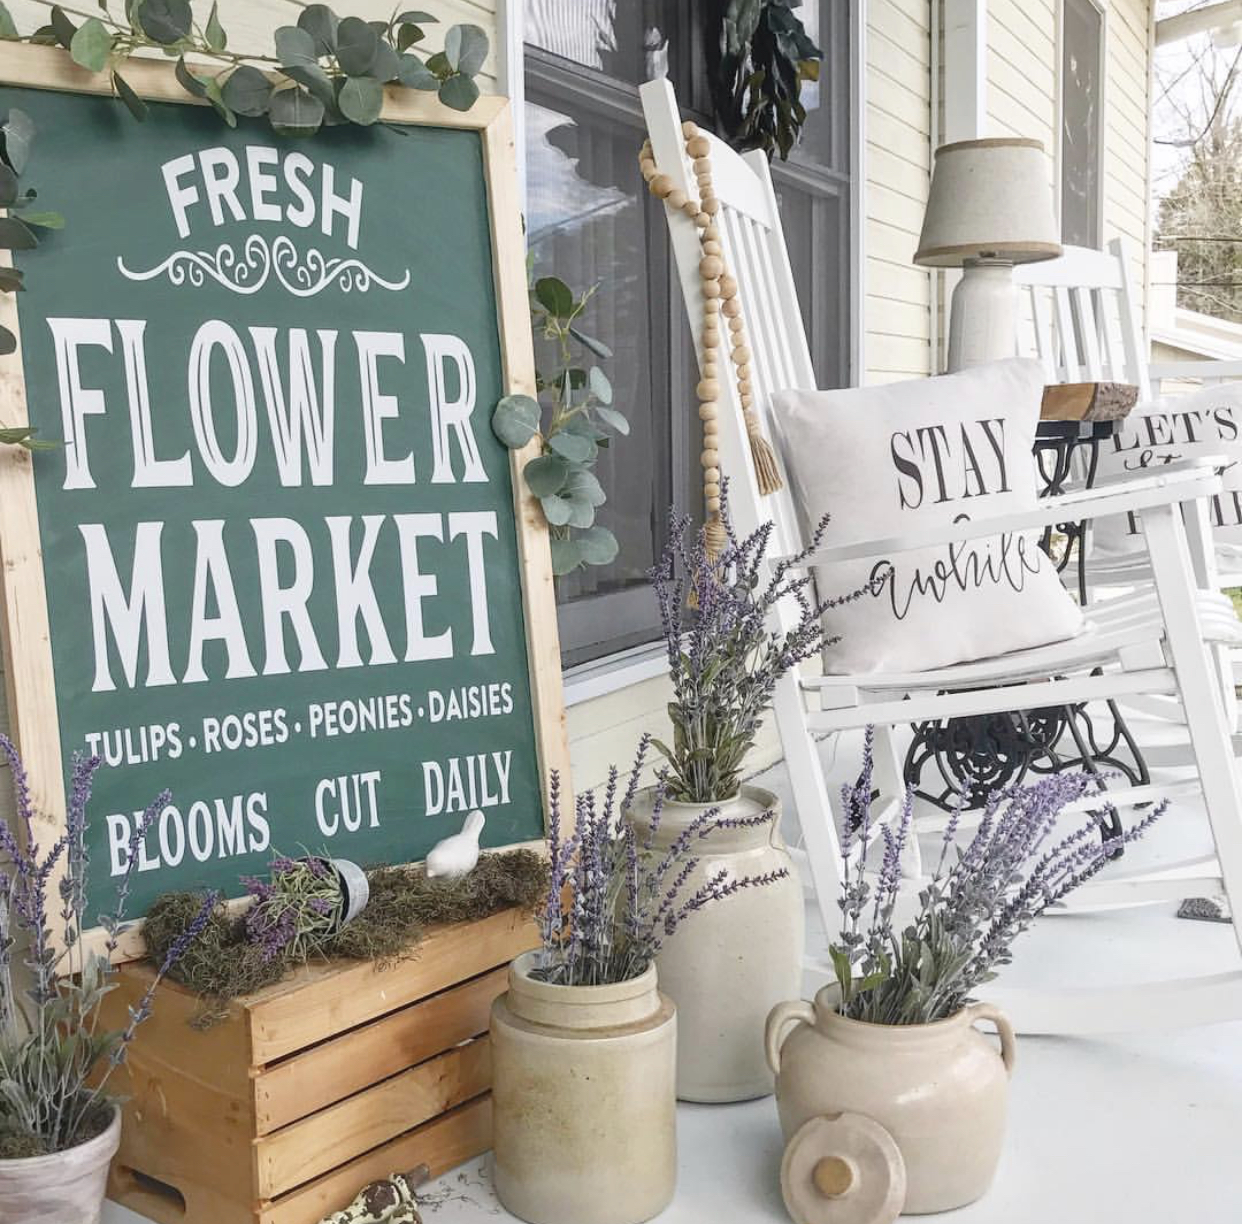
For the wording on my sign, I purchased a file from the Silhouette Store called Fresh Flower Market. I cut, weeded and applied the design to my sign.
This is a simple diy and I love how it turned out! I have even used the sign on my front porch for décor!
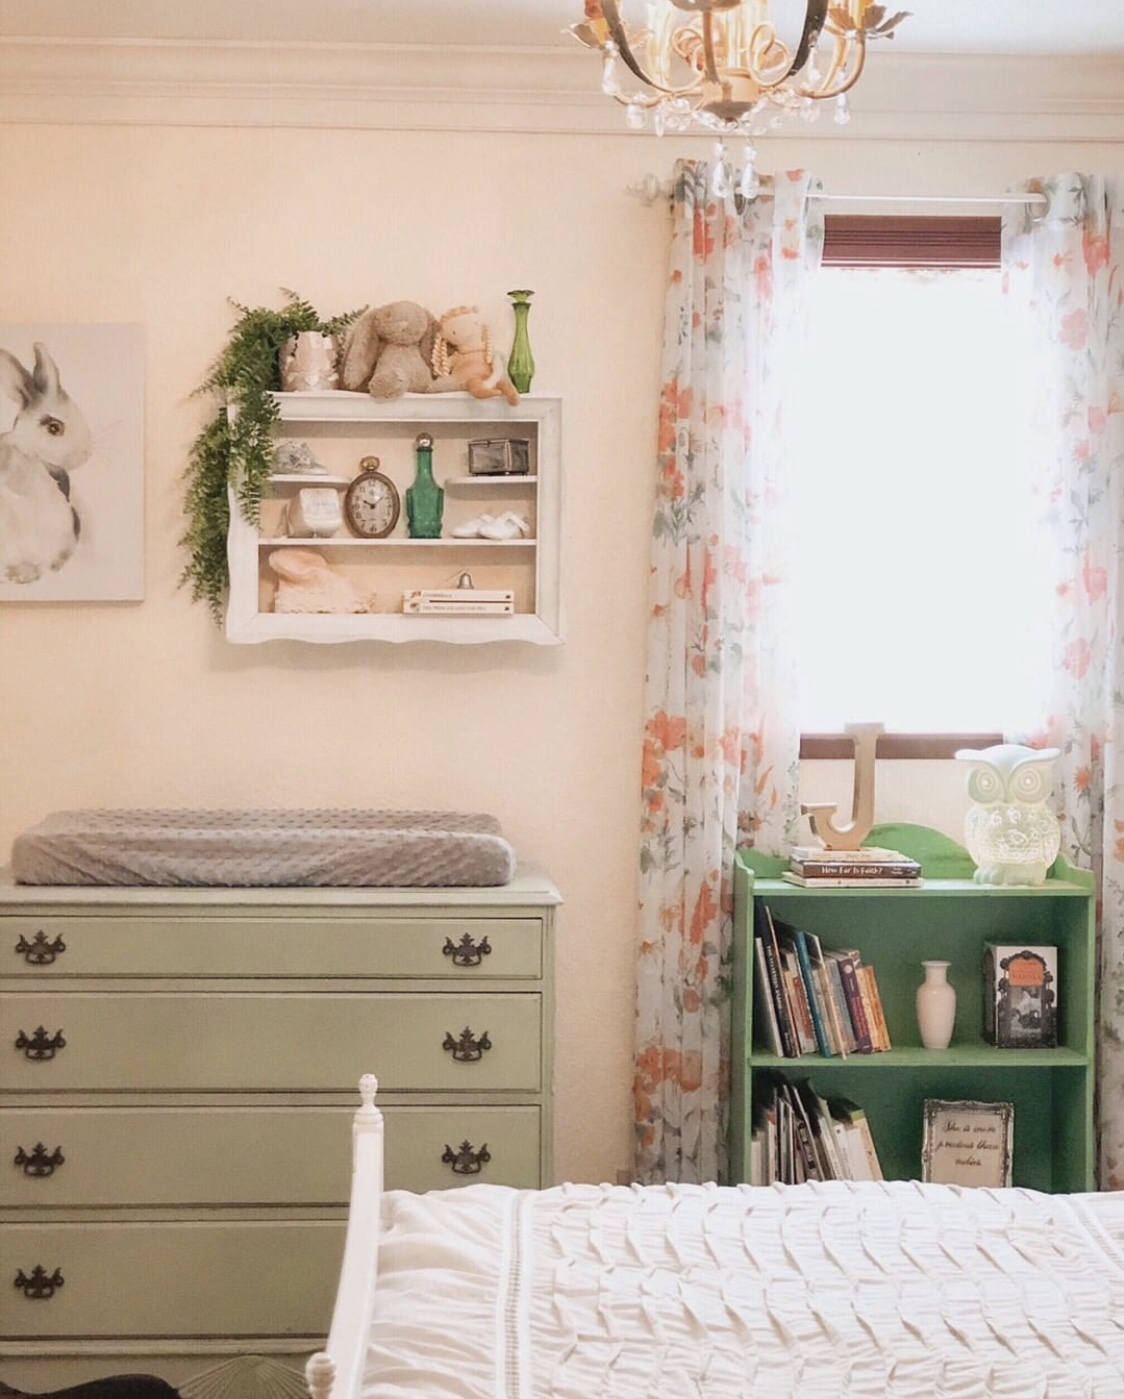
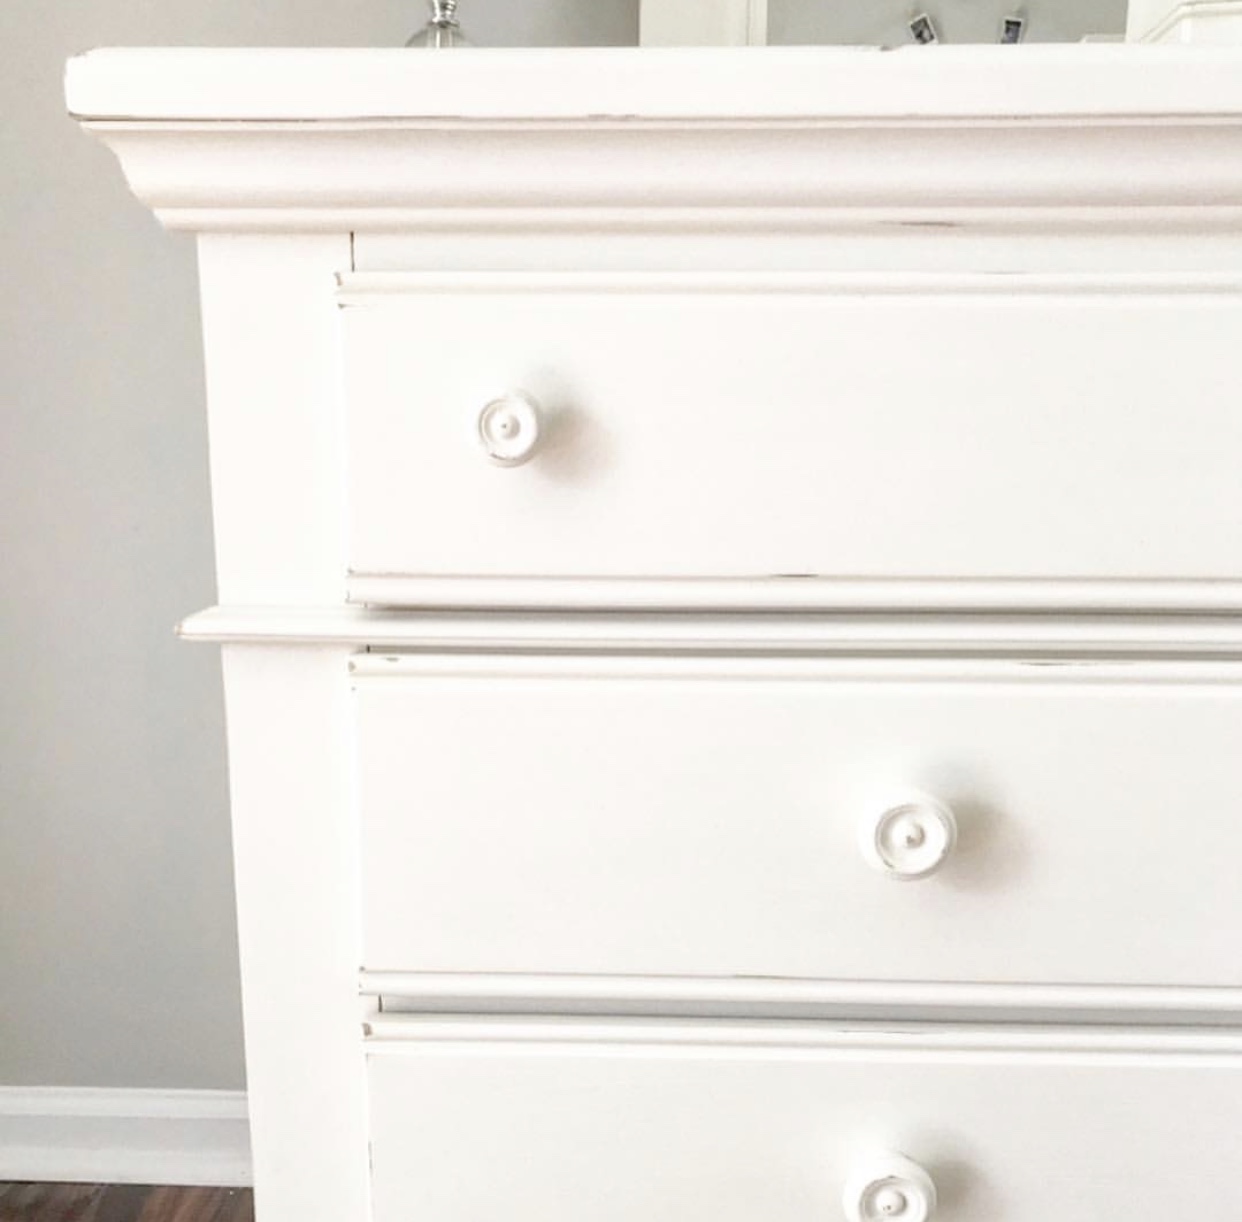
Have you been searching for the perfect diy chalk paint recipe? I have a tried and true recipe right here! The best thing is it is very budget friendly for under $45!! Last week, I decided that one of our daughter’s furniture could use a face lift, per say. After all, this furniture is a good 15 years old. We have moved a few times and it had a few dings in various spots. Those natural “dings” on the furniture would be perfect for chalk painting! I could sing chalk paint praises, all day long! It is the most hardiest paint that I have ever used! I absolutely love it!
Mix 1 c paint and 1/2 c baking soda very well with a plastic fork, until you see no lumps. Then your going to mix the water until incorporated well and there are no lumps.
I use a Wooster Paint Brush from Home Depot. You do not want to use a cheap paint brush because you will be left with bristles in your paint and lots of brush strokes. I can not stress this enough!
The very first thing you are going to want to do is clean your piece very well with a damp cloth. Next is lightly sanding your piece. The reason is so that it gives the chalk paint a little something to grab onto. After sanding, clean your piece really well with a damp cloth again.
As you can see in the pic above, this was before cleaning and sanding, it definitely needed to be cleaned.
When you begin painting, paint in the direction of the grain of the wood. So, if your wood grain is horizontal, you are going to paint, horizontally. If the direction of the grain of your wood is vertical, you will be painting vertically.
When you are painting a long piece of furniture, like a dresser, I like to have one long paint stroke, at a time. I will start at the top and go all the way down and continue until the entire top piece is finished. Chalk paint dries really quickly, so you will need to work fast. When you have the entire piece painted with one coat, the paint should be dry within a couple hours, you can lightly sand over the first coat. You are going to be sanding in the direction of the grain of the wood. I use 120 grit sand paper for sanding. I like to lightly sand in between coats because it will lessen the chance of having a lot of brush strokes. After each sanding, wipe down your piece with a lint free cloth. Most pieces are going to need three coats of chalk paint, depending on how much coverage you are wanting for your piece. I always do three coats, with light sanding in between and wiping with a clean dry cloth.
In the above picture, I wanted to point out that sometimes when you are lightly sanding in between coats, that your piece may automatically start to kind of distress itself. That is ok, so don’t let it worry you. After you have painted all three coats with lightly sanding in between, you are now ready to distress your piece. I don’t like super heavy distressing, so my distressing is somewhere in between light to medium distressed. To distress, you are just going to take your sand paper and lightly sand in the areas of your piece, as to where it would naturally wear.
Now you are ready for your wax! Waxing provides a wonderful layer of protection for your chalk painted furniture. I always use two coats of Martha Stewart Vintage Clear Wax from Michael’s. It is under $10 with a coupon. Depending on the amount of items you are painting, will determine how much wax you will need. I needed two bottles of wax plus a little bit of another bottle. I painted six pieces of furniture. A bed with headboard and footboard, dresser with mirror, side table, desk and chair. I think it is best to use a lint free cloth with your wax. You do not want to have any dust or hair that can get trapped in the wax, as you are applying or as it is drying. To apply the wax, grab a quarter sized amount and begin waxing in a circular motion until you’ve waxed your entire piece. Allow the wax to dry for several hours and apply a second coat. Once the wax dries, I allow 4-6 weeks for the paint to cure before setting any heavy items on my chalk painted furniture.
You can also check out our You Tube Channel for a more detailed video of how to make your own chalk paint and painting your furniture piece.

 Step 1-Draw Up Plans


 You can also check out our
You must be logged in to post a comment.