DIY Dollhouse Kitchen Backsplash

I am excited to share about a project that is near and dear to our family’s hearts. When our #3 daughter was turning 2 years old, my husband and I designed and built a wood kitchen set for her!

This is our number one, two and three daughters decorating cookies for Santa! When we built the kitchen set (far right), we also build a table and chairs set too. This photo is circa 2014.

When their baby sister came along…

Photo is circa early 2016!

…and we couldn’t wait until our youngest two were able to enjoy playing with it together! We have had this in our home for the past 8 plus years! Plus, all of their cousins have enjoyed coming over to visit and play with it too! How special!

I chalk painted the kitchen set and table/chairs set in white! Photo is circa 2018.

DB7C189D-A806-4E63-A7DC-7BACDFCADCA3

Now that the kitchen set has been outgrown, I wanted to repurpose it into something that would be enjoyed for a few more years to come! I thought it would be cool to turn the kitchen set into a Barbie ”Bardominium” Doll House. The first if it’s kind, I believe. Fitting for our family, as we’ve been building our barndominium for the past year and a half!

DIY Challenge with Glue

I’ve teamed up with my sweet friend (host) Terrie from Decorating & More with Tip, plus several other blogging buddies! Our goal is to do a diy type of project with any kind of glue. Challenge accepted! My glue of choice is hot glue!

Doll House Kitchen Backsplash 

After we reconfigured the kitchen set into a dollhouse, I knew I wanted to ask my youngest daughter, what she wanted in her dollhouse. Definitely a kitchen, bedroom and bathroom. Ok. Those are attainable.

This is during the demolition process of the kitchen set!

And this is part of the after. We salvaged every piece that we thought we could repurpose in some way.  

As I dove into all things dollhouse related-scale sizes of Barbie furniture, how to make little accessories, wood for building, ext, I thought about popsicle sticks for the backsplash in the doll house kitchen. Wait. Let me back up for a minute. If your new here, we did a wood herringbone backsplash for our barndominium kitchen. Check out our IG post here. Naturally we needed that in our dollhouse too, right?! 

Dollhouse Plans

I always roughly draw up plans for whatever project I’m working on. Here is my drawings for the front and back of the dollhouse. Also, keep in mind, this is our version of a Barbie Dreamhouse, “Barndominium Addition” and made to look like our barndominium. 

Front of the Dollhouse Rough Drawing.

Back of the Dollhouse Rough Drawing.

Dollhouse After

This is the dollhouse after we rebuilt it from the girl’s kitchen set. This is with almost two coats of paint! I had a great helper! Our youngest babe!

Supplies needed:

• Hot Glue Sticks

• Hot Glue Gun

• Wooden Popsicle Sticks

• Scissors 

Herringbone Pattern Backsplash

The task may seem daunting but it is achievable! We used the herringbone pattern backsplash in our kitchen as a reference! The herringbone pattern started at the bottom edge of where the dollhouse countertop will go and continued making it’s pattern,  all the way to the top. Then continued until both kitchen walls had been completed! 

Photo from welshdesignstudio.com. 

Measure 

Basically, whatever size herringbone design you decide to make,  which in our diagram is represented by the letter ‘W’, make your cuts based on the size of your space.

This is my very rough drawing.

It’s basically a math equation based on height and width. The dollhouse was a little different than our actual kitchen backsplash. Check out welshdesignstudio.com to follow their mathematical equation!

Cut

I suggest cutting your pieces in sections, in case of any mistakes that are made. There will be some as it was a learning curve until I figured out that we could easily do a herringbone pattern if I made a math equation from the size of the space for the herringbone pattern. It’s kind of like simple algebra!

Stain, Paint and Protect 

Stain or paint your wood. Since this was a dollhouse, we decided to leave the wood bare. Our kitchen backsplash in our home has two coats of poly in clear matte.

Lay Out Pieces

I suggest laying out your pieces first, which will help insure less mistakes! Trust me, we made some with the kitchen wall! 

Add Wood

Now we are ready to add the wood to the space! Herringbone is such a beautiful, classic pattern to add to any home or dollhouse in our case!

If you don’t succeed, try, try again!

I tried three different options for the dollhouse kitchen backsplash before the third one worked! First was to draw on shiplap with a pencil then trace with a black permanent marker. Second, I tried horizontal shiplap. Finally my oldest daughter suggested the original idea I had had, which was to make the herringbone patterned shiplap. I finally agreed we should at least try it and it worked to our liking!

Finishing Thoughts

It’s really not to hard and the impact is amazing! We still have a ways to go with our dollhouse as it’s been a learning curve for me! I am so glad we went with the herringbone pattern!

Dollhouse Completion

The best way to follow along on the completion of the dollhouse is on IG, which I will link below!

I finally have figured out that balsa wood is the best for dollhouses! I am going to add the window trim and board and batten next! Then I will build the kitchen cabinets! It’s a process but I will make sure to blog about all things related to the dollhouse build as things become finished!

I hope you have enjoyed being here! I would love for you to follow along with us on IG for our dollhouse build and for our self built barndominium as well!

Please take some time and check out the other ladies in our blog  to see what they’ve created with glue! 

DECORATE AND MORE WITH TIP
THE HOUSE HOUSE
PURPLE HUES AND ME 
SWEET SOUTHERN GRACE
PATINA AND PAINT

Home Security with Lorex Technology


“This blog post is sponsored by Lorex Technology and reflects my personal views and opinions on the products.”

3604121A-D7CB-4E1D-A983-33E64D2A117C

Lorex Technology offers a simple solution of home security system that you can access from your pocket computer-aka your smartphone of your choice.

Home Security Made Simple

Does the thought of installing your own home security system intimidate you? Fear no more, we are here to show you just how easy it is to install you own home security stystem from Lorex. Plus, I want to share why we chose Lorex for our home security monitoring needs! Check out our VIDEO on IG of our installation and how it works

96A54500-769B-4C60-8E49-B3ADACF05715

2K Wire-Free Camera Security System with Wi-Fi Doorbell

Overview

Lorex’s home security has never been easier to install or monitor your home with their indoor/outdoor 2K Wire-Free Security System. The Lorex Home Hub, a 2K Wi-Fi Video Doorbell and three 2K resolution wire-free cameras, this system will help you protect what matters most with no monthly fees. Let me show you how!

2C5410E1-A068-49C5-80A3-929452C73A68

Smart Deterrence

The Doorbell and Wire-Free cameras include a motion-activated LED warning light to deter any unwanted guests. You can even get a notification on your smartphone when someone arrives at your home!

2K Resolution Recording

A 4MP image sensor provides 2X the resolution as 1080p, which provides an exceptionally sharp and detailed video.

B3A14635-B4C4-434A-8766-FB16AFD7434A

Color Night Vision™

External lighting capture’s full color video at night. In low-light settings, the camera’s IR night vision will activate.

6D35EF4F-1AB9-40C1-80A1-A37DBACF018F

1080p Wi-Fi Floodlight Camera

Overview 

Combine your security plus lighting with Lorex Technology’s 1080p Wi-Fi Floodlight Camera. With dual LED lights that can produce 4k lumens, which is plenty to illuminate your front door, garage or backyard during the night.  I believe it also serves as an effective deterrent for any unwanted guests on your property.  The 1080p Wi-Fir Floodlight Camera also includes full 1080p HD recording, a remotely triggered siren, two-way audio and infrared night vision, that allows the camera to see up to 50 feet. Local storage means no monthly fees. One of the best features is that you can install by using your existing light fixture wiring, so it stays powered 24/7 without having to recharge batteries! The camera on the floodlight can be adjusted vertically or horizontally. Includes a 32 GB microSD card and supports up to 256 GB microSD storage

Dual LED Floodlights

With the Dual LED Floodlights, there are three ways of activating the floodlights: motion, on a schedule or manually. In motion-triggered mode, the lights will automatically turn on when the passive infrared sensor detects movement. They will automatically turn off after the designated duration. Option to activate the floodlights manually or on a schedule through the Lorex Home app.

Fully Weather-Resistant

The Wi-Fi Floodlight camera is MADE for the outdoors. Featuring IP65 weather-resistance certification, even rain and snow!

Real-Time 1080p HD Video

Its all in the details by capturing important details with real-time, 30 frames-per-second full, 1080p HD resolution recording.

PIR Motion Detection

Passive Infrared motion detector will capture the most important moments and has a 270° horizontal field of view!! It is designed to sense the infrared energy that eminates from people, animals or even vehicles. This helps to reduce false alarms from other moving objects! So smart!

Wide Angle Lens

This Wi-Fi floodlight security camera is equipped with a wide angle lens that is ideal for monitoring large areas or doorways and has a 137° diagonal field of view!

015915F3-B7D6-444B-B230-22D4C08E739A

1080p Full HD Smart Indoor Wi-Fi Security Camera 

Overview

Lorex’s 1080p HD indoor Wi-Fi monitoring is a seamless, easy solution for monitoring doorways, windows, hallways or even your high value items. Or if your like us, have a puppy to monitor while your away! You could even use it to monitor little ones at night. The camera features a pan-tilt feature that allows you to remotely adjust it’s field of view up and down or left and right straight from your phone. It also has 1080p HD resolution, two-way audio and  infrared night vision!

Privacy Mode

Privacy Mode is available using the Lorex Home app to temporarily disable your camera’s remote viewing, recording capabilities and push notifications. 

Pan, Tilt, Digital Zoom

The WiFi camera has the ability to pan and tilt! It also features 16× digital zoom and night vision range up to 33 feet. 

Two-Way Audio

The camera’s built-in microphone plus speaker will help you ward off uninvited guests, all with a touch of your smartphone or even your tablet. You can talk to whoever is on the other end of the camera!!!

Wide Angle Field of View

The Wi-Fi camera is equipped  with a 135° diagonal field of view. I recommend setting up the camera near doorways or wide entranceways for maximum coverage!

Person Detection

With Person Detection, avoid false alerts and unnecessary notifications. Designed to recognize when a person enters the camera’s field of view, this feature will reduce unwanted motion alerts while providing more intelligent monitoring for us!

HEVC / H.265 Encoding

High Efficiency Video Coding, more commonly referred is a video encoding technology that compresses large data files without diminishing the quality. It can compress up to 50% more than previous encoding technology, which helps save you bandwidth space when remotely watching live or recorded footage.

Lorex Security System Installation

Set up

With Lorex, you can easily set up your Wi-Fi Floodlight Camera with a quick and easy installation process by using the existing wiring from your previous floodlight or outdoor house light. It can also connect to your pre-existing standard junction box. How amazing is that?! Win, win in my book!

B1FF1CF1-31FE-4440-A1DF-DB6A761AA0E8

Lorex Home App

For our family, if your like us, when your away for a business trip or on a long overdue family vacation, using the Lorex Home App to keep tabs on your home, has never been easier! Stress-free if you will!  Download the app and use your smartphone or tablet to view live and recorded footage, change the camera settings or even use two-way audio plus more!

6ABEBA82-DF21-4932-9B97-29526D32C19A

Overall Review

I researched every single home security system that is available on the market, right now and I chose Lorex for our home security! Why? Easy to install, budget friendly and it  gives us the home security that we need!

I absolutely love our new security system from Lorex!! I have worked with Matthew from Lorex and from the start, he has been so kind, asking if we had any questions about the system, if we were enjoying it and if he could be of any assistance, he would help!! If I needed tech, he was on it and they would call me within the hour! 

EXCEPTIONAL PRODUCT

Lorex’s reviews online are outstanding and I give them an outstanding ovation of quality of product and outstanding customer service! This system is also super budget friendly when comparing other home security systems! I believe it will fit into almost any budget! If you have any questions, please reach out! I’d be happy to answer any of your questions or point you in the right direction!

PS-Lorex has Black Friday sales now!!!

❤️~Shae

How We Built Our Barndominium-With Our Own Hands

During the summer of 2020, my husband and I decided that we would place our house up for sale and move to the beach! The housing market was booming for homeowners and we decided it would be the best time to sell!

ED3FB364-9D49-4EA3-9C34-6068963036F8

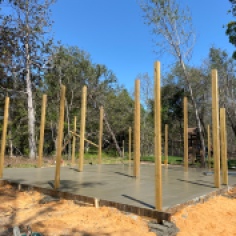
Our home sold within the first week of having it listed and thus began our plan of homeownership via paying cash! We settled on building a pole barn that we would live in temporarily while we built our forever home! The pole barn quickly became our barndominium! We chose to build our barndominium at the size of 30×40!

Researching is Key

Researching is key if you are thinking about undertaking a large project like building your own barndominium. This project has consumed us for months, but it has allowed us to build almost everything ourselves and it has been so worth it! When we would shop for estimates, we shopped until we found a price we liked!

The photo below is the backside of our property and where our barndominium currently sets.

9B75C7D3-18E0-40CA-BD80-00C9CFC4B5B1

Finding Land

The very first item on our agenda was the land! We knew a quaint little beach town that we wanted to grow old in and began driving around looking at property in July of 2020.

The photo below is the beach across the street from our property!

F6001076-5A34-423F-AC18-F06678487D73

We began looking up owners of properties in the town from the plot map, to begin writing them, asking them if we could purchase their land. We had found a couple pieces of property, when my Father-In-Law reached out to us, who happened to live in the same quant beach town and asked us if we would like his property. We were shocked and so happy! Thus began our dreams of building a Pole Barn with an attatched Guest Suite.

In this photo, my husband had begun clearing our land. This is about two days into it!

BB51405F-37CB-4AC6-B7A2-09C22D879562

Clearing the Land

Next on the agenda was assessing the property. The property was not in the best shape. In fact, you could hardly see it with all of the overgrown trees.

This is the very first picture that I took of our property. This is the front side of our property.

D01481E7-DF58-4A88-9D11-790184DEEF3D

There was also a older mobile home, a storage building plus seven junk cars that had been setting on the property for years, along with a boat plus a good amount of trash to clean up.

Below in this photo, my husband was removing the last of the junk cars!!! This was car number seven!

BFF81687-4E23-4AF0-9BA8-DDAE3093386E

We knew we needed to rent a tractor to clear the land and make a driveway. I also wanted to learn how to operate a tractor! I actually wanted to learn about anything that my husband was willing to teach me during this process!

B8E8F6D0-ED09-4528-A2A7-71C9369D3C01

Neither my husband or I had never used a tractor up until this point, but we learned! I think we enjoyed it too!

540F8420-0299-4936-836B-8E14E203D7A2

It was a lot of sweat equity work with taking out trees, pulling them down and across the road and watching my husband drop trees that stood seventy feet in the air!

95097FD0-9C54-4EA4-A412-22F05977837B

My parents would always be calling, when they saw our stories on Instagram and say to be careful! We also have our own portable sawmill that we plan to mill our pine and oak trees that we saved for wood countertops for our home.

Setting the Posts and Adding Fill Dirt

5F04DB1C-BAF5-49C9-ADE9-E7D981BAADC9

The first step was setting the posts! 

We also purchased two dumpsters of fill dirt from a local company. We rented another smaller tractor to help push the dirt out into the pole barn and help keep it evenly spread.

92A33F40-68CC-4911-8803-D02AFA3B4033

Leveling Out the Dirt and Adding Posts for Barn Doors

The next step was buying a laser to level out the dirt for the pole barn. We wanted to make sure we had the ground level!

75FB3A32-E02B-447C-858B-BB7324786EB4

We also rented a compactor to compact down the dirt. We also added two posts for the barn doors on the front!

FF631E1B-A942-4886-BD00-A3730F110829

Adding Footers and Rebarb 

Next we added a layer of plastic and the footers and rebarb. We also attached concrete wire to the rebarb. 

Concrete Pour for the Foundation

We did hire out this job because it was such a large job that we did not think we could handle the amount of work on our own.

093D6D3D-0C39-4A6E-9E2C-31DB3F0A736D

Plus, if you happen to mess up concrete, well, its a hard and expensive job to mess up on!!

So glad we hired this one out! Those concrete guys worked so hard! You can watch the video of our concrete pour here

Buying Windows and Doors

My husband wanted to go ahead and buy the windows and doors before framing, so he knew the size of the frames that he would need to be making for the pole barn. We went to Habitat for Huminity to find our windows and doors. We scored big and were able to grab almost everything we needed from Habitat for Humanity! Some of the windows and doors were used but some were new! We spent under $500 for all of our windows and doors! Check out our trip to Habitat for Humanity!

18329225-36F6-4BFD-8666-FE8AA6291958

Framing the First Floor

Framing the first floor went pretty fast.

We were able to get it all done in about two to three days.

9936BB2B-77C1-4506-B75A-512C3AF6A1A3

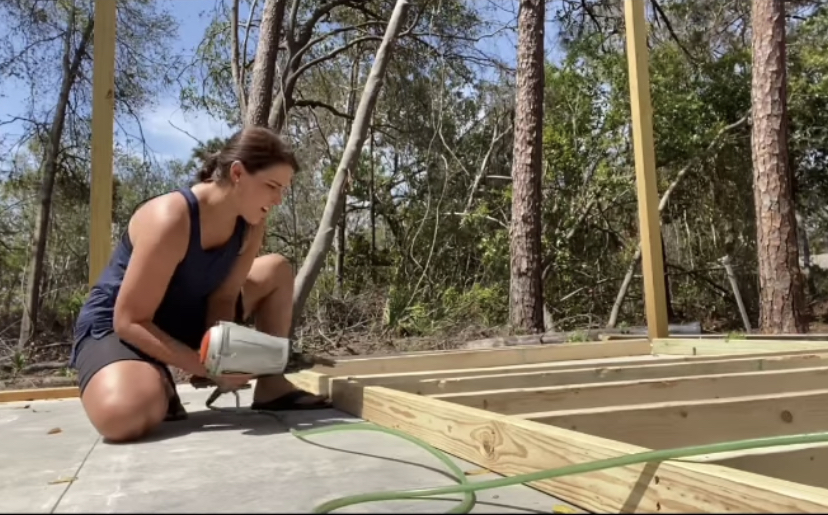
I learned to frame and framed one of the walls on my own! It is always so cool to learn a new trade!

Framing the Second Floor

We second story framing went faster than the first floor. We plan to use the two wings of the barndominium for attic storage and then the middle of the second floor as useable space. My parents came down to help us on a Saturday! Much needed!

Roof

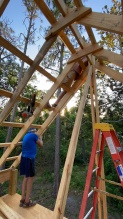
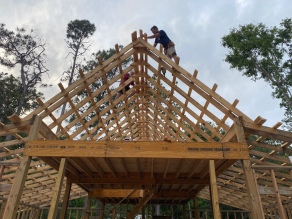
We were able to frame the roof fairly quickly in about two weeks,  then added the galvalume roof.

My parents and my brother came to help for the putting the galvalume roof on! It took about two and a half days for the install on the galvalume roof! Not to bad for two old guys (both of our Dad’s) and two middle aged guys (hubs and bro). No pun intended 🤣


My parents and my brother came to help for the putting the galvalume roof on! My mom helped me with cleaning up debris, breaking up a pile of extra concrete and making lunch for our guys! Check out our reel on the installing of the roof! 

After Framing and Roofing

After our barndo was framed,  the next few projects were not nearly as overwhelming. My husband had general construction knowledge and we are both hard workers, willing to do whatever it took to bring our temporary home to life!! Anything we were not knowledgeable on, we turned to You Tube, family or friends that were experts in the subject area.

B6E7C545-8872-4024-9753-594CFC3896BC 

I built the exterior barn doors, myself, with the help of a couple assistants to cut and hold wood! Check out that process here!  It is truly amazing what you can learn to do if you have the willingness to learn! You might may some mistakes along the way, but just start over and try again!

 
CDFC3110-AB3D-4B5A-A880-01B26B95FE12

Our plan has been to do as much work that we can do on our own, to keep building costs as low as possible. This is a cash build and we had absolutely no plans to get any type of loan for our barndominium build or our forever home build! Our hope was to get the barndominium dried in and basic items checked off then take time to finish the remaining rooms. 

Home Depot Gift Card

We are almost completely done with the building process. Finishing up with sheet rock and paint over the next little bit! Would you like to guess at how much we spent on our Barndominium build? The first person to comment with the correct amount, I wil send you a $100 gift card from Home Depot!

1A62566A-1B2E-4A53-B9E5-C11DF8976FEE

Instagram Collabs

I have been so blessed to have a job that never feels like work to me! I couldn’t be happier as a blogger and a influencer on IG! I am excited to share in a blog post, soon, our barndomium reveal and which companies I collaborated with! Any questions, please don’t hesitate to reach out!

Love~Shae

Decorating the Exterior of Our Barndominium for Christmas

Decorating the Exterior of Our Barndominium for Christmas

5B298663-09C6-42B6-80E6-5C22D878552A

Decorating our Barndominium for Christmas 

If you follow along with us on Instagram, you know that this past year has been a journey as we’ve built our barndominimum! To say I was THRILLED to decorate for Christmas this year is an understatement; especially considering we were living in our camper during the holiday season last year!

1992A79F-6A6C-4463-89F6-8B2334CA431A

The photo above is the Christmas season of 2020, aka, the christmas we lived in our camper, on our property, as we built our barndominium!

33DA799B-B164-42B7-A83C-AE81E6320E7D

Exterior Christmas Lights

I had so much fun shopping for exterior Christmas decor pieces for our DIY Barndominium! My husband and I knew we wanted to buy Edison bulb lights for decorating the exterior of our Barndominium and I was thrilled when I found them! Our whole family loves seeing our house filled with lights for Christmas!

2A98AA69-5211-4D4C-8E0D-8899F51CC5B7

DIY Christmas Wreaths

Old Time Pottery has quite the selection of Christmas wreaths to choose from but when I noticed they had all of the items that I would need to make my own wreaths, well, I just couldn’t help myself! After all, I am a DIY’er!! 

D523A0F3-0185-4478-9399-E53BA265205B

I grabbed two grapevine wreaths, along with one roll of Christmas ribbon and one strand of my favorite Christmas garland! I was able to make two Christmas wreaths for around $30! So easy and quick to make! I plan to share my diy wreath and bow tutorial soon! Check back on IG!  

FB8411B6-1A9B-471C-A160-D98409BBC63A

Christmas Winter Pillows

Christmas decor isn’t cozy enough until you add pillows and I believe these pillows can take you through February! Christmas pillows in late November and December. Winter pillows for January and Valentine’s pillows for February! At $15 each, it’s a wonderful, budget friendly decor piece! 

I enjoy capturing our barndominium during sunset! 

6AACC66B-F2D0-4DCE-B7D7-B644D9C8567F

Happy Holidays

I hope you have enjoyed a little Christmas here at our Barndominium! It’s our first Christmas here and we are so excited to share our holiday season with you all! On behalf of our family, we wish you and your family, a wonderful holiday season!

❤️~Shae 

REFRESH YOUR SPACE FOR LESS WITH KIRKLANDS

[This post contains sponsored links. The items featured and linked, in this post is provided by Kirklands; all opinions and reviews are my own.]

4E2CD6BB-53E0-4AC0-90DA-B0DA61C2E57C

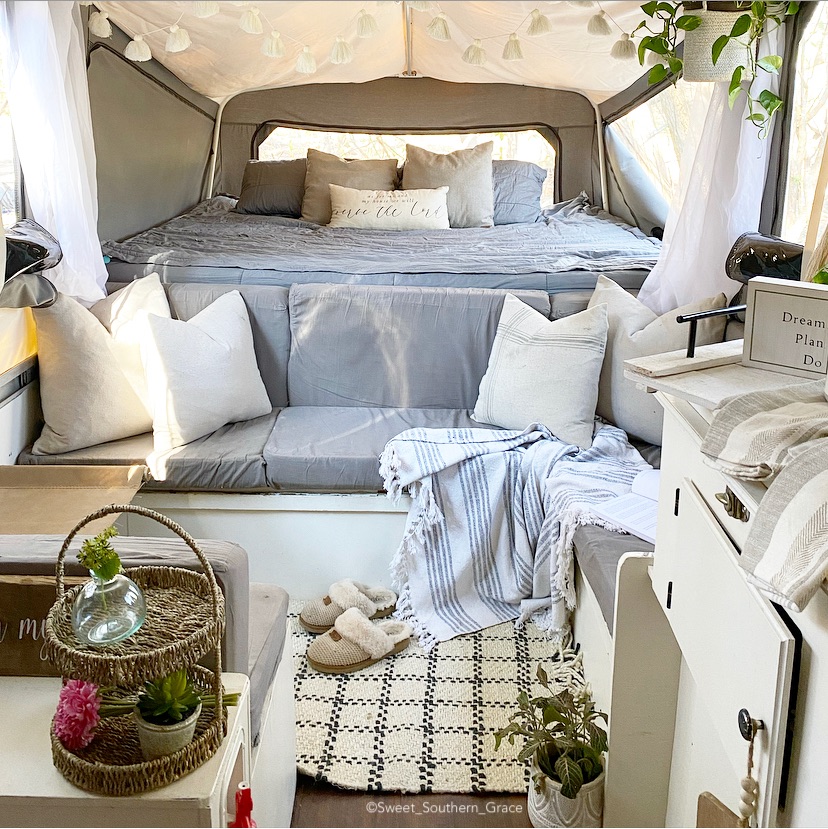
I love a good decor challenge, so when Kirkland’s challenged me to refresh a space in my home for under $100, I knew a challenge would be in our camper! Who says a camper can’t be stylish too?! I love being able to share budget friendly ways to refresh a space on a budget!

7D492066-CB7B-458D-9105-694A89941BD8

It is cold and dreary out but that doesn’t mean you can’t have a cozy space set up in your home, that can make an impact!

I started off with the Wood Plank Tray. I love how rustic yet sophisticated this tray can be plus you can dress this tray up or down! Serve breaksfast to your significant other in the morning or use as a serving platter when entertaining guests.

F6FFEB62-46AC-42EE-AFD4-3570E1CD7BC3

I added these Cream Simple Things Mugs that my husband and I love! Perfect for just about any decor! We both enjoy having our coffee in these each morning! I could not pass up this adorable Word Block Sign that says, “DREAM, PLAN, DO.” I think the words stuck out to me because of where God has called myself and my husband right now. You can follow along with us on Instagram!

7CF8CF5C-902D-452D-A1AD-F28C4973EB4C

Last but certainly not least is this Black and White Scattered Jute Rug!! I love it!! Jute rugs are my favorite right now and this one called my name! Again this is neutral, so it would look amazing in almost any decor. Add it to your kitchen or an entryway. You could even add it to a half bath.

EE370644-F773-4CEC-ADEB-3C7E5D9FEB79

Refreshing a space in your home can be budget friendly! My hope is that I have inspired you to refresh a space in your home and be able to maintain your budget, as well! If I can be of any help, please let me know!

Love~Shae

DIY CLEAR CHRISTMAS ORNAMENTS

DIY CLEAR CHRISTMAS ORNAMENTS

CHALLENGE DEETS

Today I am teaming up with several of my blogging friends to share how we each put our own spin on a clear ornament. My friend Terrie from Decorating and More with Tip is our host and always has creative challenges for our group!

I know you will love to see the DIY ornament from  my friend Tara!

FAMILY TRADITIONS

I have always enjoyed making Christmas ornaments. I started this tradition with our family, for my husband and I’s first Christmas together. He actually was recovering from major abdominal surgery and I wanted to have something fun for us to do, while he was at home. I have continued this tradition, every year in our family. I have made all types of ornaments from salt dough ornaments to hand painted ornaments!

LETS MAKE ORNAMENTS

Come follow along with me, as I show you, just how easy and budget friendly it can be to make your own ornaments! Plus it is so much fun and it will be memories that you can add on your Christmas tree, year after year!

2AE31EC9-8834-4341-9D25-7F39A83583FB

SUPPLIES NEEDED:

*Clear ornament(s)

*Fabric

*Ribbon

*Flocked Garland

*Mini Pine Cones

*Hot Glue Gun and Glue Sticks

*Jute Twine

I grabbed this six count of clear ornaments in the Dollar Section of Target for $3! I wanted some smaller ornaments to put on our mini Christmas tree for our camper. Since our camper is decorated in a rustic, boho type decor, I decided to go with black checkered fabric and burlap ribbon to cover my ornaments, that I purchased from Hobby Lobby.

05461B49-4D7D-489D-ABFD-79F606D3849E

I also picked up small pine cones and some flocked greenery with red berries.

HOW TO MAKE THE ORNAMENTS

These ornaments are really simple to make. Plus, they make great gifts too!

71673469-1F30-4B1B-A16D-F8B4429469C8

I tied my jute twine around the ornament top base to my desired length, for the ribbon hanger.

9C89E04E-C604-4B2A-957E-FB4A5DA9E951

Next, I cut my fabric a few inches wider than the diameter of my ornament, then began lightly adding hot glue to the ornament and wrapping the fabric around the ornament.

4DD205CC-3619-4FC8-B831-5ECF19C383E2

I could not find any burlap ribbon at my Hobby Lobby, so I purchased an eighth of a yard of burlap to cut my own “ribbon”.

045293BF-293A-47EA-B551-AB015E78970C

I cut my ribbon in one inch strips.

A609DC5E-9419-438C-B9FA-C4D90D53886D

Next, I tied my burlap ribbon around the ornament then added a few strands of jute twine by tieing them into the burlap ribbon.

1A1B8ABC-E4E2-4A37-8D79-EE1B2F32D584

For the greenery, pine cones and berries, I just cut from the greenery and pine cones bunches that I purchased from Hobby Lobby. Add a little dab of hot glue and your good to go! You can also adjust your burlap ribbon to look neater by adding dabs of hot glue to the back of the ribbon, attaching it to the ornament. How simple are these ornaments!

A3C56761-0D71-4CA5-A7F8-5F07C1AF42C4

FINAL THOUGHTS

I hope y’all have enjoyed reading about my DIY Clear Ornamants! I love that these will be a memory on my Christmas tree, year after year! I hope you will check out the other ladies to see what they have come up with for their clear ornaments!

I know you will love to see how this ornament by Jodi turned out!

Love~Shae

FE79AFDD-0434-471C-A052-628803E2FED2

Decorate and More with Tip|Purple Hues and Me|Cloches and Lavender|Pallet and Pantry

Patina and Paint|Paula’s Handmade Space|Stilettos and Shiplap|Sweet Southern Grace

The House House|B4 and Afters

66FCA4D1-C80F-4A18-B194-892424DD96E3

Homemade Powdered Laundry Soap

Homemade Powdered Laundry Soap

Homemade Powdered Laundry Soap

Making your own homemade powdered laundry detergent may take a few extra minutes of your time, but it’s a lot cheaper than store bought. Plus you’re keeping your home chemical free. Continue reading for full instructions and cost break down.


28F4CBB9-AC33-4310-84C6-414212A0CD28

Ingredients:

I’ve been making my own laundry detergent for years! It saves so much money plus y’all know how much we try to live without those yucky chemicals! Plus, it’s super easy with just three ingredients: washing soda, borax and Dr. Bronner’s Castile Soap .

What you will need to purchase:

• (1) 3 pound box of Super Washing Soda

• (1) 4 pound box of Borax

• (2) Dr. Bronner’s Castile Soap Bars

• Container for the detergent

• Grater

• Wooden Spoon for stirring

• Tablespoon for measuring

Directions:


F31AC1A6-ED37-4D64-8790-4BC7255AE693

Pour the washing soda and borax into a large bowl. Grate both bars of the Dr. Bronner’s soap, on the fine side of the grater, then add to the washing soda and borax bowl. Stir the detergent until it’s all mixed in really well.

How Much Detergent to Use Per Wash? 

I use 1-3 tablespoons per wash, depending on the load size and how dirty the load. In a normal load, I normally use 2 tablespoons but if a load is really dirty, I will use 3 tablespoons.

Cost Break Down: 

Let’s break down the cost to compare pricing of store bought.

Washing Soda $4.12

Borax $4.47

• Dr. Bronner’s Castile Soap $3.62

• Total= $12.21

This receipt will make 112 loads, giving you 7 pounds of detergent. Break that down to $0.11 cents per load!

Compare Natural Name Brands: Conclussion:

Now, if I were to buy a natural detergent, let’s compare the costs of those! Let’s compare costs to Whole Foods 365, Molly’s Suds and ECOS.

• Whole Foods 365 for 80 ounces at $11.99 with 53 loads = $0.23 cents per load.

• Molly’s Suds for 70 ounces at $20.99 with 120 $0.30 per load.

• ECOS for 57 laundry square pods at $25.26 for 57 loads = $0.44 cents per load.

Conclusions: Savings, No Chemicals and How Long Will the Detergent Last

Y’all! The math don’t lie! I love saving my family money and we are using a detergent that is not full of chemicals! I call that a win win! This detergent will last us for a month! Can y’all believe that I’m only spending a little over $12 per month on detergent for a family of 6?!

Sensitive Skin: 

Yes! We use this on our sensitive skin! Several of our family members have sensitive skin with skin issues like eczema, ect. I have even used it in replace of the expensive baby washing detergent! I have been using this recipe for the last 16 plus years!

Liquid Laundry Detergent: Final Thoughts

When I first began making my own laundry detergent, the first recipe I used was for liquid detergent. I used that recipe for the first couple of years since we had a HE Washer and were told to only use HE soap. One day I decided to test a couple loads with the powdered detergent and never went back to the liquid. We have never had a problem with using either recipe’s in our HE washer’s!

Final Thoughts:

Have you ever made homemade laundry detergent? If so, what have been your thoughts? Hope y’all enjoyed the recipe and enjoy the savings!

❤️-Shae

987859BF-0D05-4509-9F98-8A51FFE7E6F7


Exploring St. Augustine, Florida: History and Culture

Exploring St. Augustine, Florida: History and Culture

This post contains sponsored links. The item featured and linked, in this post is provided by St. Augustine Lighthouse (six admission tickets); all opinions and reviews are my own.]

F0E130D6-F451-43D0-8550-3B35D1A44E7D

St. Augustine: History 

In June of this year, we had the pleasure of visiting St. Augustine, on the Atlantic cost of northeastern Florida. St. Augustine is a gem situated neatly along the shores of the Matanzas River and holds heavy historical significance! The Southern and Spanish-influenced St. Augustine, Florida was founded in 1565 by Spanish explorers and it is the oldest inhabited European-established settlement in the United States. When you are walking around on its centuries-old cobblestone streets, you will instantly feel like you are either in Europe or Old Florida, depending on which street you’re on! It’s a charming escape for anyone wanting to take a vacation!

Bridge of Lions; St Augustine, FL; Plate Girder; Painted, Metali


St. Augustine: Arrival

The Bridge of Lions will take you across the Matanzas River to the heart of the historic old town. Once across the bridge you have the choice of turning left on Avenida Menendez to the marina and sight-seeing cruises or right to the Castillo de San Marcos. You can also continue straight ahead on Cathedral Street into the heart of downtown.


26BD8663-9172-4F45-8F93-404A9A394388

St. Augustine: Beaches 

One of the reasons we wanted to travel to St. Augustine was for the beaches! The beaches are so pretty! With a historic city being one of its main attractions, don’t forget about the  beaches near St. Augustine! From their sunrises to sunsets, they are stunning!

DAF9FA30-0B10-49DC-A09E-4631951C97C0

Located on Anastasia Island, a barrier island off the mainland, St Augustine Beach has a natural feel with a wide beach and lots of good surf and shorebirds!

762CE7A3-1D03-4237-B9BD-B94A139B20BC

St. Augustine: Lighthouse & Museum 

While traveling, one of our family goals is to visit every lighthouse we come by! The St. Augustine Lighthouse & Museum was a highlight for our entire vacation! When we arrived at the St. Augustine Lighthouse & Museum  , we were greeted by Daniel Lee, who  took us on a tour of the property and we learned quite a bit of history about the lighthouse. He was very welcoming and informative on the history of the lighthouse.

9500D6D7-E4B1-4D27-A9E1-F05328413540

History: Pre-1862 

The story of the the current lighthouse in St. Augustine is not the original St. Augustine Lighthouse. The Spanish constructed the tower that became the first lighthouse in 1737. They used a naturally occurring stone called coquina to construct the original tower. The coquina tower replaced wooden watchtowers the Spanish built dating back to the beginnings of Spanish Florida.

30C46964-8825-4BEC-AB1D-E3AA7146D06C

A map of Francis Drake’s 1586 raid on St. Augustine reveals the presence of a small tower on Anastasia Island. The map refers to the tower as “a Beacon or high scaffold standing on the sand hills, wherein the Spaniards did use to discover the ships at sea.” In 1823, John Rodman, Collector of St. Augustine, wrote to Stephen Pleasonton, Fifth Auditor of the U.S. Treasury, that despite the tower’s presence, “…it was never built for a lighthouse or used as one, but merely a look-out-house. The location is well suited…but a great proportion of the tower, nearly one half, is not sufficiently strong to bear any greater elevation either if wood or stone work.” 

John (Juan) Andreu became first keeper of Florida’s first official U.S. lighthouse in St. Augustine. Not only is he one of the first, he also holds the distinction of being the first Hispanic-American to serve in the Coast Guard and the first to oversee a federal installation of any kind.

Juan Andreu served as keeper until 1845 and the records are unclear as to who took over and served as lighthouse keeper from 1845 to 1849. John (Juan) Carrera served as keeper from 1849 until his death in 1853. Joseph took care of the lighthouse until his death, which he fell, while painting the lighthouse.

Joseph’s wife Maria Mestre de los Dolores Andreu was appointed keeper in place of her deceased husband. The Coast Guard recognizes Maria Andreu as the first Hispanic-American woman to serve in the Coast Guard. Maria was the lighthouse keeper from 1859-1862.

History: Current 

5105B3B9-BD1B-49FD-8D65-FE3B926721BB

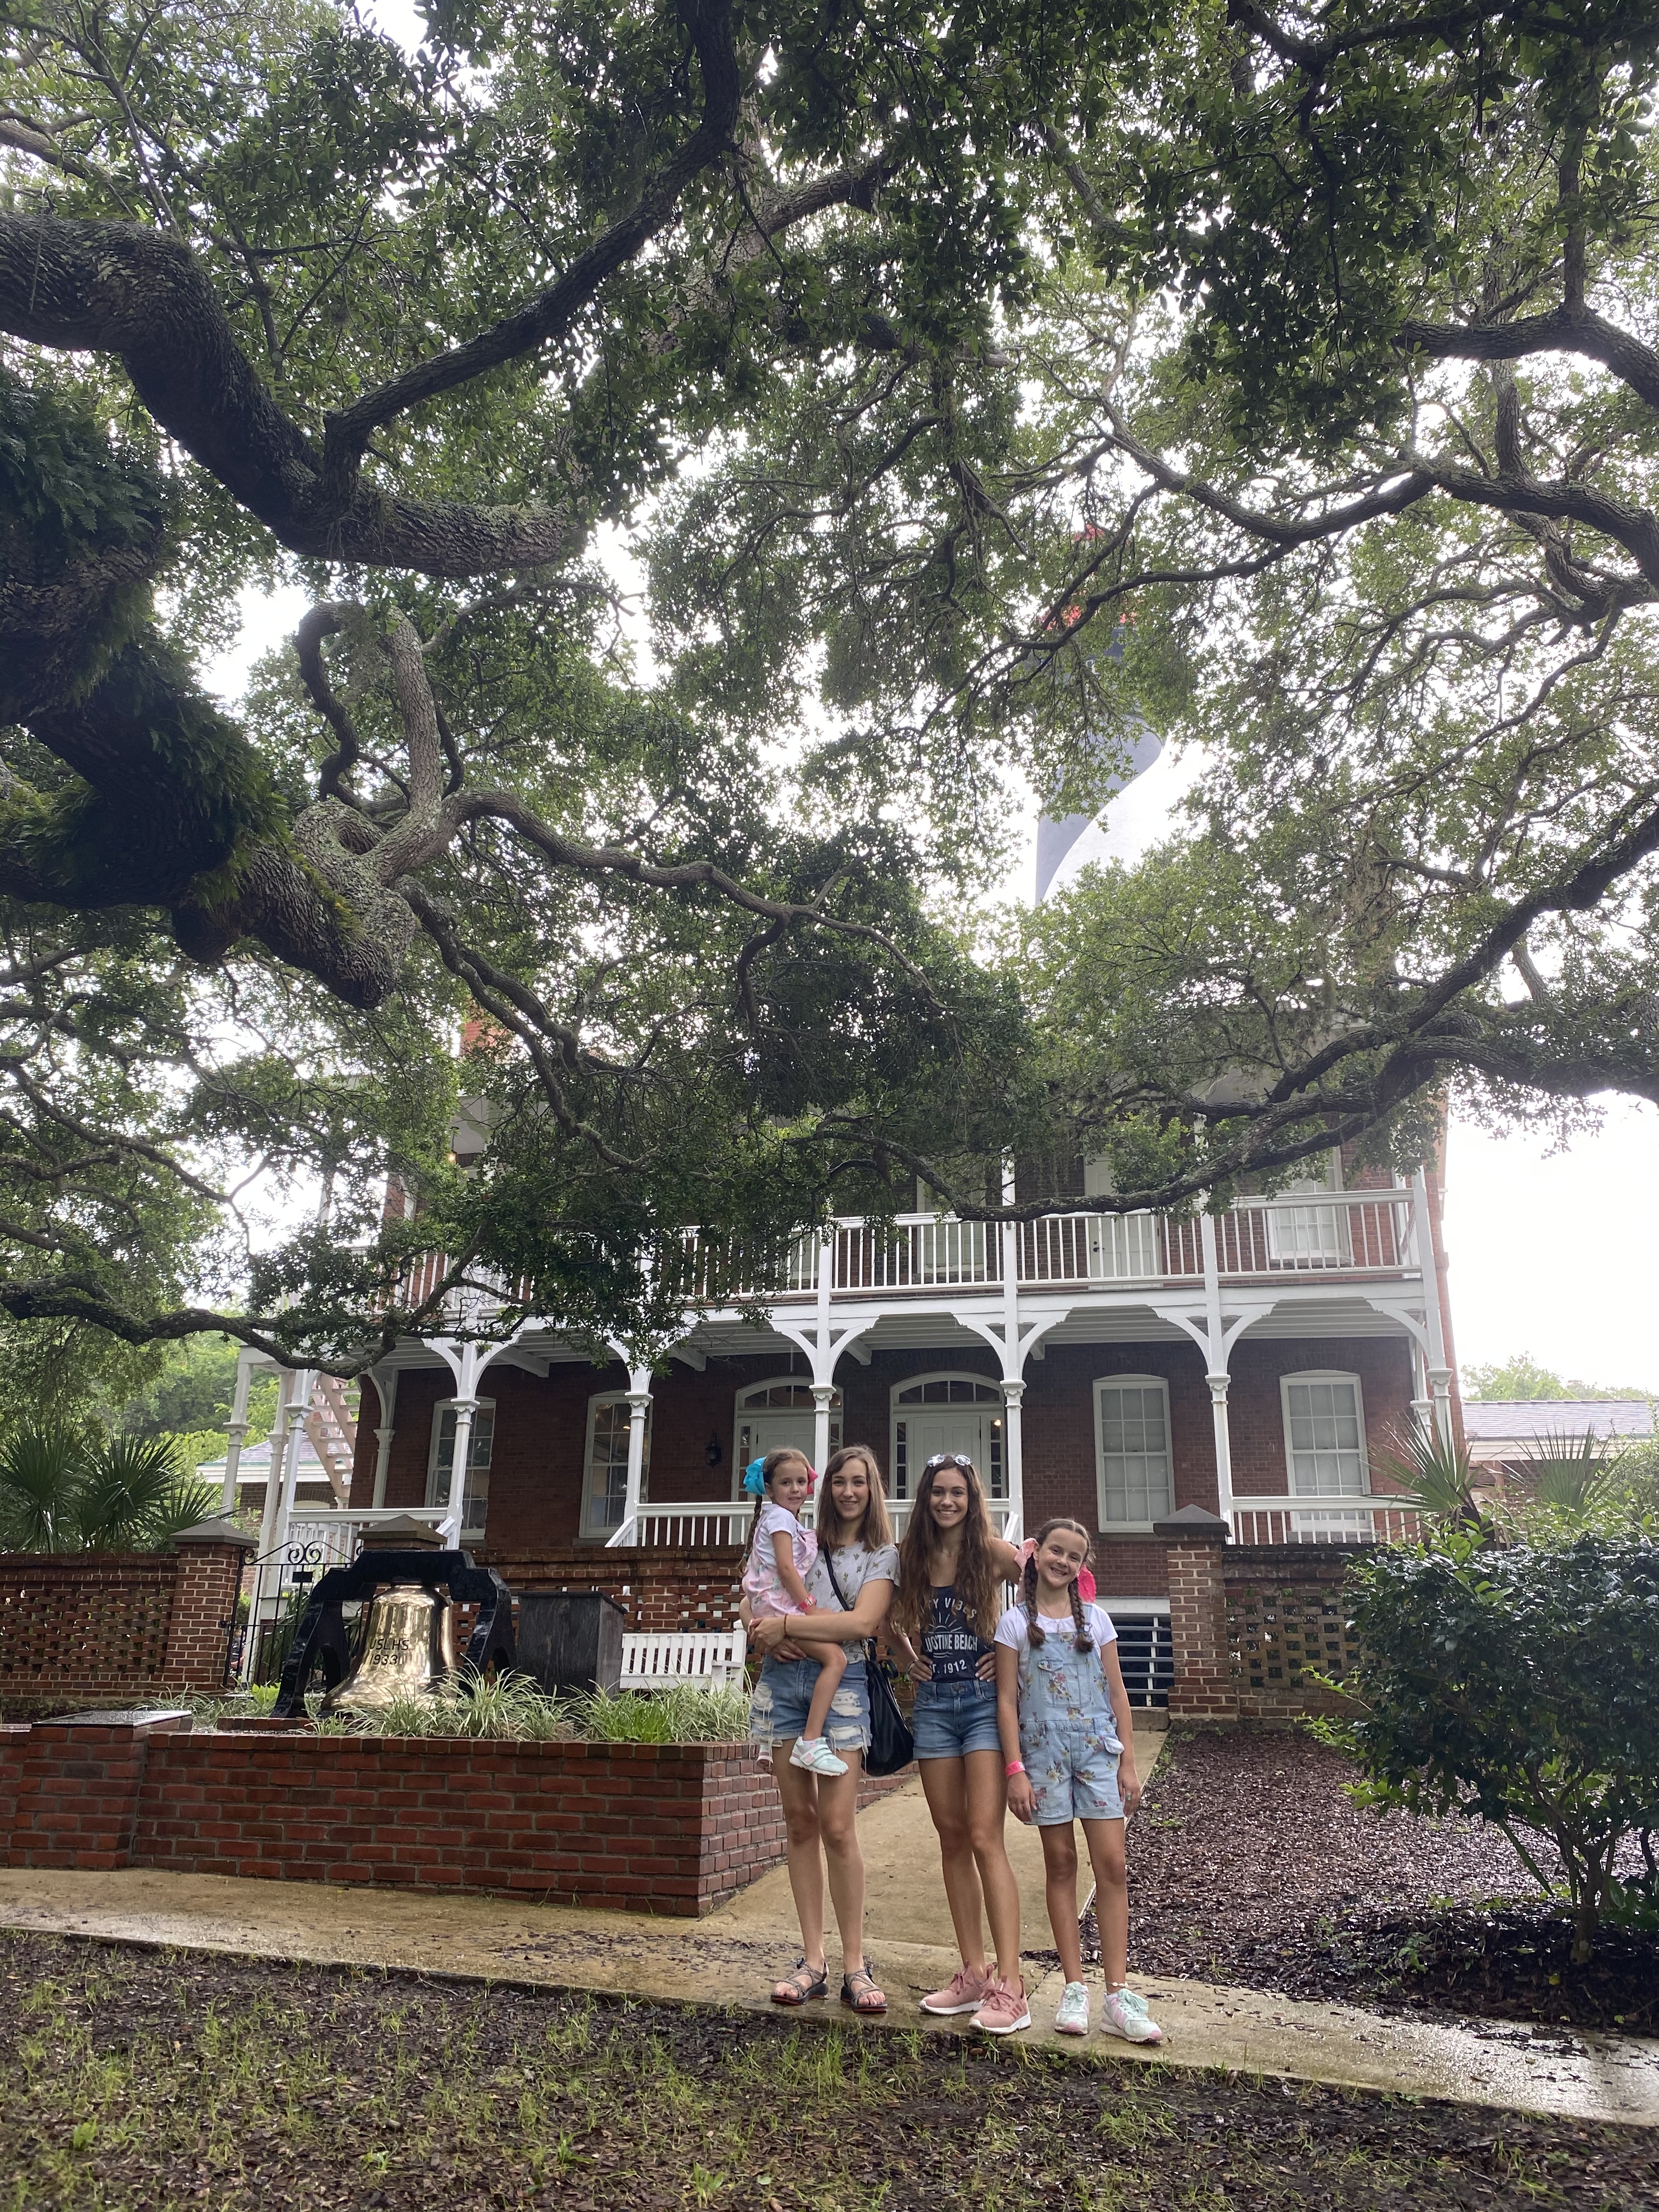
The current St. Augustine Lighthouse is nestled among live oaks and beautiful Spanish moss making a stunning nautical canopy. Also located on the property is Maritime Museum, along with the light keepers house.

D235C3CA-E9D5-48F5-B4D9-62BF3D4F0BC0

There is also the Maritime Hammock which is a natural area that the coastline formed when it receded, creating stabilized beach dunes that allowed for larger growth trees.

8C7C3493-A43B-4DB9-924D-58B0CA04DB20

There is even a cute gift shop located on the property as well!

CBD5316E-E4EF-492E-8015-0481DDD8DF19

St. Augustine Lighthouse: Climbing the lighthouse

To climb the lighthouse, you will need to climb 219 stairs! Trust me when I say that is is worth it! There are eight landings and even one with a bench. Plenty of space for others to walk past you and if needed, space for a break!

959D2900-F465-4326-85E3-99E1E397C9F4

When you walk into the lighthouse, walk to the first set of stairs, go to the very middle and look up! This is the view that you will see!

A1372989-1B5C-4671-8641-EE5C0DA6090F

The view from the top is amazing! We had a couple that were a little nervous to be up so high, yet is not our first time on the top of a lighthouse either!

60EE4098-A5E2-4ABA-8562-B8203F752DE7

Amazing view of St. Augustine from the top of the St. Augustine Lighthouse!! If you decide to come to visit St. Augustine, don’t forget to stop by the lighthouse!

B98A3E64-07FE-4191-8A89-030F09A60CD7

St. Augustine: Downtown Old City Gates & St. George Street 

The Old City Gates are a site to behold toward the north end of St. George Street. The Old City Gates were at one time the only entrance into St. Augustine. The two ancient columns made of coquina were built in 1808 as a line of defense for the city.

89B84589-FCF5-4723-84ED-632AB57DC397

After visiting the Old City Gates, walk through to enter St. George Street, which is a historic street, that is filled with galleries, shops, restaurants and popular St. Augustine attractions.


FDFD5C36-8878-4C00-8125-0141DF429460

St. Augustine: Castillo de San Marcos

The Castillo de San Marcos is the largest masonry fort in the continental United States and was built to protect Spain’s claim to the New World!

Unfortunately due to the Covid-19 pandemic, the fort was closed on the inside. We did walk around the exterior of the fort!

St. Augustine: The Fountain of Youth  

1C6A0D5C-086E-4CC3-8751-88ADF53903C9

The Fountain of Youth was believed that anyone who drank from the fountain would have their youth restored. In 2,400 BC, the Native Americans, a tribe known as, Timucua, were amount the first to inhibit the land. Ponce de Leon was the first Spanish explorer to find the Fountain of Youth. The grounds at the Fountain of Youth are beautiful and you will also find several peacocks throughout the property!

B2F0DBEE-33DA-450A-8FDF-B89D289C2E7D

Drinking from the Fountain of Youth is wonderful experience that our family will never forget!

C82A31E8-DD50-47CA-8214-5BBB8843C20A

I could honestly go on and talk about St. Augustine for a long time! We love this city so much!  It is such a pleasure to visit the historical St. Augustine and we know we will definitely be back!

❤️~Shae


Modern Farmhouse Master Bathroom Renovation

Modern Farmhouse Master Bathroom Renovation

[This post contains sponsored links. The items featured and linked in this post were all provided by Pfister, Kwikset , National Hardware and Jill & June; all opinions and reviews are my own.]

1AE8A3C4-AD18-43CC-87B1-E226DAF4D54B

The day is finally here! Your going to be shocked at the transformation of this modern farmhouse bathroom reveal! This renovation has all of the modern farmhouse elements- classic white subway tile, glass accessories with modern satin nickel hardware, warm wood tones, tile flooring and vintage shiplap ceiling. Come see how we transformed this room!

{Full sources available at the bottom of the page for your convenience.}

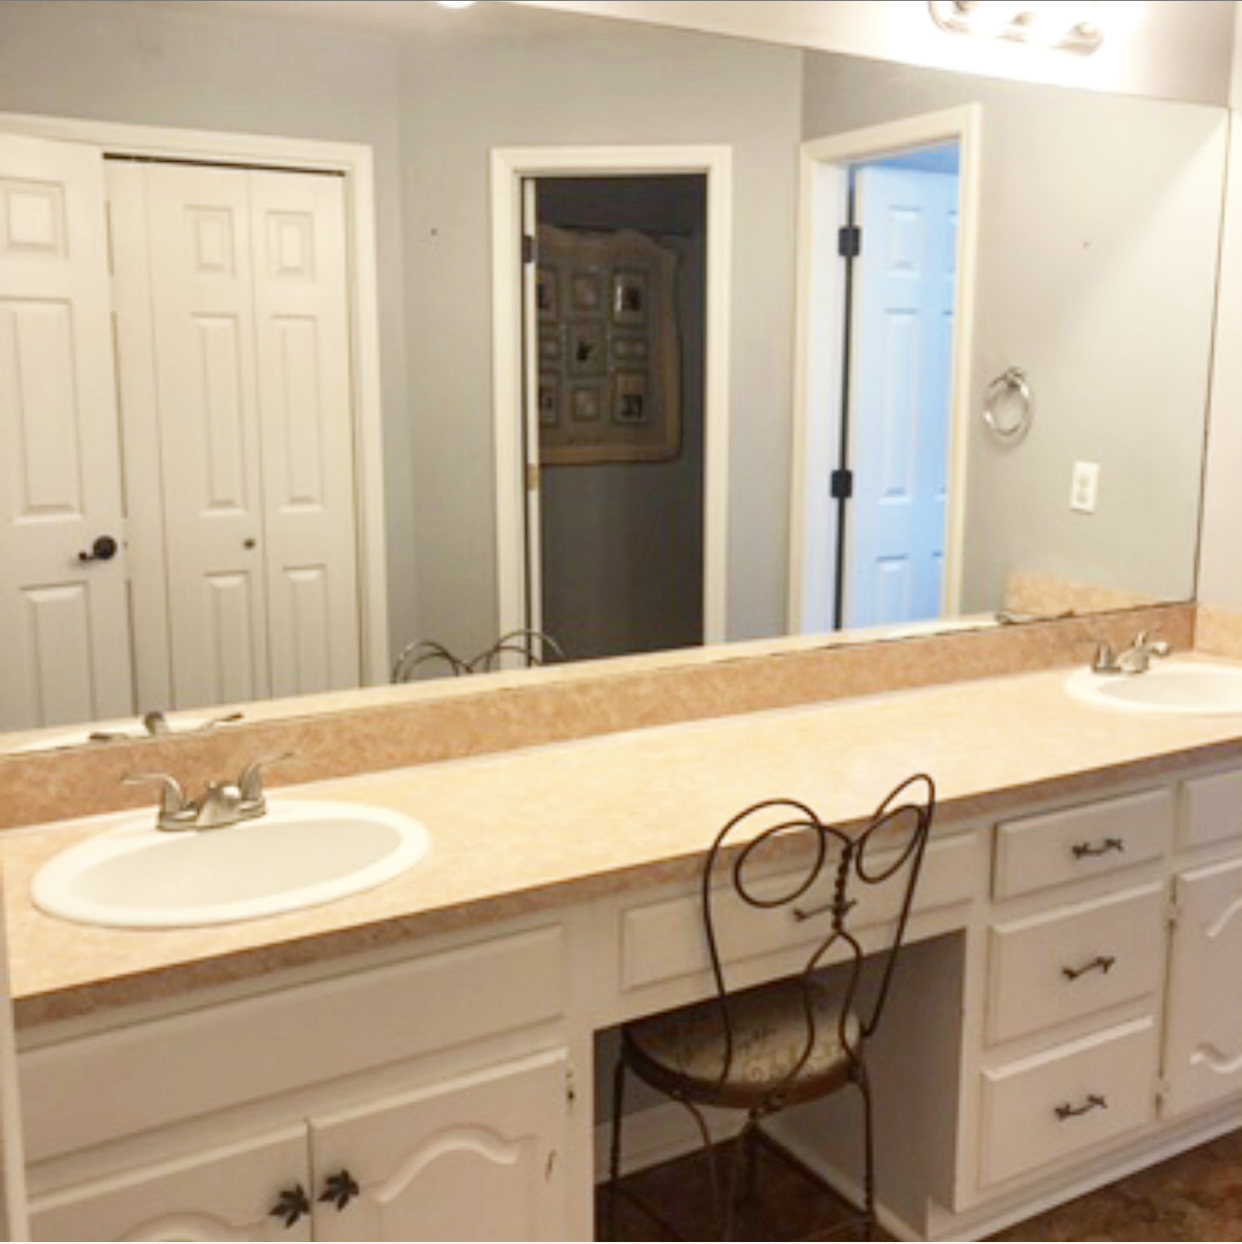
I still remember the first time we walked into this house. We knew the house had “good bones” and the layout, front porch and land is what drew us here. We knew from our Realtor that most people were passing on this house because the master bathroom was not updated. My husband and I have been diy’ers for twenty plus years so we knew we could transform this home into the home of our dreams. All we needed was a little faith, a lot of patience and some hard work!

First things first. You can’t have a reveal without a few before pics, right?!

Before Photos:

Bathroom Full Shot

93F6BD61-11E2-4797-96B7-D2C193919854

Vanity & Mirror View

78E38847-F384-4F54-BFD6-F0313F32557B

Shower View

0D745BD5-4E49-402E-844F-439AC7040EAA

Renovation Process:

First things first! Demolition of the old shower insert and tub.

1342C357-3839-465C-9E3D-3E23C830CE0E

The hubs working with his saw-zaw to tear out the the insert.

1C7755A6-5F9C-454C-BE16-F3D9F1694DDF

Getting there!

DE6F21F8-FEC8-4491-89A4-3880057FF69A

After everything was torn out, some of the walls needed to be re-framed to accommodate the size of the new shower, along with a frame for the shower seat.

C33D6975-B54A-470B-9F40-2ABAB8B1B638

Next was installing the shower pan liner, along with the mud bed.

7CCFAA24-1511-43DC-B352-8D292D580ABC

Framed shower seat with shower bed liner & mud bed.

95B610D6-CE38-40AA-BAB4-EECFCE877802

After the mud bed was completely dry, about 3 days later, the shower walls went up!

2BA5C1B3-53A5-47F5-BFB5-23DF6CFAF727

The red guard was rolled on and it’s a rubber membrane material to protect against water.

79CE9008-F78B-449E-A27F-92B2DBECE058

Shower Tile:

I have always wanted to learn how to tile, so my husband taught me how during our renovation! I tiled the first two walls, all by myself, with my husband making the cut pieces.

42D8C746-CDA2-45A7-A5DB-907E1410B028

I really enjoyed tiling our shower and having my hand in the work of our bathroom! When I got tired, my husband would help apply the thinset!
6EED1EFE-6517-4EC1-BC36-0EC3BC9FD22B

Making sure each tile was lined up just right!

456BC1E8-3632-4280-A2EE-2C166CECDA7C

My husband cutting the tile pieces.

692D2D67-1931-4880-ABE6-B9E1ECC6EB86

My husband tiled the 3rd wall and the shower seat, along with the shower floor.

C30D8001-D670-4055-AEF1-1DF43A94AEEA

Shower Wall 3

E8160B01-B883-4A35-A00D-133B349F127D

Shower Floor

0AADE835-588F-44D1-9365-52A5FE266031

Removing Old Flooring:
There was two layers of flooring. The first layer was put on by the previous homeowner. It was the pre-cut square linoleum tiles with a layer of sticky glue underneath. The bottom layer was the original linoleum to the house. It was a sticky mess! 

4C57A9AC-12F7-42F1-AECB-C6750087D183

Painting the Cabinets:

We decided to keep the vanity to save costs. I decided to paint the inside and outside of my cabinets with my diy chalk paint. You can find that recipe here . I used Sherwin Williams in Snowbound.

Floor Tile:

First on the agenda was adding the backer board then adding the thin set with tile.

C68A07B7-415F-4CA5-A87C-971F3A99D4A0

Removing Popcorn Ceilings:

This was the last room to remove popcorn ceilings in our house 🙌🏼 We removed the popcorn then patched and painted!

B6B2814B-DBA7-4157-AF81-C7B94DA017C8

Shower Ceiling: 

We chose to do a shiplap ceiling with vintage board & batten to the ceiling! We also added two recessed lights and a fan. This picture is beginning to add the wood.

9EF34437-6DBE-4B06-905B-D2F7E34FDECE

The boards had what we originally thought was several layers of dirt. What we were surprised to find was several layers of dirt with a layer of mold underneath. It took several applications to treat the mold and remove it completely!

5F94EE66-F263-4FBD-B5F2-B1837D6AACE1

Making progress!

417B9226-E68F-4BAA-A7CE-37C7EF6875A9

Almost done! Just need to add the other recessed light.

A640E5AC-13A1-408C-9949-B1FABB6AB932

Wood Countertop:

We had a huge red oak tree fall on property a little over a year ago. My husband had an idea to mill the wood! We have already made several shelves & wood cutting boards from this wood! I had the idea to use the wood for a wood countertop in our bathroom. It would basically be at no cost, just our time.
AA595580-DE9D-4E4C-B0A1-A7636CF4823A

Removing old countertop and sinks.

BEB145CD-799D-4655-8834-E33154FBE4DD

Out with the old and in with the new!

04682030-5D4A-475D-8053-1C235BCFCA90

New countertop installed and I am applying the first coat of matte poly. I applied four coats of matte poly while sanding lightly in between and no sanding on the final coat.

2B367C5A-288B-4ED8-A7B5-15628D8F30BD

Installing the Shower Door:

B5FEE226-F206-435B-A308-1D1F7E60FC7D

Installing Mirror Frame:

We decided to keep the existing mirror. We made a wood frame and painted it the same color of the cabinets.

EE3E0918-9133-41E9-8652-41DD5C88B847

Installing our Jaida Pfister Faucets:

3988DE9E-3987-4D7F-A969-35B9F6F226DF

Installing Cabinet Knobs & Drawer Pulls:

We installed glass drawer pulls and glass knobs.

5DF6C0B4-4C5D-4A6D-9F84-4B6037CE5C31

After Photos:

Bathroom Full Shot

B969DEB7-F9E7-46A1-B2CF-3097085A7A60

Bathroom Vanity Before & After

Bathroom Countertop 

2C9386D5-67B5-4940-B68A-621C1B019FB6

Accessories:

My husband and I designed and built a towel ladder rack. All of my Turkish towels are from Jill + June  and they are so soft plus oversized! Loving the tassels!

F3EDE6EB-9460-4053-BFA6-A8194903630A

Shower View with shiplap ceiling

16493BF1-26E2-4EF8-8A65-E2403FA51DEC

Shower View with Shower Seat

79FDEF4E-E130-428E-965C-3A8C8E7D5B83

Master Closet & Linen Closet:

During the renovation, we also renovated our master closet and master linen closet.

Master Closet Before

40FB2DEC-B69E-4CE7-989C-8A1DB4C8C3FC

Master Closet After

ECF958D8-FAB7-4A1C-8D8C-348E1726A4EF

Master Linen Closet:

6414C8F2-977F-46A1-BA19-CA196F6F16CF

Bathroom Organization:

And a renovation wouldn’t be complete without bathroom drawer and and cabinet organization!

Bathroom Drawer Organization

947518C5-A364-408A-BBF0-7CA7DA9B33EF

Final Thoughts:

We are enjoying our newly renovated bathroom so much! It is so nice to have a master retreat! This is a wonderful gift to be able to give to each other. We have never taken a trip alone together or had a honeymoon! It’s about time, since we are celebrating our 22nd wedding anniversary this month! Also, this bathroom would not have been completed yet if it wasn’t for the help of our two oldest (adult) daughters! They truly helped make our dream bathroom come true!! Team work really does make the dream work!

17DEF647-169F-4591-8E16-E7CDB4792863

List of products and links used during our renovation:

Jaida Faucets in Brushed Nickel with Spot Defense and Push ‘n’ Seal are from
Pfister . Spot Defense is perfect for a busy mama like me!

CEBDC58D-318E-4159-9E58-1C48014A9788

Ladera Towel Rings with Spot Defense in Brushes Nickel are from Pfister . Love their sleek design!

46290286-2DE4-439A-AA31-12FAC1043716

Ladera Tissue Holder in Brushes Nickel is also from Pfister . My favorite feature is how you can just lift up and change out the roll like a easy breezy summer day!

296EACD1-DA8F-476F-81FC-6259296CBE3A

Our Cameron Bed/Bath Door Knobs in Brushed Nickel are from Kwikset . I love its simplicity!

AD1DE681-7314-4B8F-BCC9-68A1B4F6F810

Our Interior Door Hinges in Satin Nickel are from National Hardware .

D72FAF38-CA1D-4F9F-B018-FB7FC16CD149

That concludes our renovation! Thank you so much for taking the time to read about our master bathroom renovation! If you have any questions, please let us know!

❤️-Shae

How to Style Around Your TV

How to Style Around Your TV

[This post contains a sponsored link. The item featured and linked, the “better together” sign in this post is provided by A Simple Place on Main; all opinions and reviews are my own.]

48F0D0A7-AB0D-42AA-A289-5F0DB4128CCE

Today, I was invited on a blog hop with my friend and host, Terrie plus a few of our blogging friends! We want to share how we style around our tv! Lots of people struggle with decorating around their tv, I, myself, am included!

A Little Decor Background:

When we decided to get out of our 90’s decor style vibe, not knocking it because I will always have a heart for 90’s decor style, we decided to go the farmhouse decor route. The farmhouse decor style reminded us a lot of yesteryear and of simpler times, like of those that our grandparents had as children. A lot of the vintage decor you see in our home will be from one of our grandparents. We feel so blessed that they wanted to give us something of their own that meant so much to them!

Farmhouse Style:

BF9354C2-000D-4604-90B0-D6EF384B99A8

Farmhouse TV Cabinet:

One of the very first pieces of farmhouse style furniture we built was our farmhouse tv cabinet. I originally stained the wood a gray color but recently painted it with my diy chalk paint. Styling the inside of those shelves and styling above the tv has not been my strong suit but I love how everything has turned out in this space! I don’t usually have a vision, my ideas usually just come to life with some changes here and there!

White Shiplap:

94D2C9A8-82CA-4AFE-8AC6-F9312942B4ED

Next we added vintage shiplap to our wall. What made it even better is it was fo’ free 🙌🏼  I started off by painting one coat of white paint but a year later, decided to remove the white paint with Citristrip. Since all of the paint would not come off, it gave the wood and white wash look, which we loved! It gave the space such a warm feeling! 

D0A9DAA5-82B6-4B1D-ACAF-99F61B62E9A7

Styling Plus Functionality In Your TV Cabinet:

Styling inside the tv cabinet, I wanted decor plus functionality. Vintage books from a local thrift shop along with Target’s line of Hearth & Hand Faux Fern Arrangement  and Faux Locus Arrangement .

8F9A64E2-8B23-475C-A9BC-10D356DEE74B

Very budget friendly at a couple dollars per book and $5 for the Target arrangements. On  the bottom shelves is where my functionality comes in with Hobby Lobby’s Wire & Metal Galvanized Baskets .

4F58A7F2-D0E6-4081-B37F-47BF26B87DE3

If you catch them on their 50% off sale, they are only $12.50 each! In those baskets, we store games and controllers for the Nintendo.

A21B9CCB-6D40-4B85-ABEB-3C023524B024

 The middle of our tv cabinet is the boring stuff like the cable box, ect that I wanted to hide. The bottom basket holds a basket I purchased from Target about 15 years ago which stores dvds and remotes, so hence the sliding (or should I say “hiding”) doors.

39B8FB84-43EE-43AE-BFA8-A45A50D0D38F

Now, above the tv is my most favorite space!! My sweet friend Linda from A Simple Place On Main makes the most absolutely BEAUTIFUL wood word signs!! I actually met her at our local Vintage Market Days and we chatted for at least 30 minutes or more, along with my friend Cindy .

DD23FC62-343A-469F-9537-35447C5ADB5A

Each wood sign is made with baltic birch that is 1/2 inch thick, then it is custom cut, painted and shipped to you! Linda even has an Etsy Shop where you can purchase your wood word sign and right now there is free shipping with orders over $35!! Can y’all tell how much I love her signs?! Now I need one for our newly renovated master bathroom!

D0A9DAA5-82B6-4B1D-ACAF-99F61B62E9A7

I hope that I’ve been able to inspire you on How to Decorate Around Your TV! Please check out my friends to see how they’ve decorated around their tv’s as well!

❤️-Shae