[This post contains sponsored links. The items featured and linked in this post were all provided by Pfister, Kwikset , National Hardware and Jill & June; all opinions and reviews are my own.]

The day is finally here! Your going to be shocked at the transformation of this modern farmhouse bathroom reveal! This renovation has all of the modern farmhouse elements- classic white subway tile, glass accessories with modern satin nickel hardware, warm wood tones, tile flooring and vintage shiplap ceiling. Come see how we transformed this room!
{Full sources available at the bottom of the page for your convenience.}
I still remember the first time we walked into this house. We knew the house had “good bones” and the layout, front porch and land is what drew us here. We knew from our Realtor that most people were passing on this house because the master bathroom was not updated. My husband and I have been diy’ers for twenty plus years so we knew we could transform this home into the home of our dreams. All we needed was a little faith, a lot of patience and some hard work!
First things first. You can’t have a reveal without a few before pics, right?!
Before Photos:
Bathroom Full Shot

Vanity & Mirror View

Shower View

Renovation Process:
First things first! Demolition of the old shower insert and tub.

The hubs working with his saw-zaw to tear out the the insert.

Getting there!
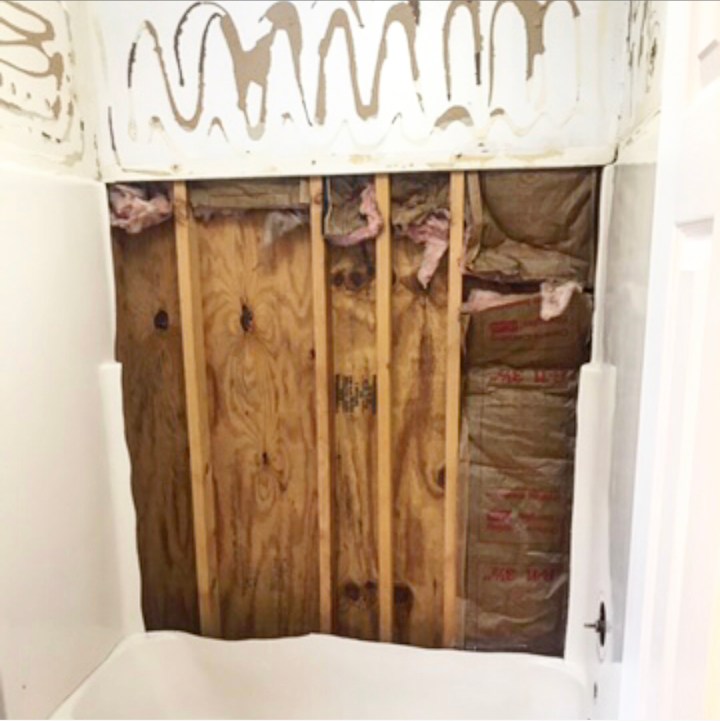
After everything was torn out, some of the walls needed to be re-framed to accommodate the size of the new shower, along with a frame for the shower seat.

Next was installing the shower pan liner, along with the mud bed.

Framed shower seat with shower bed liner & mud bed.
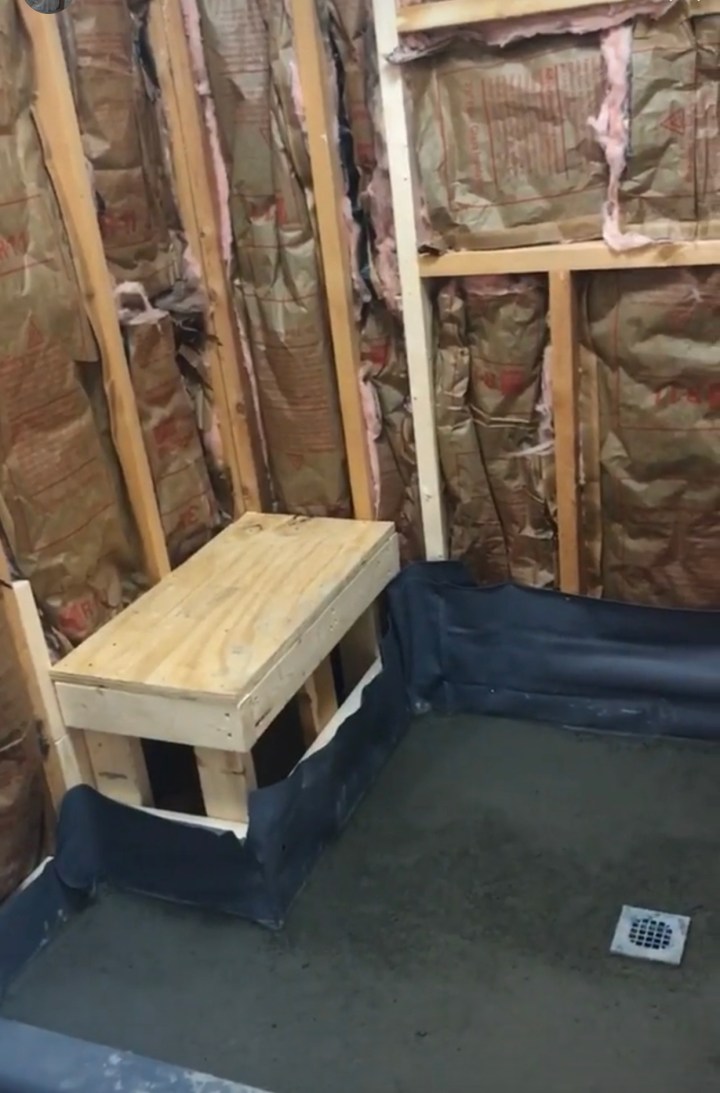
After the mud bed was completely dry, about 3 days later, the shower walls went up!

The red guard was rolled on and it’s a rubber membrane material to protect against water.

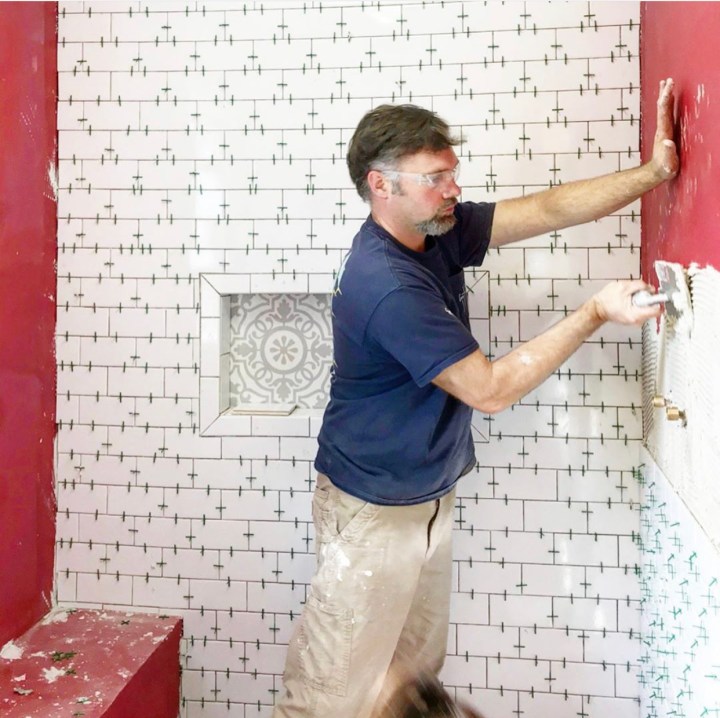
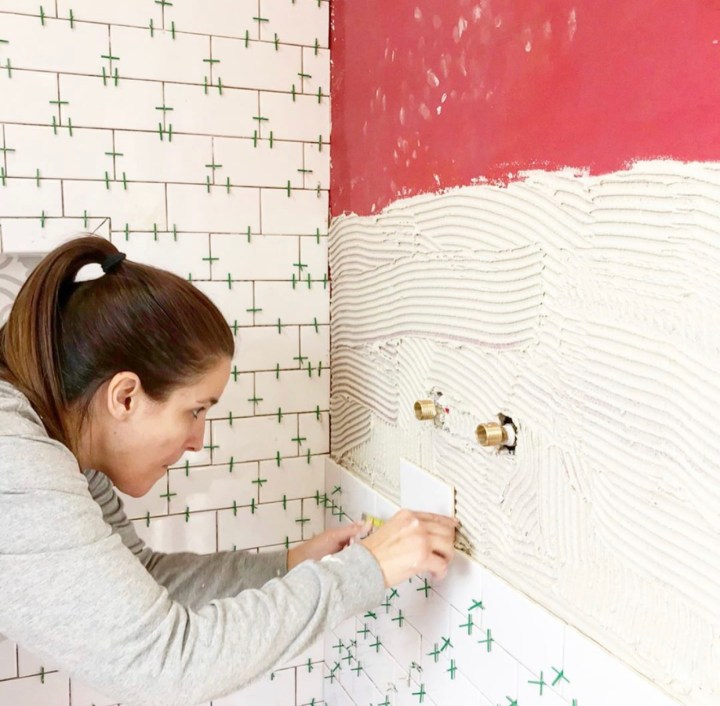
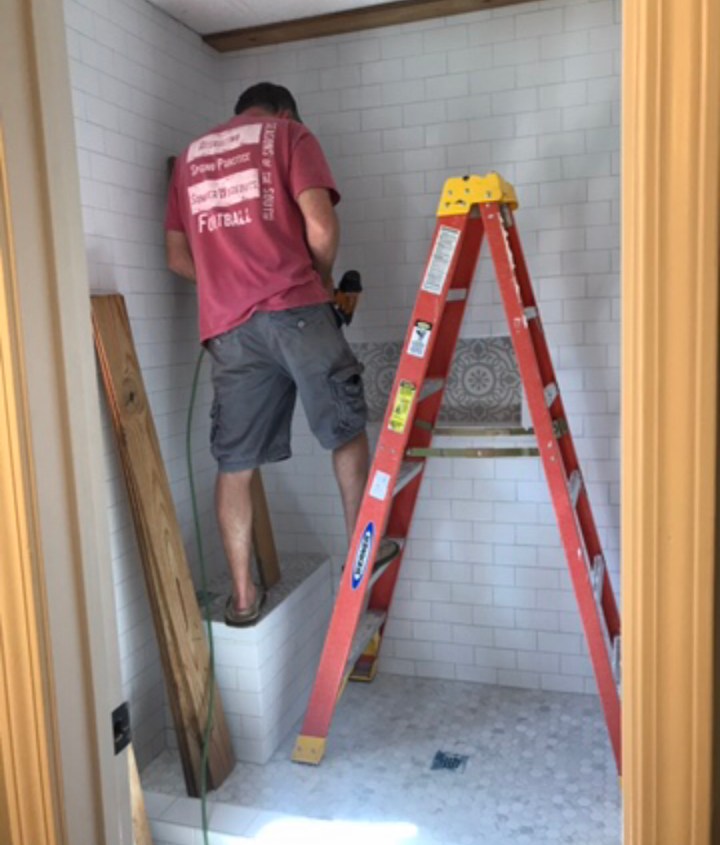
Shower Tile:
I have always wanted to learn how to tile, so my husband taught me how during our renovation! I tiled the first two walls, all by myself, with my husband making the cut pieces.

I really enjoyed tiling our shower and having my hand in the work of our bathroom! When I got tired, my husband would help apply the thinset!
Making sure each tile was lined up just right!
My husband cutting the tile pieces.

My husband tiled the 3rd wall and the shower seat, along with the shower floor.
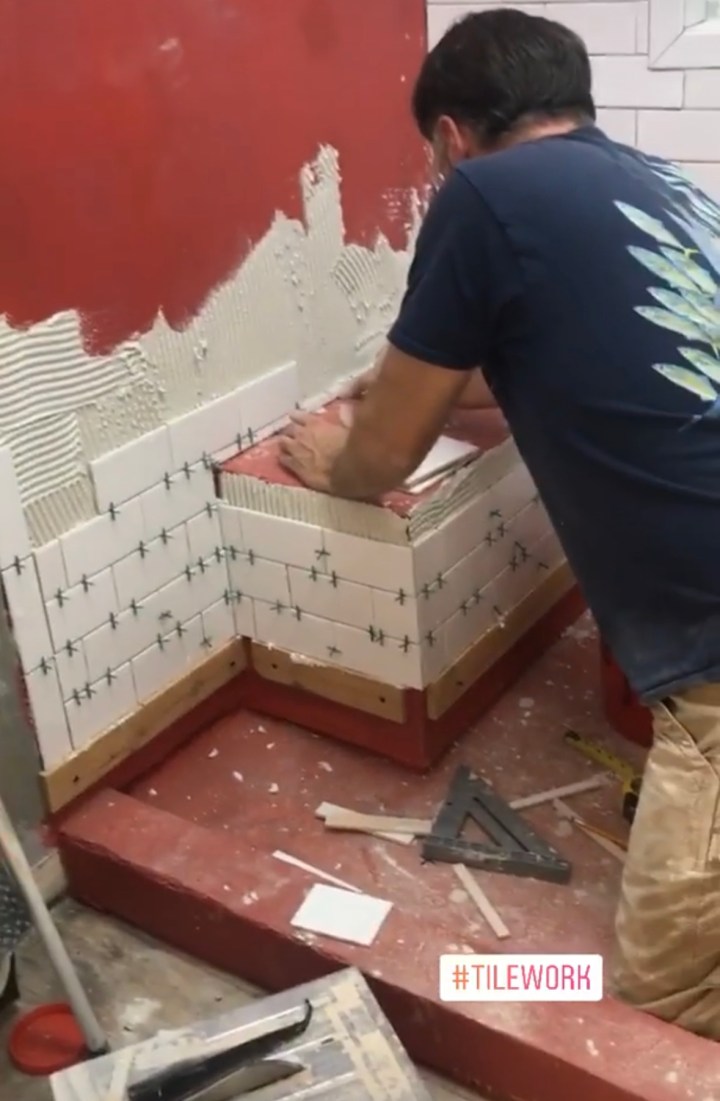
Shower Wall 3

Shower Floor

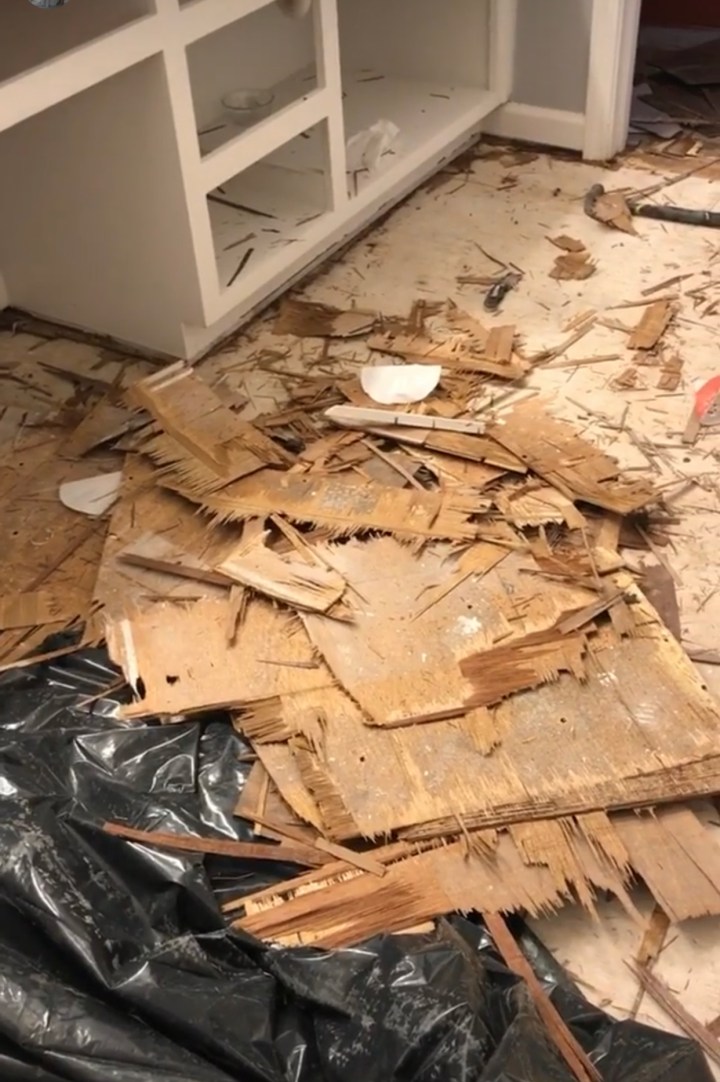
Removing Old Flooring:
There was two layers of flooring. The first layer was put on by the previous homeowner. It was the pre-cut square linoleum tiles with a layer of sticky glue underneath. The bottom layer was the original linoleum to the house. It was a sticky mess!
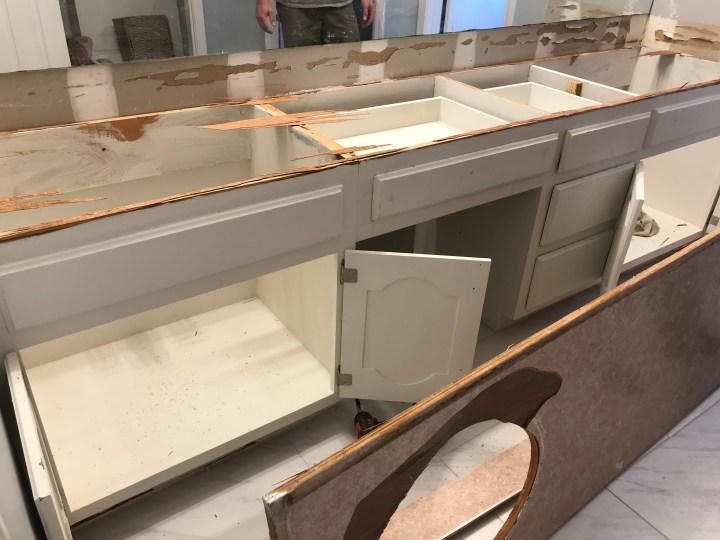
Painting the Cabinets:
We decided to keep the vanity to save costs. I decided to paint the inside and outside of my cabinets with my diy chalk paint. You can find that recipe here . I used Sherwin Williams in Snowbound.


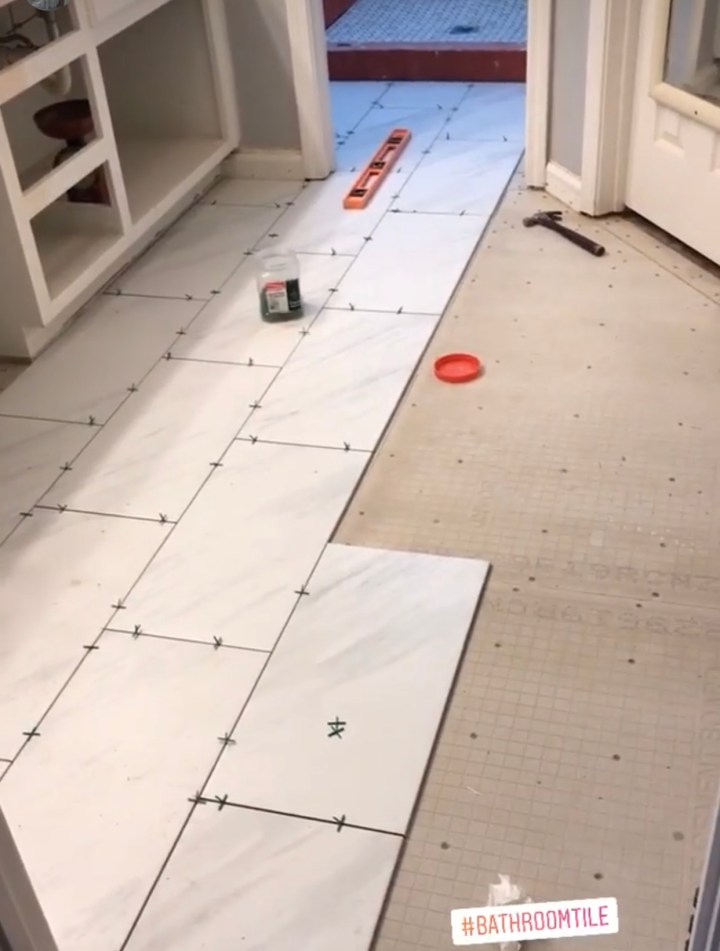
Floor Tile:
First on the agenda was adding the backer board then adding the thin set with tile.
Removing Popcorn Ceilings:
This was the last room to remove popcorn ceilings in our house 🙌🏼 We removed the popcorn then patched and painted!
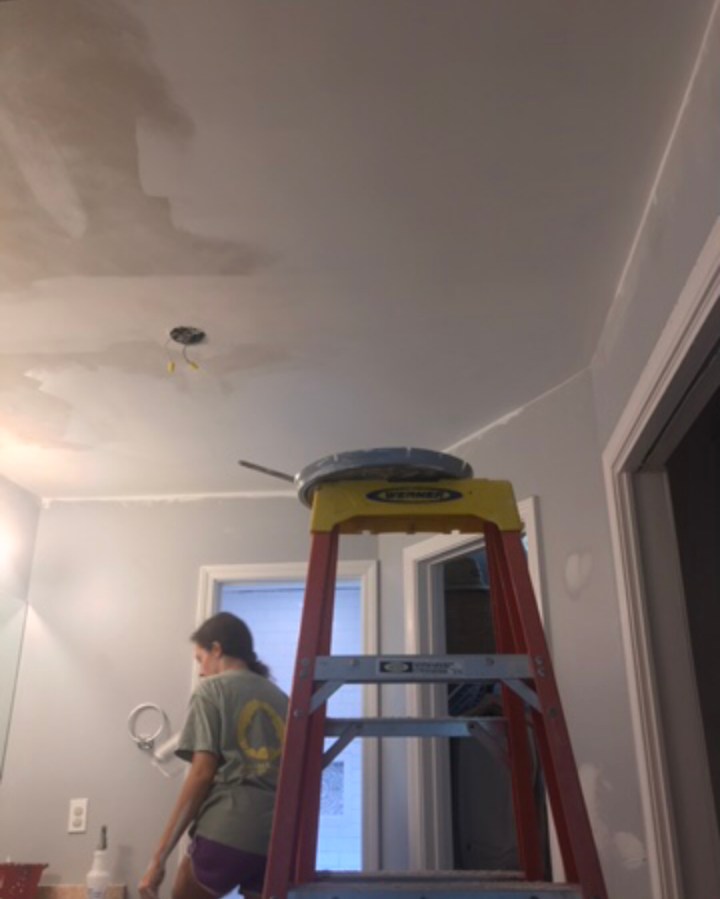
Shower Ceiling:
We chose to do a shiplap ceiling with vintage board & batten to the ceiling! We also added two recessed lights and a fan. This picture is beginning to add the wood.
The boards had what we originally thought was several layers of dirt. What we were surprised to find was several layers of dirt with a layer of mold underneath. It took several applications to treat the mold and remove it completely!

Making progress!

Almost done! Just need to add the other recessed light.

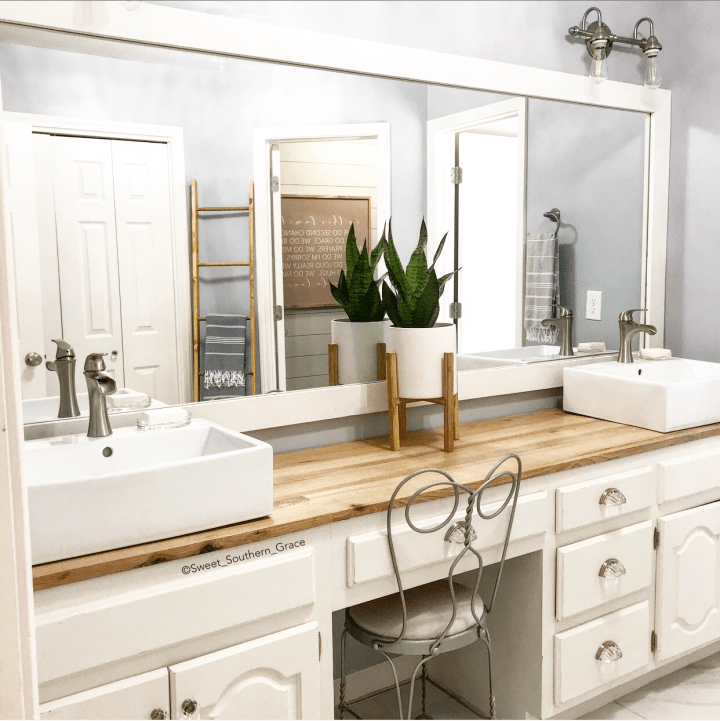
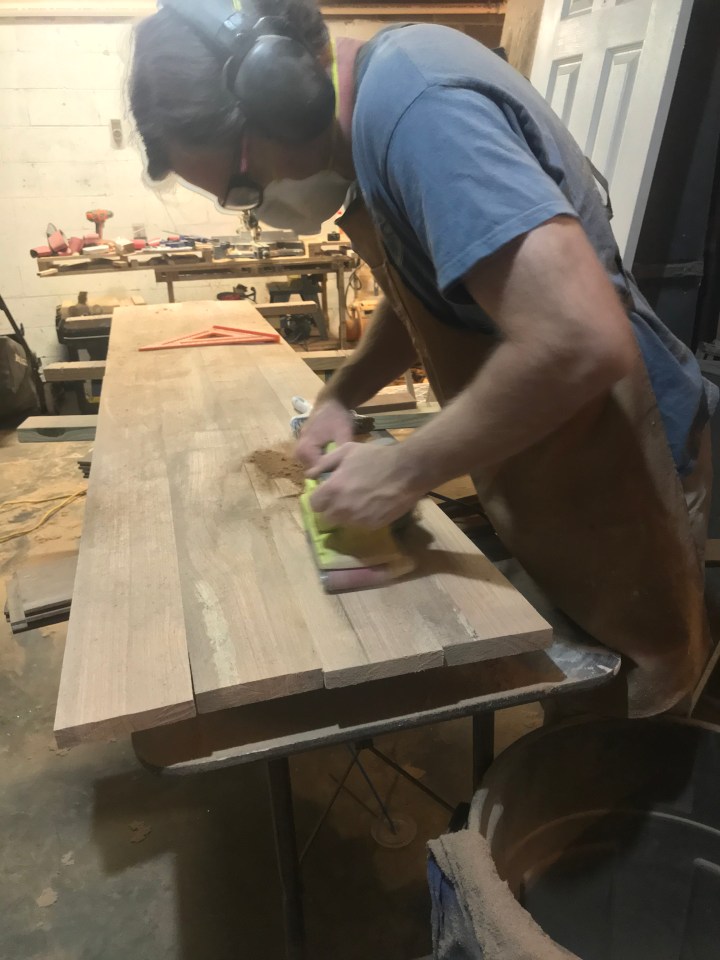
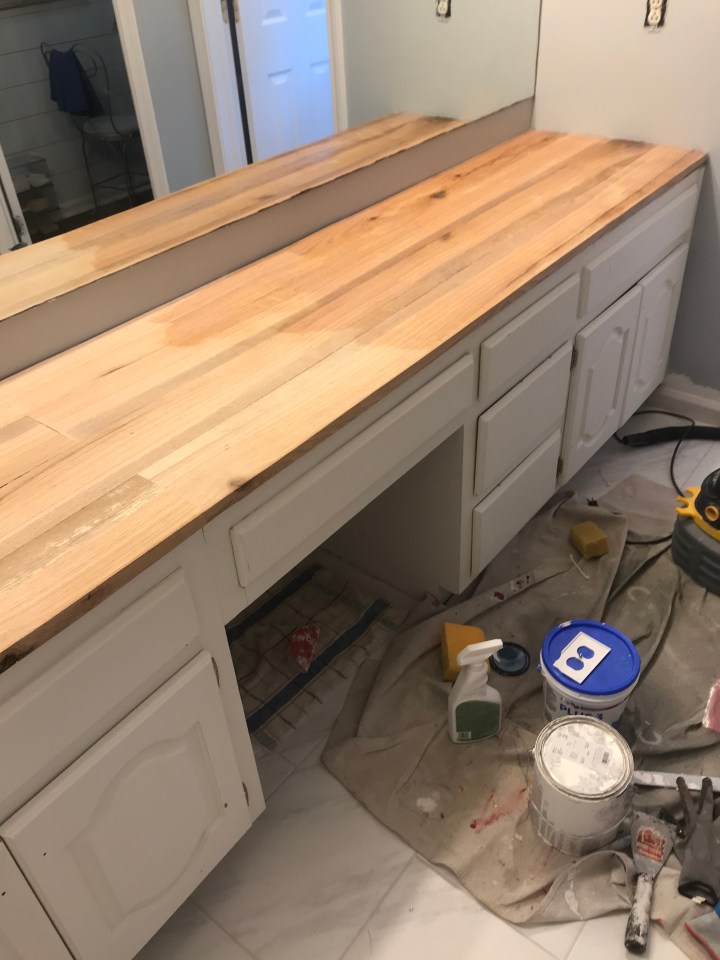
Wood Countertop:
We had a huge red oak tree fall on property a little over a year ago. My husband had an idea to mill the wood! We have already made several shelves & wood cutting boards from this wood! I had the idea to use the wood for a wood countertop in our bathroom. It would basically be at no cost, just our time.
Removing old countertop and sinks.

Out with the old and in with the new!
New countertop installed and I am applying the first coat of matte poly. I applied four coats of matte poly while sanding lightly in between and no sanding on the final coat.
Installing the Shower Door:

Installing Mirror Frame:
We decided to keep the existing mirror. We made a wood frame and painted it the same color of the cabinets.

Installing our Jaida Pfister Faucets:

Installing Cabinet Knobs & Drawer Pulls:
We installed glass drawer pulls and glass knobs.

After Photos:
Bathroom Full Shot
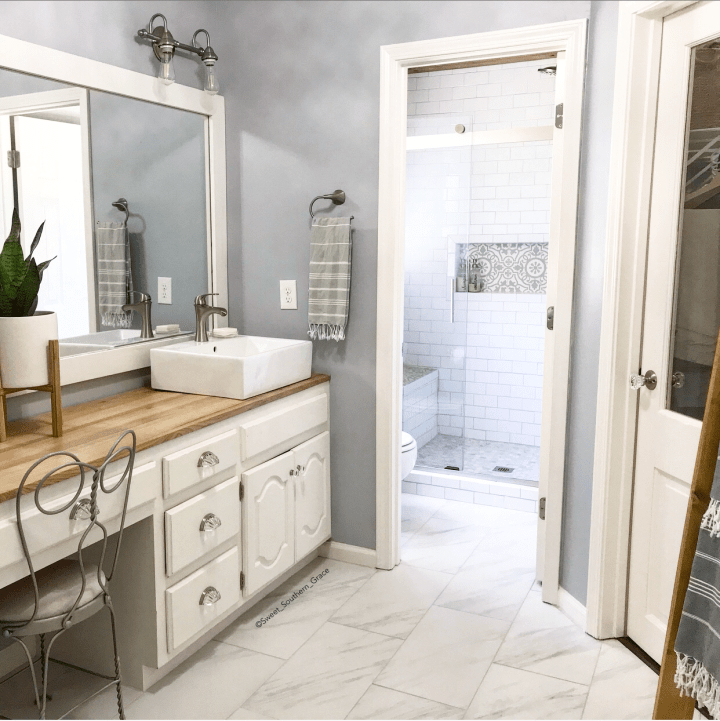
Bathroom Vanity Before & After


Bathroom Countertop

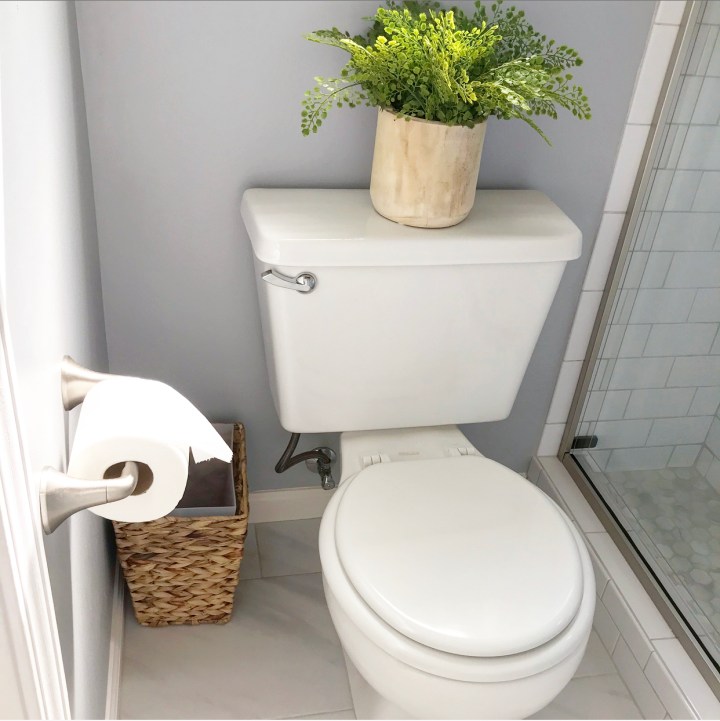
Accessories:
My husband and I designed and built a towel ladder rack. All of my Turkish towels are from Jill + June and they are so soft plus oversized! Loving the tassels!
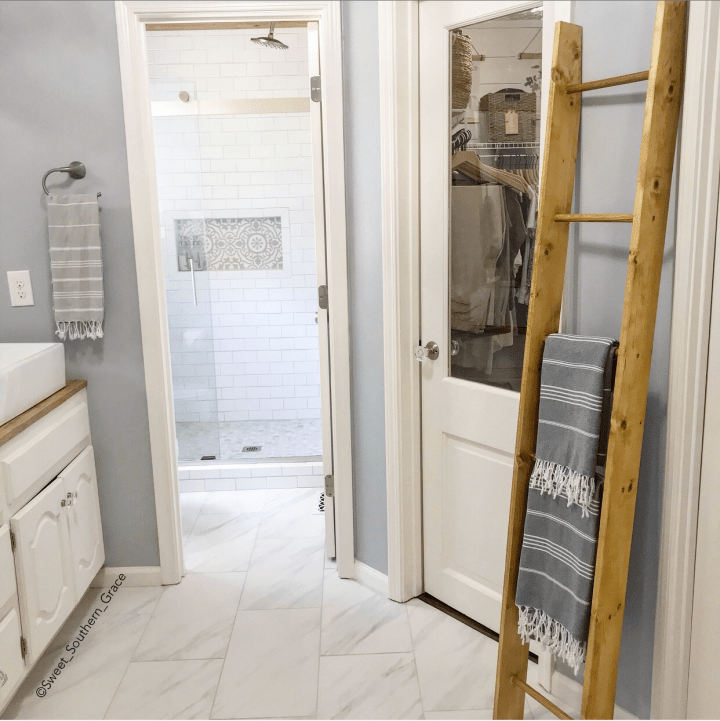
Shower View with shiplap ceiling
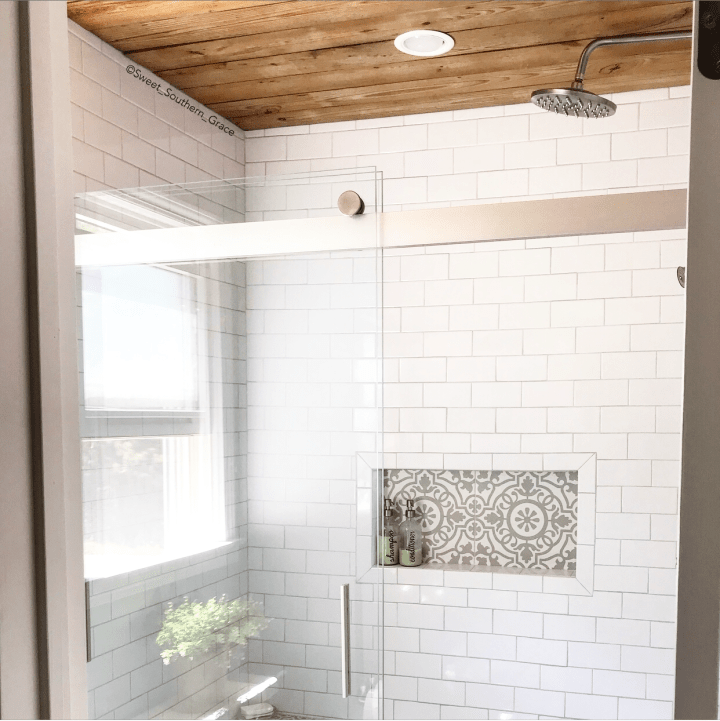
Shower View with Shower Seat

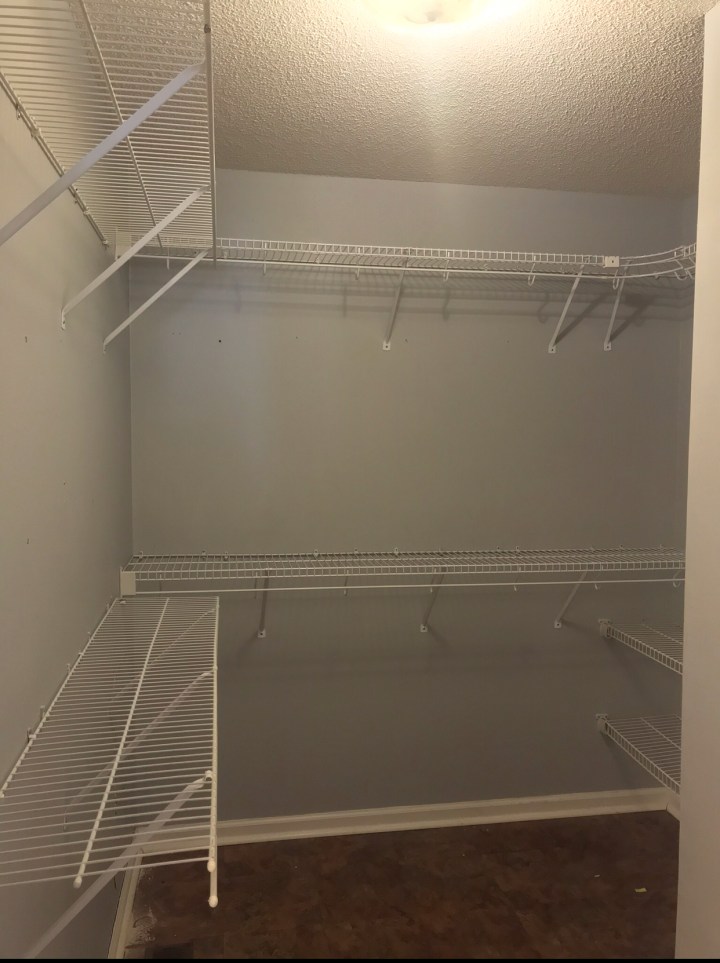
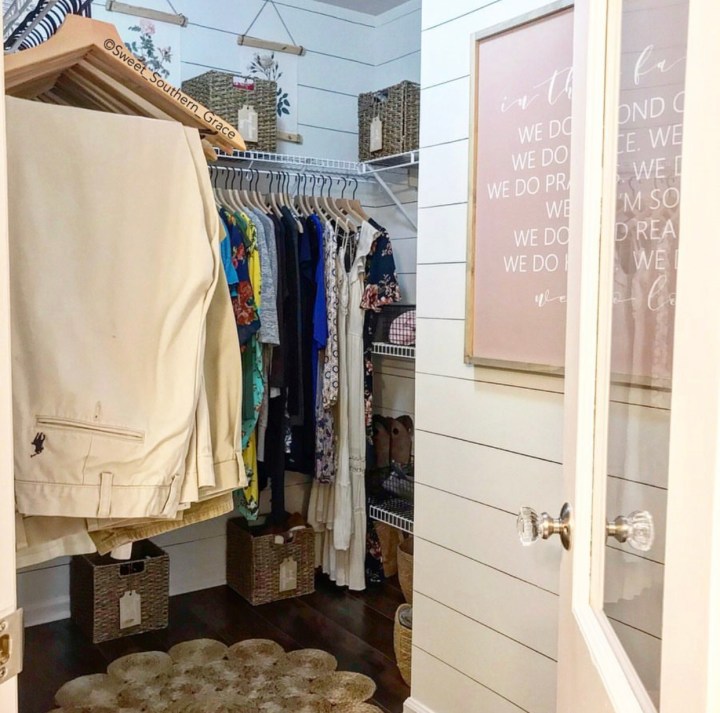
Master Closet & Linen Closet:
During the renovation, we also renovated our master closet and master linen closet.
Master Closet Before
Master Closet After
Master Linen Closet:

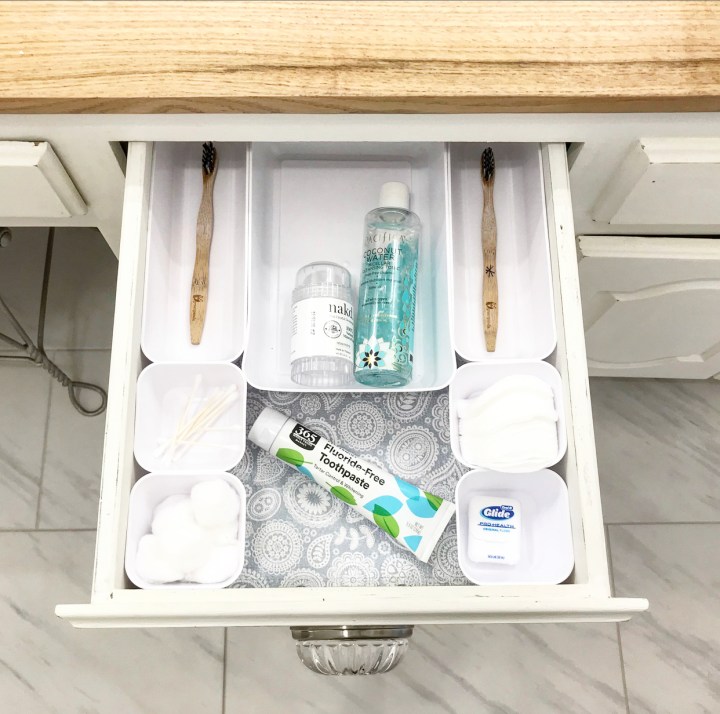
Bathroom Organization:
And a renovation wouldn’t be complete without bathroom drawer and and cabinet organization!
Bathroom Drawer Organization
Final Thoughts:
We are enjoying our newly renovated bathroom so much! It is so nice to have a master retreat! This is a wonderful gift to be able to give to each other. We have never taken a trip alone together or had a honeymoon! It’s about time, since we are celebrating our 22nd wedding anniversary this month! Also, this bathroom would not have been completed yet if it wasn’t for the help of our two oldest (adult) daughters! They truly helped make our dream bathroom come true!! Team work really does make the dream work!

List of products and links used during our renovation:
Jaida Faucets in Brushed Nickel with Spot Defense and Push ‘n’ Seal are from Pfister . Spot Defense is perfect for a busy mama like me!

Ladera Towel Rings with Spot Defense in Brushes Nickel are from Pfister . Love their sleek design!

Ladera Tissue Holder in Brushes Nickel is also from Pfister . My favorite feature is how you can just lift up and change out the roll like a easy breezy summer day!
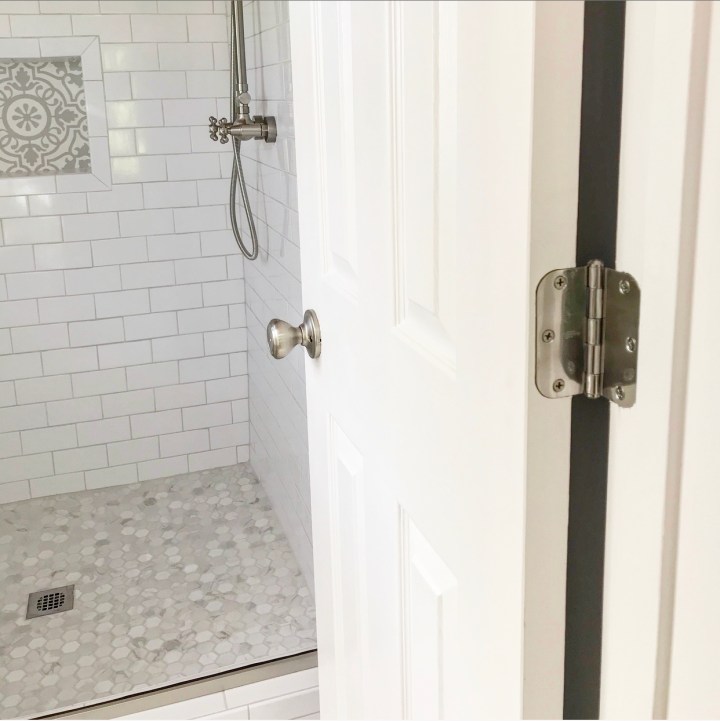
Our Cameron Bed/Bath Door Knobs in Brushed Nickel are from Kwikset . I love its simplicity!

Our Interior Door Hinges in Satin Nickel are from National Hardware .
That concludes our renovation! Thank you so much for taking the time to read about our master bathroom renovation! If you have any questions, please let us know!
❤️-Shae

Shae all of your hard work paid off!!! This looks amazing!!!
LikeLike
Thank you so much Becca!!!
LikeLike
What an absolutely amazing transformation!!! I love how you showed each step and with explanation. I have never seen shower doors that are like barn doors, love love love them. Where did you get those or did you make them yourselves? Thank you for sharing
LikeLike