Natural and Simple Fall Home Tour

Gather autumn inspiration from our natural and simple fall home tour that is loaded with farmhouse, rustic charm and lots of diy’s.
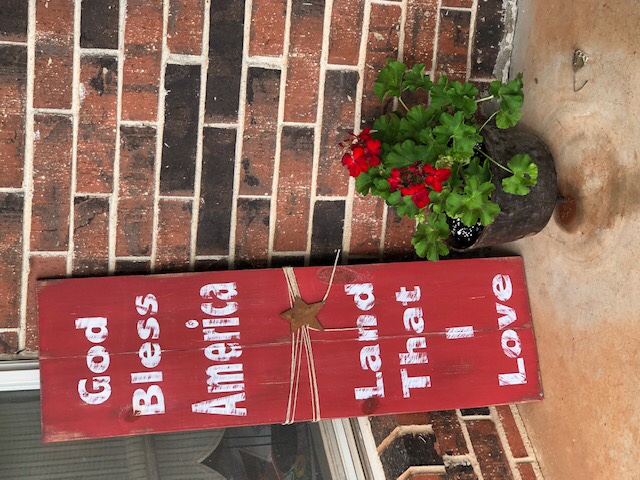
Fall Front Porch 

09C86D0F-BBAE-4A9B-A6EA-3C30AD2E5100

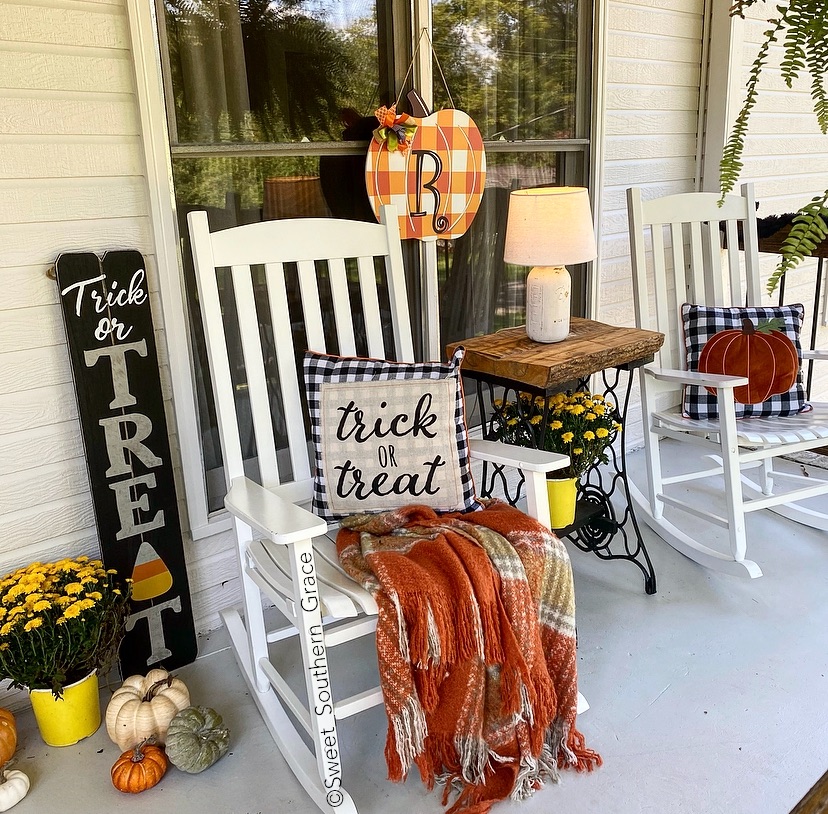
Although the fall weather is just beginning here in Alabama, I am loving the crisp fall days and watching the leaves begin to change. Fall is by far my favorite season! I am excited to join a few other ladies on instagram to share their fall home tours as well! Please make sure to visit the other fall homes over on instagram! For my fall front porch, I added fall mums, pumpkins, pillows and a cozy blanket! Add a couple signs and your fall porch is ready for the fall season!
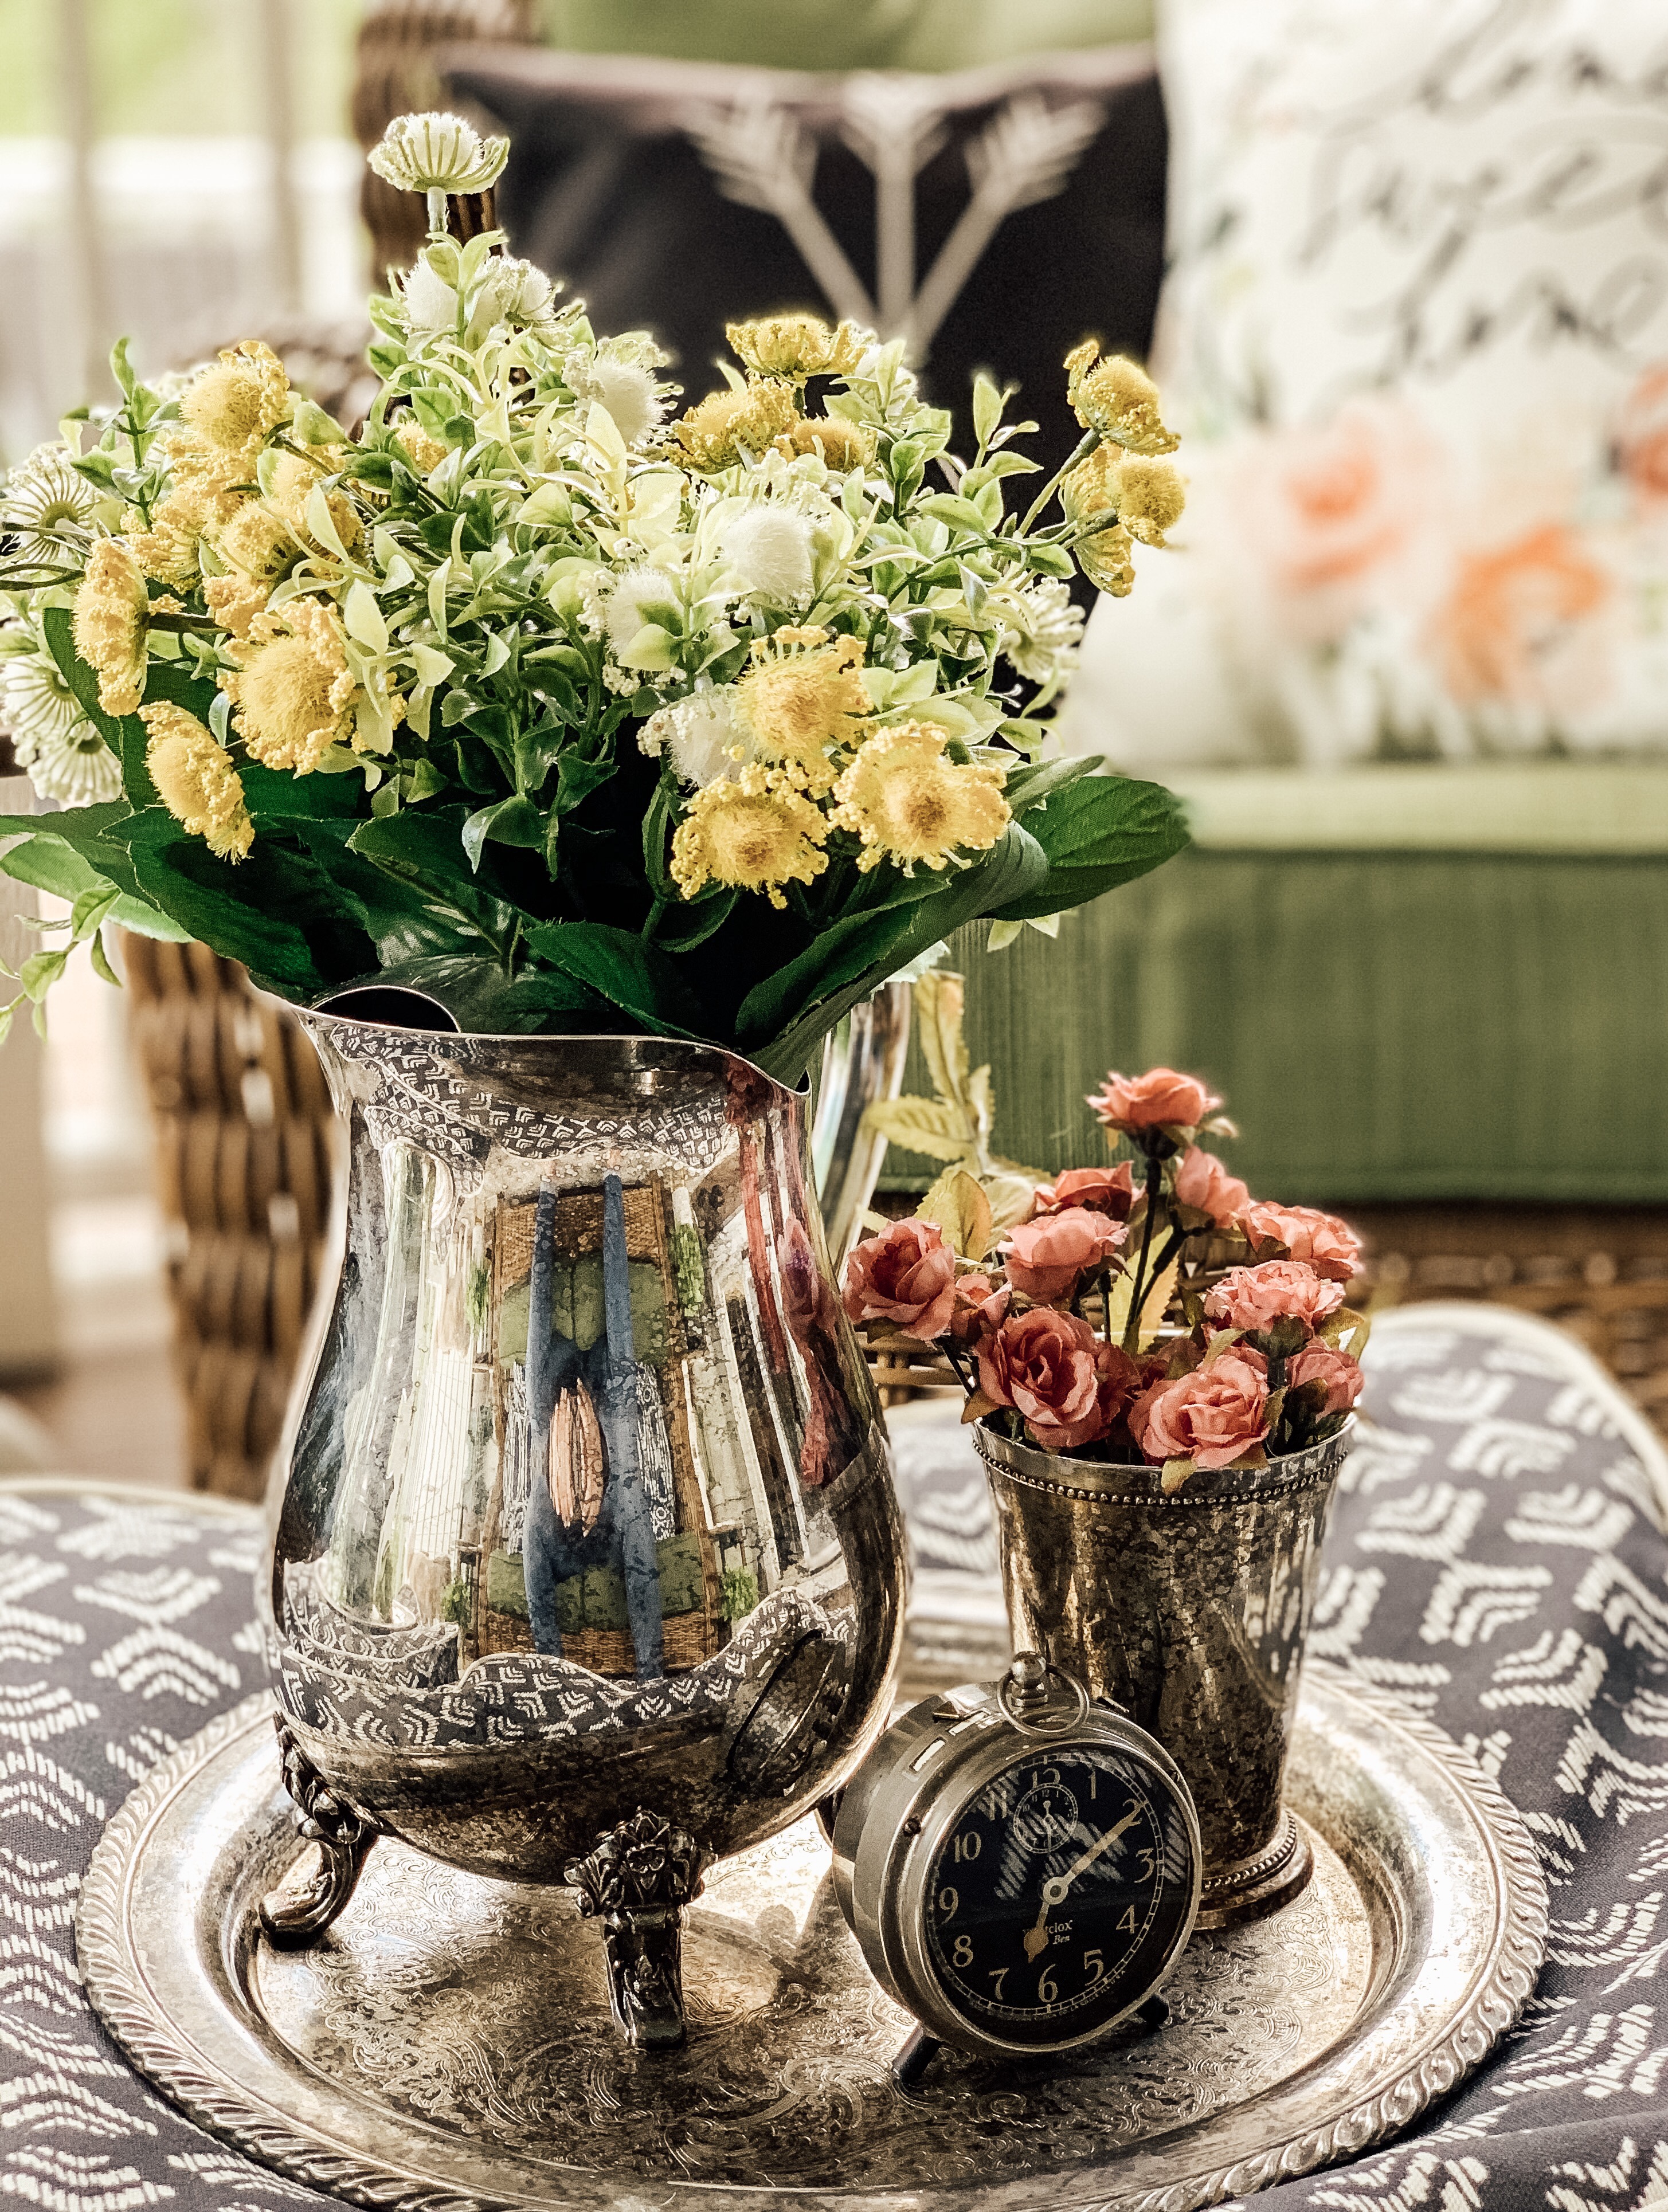
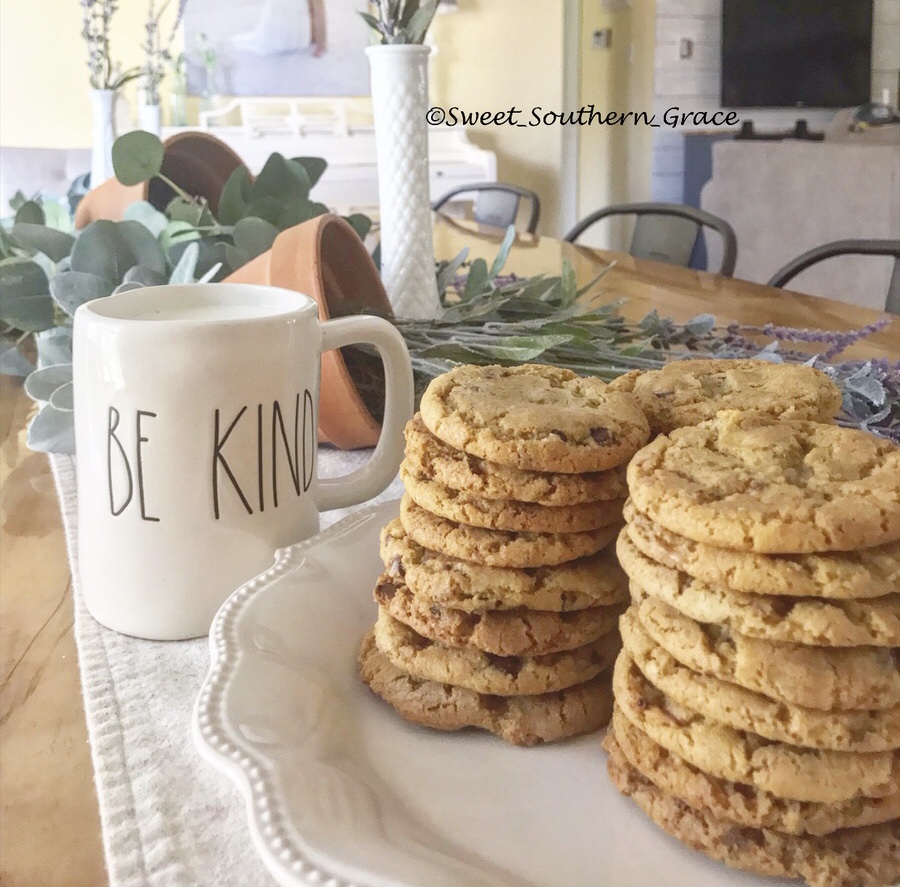
Fall Dining Room

678A4FB3-F692-43EC-8A76-06279EE876EE

If you dropping by here for the first time, welcome! My name is Shae and I live in Birmingham, Alabama with my husband and our four daughters, along with our pup, Tinker Belle. We have worked so hard to transform our house into a home. Lots’s of diy’s fill our light and bright home, characterized with farmhouse charm. One of my favorite projects in our home is the designing and building of our farmhouse table in our dining room. We even designed and built the light fixture as well.

30426F0F-FBF4-4ACB-9CB9-B36A51CD5E08

Since it is just beginning to feel like fall here, I really wanted to have a more simple, natural approach to my fall decor. Plus, I knew we would be moving in mid October, since we just recently sold our home! Simple sounded like a breath of fresh air with the swirl of moving in the back of my mind! I kept everything as neutral as possible then added a couple muted tones of orange with fall pumpkin pillows, a blanket then several multi-colored fall eucalyptus pieces. I always enjoy styling my dough bowl for each season.
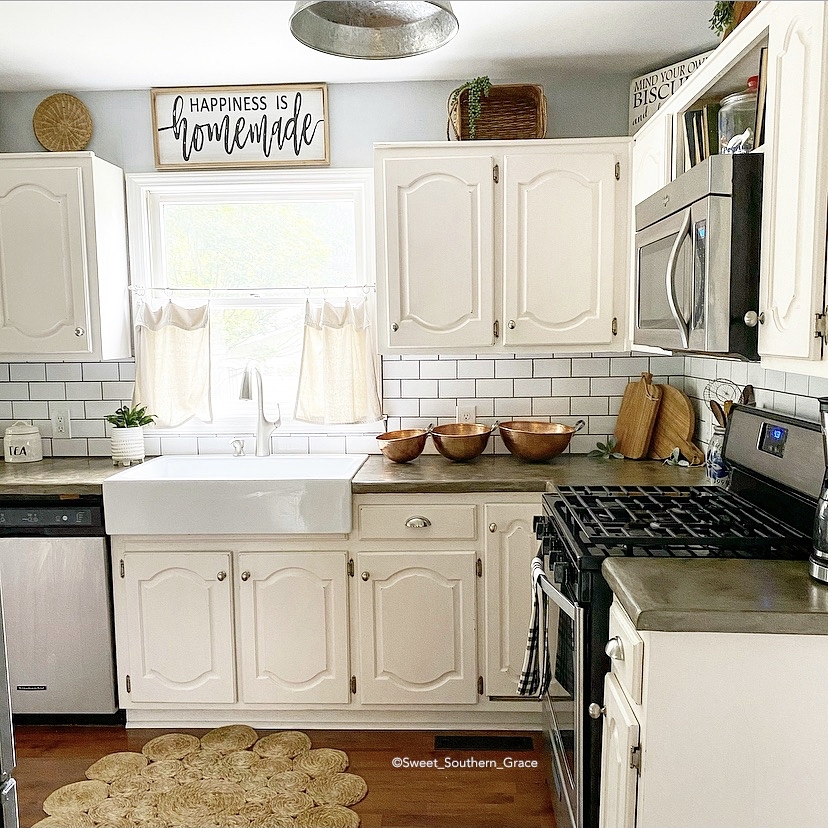
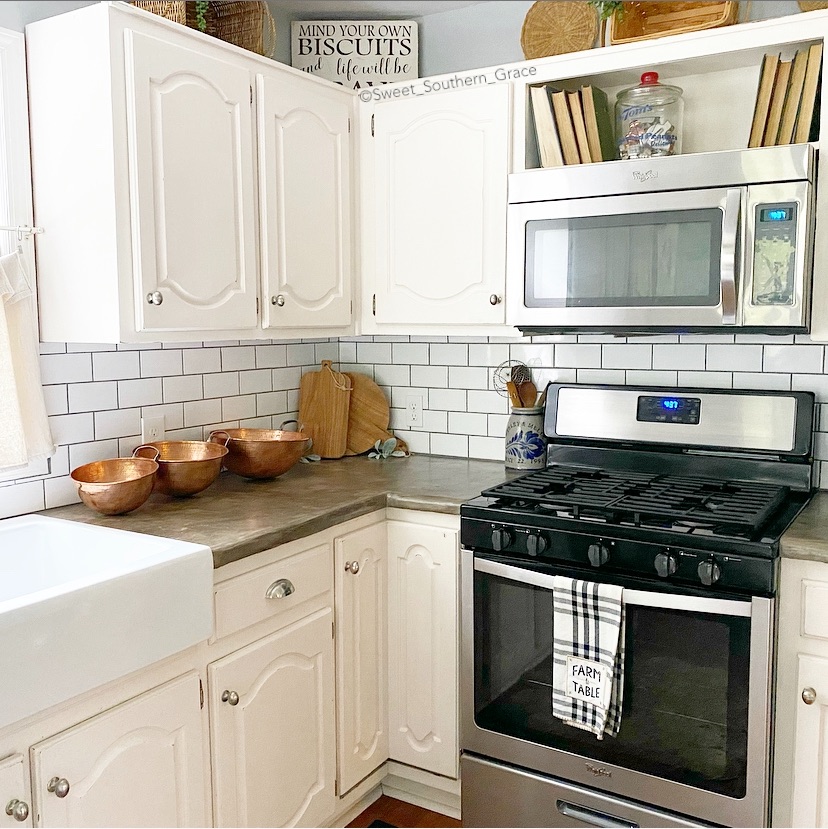
Fall Kitchen

CB8FE987-3E6A-4916-91A5-FA1DF93676B7

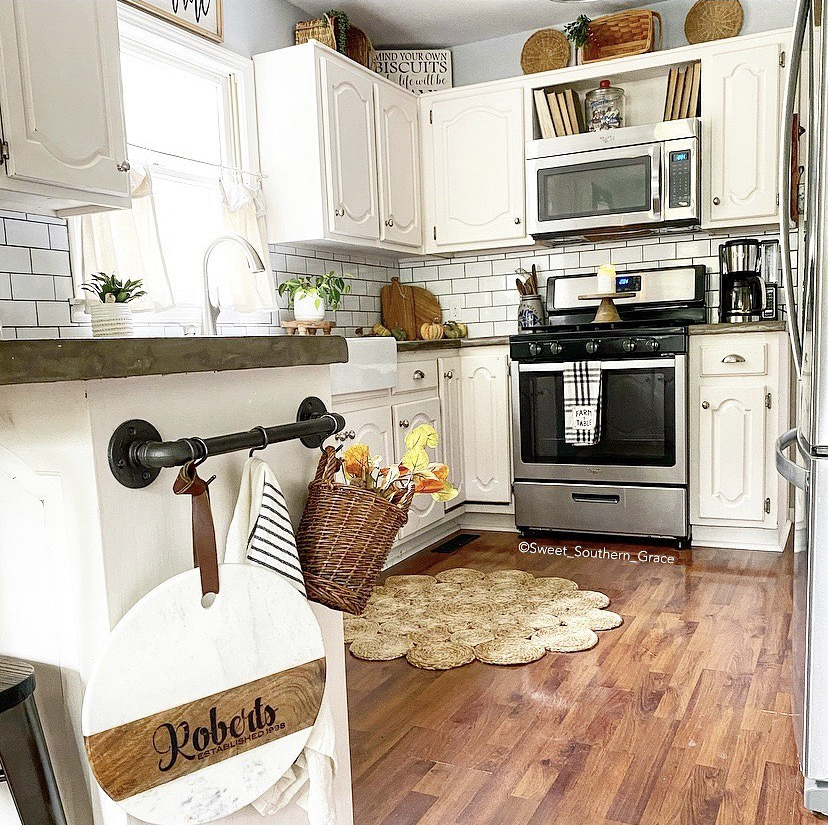
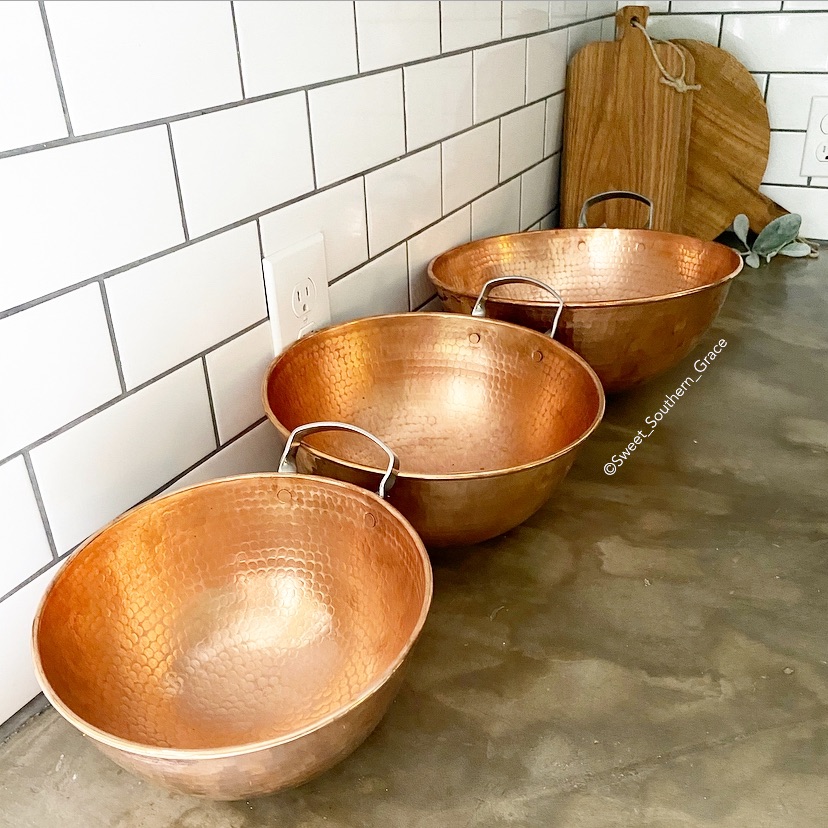
I really wanted to keep my seasonal additions in the kitchen neutral and simple. If you are a regular, you may have noticed how we have completed this space as more of a rustic farmhouse look. If you haven’t caught the posts about our kitchen, check out the renovation process HERE . We painted the CABINETS inside and out, with my diy chalk paint. It made an incredible difference! I even did the concrete countertops by myself! Of course, the farmhouse sink is my favorite thing about our kitchen renovation! For the fall decor, I added the muted toned, eucalyptus in a hanging basket and kept everything neutral from the wood colored baskets to the live plants! I also added a few pumpkins on the counter and one of my fall curated candles that you can purchase here.  Sometimes simplicity is best! 

Fall Family Room

9FC3AD56-97BC-4D8F-AFB7-51D500458A34

One thing that I am really going to miss about this room is our ship lap wall! This wood is around 100 years old and I love the white wash that I added to it! The white wash just brings in so much more texture to the focal wall! In this room, I added several fall pillows in that same muted orange. I also added another fall blanket that helps tie in the colors of the room.

106A3F94-EBE8-4125-8197-FCE8C4DA22E3

I can’t forget about the fall florals on the mantel from Kirkland’s! You can find that post  HERE.  One of my favorite smaller diy’s that my husband and I did a few years ago was our Pumpkin Patch Sign. Lining up and gluing on all of those letters, just above drove our OCD-selves crazy but we did it! This sign also doubles as a Christmas Tree Farm sign on the back! I have used this sign in our decor for the past three years and I still love it! DIY’S with my husband will always be my favorite because we create in together and with love for our home! 

Fall Half Bathroom

37AEAF00-D6F1-4124-B41D-011FA4478D45

This little farmhouse half bath still gives me all the heart eyes! This was one of our first diy’s in this home! You can read all about how we transformed this Half Bath Makeover Under $180! Whites and woods are definitely apart of my love language when it comes to decor. My husband and I made the frame and the shelves from 100 year old barn wood. Leaving them with this house definitely makes me sad but knowing that the new homeowners will appreciate their beauty makes me happy!

942B51AD-C005-44AE-88D7-EC0484BC5090

Fall decor was definitely kept simple in our half bath, as I added the muted eucalyptus and a couple glass vases with fall florals from Target.

Fall Laundry Room

99B63463-92C1-4182-B777-099EEC5C6A7F

I feel you can never go wrong decorating any space in your home, as long as it gives you joy, go for it! That is exactly what I do, when decorating this little shelf in my laundry room! I love having a beautiful space to wash and  dry my family’s clothes! It is such a blessing to me!

7F421459-3011-4EDD-9BBA-4948F60FB87A
For this space, I added a fall wreath along with a few pumpkins and that beautiful fall eucalyptus! Simple, budget friendly and you can use it every year and even add to it yearly as well!

3DE5801F-66B4-4EB3-9A9C-41BC059185A6

I hope ya’ll have enjoyed our Natural and Simple Fall Home Tour! I sure have enjoyed sharing our fall spaces with you!

Laura over on her blog

Adriana over on Instagram

Rachel over on Instagram

Divya over on Instagram

Suman over on Instagram

Please let me know if you have any questions! 

Love-Shae 

AE2C872C-E1A8-463A-A1C9-A7AE4E85F7F0

Sertodo Copper

[This post contains sponsored links. The items featured and linked, in this post is provided by Sertodo Copper; opinions and reviews are my own.]

Sertodo Copper: Benefits

Did you know that copper has anti-microbial proberties? I also can appreciate that 65% of all copper mined today has been recycled over and over to make new pieces! I enjoy having a product in my home that is anti-microbial and is recycled!! 

E68D7D2E-891A-468C-BEAD-CEDC39A579A8

Sertodo Copper: History

Over 23 years ago, Jonathan Beall founded Sertodo Copper and began selling it throughout the United States  from the back of his truck! He even nicknamed his truck “El Macho”.  Since 1997, Sertodo Copper has been bringing the highest quality copper goods made by the master artisans in their shops located in Austin, Texas and Santa Clara del Cobre, Michoacan.

cdc681dc-5746-4634-a186-479df0f64949

Sertodo Copper products are designed to become heirlooms for generations to use with cooking, socializing and enjoyin with family and friends. The first pieces that Sertodo Copper sold in 1997 are still in use today because the first customers are still customers today!

C9486BDC-F713-4D80-8E62-504B688D3B21


Whipping Egg Whites in Copper Bowls

The really cool thing about whipping egg whites in a copper bowl is that as the whisk hits the bowl, tiny bits of copper break off from the surface of the bowl and mix in with your egg whites. Since copper can bind sulfur groups, those tiny bits of copper bind to the egg white proteins and therefore, sulfur groups are unable to form the strong disulfide bonds that can leadd to gritty, dry whipped egg whites. The egg whites whipped in a copper bowl stay glossy and firm without as much risk of becoming grainy or overwhipped. Pretty cool, right! So tell me, have your tried whipping egg whites in a copper bowl?

Recipe: Whipped Egg Whites

It is best to use fresh eggs, since the proteins are more conductive to forming an airy, porous foam when they are new. Seperate your egg yokes from the whites.  If you accidently drop some yolk into the egg whites, the fat will prevent the egg whites from foaming up.  To avoid this, use two seperate bowls-one for yolks and one for whites.  Place your egg whites in your copper bowl and begin whipping the egg whites with your whisk.  As you beat, do not rush adding the sugar. The slower you add your sugar, the better it will dissolve.  I recommend using one tablespoon at a time.  Also, take weather into account, as it is best to make meringues on a dry day. On humid and hot days, they can become limp or sticky.

Ingredients:

* 4 large egg whites

* 1 cup sugar

*1/2 tsp of cream of tartar IF you do not have a copper bowl.

Directions:

Beat egg whites until foamy with a whisk or mixer. If you do not have a copper bowl, now is the time to place the cream of tartar into the foamy egg whites. Try not to overbeat the egg whites at this point or they will have a harder time combining with your sugar.  Slowly add the sugar, 1 tablespoon at a time. Beat until you no longer hear the sugar in the egg whites. (No sound of the sugar hitting against your bowl as you mix.) Once all of the sugar has been added, you can stop worrying with overbeating. Beat until stiff peaks form. How to tell if you  have stiff peaks? Test by lifting your whisk from the bowl. The peaks of the egg whites that rise as you lift should stand straight up.  Also, as you tilt the bowl, the whites should not slide. You should not see any clear watery egg at the bottom. Double check to make sure the sugar is dissolved. Pinch some meringue between your fingers. It should feel sliky and smooth. 

Sertodo Copper: My Favorite Copper Pieces

I am loving their Bisotun Water Pitcher! I think it is a great conversation piece as well! 

A6D0CDC8-050E-4EBF-A1B9-09E6EA1972A3

I also love their Alicante Paella Pan. Perfect for whipping up something for dinner! 

15061220-B128-4382-BE9E-B0926F38FDC4

Of course, I love my Sertodo Copper! Perfect for the meringue recipe!

C9486BDC-F713-4D80-8E62-504B688D3B21

I hope ya’ll have enjoyed reading about the benefits of copper, the meringue recipe and  about the history of Sertodo Copper. Please check our thier website. I know you will love  their copper!

❤️~Shae 

069BE719-0080-46D7-98AC-6A0E4F637C88

May Thrift Store Challenge

May Thrift Store Challenge

Teaming up with a few of my favorite friends for our monthly Thrift Store Challenge! The rules are to find an item thrifted and show how you can use it in our home! This month I fell in love with a couple of matching vintage pillow cases from an estate sale and you will never guess what I paid for them?! I paid a grand ole .25 cents each! I knew exactly what I wanted to do with them! When my oldest two daughters were little, pillow case dresses were popular. I had made both of them a vintage pillow case dress and I wanted to do the same for my youngest two.

CE4FA7E5-2167-460F-A03C-FD1D4ADF0E23

I headed to my local Wal-Mart and picked up a roll of 3/8 inch offray satin pink ribbon . It was only $1.99 for one roll.

E2DBF1F9-CADE-4629-A68A-9543B075C4B7

The first thing you want to do is measure the child you are making the dress for and your going to measure from the top of the shoulder to where you want the hem to be. In this case, I want the end of the hem to be at the end of the knee. It is a little longer than I want it to be, but I know I will be able to get two years of wear from this dress. After the dress is to short, it can then become a tunic to wear with leggings! You can actually get about 3 years wear from this dress! After you get that measurement, you will add 7/8th’s of an inch to that. My measurement at the top of the knee was 25.5 and 7/8th’s, so mine will be approximately 26 and a 1/4 inch.

52C74C57-F340-4177-B249-520F00E22E3E

Take your measurement and begin at the opening of the pillow case and measure at the opening of the pillow case, mine is 26 and 1/4, cut at that measurement. The next step is to fold your pillow case in half, vertically. You will be cutting arm holes in the pillow case. By folding it in half, you will be creating two identical arm holes.

47FA51BF-CE82-4BEB-9E6C-6CB825113E8D

The shape of the arm holes should be like a letter J. For an older child, I measured out 2 inches wide by 4 inches deep. I marked the measurements with chalk. Go ahead and cut between those lines and remember your pillow case is folded in half, vertical. Once you cut, you will have two arm holes that are exactly the same.

BA018B65-DC00-49A9-B25D-EE3F604D33CC

Open up your pillow case dress and fold over the edge on the arm holes and pin. Sew down the edge. Once you have sewn down the edge, turn down for a second time, pin and sew again.

5F5CDAC3-9B85-41AE-A531-B28CACA43195

The next step is to open your pillow case and lay it out flat. Sew 1/4 inch at the top of the dress. Fold down and measure 5/8th’s of an inch, pin and sew. This will be your casing for your ribbon ties.

B0350060-7259-4353-9CA4-29356F7C88FD

The last step is to grab your ribbon and heat seal the end. Add a safety pin to the end of the ribbon and thread through the casing until you reach the other end.

3F9A5BAF-2695-4012-9C07-B1383D92E722

Make sure to heat seal or you can use ribbon fray check for the ends of your ribbon so that they don’t fray. I also tie very small knots at the end of my ribbons. You have officially made a pillow case dress! Easy, right! You could even add a monogram or an applique! Check out my my highlights section on IG for a full video tutorial, under “pillow case dress” .

0493FE11-D5DE-4B4B-BAC3-3027E46318D4

Such a simple, budget friendly way to make a beautiful keepsake for under $3.00 for both dresses! Please check out my friends to see what they have found for our May  Thrift Store Challenge. I am sure you will enjoy their finds as well!

From our family to yours, Happy Memorial Day!

Love, Shae

Tara, Stilettos and Shiplap


Shae, Sweet Southern Grace


Dori, This Full Life 5


Victoria, The Home Envy


Jodi, The House House Blog


Lindsay, Farmhouse Eclectic


Teresa, Through A Vintage Door

Chocolate Chip Toffee Cookies

Chocolate Chip Toffee Cookies


81B75467-6FF7-454F-9E9A-59B1FD84F74E

This is probably our family’s fav cookie recipe, at the moment! The bits of toffee jazz up our chocolate chip cookie recipe! The cookies are soft and chewy with a bit of a crunch on the outside!

INGREDIENTS:

3/4 c butter (1 1/2 sticks), room temp

1 1/4 c light brown sugar (packed)

1/2 c white sugar

2 eggs

1 tbsp. vanilla

2 1/4 c all purpose flour

1 tsp baking powder

pinch of salt

1/2 tsp cornstarch

1 1/2 c semi sweet choc chips

1 1/2 c toffee bits (Heath Bar Bits ‘o Brick baking pieces)

DIRECTIONS:

Preheat oven to 375 degrees. With your stand mixer, cream together butter and sugars on medium speed. Add eggs, one at a time. Add vanilla. Mix flour, baking powder, salt and cornstarch until just combined.

B6104009-96DF-4FA6-A0D2-FAEBEC7B3F5F


Add choc chips and toffee bits and mix until incorporated. I like to fold in with a spatula or my hands.

058B4E28-5AED-4F14-99C5-973F0938AF55


Drop by rounded 1 inch balls on baking stone or sheet and bake for 9-10 min for softer cookies (just beginning to brown on edges) or 11-12 min for crunchier cookies. Cool on wire rack.

EB56D9C3-0F2B-46F8-956C-5B807F533D64


Milk Glass Collection

1337DB83-BCAE-472C-B1C2-075FCA494E3F

I fell in love with milk glass a couple years ago, thus the beginning of a new found collection! I originally began collecting milk glass so I could show it off in a corner cabinet that I am dreaming of! We have plans to build one soon! For now, I enjoy decorating with milk glass throughout my home. Everything you see pictured in the first pic, I actually purchased at an estate sale for $15!! It was a steal!

AAE81633-FA74-4D3C-A9AD-EC443FEF75A4

Over the weekend, I visited my favorite local antique store, called the Brass Bear Antiques. I was on the hunt for a few items and one of those items was milk glass vases! I did find several milk glass vases! Score! Reasonably priced for $4-$6 a piece!

C91B7154-13F8-4846-A4C1-60377FD491CD

I feel like there are so many different ways to display your milk glass. From a spring tablescape to a corner hutch or on a tray in your kitchen! Add greenery or flowers and you’ve got a gorgeous, simple vignette!

E1662CAF-4163-4063-B99A-44500E650283

Do you ever purchase a antique piece and wonder where it has been? What is the history behind the milk glass? How many owners did it have? Was it given as a special gift to someone for a birthday or a “just because” gift? Do any of ya’ll collect anything that is dear to your heart? Do you have a special antique that was given to you by a family member? You will find many antique pieces, throughout our home. Many of those pieces were given to us by our Grandparents.

XO~Shae

ABOUT ME

Hey y’all! My name is Shae and I grew up in sweet home Alabama! I graduated high school at sixteen and began going to college to study child psychology. (Years later, decided to study to become a pediatric neurosurgeon.) I met my husband at work, so I essentially married my high school sweetheart, at the tender age of seventeen. A year later we had our first daughter and I guess, as they say, the rest is history. We have been married for twenty three years with four daughters and two fur babies. My husband and I are a powerhouse when it comes to working together on our DIY’S for our home. I love to design and he loves to build! We are currently building our barndominium!!

BFDCD94F-6205-4412-8C62-5F04AB5E97AF

MY VISION FOR SWEET SOUTHERN GRACE

My vision for Sweet Southern Grace is a dream of mine, one that I truly love sharing with you! This site will combine so many of my passions. A few of those are faith, family and farmhouse décor. Sweet Southern Grace is a place for me to share to my home, recipes, decorating tips, inspire others, DIY’S and much much more! I am honored that you have taken the time to stop by Sweet Southern Grace. Let me know if I can do anything to help you in any way!

Sweet Southern Grace is on Instagram. Link below.

https://www.instagram.com/sweet_southern_grace/