Homemade Apple Pie

Homemade Apple Pie

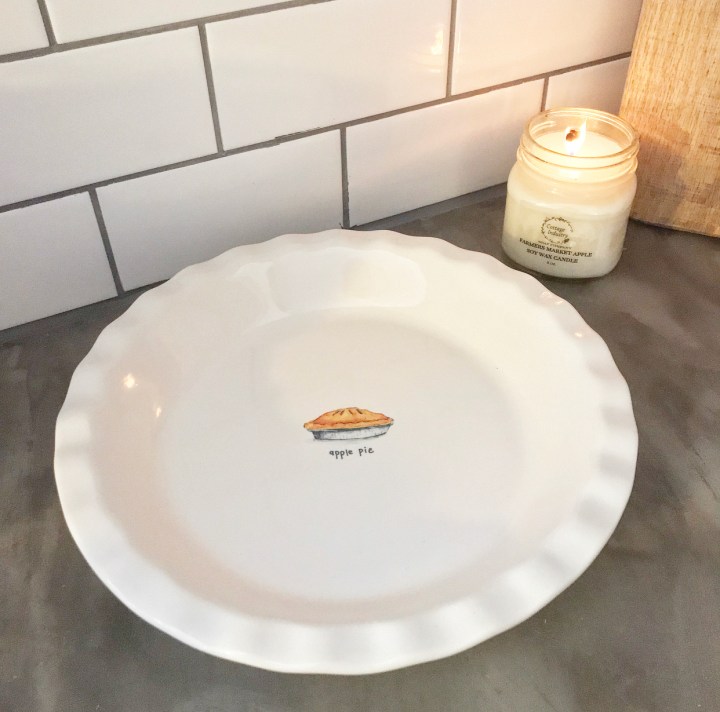
Today is our blog hop for our monthly Clearance Challenge. The rules are it has to be more than 50% from a store of our choice & show how we can use the piece in our home. As I was browsing Home Goods for fall pillows a couple weeks ago, I like to start off in the clearance section because I am constantly looking for Rae Dunn pieces; when low and behold, I found a Rae Dunn pie dish!! I turned it over to see the cost and it was only $14.99! Score! It was 65% off!

6F12F5ED-CC53-487C-8A25-5CFB91095378

One of my favorite fall traditions to do with my daughters is to make homemade apple pie. This is something I started with my oldest when she was really small and as soon as the weather turns chilly, we look forward to pie making day!

98EA3AF2-2991-41F6-BF55-69FA9A9D1132

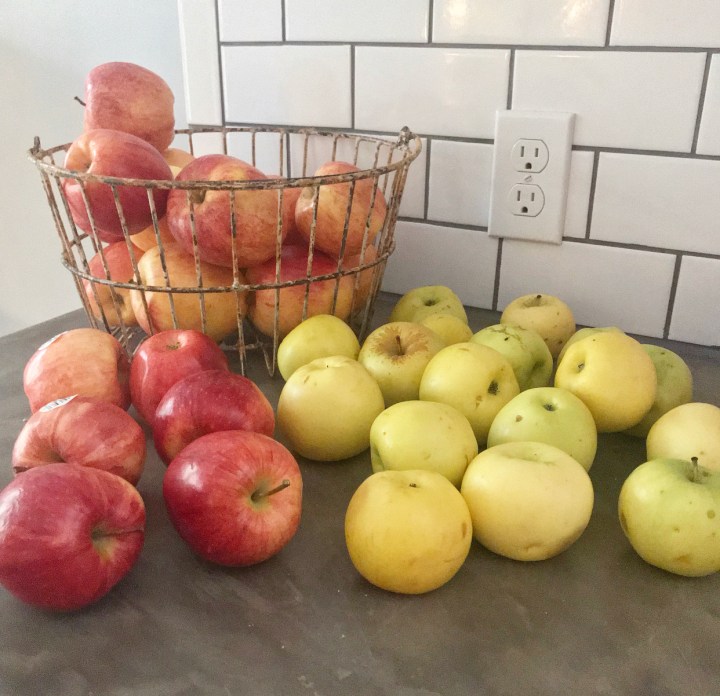
When I make apple pie, I like to use a couple different variety of apples. This year we used Gala & Granny Smith.

My oldest daughter and number 3 daughter peeled, sliced & cored the apples. They also mixed all of the filling as well! We have a handy apple peeler from The Pampered Chef that makes it super simple to get all your apples ready in basically one swipe!

5C46CBBE-E4AF-4DE5-B605-15D484B59EEB

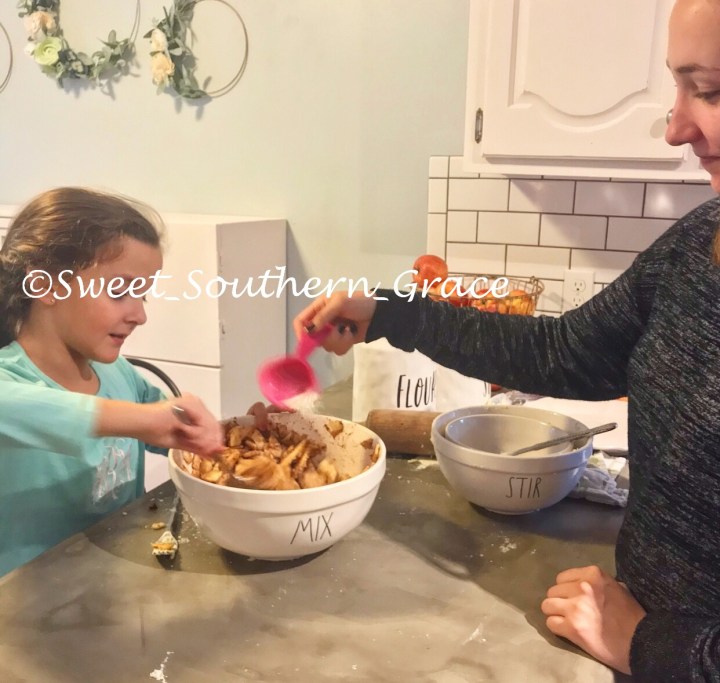
My number 2 daughter and number 4 daughter helped me with mixing the pie crusts & rolling them out!

198BF208-8514-4F79-BC46-7E6A0403F53D

We made a total of 4 pies plus homemade apple cider to sip on while me baked our pies!

CA703B9B-5446-4C4F-8BC5-EADEFB944C30

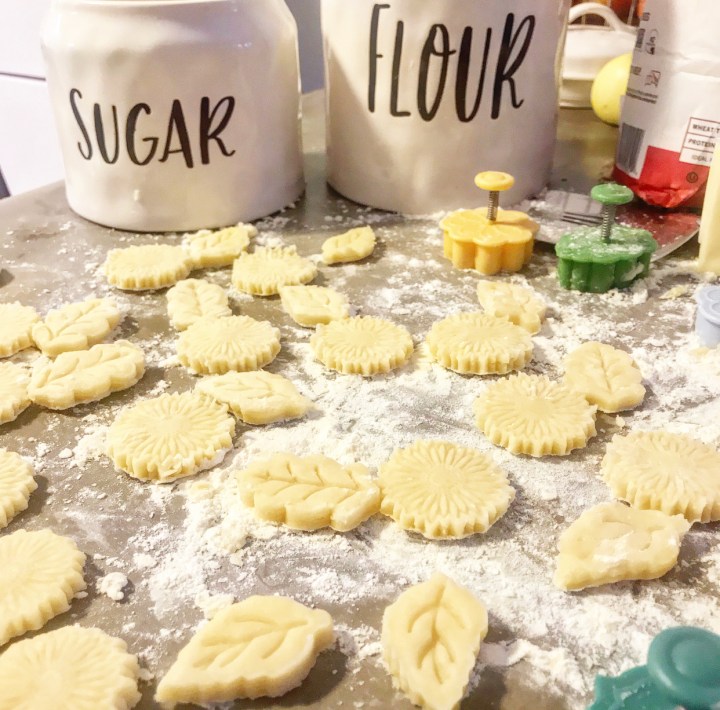
Now to choose how to decorate the top! Most of the time we do the lattice technique but the past couple of years we have been using a Pie Crust Cutter Set from Williams Sonoma.

Apple Pie

7 medium apples (Granny Smith and Gala), peeled, cored & sliced, zest of one lemon, 2 tsp of cinnamon, 1/8 tsp ground cloves, 1/2 c sugar & 1/2 c brown sugar. In large bowl, toss apples with all ingredients and set aside.

Crust

I use William Sonoma’s Basic Pie Crust recipe. The only thing I do different is add 2 more tbsp. of sugar.

Add your crust to your pie pan and poke holes in the crust with a fork. Bake at 400 degrees for 15 min. Take out and add your pie filling along with how you chose to decorate your top of your pie.

9F7C67DE-B403-4B1E-8C3E-24B8E6B53EB6

I will bake an additional 10-15 min but as soon as the top begins to brown, I add a tent shaped piece of foil to the top of the pie so it doesn’t brown to quickly. Now, try to be patient as you smell this delicious aroma of apple pie, fill your home! It is so good y’all! Do you have any baking traditions in your family?

814A4B4A-E997-4BFC-B7D7-104ACE365B51

Don’t forget to check out my friends on our blog hop to see what they have found on clearance and styled to perfection in their homes!

Love~Shae

F2AF8839-AB1D-47A5-ABF9-91F4B92762E8

Top Shelf Clearance Challenge ~ October

BD24C3B3-B34F-42EB-8E7E-A31990AE9E48

https://stilettosandshiplap.com/clearance-challenge:-it’s-amore/3784/

8355D5F9-9EE9-4058-BF13-066DCDCDCFCA

https://barnhousemess.wordpress.com/2019/10/13/clearance-store-challenge

B43F213F-9C85-48E8-8C43-B47F8506F34E

Clearance Challenge – October 2019

1607C57B-674C-4559-95A9-54B59477E684


Halloween Themed Mantel – October Clearance Challenge

Thanksgiving Tablescape

Thanksgiving Tablescape

Today I am joined by several of my friends, that happen to be bloggers as well, to share our Thanksgiving Tablescape’s with y’all! I would also like to thank our host Terrie, from Decorate & More with Tip. Rules: To decorate our table for Thanksgiving and one item needed to be a DIY! As I always say, challenge accepted!

I have had this idea in my head to make my own charges from a tree log, except I had to find a log that would be large enough for chargers. This moment unexpectedly presented itself when we had a storm pass through in our neighborhood, back in August. We have a 75 plus year old willow oak tree in our front yard. The wind had whipped up quite intensely and I actually thought the tree was falling on top of our house, but two of the larger limbs broke off from the tree and fell to the ground.

5AFDAF7F-23AA-4391-8996-D9D58A07F1DC

After the storm was over, one of my first thoughts was that we could make several chargers from one of the limbs.

C9FCA79B-2B1B-4A14-AA84-800DF33E1317

The very next day, the first item on my husband’s agenda, without us even talking about it, was cutting eight chargers for our dining room table! My husband used his chainsaw to cut the chargers right off the fallen limb and voila, we had chargers!

0040CCF1-DAA1-4686-8A8A-37BAFDC40E3E

This is from the top of our front porch. The limbs completely knocked down the power lines in the road as well. We also had a small amount of damage.

5008DCCD-0763-4EE0-8694-6A29CCAB073D

I have been letting the wood dry out in my basement before sealing. Wood usually needs to dry out for 3-4 months. I am planning to seal each charger with a clear coat to protect the wood for years to come!

DCA61F3D-3528-4E2E-BA78-C19F54753D58

For the items on my Thanksgiving Tablescape, I began each place setting with the chargers that we made, along with a Pioneer Woman White Linen Salad Plate and a Pottery Barn Leaf Harvest Salad Plate. Pottery Barn is not carrying the Leaf Plates any longer, but I did find them here . I was able to find my Pottery Barn plates at a church rummage sale for $1.50 each and they were brand new! The crystal glasses were handed down to me from my Mother. I also used real cinderella pumpkins and faux pumpkins from Hobby Lobby and Trader Joe’s . The orange, yellow & green sprays are also from Hobby Lobby. I purchased four that I cut up and have used throughout my home for this year’s fall décor. I love the muted tones in the birch sprays! I also grabbed several brown acorn & berry picks from Hobby Lobby. I have used those all over my home as well in my fall décor. The brass candlesticks are from my fav local antique shop and local thrift store! I paid $2-$6 for each one. Farmhouse table, light fixture, wood cutting boards, curtains and Pumpkin Patch sign are all made by my husband and I.

1FB1307D-0FA8-4DED-B5E4-ECB92DC5563D

I hope y’all have enjoyed this easy diy and budget friendly Thanksgiving Tablescape! It does not need to cost an arm and a leg to decorate your home beautifully! Please stop by and visit each of my friend’s to see their Thanksgiving Tablescape!

Love~Shae

442D9847-FDCE-476C-865C-AD630C5ACD26

You are invited to the Inlinkz link party!

Click here to ent

Exploring Egmont Key in Florida: Wildlife and History

Exploring Egmont Key in Florida: Wildlife and History

In June of this year, we had the pleasure of visiting Egmont Key, located at the mouth of Tampa Bay, Florida. It lies southwest of Fort De Soto and can only be reached by boat or ferry. The Egmont Key Lighthouse and the ruins of Fort Dade, a Spanish-American War era fort, are also located on Egmont Key. Egmont Key extends along the Tampa Port Shipping Channel. The nearest city is St. Petersburg, Florida. We took the Tampa Bay Ferry from Fort De Soto to Egmont Key and on the way over to the island, I couldn’t help but notice the Caribbean-like blue green waters of Tampa Bay.

8E9F272B-B14A-43BB-A941-83188351526E

When we had almost arrived to the island, we had the pleasure of seeing three manatees!! This was the first time our family had ever been this up close to manatees before and I am almost at a loss of words by how amazing they were!

0BD6E4E7-B771-40FD-AA43-4F7A46E4F9B7

Two of the manatees were kissing and they were such gentle animals!

AF7C8FD8-FF1B-4C6F-8021-F80B04D565A1

Arriving on Egmont Key!

17F96678-3909-4CA4-91A9-3914D14DAFF3

Once we arrived on the island, we walked along the pathways lined with palm trees and flowers. The flowers and palm trees were so beautiful!

989F2DDA-2A35-4F22-8C26-CB0FDA58A061

One of the first sight’s to see is the lighthouse!

7B0F3A41-2233-46A9-98C1-5B5A10C3DF64

We continued walking along the pathway to the beach and decided to go exploring for sea shells! We walked along the beach and found all different types of sea shells.

B6813C2F-6D67-4394-80B5-40BD2853C17F

After shell searching, we worked up an appetite for lunch! We ate our lunch on the beach and decided to explore the forts on the island from the Spanish-American War.

9B8DB55C-7DF7-4595-9A6D-85AA99205B56

The picture below is Battery McIntosh, one of five gun batteries on Fort Dade.

1A961E08-2BAC-43FB-BAF2-38D8AFA18F43

Fort Dade was built on the island in 1898 during the Spanish-American War and remained active until 1923.

4916B2C2-028D-4738-ACB6-C28BF2064151

During this time, there was about 300 people living on the island with a small hospital, bakery, movie theater, bowling alley and tennis courts. While exploring the island, you will come across several of the remnants. The picture below is remnants of Fire Command Control Tower.

A5831B1D-A592-4875-9FED-D68F6B29959E

We stumbled upon several gopher tortoises!

5775BA5A-C45A-4591-A344-422A04D9F706

We even got to feed one! Be careful though, they think brightly colored nail polish is food!

8FCF5E33-F3E5-4B7F-BA08-EC8B29E2910D

Our family enjoyed seeing the lighthouse that was built in 1858, while being maintained by the Coast Guard for ships and boats.

F099EED4-D6EA-4E0C-8072-36F2767411A8

Picture below is of my husband and I!

F944EA9C-0D69-4A57-9889-721A374D89F2

When we got back to the other side of the island, we headed straight to the water to cool off! It is very hot and humid, so please make sure to bring lots of water!

B4F88190-6A8A-4A62-BE38-0C89875BD97D

On the ferry ride back to Fort De Soto, we saw dolphins!

FD63E82C-3792-4A54-BC46-7F11D6E9B7C0

The dolphins were stealing all the fisherman’s bait fish off of their poles!

7AA9EF7F-9D35-4DD7-916D-2C033075A731

Definitely a unique island to visit and explore!

Tips from our family:

*Pack food and plenty of water

*Bring sunscreen

*There are no restrooms on the island, so be prepared.

*Wear clothing and shoes that you don’t mind getting wet/sandy.

Absolutely a wonderful experience that we will treasure for a lifetime and it could possibly be one of my most favorite places to visit in the world!

Love~Shae


Some of Life’s Greatest Treasures

Some of Life’s Greatest Treasures

I think when a Grandparent gives you something they value, it is one of the most greatest treasures in life! The picture above is my husband’s Paw-Paw & Big Grandma. I believe they were dating in this pic, soon to be married! Aren’t they a stunning couple! I think back on the time that I knew Big Grandma (never met his Paw-Paw because he passed before we married) and I think she had a good life with lots of family surrounding her. That was one thing about her is that she loved her family and she loved helping anyone when they needed help!  Right around mine and my husband’s first anniversary, we had our first daughter and anytime Big Grandma came to visit, she would always bring diapers! She knew how expensive those things were and babies are expensive! It was like she just knew when we always needed something and that’s just how she was! I remember the first time she had a stroke and I really thought we would loose her. I was so scared that when I spoke with her on the phone, I started crying and told her how much I loved her. We had her for many more years before she passed. I will never forget telling her that we would be naming our 4th daughter after her….her eyes just sparkled and she said “Really?” I told her “Yes!” and boy was she proud! It wasn’t long after that, just two months, before she passed away. She never got to meet our little Jewell but I know she is looking down and smiling at our rainbow baby!

23FD3852-D021-48CE-963F-E45828783CB6

This antique milking stool was my husband’s Big Grandma’s.  He said she didn’t have many possessions as a child, but I wonder if this stool served as many purpose’s, in her childhood and as she grew up. I have explained in my last blog that we acquired a antique key from her home, when we were cleaning it out, as we were getting ready to renovate it. The stool was also an item that we picked out that day because Big Grandma wanted us to have it. Our oldest two daughter’s were small at the time so we decided the stool would make a great “time out” stool or we could use it to stand on, when we couldn’t reach things in the pantry! We’ve had it in our home for at least 15 years now and I love thinking back to that day, when we came home with all of our treasure’s from Big G’s house.

Here’s a little throw back pic of our two youngest daughter’s on their first trip to Disney World!

27F691F3-4672-47CF-B790-1404CE14FDF0

Please check out my blogging friends to see what they have found on their thrift store, estate sale, yard sale or family heirloom searches!

Love~Shae

2DBE7694-9826-4B57-835F-A9502E253447

https://decorateandmorewithtip.com/my-thrift-store-louver-door/

ECFA6F44-A918-47F6-947F-8ED25A1D9BCB

Thrifted Treasure ~ July

6F085B2F-DC0D-4551-8C14-8FC252FB30CE

https://throughavintagedoor.com/2019:07/10/July-thrift-store-find/

FEE4FFB5-C804-480F-AFB5-302F8629B5D5

https://decorateandmorewithtip.com/my-thrift-store-louver-door/

13E9C848-8796-4AA9-8F64-9202663619BF

Vintage Washboard – July Thrift Challenge


June Thrift Challenge Blog Hop

June Thrift Challenge Blog Hop

Hey ya’ll! I have teamed up with several blogger buddies for June’s Thrift Challenge. This month, we have changed up our challenge a bit. The rules are to purchase an item from a thrift store, yard sale, garage sale, estate sale OR revamp/upcycle a piece you already own which no longer works in our home. As always, there is no set budget but we like to keep it as budget friendly as possible.

With the change in rules, I knew immediately what I wanted to do. When my Grandmother passed away, 11 years ago, I was allowed to go through her personal belongings and pick out what I would like to have of hers. One of the items I chose was this red quilt.

5E43E628-501A-410C-B8C8-053F56310215

Over the years, my own little family used it for picnics, beach trips and nap time and as you can see, it had had it share of wear. I placed it in a box in our attic to save and hopefully one day, repurpose it.

62D90185-9C47-47E5-ADC1-89B845EC5609

When the challenge rules changed for this month, I literally jumped for joy, at the idea I had to make pillows from the quilt. It was super simple!

08E7881D-79F4-4E9B-AC18-23822AB86C93

I grabbed a pillow cover that I already had and used it as the pattern for my pillows. I cut two pieces of the quilt for each pillow and sewed together, added poly-fil and wa-lah, the pillows were complete! Quick, easy and free! I had all of the supplies on hand for making the quilt pillows. The poly-fil is super budget friendly. You can grab it at Joann Fabric and Craft Store for around $5-$10, depending if its on sale or you use a coupon. You can check out my under IG highlights “DIY Pillows”.

FD2AC0EE-44A2-418A-B0E0-72DD168A4E9B

I hope you will check out my friends to see what they have found for our June Thrift Store Challenge! I promise you will not be disappointed!

Love, Shae

Thrift Store Challenge: Rustic Bench
blog

Thrifted Treasure ~ June

blog 5

MIRROR MIRROR AT THE THRIFT STORE

blog 6

https://throughavintagedoor.com/2019/06/23/thrift-store-challenge-makeover/
blog 2

Thrift Store Challenge – June 2019, Coffee Table Revamp


blog 3

http://www.clochesandlavender.com/thrift-store-challenge/

blog 4

June Clearance Challenge

June Clearance Challenge

For this month’s Clearance Challenge, I knew exactly what I was going to use for the challenge. I headed to our local Five Below store before our vacation (check my IG highlights/posts) to grab a few items for our newly renovated pop-up camper. Do y’all know what amazing items they have in this store and all for under five bucks?! Ok, ok, let me show you! I bought a black and cream boho chic rug and a cute little gray fuzzy foot stool for the camper. Both were $5 each!

04A5E20A-43A7-4A88-9742-3601DD5A5A00

I also purchased a gray and white plastic outdoor mat for $5. It worked perfectly for our “front porch” area on the outside of the camper.

0404748D-3002-46EA-8C1E-92C0A19F4AB5

But, perhaps the best bargain of all was the felt letter board that I found on clearance for $1! It was regularly priced for $5, but when I got to the register, it was on clearance for $1!

D89BA422-2047-46BB-961B-D65E4F29971F

See? You really can decorate your home or camper, while being budget friendly. I hope you take a moment to hop on over to each of my friend blog’s and see what these creative ladies have found on clearance. I promise you will not be disappointed!

Lots of summer vacation vibes from our family to yours!

Love, Shae

5E96E9F7-5F1C-42E7-915F-E6819FC6E4A2

Top Shelf Clearance Challenge ~ June

754C8AE8-7881-44B9-8CBD-EC5305D2B7E8

Clearance Challenge: One Item, Four Looks

15409232-98C1-4275-88A1-0366AE34DE36

Hallway Update + June Clearance Challenge


D8775061-3A2C-4E7D-B5E8-10F29DB48253

June Clearance Challenge – Global Takeover

DIY Anthropologie Basket Challenge

I love teaming up with my blogging friends when they ask if I’m up for a challenge! Terrie from @decorateandmorewithtip asked if I would like to be involved with her Anthropologie challenge and I knew I couldn’t say no! Today, I want to share with you a challenge for a DIY Anthropologie basket! I wanted to try making mine look slightly different from the one in the picture.

E3E8DAB4-BE8C-4692-89C5-AC90DE55274F

I used this rope from the Dollar Tree and a crochet yarn from Hobby Lobby. I only used two strands of the rope and a very small amount of the crochet yarn.

61E982AA-750E-4342-A963-B8958611237C

I started the basket by winding the rope around and wrapping the yarn around the rope, two layers at a time. I used my crochet needle to push the yarn through the rope.

C18B5AA9-4B6E-458B-9466-E0080FB381AC

It was relatively easy to make and I could have easily made it a lot larger. I have enough rope and yarn to make another basket!

BFB49622-5D77-4C12-A216-44034FB2CAE6

I think that it definitely did not turn out how I envisioned but it is definitely a start and something to work with or build on in the future! I added my Christmas cactus to my basket and styled it in our newly renovated pop-up camper! I hope y’all enjoy checking out my friends and how they each made their own version of this basket!

Love, Shae

EB7EADFC-1EB0-4610-9D71-E7A7743E0698


Decorate and More with Tip ¦ Pandora’s box ¦LeCultivateur

This Full Life 5 ¦K’s Olympic Nest¦Barnhousemess

Uncommon Designs¦Savvy in the Suburbs¦Chasing Quaintness

Sweet Southern Grace¦Bluesky at Home¦Through a Vintage Door


Jessica Simmons


Clearance Challenge: Beautiful Décor Can Be Budget Friendly

Clearance Challenge: Beautiful Décor Can Be Budget Friendly

I have been wanting to add more touches of summer to my front porch décor. I decided to head to my local Hobby Lobby and browse to see what I could find! It didn’t take long for my creative juices to start flowing! I just happened to see this galvanized wall planter for $9 and thought, by adding greenery and flowers that it would be the perfect touch for welcoming guests into my home.

D2BE7FBD-FDBE-4F45-AB95-2400FB25C30D

I knew I had several hanging eucalytpus bushes from Hobby Lobby that I could use in my planter. I always buy them when they are on sale for 50% off or use a Hobby Lobby 40% off coupon, which will make them $7-$8.60, depending which coupon you use.

8F9E71CA-F841-4802-8A8C-B7C2818402CF

I also grabbed one cream wisteria stem , along with a pink flower stem set and one columnea bush . I also purchased a green weeping willow hanging bushes. Remember, all of the greenery and flowers were all 50% off or items i already had on hand! The “hello” sign caught my eye and it was also 50% off and for $12, I thought it would look great above the planter!  I actually took apart the wisteria and pink flowers to spread throughout the planter.

77F829A8-512A-4D94-A1F3-304ECF4C3F50

I spent around $35 dollars to update a beautiful spring/summer look to our front porch. Before shopping, I always check my décor to see what I have on hand, before purchasing any other items. A lot of times, I can “shop” my own décor in my home!

844F6E85-594E-4E51-A9EE-BCE545C7E4EC

Check out my friends below to see what they found on their Clearance Challenge for the month of May! I hope y’all have a wonderful week!

Love, Shae

Emily, LeCultivateurTara, Stilettos and ShiplapTerrie, Decorate And More With Tip Lindsay, The Farmhouse Eclectic Dori, This Full Life 5Jodi, The House house


Easter Tablescape Blog Hop

Easter Tablescape Blog Hop

Hey y’all! Today I am joining a fabulous group of bloggers for a “Easter Tablescape Blog Hop” hosted by my friend Dori of  This Full Life 5 . Are you ready for some Easter and Spring inspiration? This hop will bring you tons of Easter and Spring ideas!

3DB779C9-E731-4C50-AE61-0547B0625A6D

I am so excited to be sharing my Easter tablescape with you today! I have only created a handful of tablescapes but I quickly realized that I really enjoyed creating different tablescapes, as it allows me to show my creative side!

For my Easter table, I wanted to incorporate why we celebrate Easter in our home by hand lettering Matthew 28:6 with my chalk pen. I decided to use a roll of natural colored craft paper  from Hobby Lobby. You can use your Hobby Lobby coupon for 40% off and its less than $5.00. The paper has cut lines on the back side, so it makes it, easy cutting! I also wanted to use neutral colors and textures. I love using my rattan charges from Michaels, along with my white Pioneer Woman dishes. I found the last two sets of the white Pioneer Woman dishes from our local Wal-Mart for just $20! The pink glasses are also Pioneer Woman and the clear glasses are just mason jars in different sizes. I added eucalyptus with lavender along with lambs ear and mini hanging succulents to my dough bowl that my husband made for me.

E9154566-E341-43FE-8F9D-C66BE90E3A5E

I was able to create this entire tablescape with items we already have in our home. I paid under $50 for every item on this table! I love sharing ways to create a tablescape on a budget. After Easter, I can simply removed the table runner and keep the table set for Spring! Thanks for stopping by! Please check out all of my friend’s Easter and Spring inspiration with their blog link listed below.

Love~Shae

Shae at Sweet Southern Grace
Victoria at The Home Envy
Laurel at Little Bit of Laurel
Dani at The Taborhood
Leslee @mortons_salty_shack


DIY Chalk Painted Furniture

F13B026E-1399-46D7-9E85-1F726F8A64DB

Have you been searching for the perfect diy chalk paint recipe? I have a tried and true recipe right here! The best thing is it is very budget friendly for under $45!! Last week, I decided that one of our daughter’s furniture could use a face lift, per say. After all, this furniture is a good 15 years old. We have moved a few times and it had a few dings in various spots. Those natural “dings” on the furniture would be perfect for chalk painting! I could sing chalk paint praises, all day long! It is the most hardiest paint that I have ever used! I absolutely love it!

CHALK PAINT RECIPE:

1 c Latex Sherwin Williams Ibis White

1/2 c Baking Soda

1 tbsp. water

E4F8F42D-E982-4674-BB9A-0D74A9FBF240

DIRECTIONS:

Mix 1 c paint and 1/2 c baking soda very well with a plastic fork, until you see no lumps. Then your going to mix the water until incorporated well and there are no lumps.

I use a  Wooster Paint Brush  from Home Depot. You do not want to use a cheap paint brush because you will be left with bristles in your paint and lots of brush strokes. I can not stress this enough!

The very first thing you are going to want to do is clean your piece very well with a damp cloth. Next is lightly sanding your piece. The reason is so that it gives the chalk paint a little something to grab onto. After sanding, clean your piece really well with a damp cloth again.

66DA7EB3-3BB9-4DB2-8582-5F599B0A5BCC

As you can see in the pic above, this was before cleaning and sanding, it definitely needed to be cleaned.

When you begin painting, paint in the direction of the grain of the wood. So, if your wood grain is horizontal, you are going to paint, horizontally. If the direction of the grain of your wood is vertical, you will be painting vertically.

EA066D35-11BB-4379-9E24-3D78596C8A1B

When you are painting a long piece of furniture, like a dresser, I like to have one long paint stroke, at a time. I will start at the top and go all the way down and continue until the entire top piece is finished. Chalk paint dries really quickly, so you will need to work fast. When you have the entire piece painted with one coat, the paint should be dry within a couple hours, you can lightly sand over the first coat. You are going to be sanding in the direction of the grain of the wood. I use 120 grit sand paper for sanding.  I like to lightly sand in between coats because it will lessen the chance of having a lot of brush strokes. After each sanding, wipe down your piece with a lint free cloth.  Most pieces are going to need three coats of chalk paint, depending on how much coverage you are wanting for your piece. I always do three coats, with light sanding in between and wiping with a clean dry cloth.

225C7CFE-1D53-4714-9429-4B53C8926C3B

In the above picture, I wanted to point out that sometimes when you are lightly sanding in between coats, that your piece may automatically start to kind of distress itself. That is ok, so don’t let it worry you. After you have painted all three coats with lightly sanding in between, you are now ready to distress your piece. I don’t like super heavy distressing, so my distressing is somewhere in between light to medium distressed. To distress, you are just going to take your sand paper and lightly sand in the areas of your piece, as to where it would naturally wear.

Now you are ready for your wax! Waxing provides a wonderful layer of protection for your chalk painted furniture. I always use two coats of Martha Stewart Vintage Clear Wax  from Michael’s. It is under $10 with a coupon. Depending on the amount of items you are painting, will determine how much wax you will need. I needed two bottles of wax plus a little bit of another bottle. I painted six pieces of furniture. A bed with headboard and footboard, dresser with mirror, side table, desk and chair.  I think it is best to use a lint free cloth with your wax. You do not want to have any dust or hair that can get trapped in the wax, as you are applying or as it is drying. To apply the wax, grab a quarter sized amount and begin waxing in a circular motion until you’ve waxed your entire piece. Allow the wax to dry for several hours and apply a second coat. Once the wax dries, I allow 4-6 weeks for the paint to cure before setting any heavy items on my chalk painted furniture.

332A9732-CEC5-476D-9F44-FB8222185208

E4739214-A91B-4E2D-95A0-29B963E2E062

A6D4CF41-DD75-470A-927C-D1CFC1D155BBYou can also check out our You Tube Channel for a more detailed video of how to make your own chalk paint and painting your furniture piece.

Much love~ Shae