
Today, I’ve been invited to team up with my friend Terrie from Decorate & More with Tip and several of our blogging buddies to bring our readers inspiration with “hearts”. I knew exactly what I wanted to do when Terrie invited me to this challenge!
Guess what I took out of my craft closet? My painters canvas drop cloth, of course! I always have one on hand from previous projects from curtains to pillows! I decided to make a canvas drop cloth “ribbon” garland with hearts!
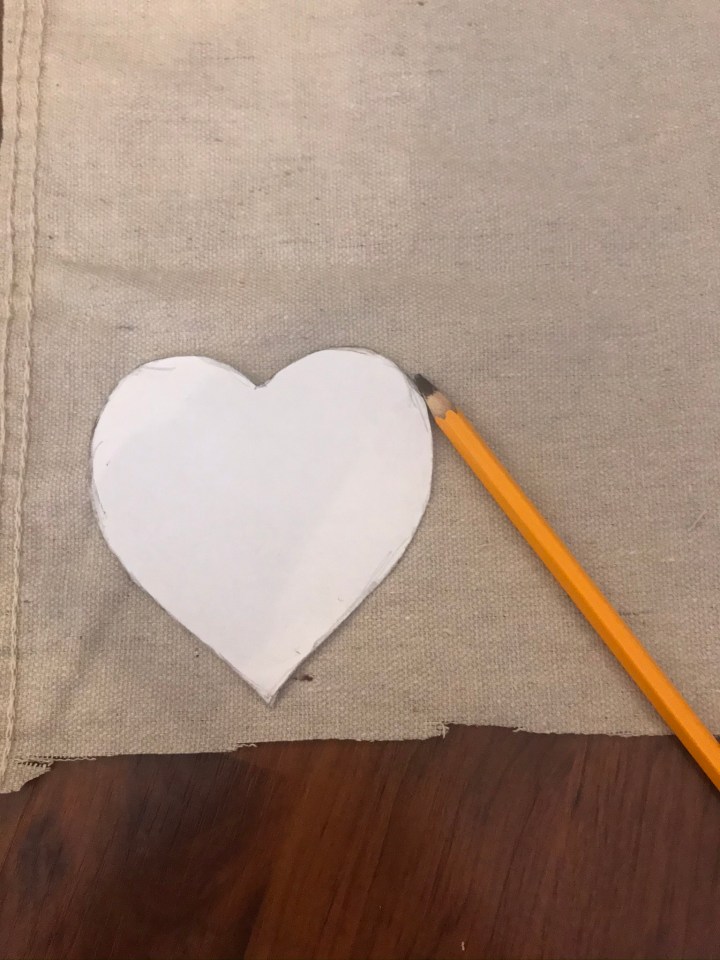
First things first..I made a heart template by hand drawing a heart on a piece of copy paper. Then I placed my heart template onto the canvas drop cloth canvas and traced the heart template with a pencil onto my canvas drop cloth.
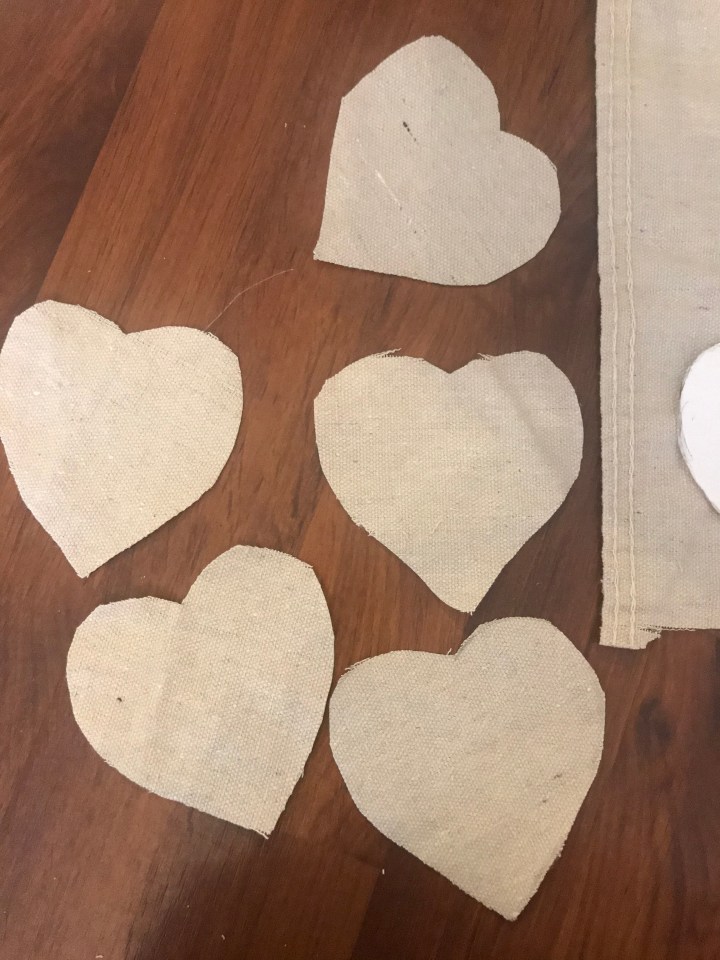
I decided to make 7 hearts, so I needed 14 in total, with each heart being 4 inches in size. I planned to stuff my hearts with tissue paper to give them more of a fuller look and to help them stand out more on the garland.

Next, I sewed around the edges of two of the hearts, leaving a 1/4 inch from the edge. I also left enough of a section unsewed (open) so that I could stuff with tissue paper. After stuffing with just the right amount of tissue paper, I placed the heart back onto my sewing machine and sewed up the remaining edge.

After finishing all of my hearts, I moved on to the “ribbon”. I used some twine that I already had on hand. You can find it at Wal-Mart, Hobby Lobby or any craft store.

For the ribbon, I decided to do 21 inches in length and 2.5 inches in width. To make the ribbon, measure the size you want to use and cut a small slit at the top of your canvas for the starting length and rip down to the desired length. Measure and do the same for the width. The amount of ribbons that you will need will depend on the size of your ribbon and the length of your garland. My garland is 58 inches and I have around 40 ribbons.
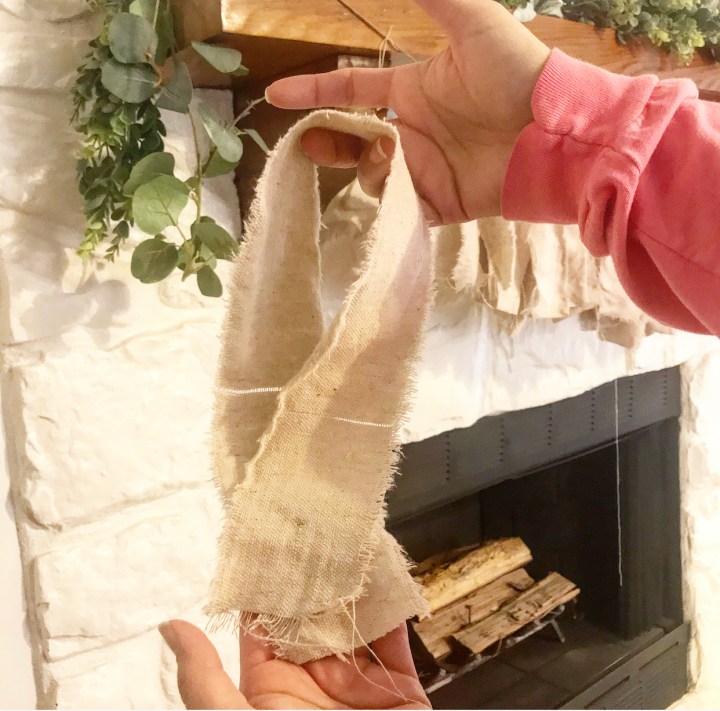
To tie your ribbon onto your jute twine- I am going to show you in a series of photos, how I tie my ribbon onto the twine. Hold your ribbon and loop it around a couple of your fingers. Now, flip your ribbon upside down, as you bring it up to your twine.
Take the loop section of your ribbon and hold with one hand then pull the ends into the loop.

This is the ends pulled through the loop.
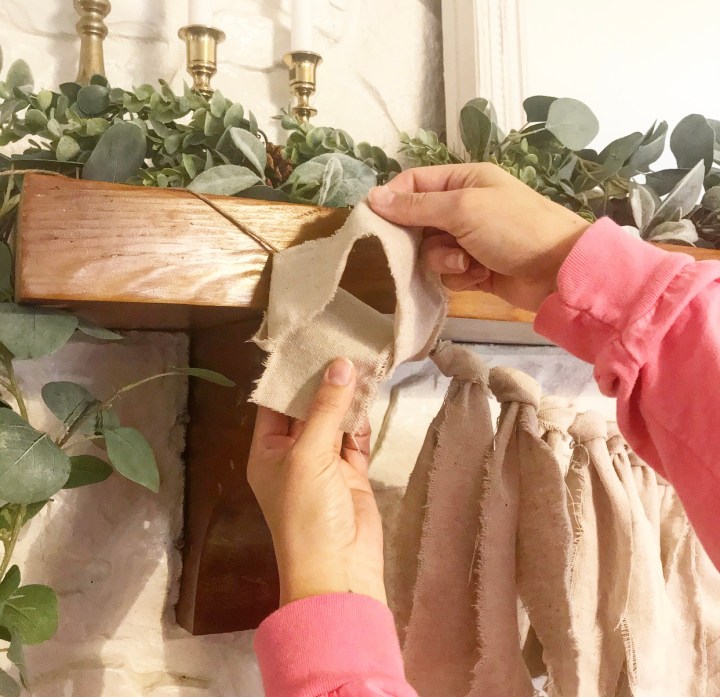
Then pull tightly to secure your ribbon’s knot.
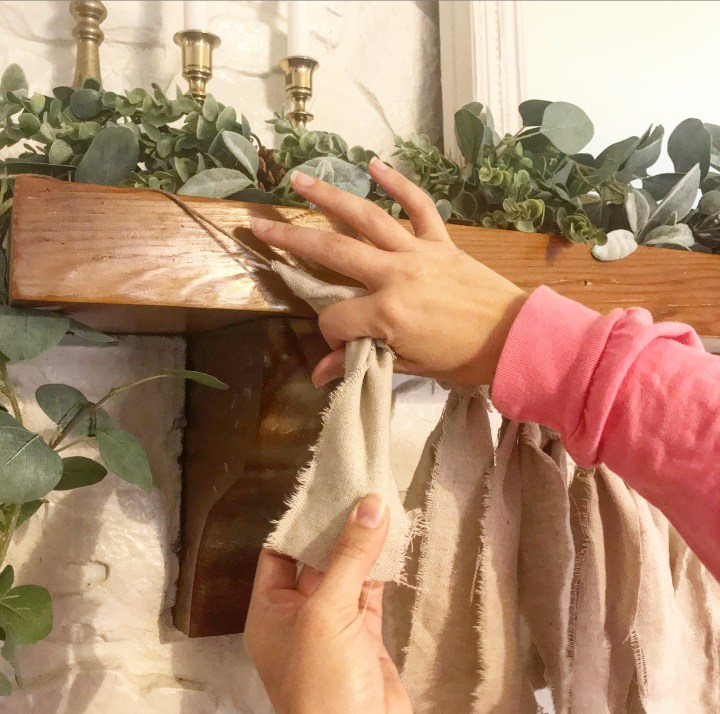
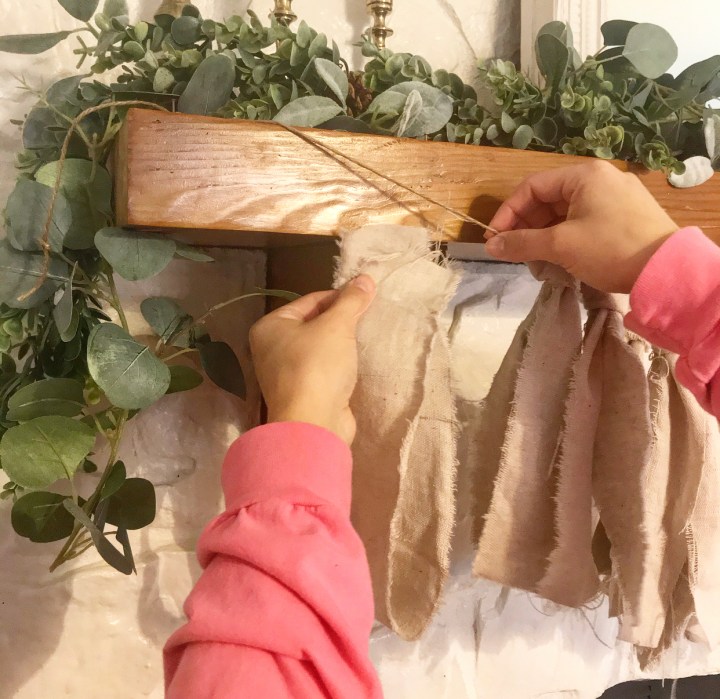
Now, go and do this several more times until you’ve completed your garland! I did this 40 times!
For the hearts, I just did one small tack of hot glue and sort-of evenly spaced them. By evenly spacing them, what I actually mean is what looked best via my eye!

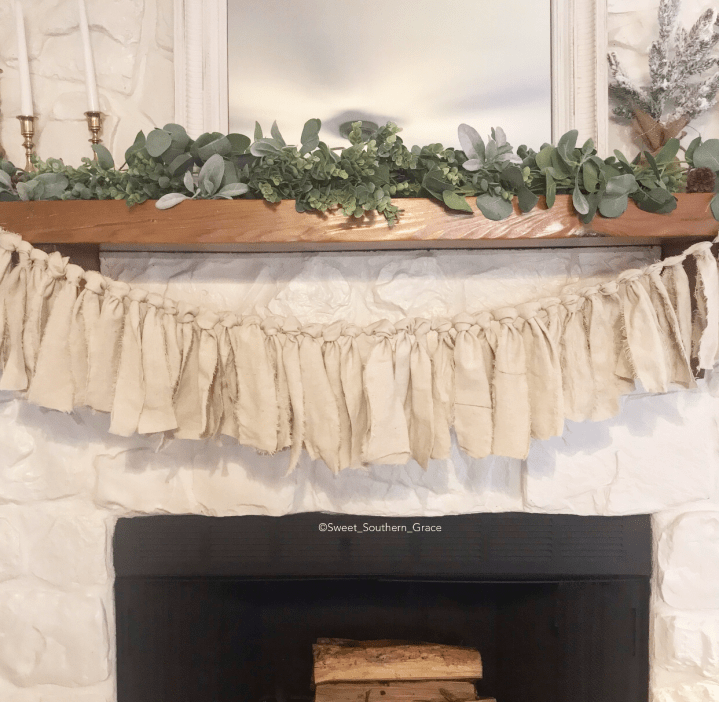
You could style your garland on your mantel, on a wall in you living room, the possibilities are endless when it comes to using this garland! You could even add colored ribbons in to go with the changing seasons!
I chose to style my garland on our little girls kitchen set! The girls and I had a fun afternoon of making handmade Valentine’s cards! We even had tea with their dolls too! I hope ya’ll enjoy our blog hop and hop on over to visit the other ladies to see what they’ve come up with for our “heart” challenge!
Love, Shae

Bluesky at Home
https://blueskyathome.com/4-red-and-white-diy-valentine-heart-decorations
The House House
https://www.thehousehouse.com/diy/february-diy-challenge-hearts/
CD Country Living
https://cdscountryliving.com/three-sweet-and-super-easy-diy-heart-shaped-wreaths/
Barn House Mess
https://barnhousemess.wordpress.com/?p=913
Sweet Southern Grace Blog
https://sweetsoutherngrace.blog/2020/02/04/valentine-hearts-ribbon-garland
Through A Vintage Door
https://throughavintagedoor.com/valentines-diy-challenge/
DIY Vibes
https://diyvibes.net/diy-valentines-day-heart-sign/
Paula Campbell 4
http://paulacampbell4.wpengine.com/?p=60

Your garland is beautiful!!! I love the shabby chic feel it has and how simple it is to put together. Great job!!!
LikeLike
Thank you so much Michelle!
LikeLiked by 1 person
First, let me start by saying what a sweet photo of your girls! Oh my goodness I do miss those days of crafting with daughter! As for your garland? What an awesome idea to use drop cloth! It gives that lovely farmhouse look I adore! P.S. 40 times! Girl, you have more patience than me for sure!!! LOL!
LikeLike
Lol!! Well, I must admit that my two adult daughters helped me rip down the ribbons! They are great helpers! I do love crafting with my littles! It is such a joy! Thank you for your kind words!!! You are so sweet!
LikeLike
So cute! And the pic of your girls… too precious! I’ve made garland out of material before and I have to say that you have the patience of a saint! 40 times…. Yikes. Love your heart garland!
LikeLike
Lol! It was a lot of work but my oldest two adult daughters helped me! Thank you!
LikeLike
This is adorable! Love your little girls play area and this garland just steps it up a notch! Great job.
LikeLike
You are the sweetest Jodi!
LikeLike
Shae I just love this garland. It is unique which I love! Using the drop cloth is perfect. Thanks for sharing this DIY with us. I love it!
LikeLike
Thank you so much my friend!!
LikeLike
I love the look of this garland! Especially like the photo with your girls. Those were the good ol’ days. Pinned!
LikeLike
Aww, thank you Cindy! They are! Our oldest girls are 21 and 18! It does by so fast!
LikeLike
Love it Shae! I am for sure going to make this garland. How adorable ❤️
LikeLike
Thank you so much Danya!
LikeLike
This garland is so simple and beautiful. Love seeing your girls get into the holiday too!
LikeLike
Thank you!!
LikeLike
This is super cute , I love the drop cloth idea its so natural and i just love natural things!
What a precious photo of the kiddos! Just adorable and the garland looks so good where you put it.
Teresa!
LikeLike
You are so kind!!
LikeLiked by 1 person
This is such a cute Valentine’s Day garland. I love that it is Valentine’s decor but still neutral.
LikeLike
Thank you so much Jessica!
LikeLike