Natural and Simple Fall Home Tour

Gather autumn inspiration from our natural and simple fall home tour that is loaded with farmhouse, rustic charm and lots of diy’s.

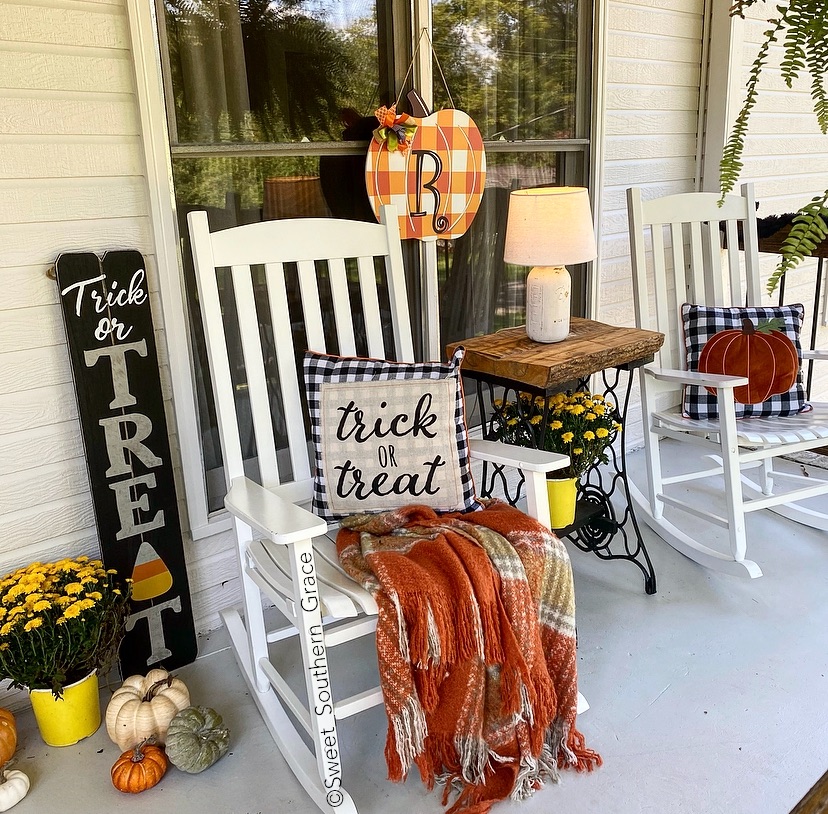
Fall Front Porch 
09C86D0F-BBAE-4A9B-A6EA-3C30AD2E5100

Although the fall weather is just beginning here in Alabama, I am loving the crisp fall days and watching the leaves begin to change. Fall is by far my favorite season! I am excited to join a few other ladies on instagram to share their fall home tours as well! Please make sure to visit the other fall homes over on instagram! For my fall front porch, I added fall mums, pumpkins, pillows and a cozy blanket! Add a couple signs and your fall porch is ready for the fall season!

Fall Dining Room

678A4FB3-F692-43EC-8A76-06279EE876EE

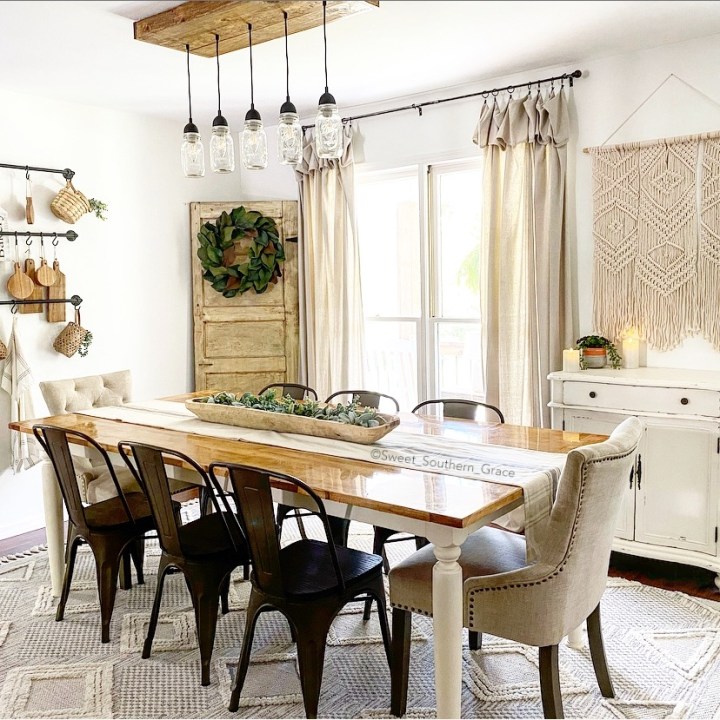
If you dropping by here for the first time, welcome! My name is Shae and I live in Birmingham, Alabama with my husband and our four daughters, along with our pup, Tinker Belle. We have worked so hard to transform our house into a home. Lots’s of diy’s fill our light and bright home, characterized with farmhouse charm. One of my favorite projects in our home is the designing and building of our farmhouse table in our dining room. We even designed and built the light fixture as well.

30426F0F-FBF4-4ACB-9CB9-B36A51CD5E08

Since it is just beginning to feel like fall here, I really wanted to have a more simple, natural approach to my fall decor. Plus, I knew we would be moving in mid October, since we just recently sold our home! Simple sounded like a breath of fresh air with the swirl of moving in the back of my mind! I kept everything as neutral as possible then added a couple muted tones of orange with fall pumpkin pillows, a blanket then several multi-colored fall eucalyptus pieces. I always enjoy styling my dough bowl for each season.

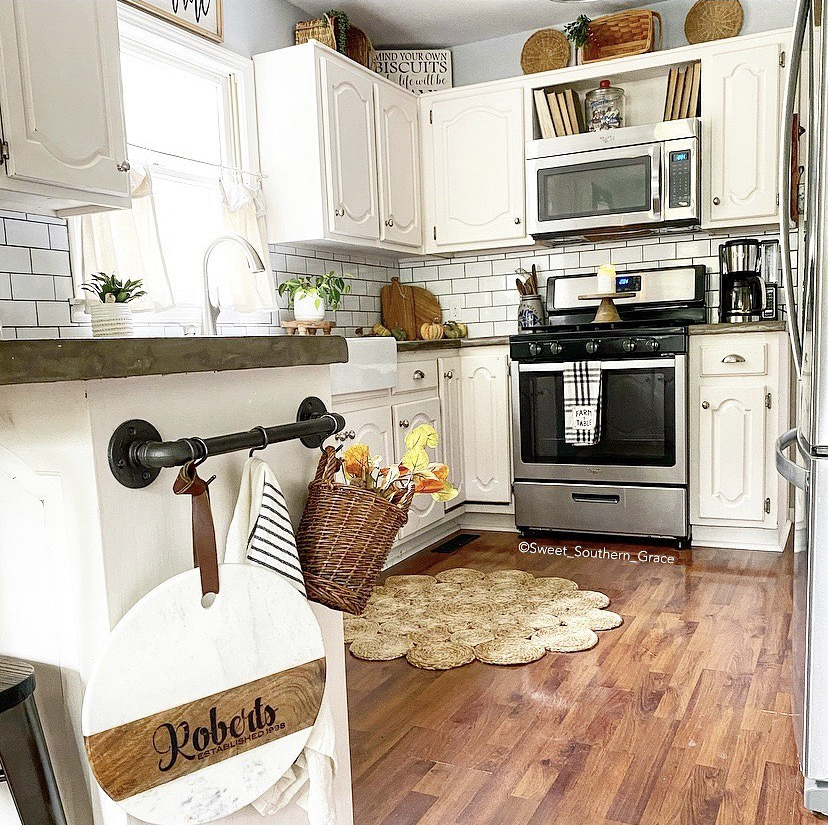
Fall Kitchen
CB8FE987-3E6A-4916-91A5-FA1DF93676B7

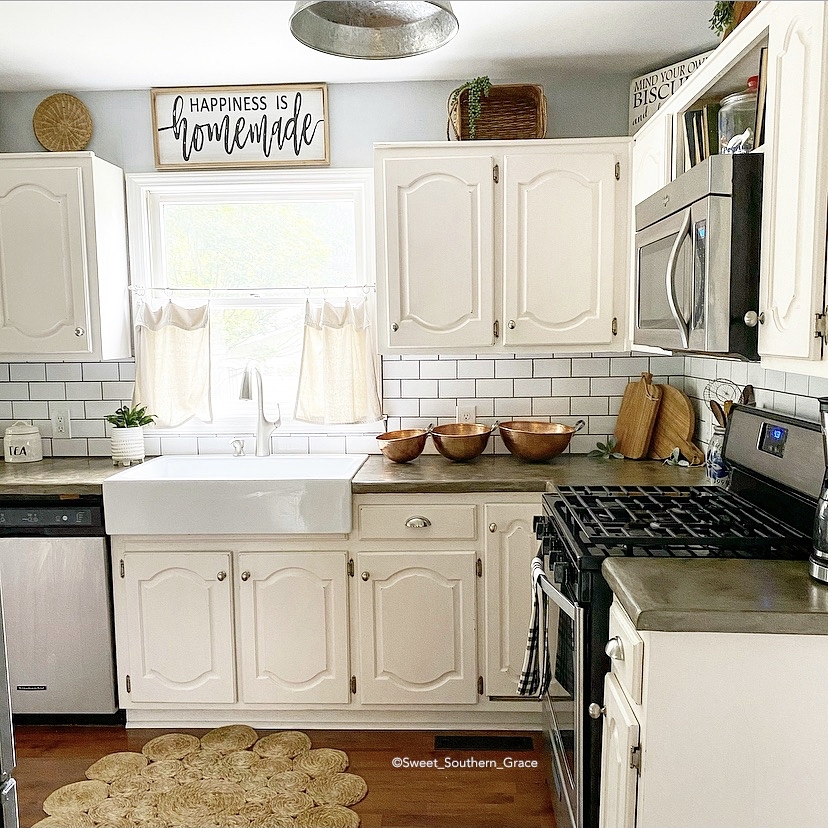
I really wanted to keep my seasonal additions in the kitchen neutral and simple. If you are a regular, you may have noticed how we have completed this space as more of a rustic farmhouse look. If you haven’t caught the posts about our kitchen, check out the renovation process HERE . We painted the CABINETS inside and out, with my diy chalk paint. It made an incredible difference! I even did the concrete countertops by myself! Of course, the farmhouse sink is my favorite thing about our kitchen renovation! For the fall decor, I added the muted toned, eucalyptus in a hanging basket and kept everything neutral from the wood colored baskets to the live plants! I also added a few pumpkins on the counter and one of my fall curated candles that you can purchase here.  Sometimes simplicity is best! 

Fall Family Room

9FC3AD56-97BC-4D8F-AFB7-51D500458A34

One thing that I am really going to miss about this room is our ship lap wall! This wood is around 100 years old and I love the white wash that I added to it! The white wash just brings in so much more texture to the focal wall! In this room, I added several fall pillows in that same muted orange. I also added another fall blanket that helps tie in the colors of the room.

106A3F94-EBE8-4125-8197-FCE8C4DA22E3

I can’t forget about the fall florals on the mantel from Kirkland’s! You can find that post  HERE.  One of my favorite smaller diy’s that my husband and I did a few years ago was our Pumpkin Patch Sign. Lining up and gluing on all of those letters, just above drove our OCD-selves crazy but we did it! This sign also doubles as a Christmas Tree Farm sign on the back! I have used this sign in our decor for the past three years and I still love it! DIY’S with my husband will always be my favorite because we create in together and with love for our home! 

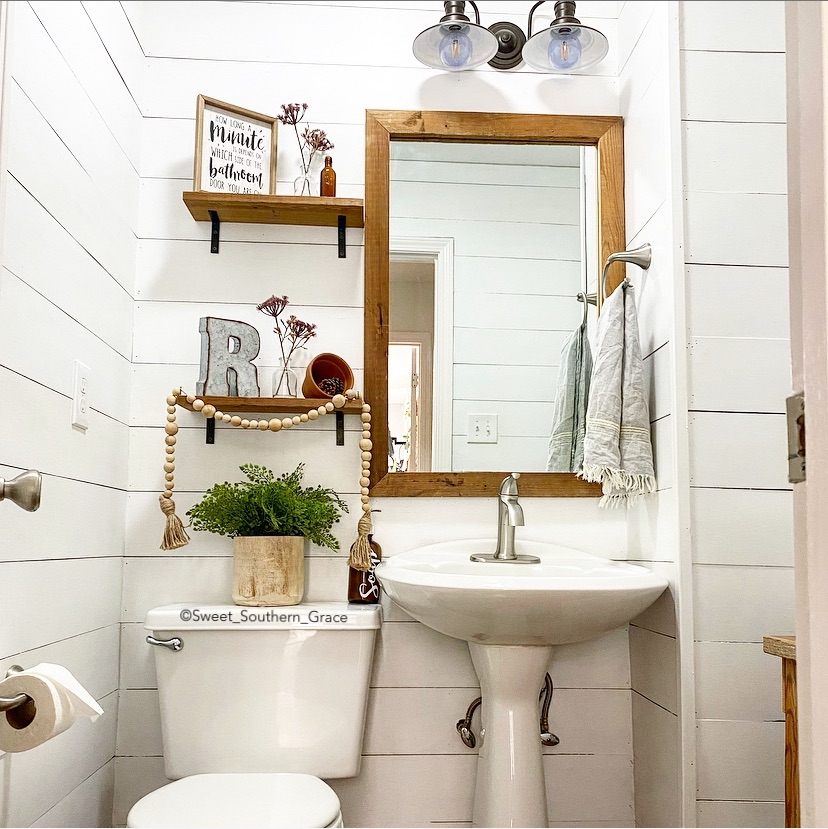
Fall Half Bathroom
37AEAF00-D6F1-4124-B41D-011FA4478D45

This little farmhouse half bath still gives me all the heart eyes! This was one of our first diy’s in this home! You can read all about how we transformed this Half Bath Makeover Under $180! Whites and woods are definitely apart of my love language when it comes to decor. My husband and I made the frame and the shelves from 100 year old barn wood. Leaving them with this house definitely makes me sad but knowing that the new homeowners will appreciate their beauty makes me happy!

942B51AD-C005-44AE-88D7-EC0484BC5090

Fall decor was definitely kept simple in our half bath, as I added the muted eucalyptus and a couple glass vases with fall florals from Target.

Fall Laundry Room

99B63463-92C1-4182-B777-099EEC5C6A7F

I feel you can never go wrong decorating any space in your home, as long as it gives you joy, go for it! That is exactly what I do, when decorating this little shelf in my laundry room! I love having a beautiful space to wash and  dry my family’s clothes! It is such a blessing to me!

7F421459-3011-4EDD-9BBA-4948F60FB87A
For this space, I added a fall wreath along with a few pumpkins and that beautiful fall eucalyptus! Simple, budget friendly and you can use it every year and even add to it yearly as well!

3DE5801F-66B4-4EB3-9A9C-41BC059185A6

I hope ya’ll have enjoyed our Natural and Simple Fall Home Tour! I sure have enjoyed sharing our fall spaces with you!

Laura over on her blog

Adriana over on Instagram

Rachel over on Instagram

Divya over on Instagram

Suman over on Instagram

Please let me know if you have any questions! 

Love-Shae 

AE2C872C-E1A8-463A-A1C9-A7AE4E85F7F0

Autumn Inspired Mantel with Kirklands

[This post contains sponspored links. The items featured and linked, in this post is povided by Kirklands; all opinions and reviews are my own.”]

D9A2FC0A-A013-4D6D-8DC2-975068B46FF0

Adding Autumn Inspiration:

I am in appreciation of Kirklands beautiful and bold fall florals this season! You will love their bright assortment of fall florals on display in your entryway , mantel or dining room. It is simple to add small fall florals to spaces throughout your home. I chose to use several fall bushes from Kirklands for my fall entry mantel.

EBC06A3A-E949-4C59-864E-70ABF02C9E1C

 Kirklands Fall Florals: 


I knew I wanted to add our Pumpkin Patch sign with some of Kirklands stunning fall florals!!


51AA839D-C11C-49F0-9F47-D007C24CB487

The first floral piece that I started with was the Wildflower Bush, which is my main center piece for the fall florals. Its beautiful and bold , setting the tones for my fall colors in my home this season! The next two pieces are the Yellow Foam Berry Buds Bushes. The yellow compliments the Wildflower Bush, perfectly! I added each of those to eiter side of te Wildflower Bush. I also picked up two of The Flower Bar Green Bushes. They no longer have The Flower Bar Green Bushes but the Lemon Stem would make a great alternative! wanted some greenery to drape over the cedar mantel.

E262D121-5F6F-4AC3-8993-F21D3E083727

Kirklands Fall Pillows:

I knew I wanted to help welcome the crisp, cool days of fall into our home with a few of Kirklands fall pillows. You will love how their pillows will help add that autumnal touch to your entry, mantel or couch! Perfect for snuggling up with a soft blanket and a movie. Oh, and dont forget a cozy fire right beside the ones you love! My favorite time of year begins now with fall through Christmas. I love decorating our home for the fall season for our family to enjoy!

51AA839D-C11C-49F0-9F47-D007C24CB487

White Knit Pumpkin Pillows

The White Knit Pumpkin Pillows makes adding a few cozy fall accent pillows to your harvest collection, a festive autumn addition.  I love the pop of muted orange with the texture of the white knit pumpkin. Perfect for your entry, dining room chairs, couch or even your fireplace. Add a cozy fire and a few smores and your all set for the season!

33401B3F-3E6E-4007-A092-F6F47284C5CF

Welcome To Our Pumpkin Patch Accent Pillow

The Welcome To Our Pumpkin Patch Accent Pillow is perfect for our fall entry mantel. I love that by adding a autumn accent pillow, how it brings a festive fall touch to any space! Hues of orange and cream with a featured embroidered border. The Welcome To Our Pumpkin Patch Accent Pillow ties in seemlessly with the our mantel’s orange fall tones, blending with all the fall florals. Muted oranges and yellows along with creams and a hint of green!

E262D121-5F6F-4AC3-8993-F21D3E083727

Plaid Pumpkins Stitched Accent Pillow

The Plaid Pumpkins Stitched Accent  Pillow just gives me all the fall feels, as it makes the perfect autumn addition to our fall pillows from Kirklands! With hues of gray, orange, red and green, it could be used in your autumn decor, throughout your home. Try it in your entry, your bedroom or your couch. 

27DAC6B4-0394-409B-A140-6AEAD019B211

Fall Entry Mantel Complete:

I am thankful to be enjoying these beautiful pieces in our home from Kirklands. They have decor to fit so many different styles and at great prices too! If you have any questions, please let me know! Which item is your favorite? Please let me know in the comments!

Love~Shae

Staycation with Vulcan Park and Museum

[This post contains sponsored links. The items featured and linked, in this post is provided by Vulcan Park and Museum; opinions and reviews are my own.]

AF2F36BB-F898-42BD-9DC1-4002FCA0B175

Staycation with Vulcan Park and Museum

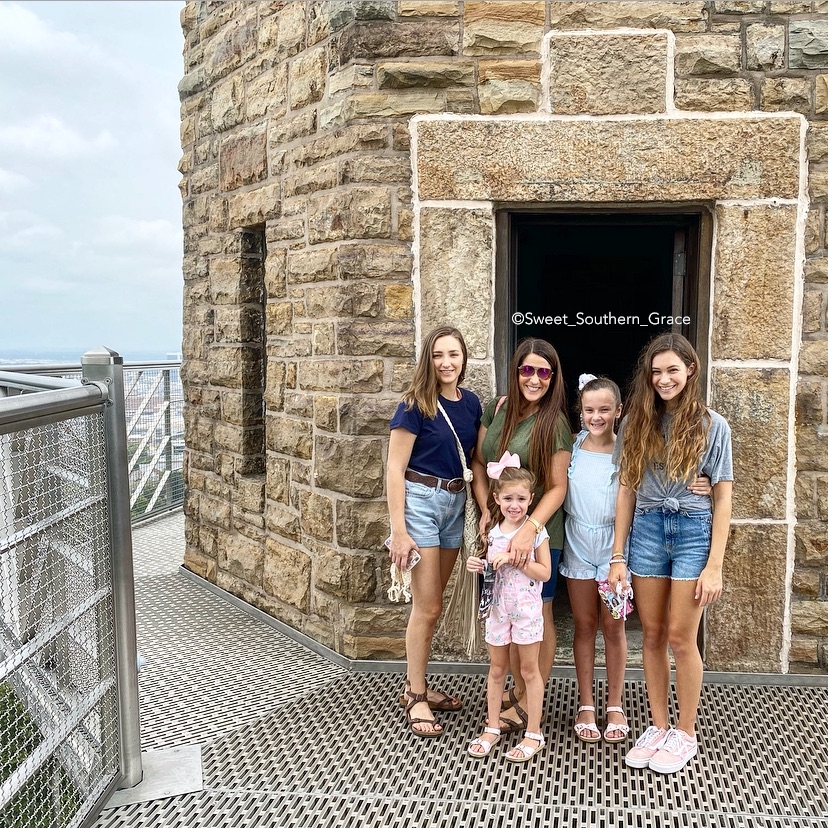
When I think of a fun activity with a little history in Birmingham, Alabama, I think of Vulcan! I can remember going here as a child on field trips and sometimes with my childhood best friend. Vulcan definitely holds some nostalgia for me! Our oldest two daughters, who are now adults, grew up visiting Vulcan. We were excited to have the  opportunity to take our youngest two daughters, recently!

7663D77A-5AA0-494D-8E2A-5106FB9F939E

Vulcan History

Vulcan is Birmingham, Alabama’s statue and is the world’s largest cast iron statue. It is also considered one of the most memorable works of civic art in the United States. Vulcan was designed by an Italian artist, Giuseppe Moretti. Vulcan was cast in 1904 and has overlooked Birmingham from atop Red Mountain since the 1930’s.  The photo below was from 1906-1935 when Vulcan was located at the Alabama State Fairgrounds. 

C7142C09-C633-4762-B35E-88F0AAE7E44E

In 1999, Vulcan was in need of repair. The 10 acre park that surrounds Vulcan was closed and Vulcan was removed from its pedestal. City leaders sought public support for its restoration, forming the non-profit Vulcan Park Foundation., which would oversee the plan to restore the statue to his 1904 grandeur. They also created a educational park complex to interpret Alabama’s industrial history. 

9B8F282F-7BC7-4DFC-991B-EA7AAE01AF40

Vulcan Today

Today, public-private partnerships and a $15.5 million campaign, our city’s beloved statue, stands rehabilitaed, along with the expanded park, now  referred to as Vulcan Park and Museum. 

4D9A63F2-50D5-4D95-A671-E18AA970944F

Our Visit to Vulcan Park and Museum

Our family was so excited to have a staycation here in Birmingham and to be able to visit Vulcan Park and Museum! It is  a beautiful park overlooking the cityscape. We decided to check out the museum first! The museum has many different exhibits about the history of making Vulcan! Our favorite exhibit was the Furnace Room, where you can see raw materials needed for iron production. We also enjoyed reading about the  Women’s Suffrage Centennial on their fight to have rights to vote. We finished the museum quickly, as our littles were chomping at the bit to go up top of Vulcan! 
B17246FC-6D75-4D22-9DF5-B912DD772D37

Vulcan

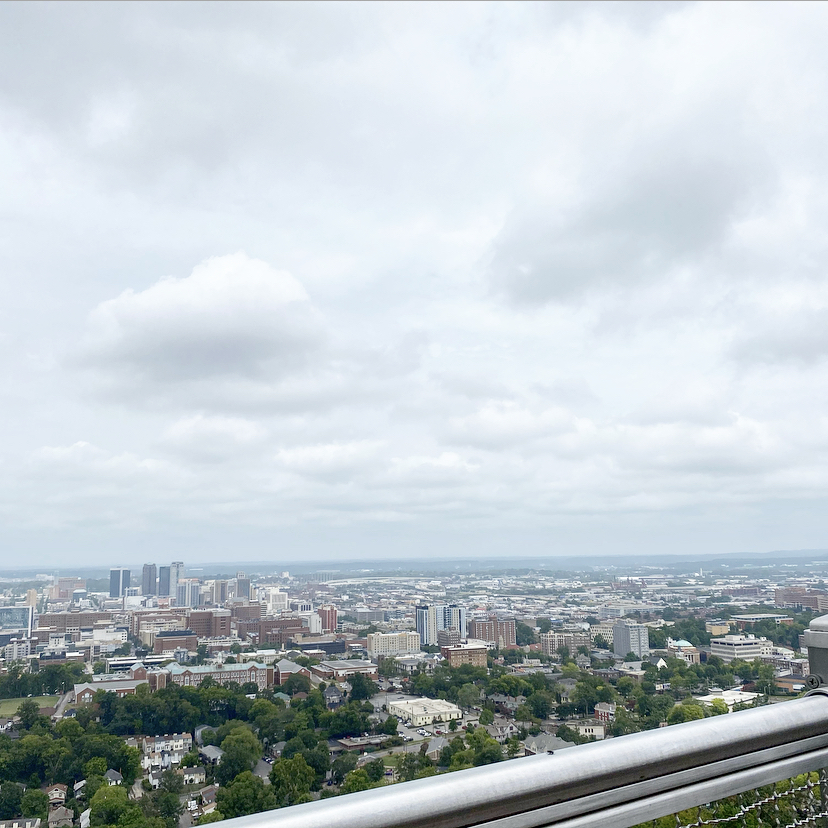
The elavator ride to the top of Vulcan offers breathtaking  views of the Birmingham region. You can see Red Mountain as it stretches to the east and west.

F13EC630-5390-4909-B4A5-F5B7585676F3

Facing north, you can see Jones Valley, one of Birmingham’s earliest business districts. To the south, you can see Shades Valley and even further south lies Oak Mountain.  

E2F4835F-5B90-4E46-B250-95C0F7E2E52A

We had a few people in our family that were a little nervous of heights but hey, that did not stop us from being atop of Vulcan! Absolutely one of our favorite spots here in Birmingham to have a staycation! 

A5D5DB2A-0508-43CD-98B4-90AB61229746

Final Thoughts

Vulcan Park and Museum is absolutely one of our favorite spots here in Birmingham to have a staycation!

AF2F36BB-F898-42BD-9DC1-4002FCA0B175

Grab your tickets here!  I would love to know if you and your family have come to Vulcan Park and Museum, here in Birmingham? Please let me know in the comments!

Love~Shae

Styling a Full Length Mirror with Greenery and Florals

It’s always fun when I challenge myself with Thrift Store Challenge. The rules are that I  have to find an item from a thrift store, garage sale, estate sale, flea market or heck, even from the side of the road and share how I styled it in our homes!

E9E07DB5-4739-436E-9480-1AEF301DC3D5

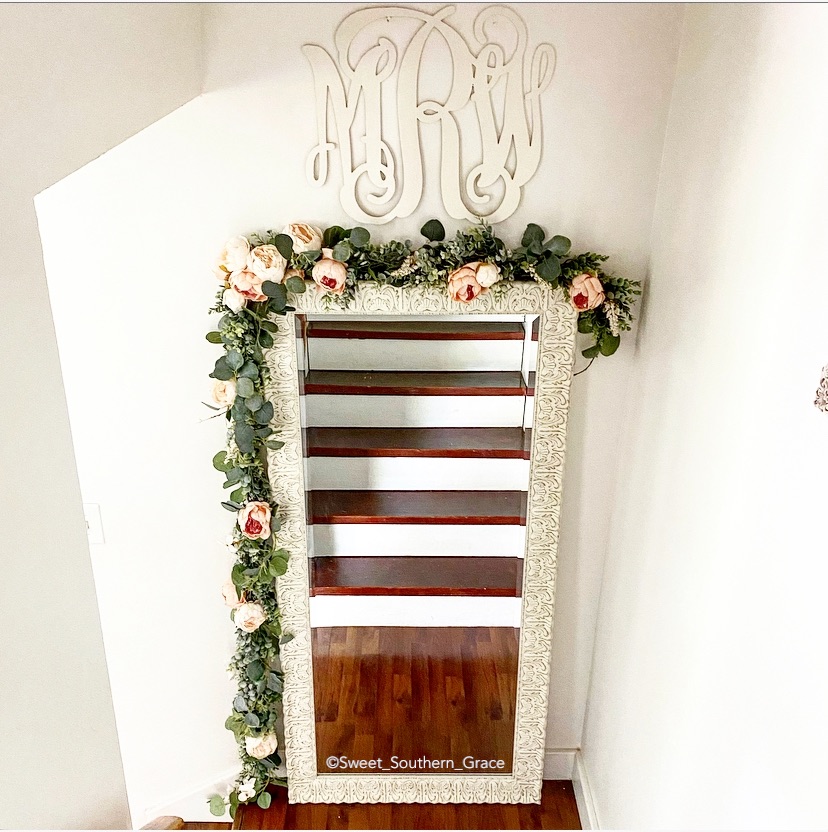
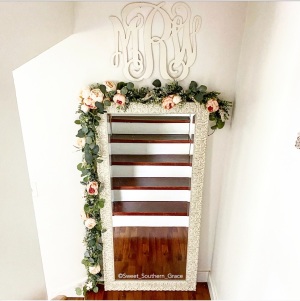
One of my favorite ways to fill a wall or add extra light to a space is through the use of mirrors as decoration! I love hunting for mirrors when I go browsing estate sales or on our local trade sites, but this time, I found a larger scale Kirklands mirror on Facebook Marketplace for $40. This mirror retails for $100 at Kirklands! Score!

I knew I wanted to place the mirror on my staircase landing, plus I decided to style my mirror with greenery and florals! I had the greenery on hand but purchase the Vintage Peonies from Amazon.


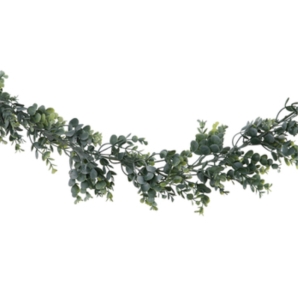
 For the greenery, I used Frosted Eucalyptus Garland  from Hobby Lobby.  They are only $10 when on sale for 50% off! I used two of these.

 I also used  Eucalyptus Leaf Garland from Hobby Lobby.  They are also only $10 each when they are on sale. I used two of each of these.  I took one of each of the Frosted Eucalyptus Garland and one of the Eucalyptus Leaf Garland and intertwined those, then placed over the top of my mirror. I tucked a few pieces of the Frosted Eucalyptus Garland behind my mirror to help secure it. Then I used one thin nail to hammer into the wall.  Next, I added the second set of combined Frosted Eucalyptus and the Eucalyptus Leaf Garland. I also tucked pieces of the Frosted Eucalyptus behind the mirror and I also sort of “hooked” on the second eucalyptus to the first eucalyptus pieces. You can also use mini command hooks to hook onto the mirror.


Next I grabbed my Vintage Peonies that I purchased from Amazon. I took apart all the Vintage Peonies and decided where I wanted to place them. I wanted to have several in the left hand corner as my focal point of the floral and greenery. I decided the best way to attach the flowers would be to add a tiny dab of hot glue to each flower and press in place until dry.


I have a video tutorial over on my IG.  Check it out to see how it all came together! I hope y’all have enjoyed this tutorial!

❤️-Shae

Sertodo Copper

[This post contains sponsored links. The items featured and linked, in this post is provided by Sertodo Copper; opinions and reviews are my own.]

Sertodo Copper: Benefits

Did you know that copper has anti-microbial proberties? I also can appreciate that 65% of all copper mined today has been recycled over and over to make new pieces! I enjoy having a product in my home that is anti-microbial and is recycled!! 

E68D7D2E-891A-468C-BEAD-CEDC39A579A8

Sertodo Copper: History

Over 23 years ago, Jonathan Beall founded Sertodo Copper and began selling it throughout the United States  from the back of his truck! He even nicknamed his truck “El Macho”.  Since 1997, Sertodo Copper has been bringing the highest quality copper goods made by the master artisans in their shops located in Austin, Texas and Santa Clara del Cobre, Michoacan.

cdc681dc-5746-4634-a186-479df0f64949

Sertodo Copper products are designed to become heirlooms for generations to use with cooking, socializing and enjoyin with family and friends. The first pieces that Sertodo Copper sold in 1997 are still in use today because the first customers are still customers today!

C9486BDC-F713-4D80-8E62-504B688D3B21


Whipping Egg Whites in Copper Bowls

The really cool thing about whipping egg whites in a copper bowl is that as the whisk hits the bowl, tiny bits of copper break off from the surface of the bowl and mix in with your egg whites. Since copper can bind sulfur groups, those tiny bits of copper bind to the egg white proteins and therefore, sulfur groups are unable to form the strong disulfide bonds that can leadd to gritty, dry whipped egg whites. The egg whites whipped in a copper bowl stay glossy and firm without as much risk of becoming grainy or overwhipped. Pretty cool, right! So tell me, have your tried whipping egg whites in a copper bowl?

Recipe: Whipped Egg Whites

It is best to use fresh eggs, since the proteins are more conductive to forming an airy, porous foam when they are new. Seperate your egg yokes from the whites.  If you accidently drop some yolk into the egg whites, the fat will prevent the egg whites from foaming up.  To avoid this, use two seperate bowls-one for yolks and one for whites.  Place your egg whites in your copper bowl and begin whipping the egg whites with your whisk.  As you beat, do not rush adding the sugar. The slower you add your sugar, the better it will dissolve.  I recommend using one tablespoon at a time.  Also, take weather into account, as it is best to make meringues on a dry day. On humid and hot days, they can become limp or sticky.

Ingredients:

* 4 large egg whites

* 1 cup sugar

*1/2 tsp of cream of tartar IF you do not have a copper bowl.

Directions:

Beat egg whites until foamy with a whisk or mixer. If you do not have a copper bowl, now is the time to place the cream of tartar into the foamy egg whites. Try not to overbeat the egg whites at this point or they will have a harder time combining with your sugar.  Slowly add the sugar, 1 tablespoon at a time. Beat until you no longer hear the sugar in the egg whites. (No sound of the sugar hitting against your bowl as you mix.) Once all of the sugar has been added, you can stop worrying with overbeating. Beat until stiff peaks form. How to tell if you  have stiff peaks? Test by lifting your whisk from the bowl. The peaks of the egg whites that rise as you lift should stand straight up.  Also, as you tilt the bowl, the whites should not slide. You should not see any clear watery egg at the bottom. Double check to make sure the sugar is dissolved. Pinch some meringue between your fingers. It should feel sliky and smooth. 

Sertodo Copper: My Favorite Copper Pieces

I am loving their Bisotun Water Pitcher! I think it is a great conversation piece as well! 

A6D0CDC8-050E-4EBF-A1B9-09E6EA1972A3

I also love their Alicante Paella Pan. Perfect for whipping up something for dinner! 

15061220-B128-4382-BE9E-B0926F38FDC4

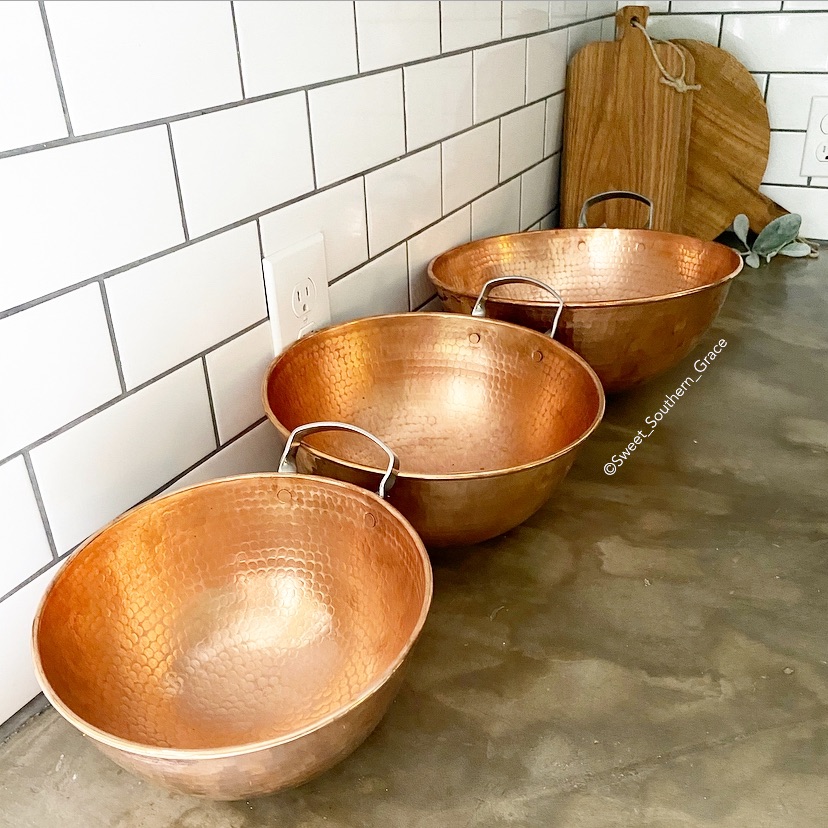
Of course, I love my Sertodo Copper! Perfect for the meringue recipe!

C9486BDC-F713-4D80-8E62-504B688D3B21

I hope ya’ll have enjoyed reading about the benefits of copper, the meringue recipe and  about the history of Sertodo Copper. Please check our thier website. I know you will love  their copper!

❤️~Shae 
069BE719-0080-46D7-98AC-6A0E4F637C88

Homemade Powdered Laundry Soap

Homemade Powdered Laundry Soap

Homemade Powdered Laundry Soap

Making your own homemade powdered laundry detergent may take a few extra minutes of your time, but it’s a lot cheaper than store bought. Plus you’re keeping your home chemical free. Continue reading for full instructions and cost break down.


28F4CBB9-AC33-4310-84C6-414212A0CD28

Ingredients:

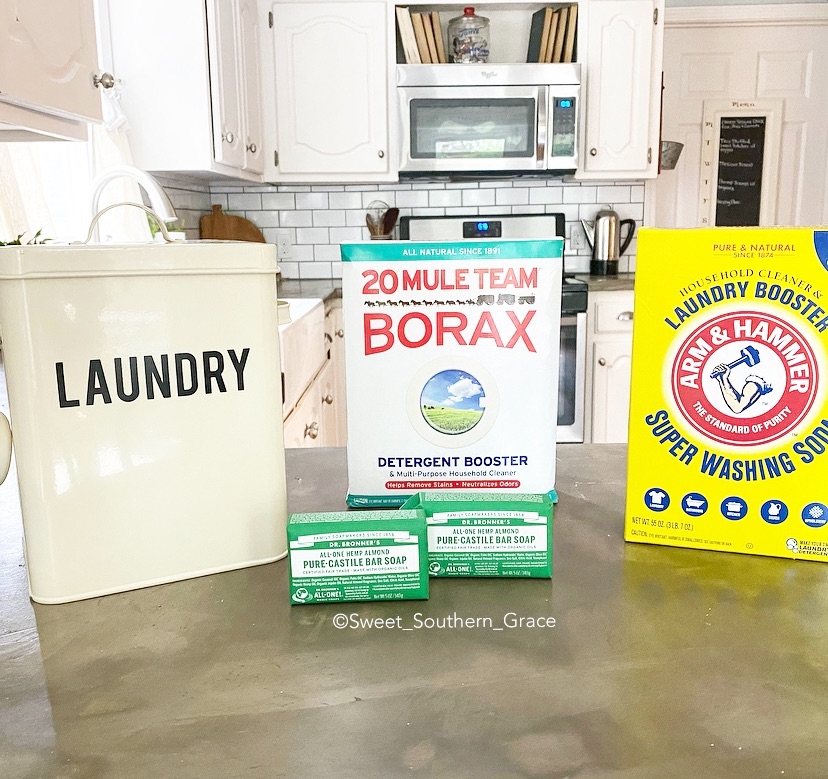
I’ve been making my own laundry detergent for years! It saves so much money plus y’all know how much we try to live without those yucky chemicals! Plus, it’s super easy with just three ingredients: washing soda, borax and Dr. Bronner’s Castile Soap .

What you will need to purchase:

• (1) 3 pound box of Super Washing Soda

• (1) 4 pound box of Borax

• (2) Dr. Bronner’s Castile Soap Bars

• Container for the detergent

• Grater

• Wooden Spoon for stirring

• Tablespoon for measuring

Directions:


F31AC1A6-ED37-4D64-8790-4BC7255AE693

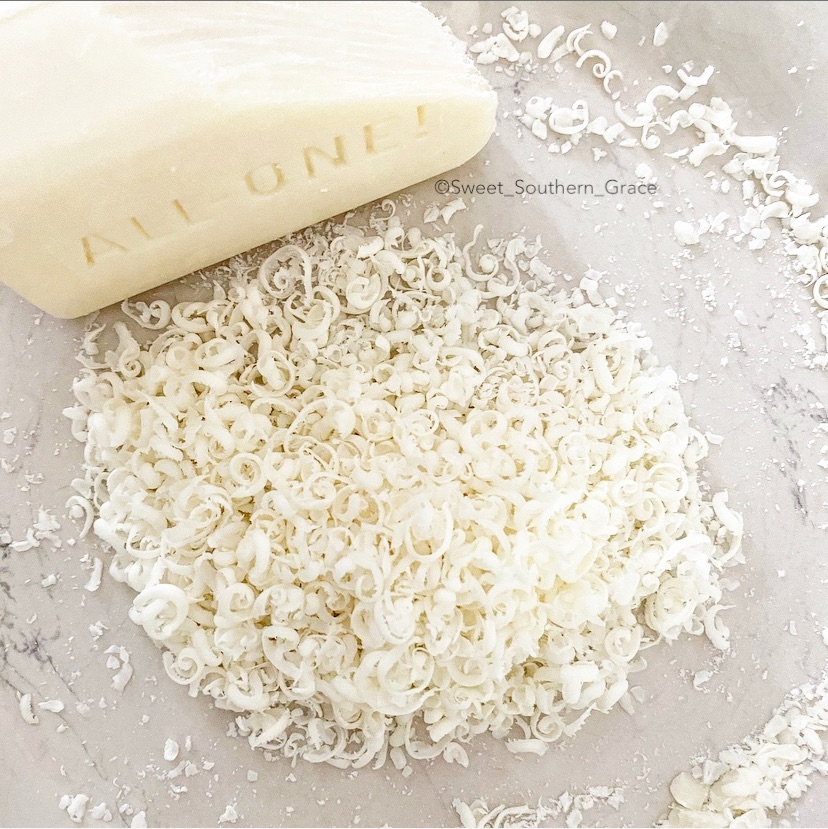
Pour the washing soda and borax into a large bowl. Grate both bars of the Dr. Bronner’s soap, on the fine side of the grater, then add to the washing soda and borax bowl. Stir the detergent until it’s all mixed in really well.

How Much Detergent to Use Per Wash? 

I use 1-3 tablespoons per wash, depending on the load size and how dirty the load. In a normal load, I normally use 2 tablespoons but if a load is really dirty, I will use 3 tablespoons.

Cost Break Down: 

Let’s break down the cost to compare pricing of store bought.

Washing Soda $4.12

Borax $4.47

• Dr. Bronner’s Castile Soap $3.62

• Total= $12.21

This receipt will make 112 loads, giving you 7 pounds of detergent. Break that down to $0.11 cents per load!

Compare Natural Name Brands: Conclussion:

Now, if I were to buy a natural detergent, let’s compare the costs of those! Let’s compare costs to Whole Foods 365, Molly’s Suds and ECOS.

• Whole Foods 365 for 80 ounces at $11.99 with 53 loads = $0.23 cents per load.

• Molly’s Suds for 70 ounces at $20.99 with 120 $0.30 per load.

• ECOS for 57 laundry square pods at $25.26 for 57 loads = $0.44 cents per load.

Conclusions: Savings, No Chemicals and How Long Will the Detergent Last

Y’all! The math don’t lie! I love saving my family money and we are using a detergent that is not full of chemicals! I call that a win win! This detergent will last us for a month! Can y’all believe that I’m only spending a little over $12 per month on detergent for a family of 6?!

Sensitive Skin: 

Yes! We use this on our sensitive skin! Several of our family members have sensitive skin with skin issues like eczema, ect. I have even used it in replace of the expensive baby washing detergent! I have been using this recipe for the last 16 plus years!

Liquid Laundry Detergent: Final Thoughts

When I first began making my own laundry detergent, the first recipe I used was for liquid detergent. I used that recipe for the first couple of years since we had a HE Washer and were told to only use HE soap. One day I decided to test a couple loads with the powdered detergent and never went back to the liquid. We have never had a problem with using either recipe’s in our HE washer’s!

Final Thoughts:

Have you ever made homemade laundry detergent? If so, what have been your thoughts? Hope y’all enjoyed the recipe and enjoy the savings!

❤️-Shae
987859BF-0D05-4509-9F98-8A51FFE7E6F7


Updating your Bathroom on a Budget

Updating your Bathroom on a Budget

Updating Your Bathroom on a Budget: It’s EASY!

[This post contains sponsored links. The items featured and linked, in this post is provided by LNC Home; all opinions and reviews are my own.]

E825101D-6403-4655-93A2-B481B5BB15CB

Bathroom Mini Reno on a Very Small Budget: Make the impossible, possible!

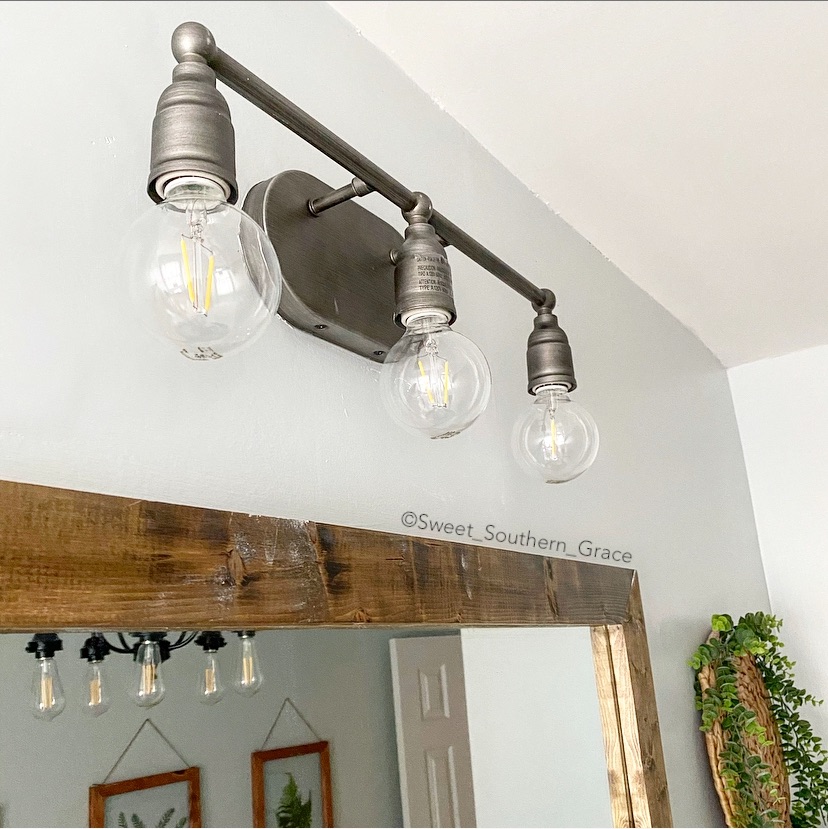
We had one last item to add to this bathroom after a mini bathroom renovation and that was our 3 Light Modern Wall Sconce  .

6564D7AB-DE08-465A-9552-ED3B78D436F0

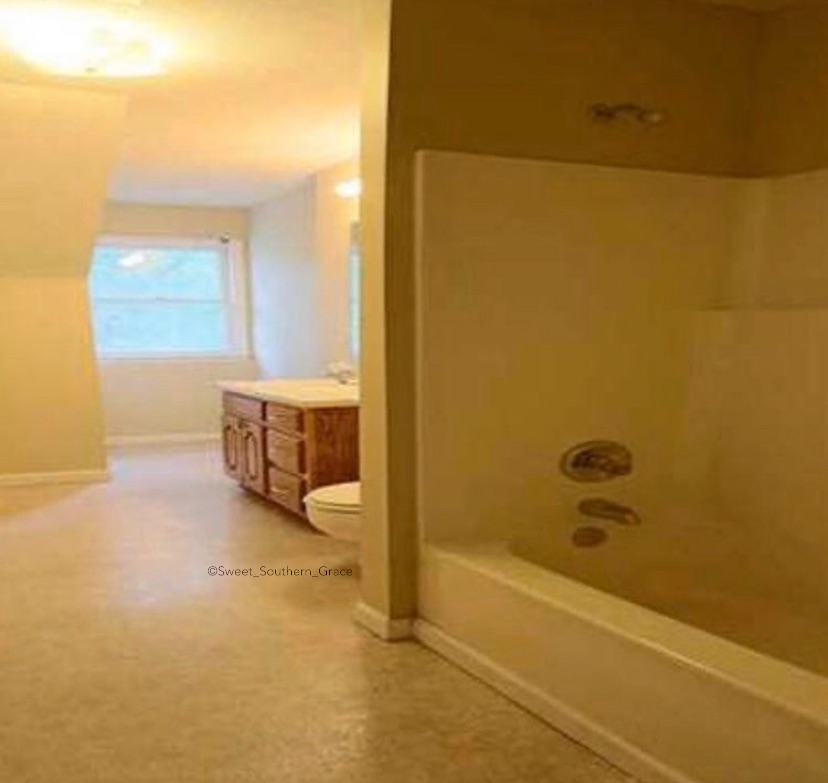
The before picture below is the day we purchased our home. It has really come so far on such a low budget!

3B6F1B3E-6FCB-44F7-B4FC-CD50C6C7945C

Decor Through the Years: Styles can Change!

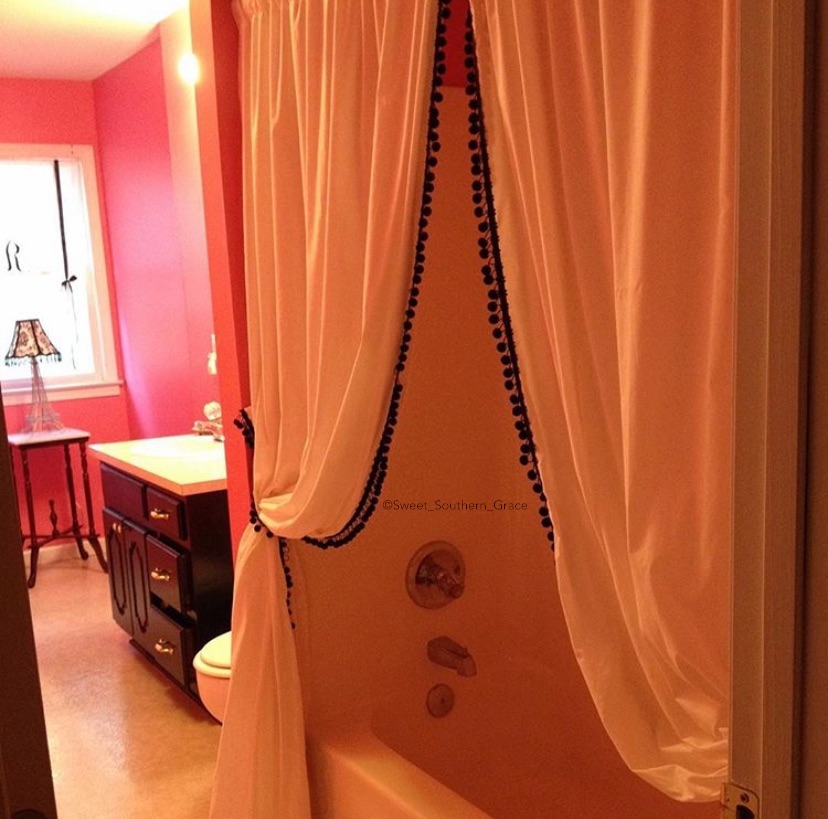
I would like to say that my decor tastes and styles have changed over the years. Some may believe I am scared of color because most of my home is now neutral but if you look closely, you will see color throughout my home! The photo below is what our bathroom looked like before the mini bathroom reno began. We had a very bright pink in the bathroom along with a black and white accent colors. Paris was the theme that my girls wanted! 

95D417D3-D200-4815-A45D-E4AEED1726C9

We decided to have a very small budget when it came to this mini reno, since it was the upstairs bathroom and is rarely used!

Budget Reno Details: DIY’s

For this mini reno, we removed the popcorn ceiling along with patching, painting the ceiling. I painted the walls in Lazy Gray from Sherwin Williams. I also painted all the baseboards, window and door with Ibis White from Sherwin Williams. I had the trim paint on hand.

42FB4C32-7B94-476E-AD7C-9DB4188DE9F9

I stripped the varnish/black paint off the vanity cabinet and painted the inside and outside with my DIY Chalk Paint. I applied a product called Ardex to the existing countertop, which is similar to concrete countertops. I added three coats of a clear sealer on it as well!  I did purchase new knobs and drawer pulls from Hobby Lobby when they were 50% so they were only $10! I re-used the existing shelf liner to the inside of the drawers and cabinet.

FBB58AB4-9CDE-4247-A5B6-2610048F3D57

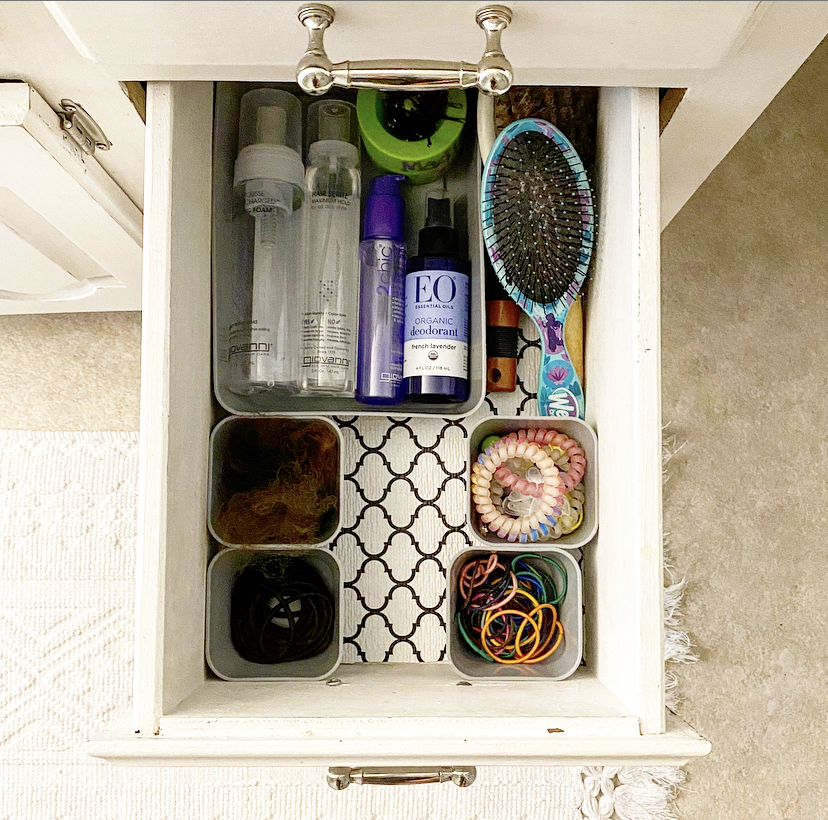
I purchased small plastics bins to help organizer the inside of the drawers and cabinet form Target. They were very budget friendly at $2 for a four pack!

7906D9C2-E8AE-4393-8603-105B170ACA65

My husband made a frame for the existing mirror and I stained it. The wood and stain were items that we had on hand from other various projects!

7B77E678-0948-4C2A-88FF-5025F9043520

We also added new hardware throughout the bathroom! I added a shower curtain and rug from Wal-Mart. I also added several baskets/greenery from Hobby Lobby. Most all of the decor were items that we basically already had on hand. The amber glass dispensers  were only $14 from Amazon. I added the labels with my Silhouette Machine!

2C572FAB-53A8-4B70-913E-9CD813AFB3EA

I painted the little table with my diy chalk paint. It was an inherited item from my Mom-Maw. I did purchase a new lamp shade for $8 for the white lamp. I sewed the curtain and added the monogram. (I made the curtain years ago.)  We hung a vintage window that we got for free off of Facebook Marketplace. The wood frames with greenery were a DIY with items we already had on hand. We found the hanging light fixture at a local thrift store for $6, several years back. I spray painted it black with spray paint that we already had on hand.

Budget Friendly Bathroom Light Fixture: 3 Light Modern Wall Sconce

Lighting is a huge part of any room transformation. A well-chosen vanity light becomes a focal point, setting the scene.

0B4262F1-3A7F-4CB0-8A60-F04CD286BE1E

I knew I wanted to replace the existing vanity light because it did not flow with our mini reno. Here is where my friends over at LNC Home into play! I found the  3 Light Modern Wall Sconce and knew it would be perfect for our bathroom!! Plus it was the finishing touch to this mini bathroom reno!

4C25E70D-B63B-43A2-878B-245769151364

3 Light Modern Wall Sconce: Farmhouse Style

This vanity light is made of metal with a silver painting finish. The simple lines and colors are full of retro style, creating a great atmosphere for you, which is ideal for your farmhouse style bathroom, kitchen, bedroom, doorways, barns and entryway.

55BB658B-28DB-4589-8A72-E341901A7D17

One of the best things about this light fixture is that it is budget friendly at only $89.99!! We are so happy with how the 3 Light Modern Wall Sconce finished up our mini reno in our girls bathroom!! Please check out LNC Home! They have many decor items for your home at budget friendly prices; from rugs to light fixtures to furniture and cushions! I know you will enjoy browsing their store!

Total Cost: Budget Friendly

Ardex-$30

Clear Sealer for Countertop-$25

Citri Stripe-$0-Had on hand

Cabinet & Table Paint-$0- Had on hand

Lazy Gray SW Wall Paint-$45

Cabinet Knobs/Pulls-$10
Plastic Storage Drawer Bins-$6

New Fixtures/Hardware-$0-Collab with Pfister

Amber Dispensers-$14

Lamp Shade-$8

Shower Curtain, Rug and towel-$50

Other Decor Items-$0-Had on hand

Hanging Light Fixture-$0-Had on hand

3 Light Sconce-$0-Collab with LNC

Total-$193

Hope you’ve enjoyed reading about our mini bathroom reno on a budget! We are making our home decor dreams come true, one at a time and of course on a small budget!!

❤️~Shae
Let the Sun Shine In with Kirklands

Let the Sun Shine In with Kirklands

Let the Sunshine in  with Kirklands

[This post contains sponsored links. The items featured and linked, in this post is provided by Kirklands; all opinions and reviews are my own.]

C33EAB96-7C1F-43BC-804A-05CD4583AEB5

Adding a Touch of Sunshine:

With everyone spending more time at home, I wanted to bring a little more sunshine into our dining room space. I am slowly adding more touches of boho to our home. Come along and see what I found at Kirklands that helps just bring a smile to my face every day!

C46CA886-0B47-4968-86F3-B037A2A63E35

Large Macrame Handwoven Wall Hanging:

I have been looking for a large macrame wall hanging for quite some time! I fell in love with this Large Macrame Handwoven Wall Hanging  . It gives your wall a bohemian, textured look! I am enjoying its natural appeal because it’s eye catching as you walk into our dining room!

291895D0-F8A5-4F62-A065-54E2E86B1F7E

The Large Macrame Handwoven Wall Hanging can fit many different decor styles from bohemian to vintage to cottage or farmhouse! I love how versatile it is for different types of decor!

DD80D5F3-BF12-4105-9209-86DBF6A9E156

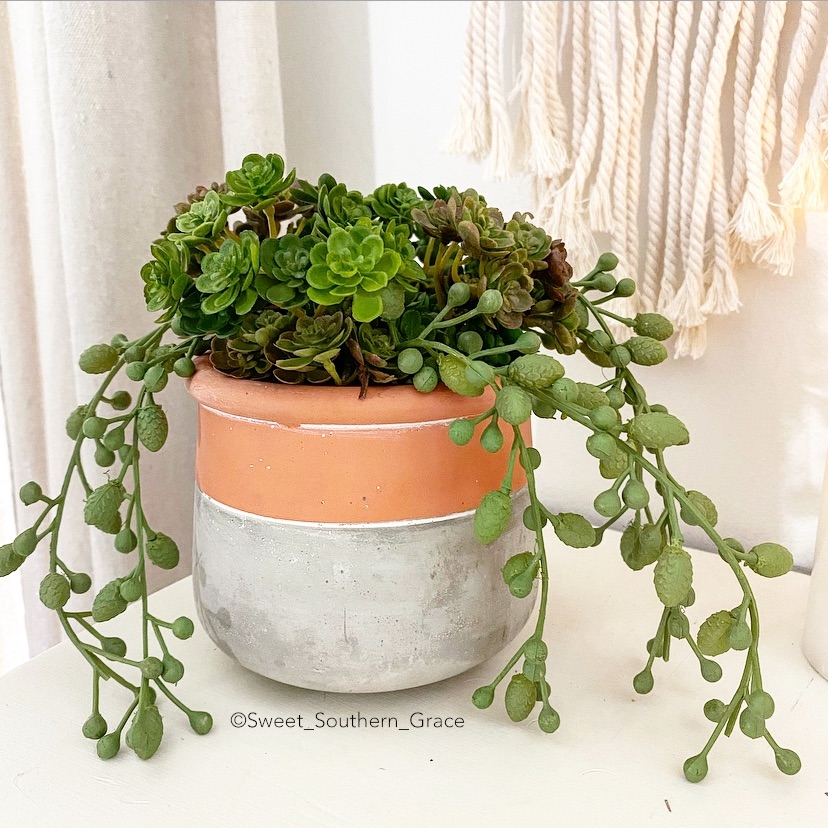
Succulent Arrangement in Clay Pot:

I am loving this little Succulent Arrangement in Clay Pot  . It is so realistic looking and it feels real to the touch!  I am enjoying its hues of white, green and tan!! The Succulent Arrangement in Clay Pot will add a touch of greenery to any decor!!

BF034473-A0CB-4AAD-ACEF-06117C85AFCB

Sunshine Well Received:

I am thankful to be enjoying these beautiful pieces in my home from Kirklands. They have decor to fit so many different styles and at great prices too! If you have any questions, please let me know! Which is your favorite item? Let me know in the comments!

❤️-Shae

Exploring St. Augustine, Florida: History and Culture

Exploring St. Augustine, Florida: History and Culture

This post contains sponsored links. The item featured and linked, in this post is provided by St. Augustine Lighthouse (six admission tickets); all opinions and reviews are my own.]

F0E130D6-F451-43D0-8550-3B35D1A44E7D

St. Augustine: History 

In June of this year, we had the pleasure of visiting St. Augustine, on the Atlantic cost of northeastern Florida. St. Augustine is a gem situated neatly along the shores of the Matanzas River and holds heavy historical significance! The Southern and Spanish-influenced St. Augustine, Florida was founded in 1565 by Spanish explorers and it is the oldest inhabited European-established settlement in the United States. When you are walking around on its centuries-old cobblestone streets, you will instantly feel like you are either in Europe or Old Florida, depending on which street you’re on! It’s a charming escape for anyone wanting to take a vacation!

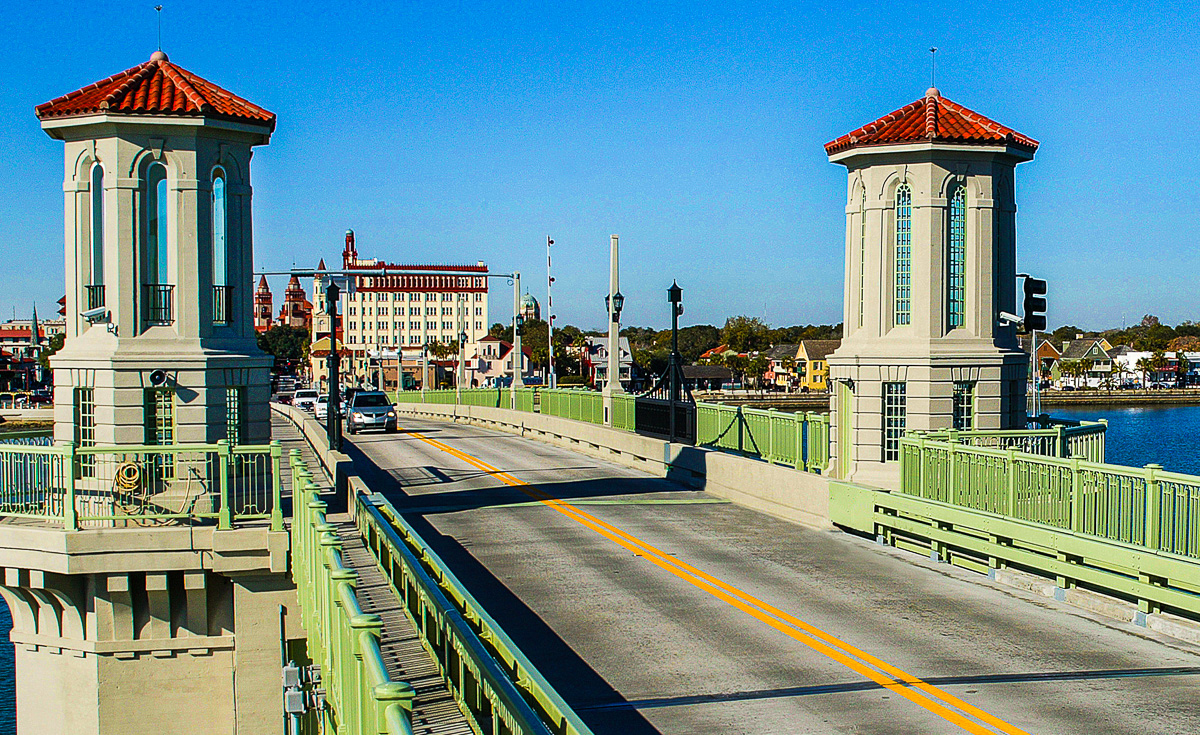
Bridge of Lions; St Augustine, FL; Plate Girder; Painted, Metali


St. Augustine: Arrival

The Bridge of Lions will take you across the Matanzas River to the heart of the historic old town. Once across the bridge you have the choice of turning left on Avenida Menendez to the marina and sight-seeing cruises or right to the Castillo de San Marcos. You can also continue straight ahead on Cathedral Street into the heart of downtown.


26BD8663-9172-4F45-8F93-404A9A394388

St. Augustine: Beaches 

One of the reasons we wanted to travel to St. Augustine was for the beaches! The beaches are so pretty! With a historic city being one of its main attractions, don’t forget about the  beaches near St. Augustine! From their sunrises to sunsets, they are stunning!

DAF9FA30-0B10-49DC-A09E-4631951C97C0

Located on Anastasia Island, a barrier island off the mainland, St Augustine Beach has a natural feel with a wide beach and lots of good surf and shorebirds!

762CE7A3-1D03-4237-B9BD-B94A139B20BC

St. Augustine: Lighthouse & Museum 

While traveling, one of our family goals is to visit every lighthouse we come by! The St. Augustine Lighthouse & Museum was a highlight for our entire vacation! When we arrived at the St. Augustine Lighthouse & Museum  , we were greeted by Daniel Lee, who  took us on a tour of the property and we learned quite a bit of history about the lighthouse. He was very welcoming and informative on the history of the lighthouse.

9500D6D7-E4B1-4D27-A9E1-F05328413540

History: Pre-1862 

The story of the the current lighthouse in St. Augustine is not the original St. Augustine Lighthouse. The Spanish constructed the tower that became the first lighthouse in 1737. They used a naturally occurring stone called coquina to construct the original tower. The coquina tower replaced wooden watchtowers the Spanish built dating back to the beginnings of Spanish Florida.

30C46964-8825-4BEC-AB1D-E3AA7146D06C

A map of Francis Drake’s 1586 raid on St. Augustine reveals the presence of a small tower on Anastasia Island. The map refers to the tower as “a Beacon or high scaffold standing on the sand hills, wherein the Spaniards did use to discover the ships at sea.” In 1823, John Rodman, Collector of St. Augustine, wrote to Stephen Pleasonton, Fifth Auditor of the U.S. Treasury, that despite the tower’s presence, “…it was never built for a lighthouse or used as one, but merely a look-out-house. The location is well suited…but a great proportion of the tower, nearly one half, is not sufficiently strong to bear any greater elevation either if wood or stone work.” 

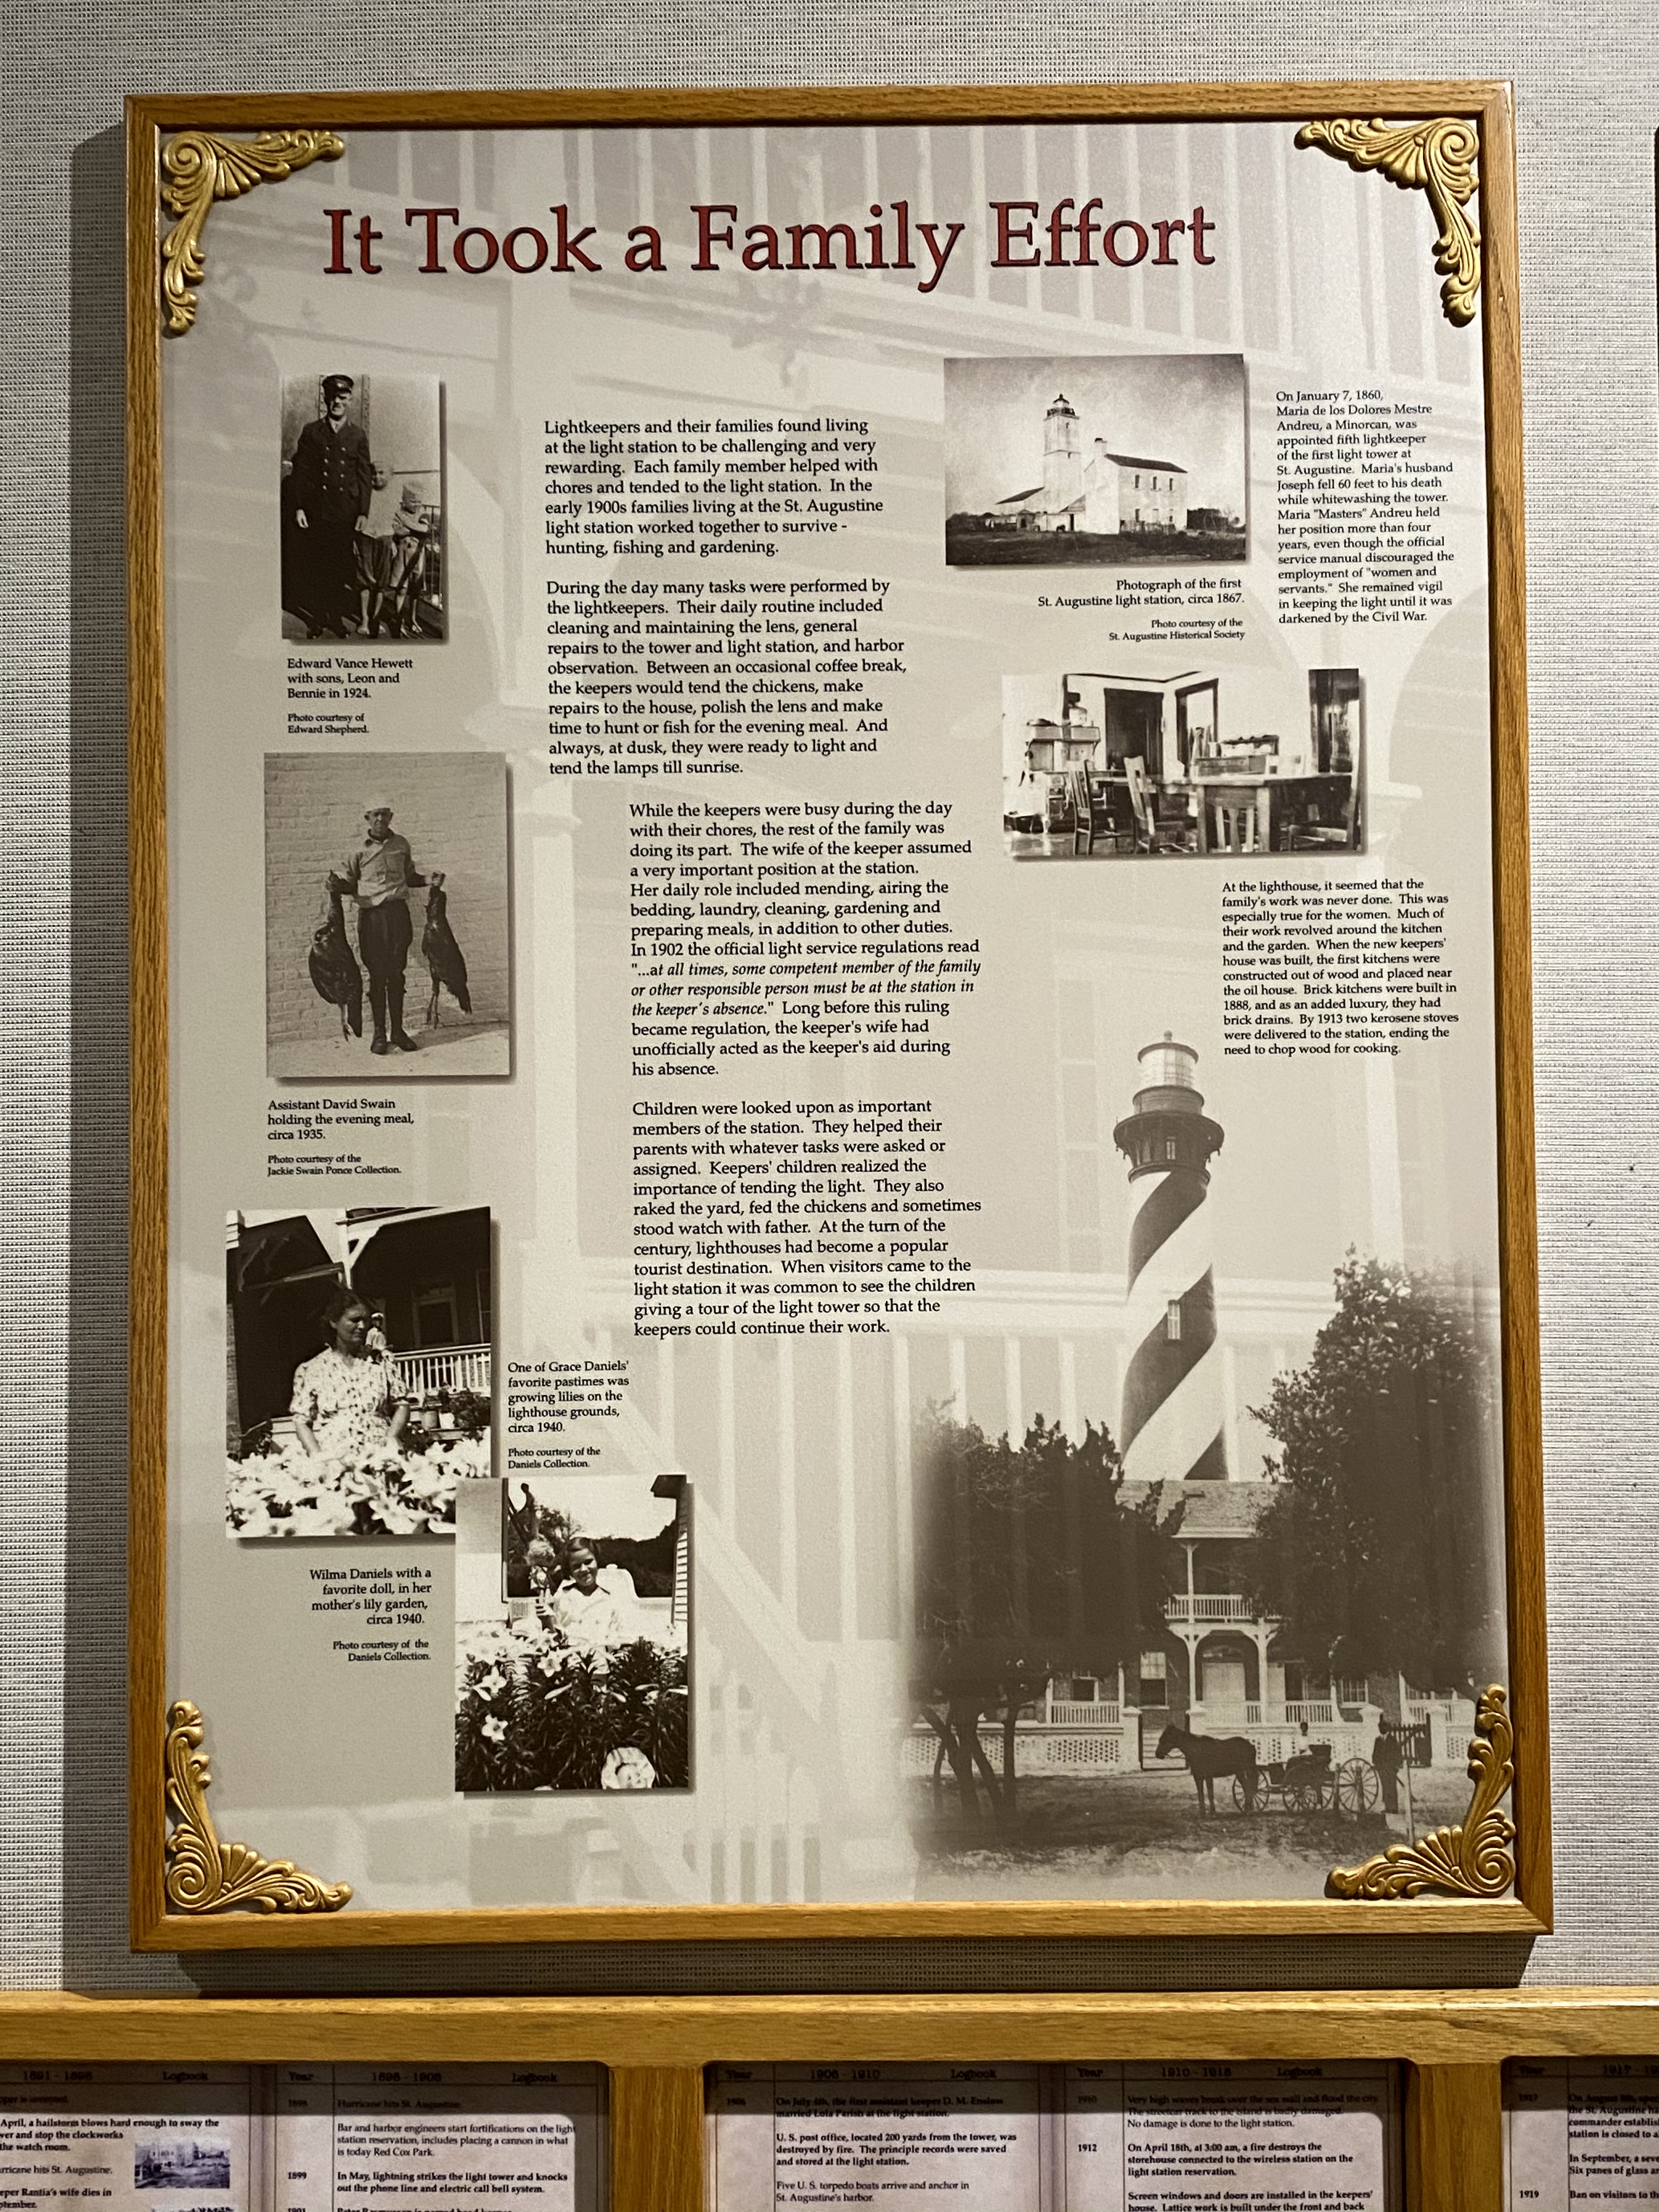
John (Juan) Andreu became first keeper of Florida’s first official U.S. lighthouse in St. Augustine. Not only is he one of the first, he also holds the distinction of being the first Hispanic-American to serve in the Coast Guard and the first to oversee a federal installation of any kind.

Juan Andreu served as keeper until 1845 and the records are unclear as to who took over and served as lighthouse keeper from 1845 to 1849. John (Juan) Carrera served as keeper from 1849 until his death in 1853. Joseph took care of the lighthouse until his death, which he fell, while painting the lighthouse.

Joseph’s wife Maria Mestre de los Dolores Andreu was appointed keeper in place of her deceased husband. The Coast Guard recognizes Maria Andreu as the first Hispanic-American woman to serve in the Coast Guard. Maria was the lighthouse keeper from 1859-1862.

History: Current 

5105B3B9-BD1B-49FD-8D65-FE3B926721BB

The current St. Augustine Lighthouse is nestled among live oaks and beautiful Spanish moss making a stunning nautical canopy. Also located on the property is Maritime Museum, along with the light keepers house.

D235C3CA-E9D5-48F5-B4D9-62BF3D4F0BC0

There is also the Maritime Hammock which is a natural area that the coastline formed when it receded, creating stabilized beach dunes that allowed for larger growth trees.

8C7C3493-A43B-4DB9-924D-58B0CA04DB20

There is even a cute gift shop located on the property as well!

CBD5316E-E4EF-492E-8015-0481DDD8DF19

St. Augustine Lighthouse: Climbing the lighthouse

To climb the lighthouse, you will need to climb 219 stairs! Trust me when I say that is is worth it! There are eight landings and even one with a bench. Plenty of space for others to walk past you and if needed, space for a break!

959D2900-F465-4326-85E3-99E1E397C9F4

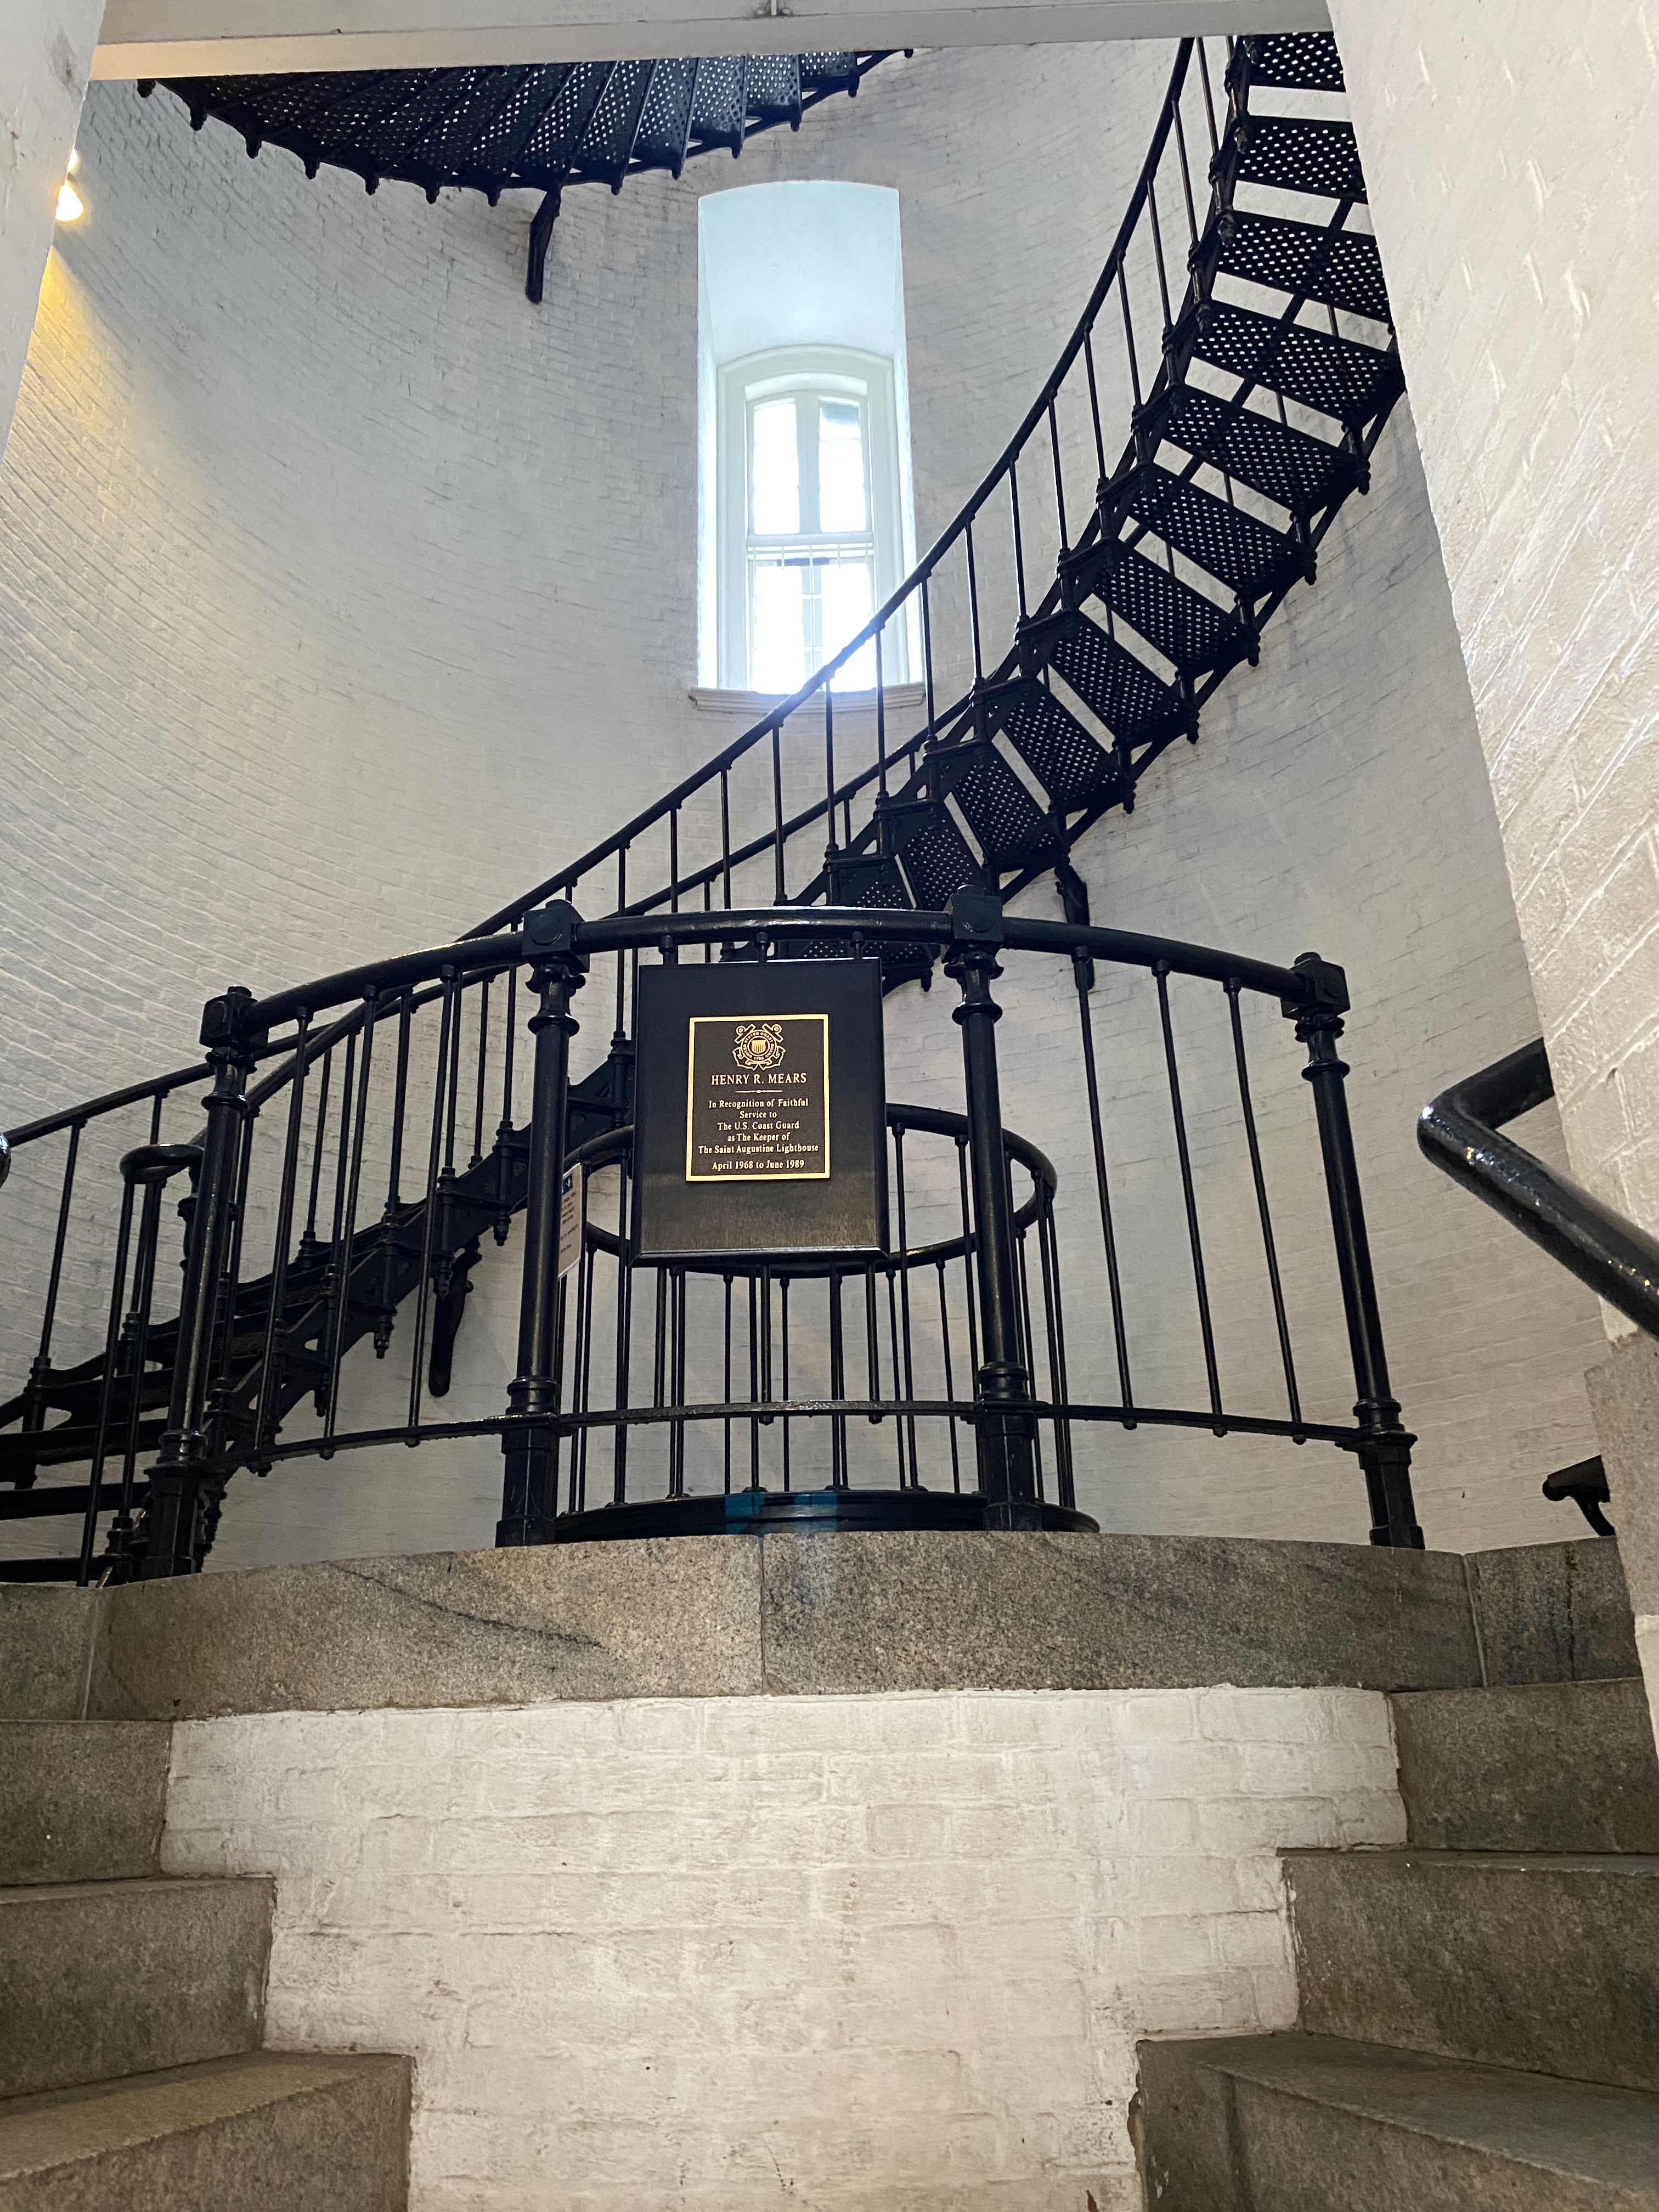
When you walk into the lighthouse, walk to the first set of stairs, go to the very middle and look up! This is the view that you will see!

A1372989-1B5C-4671-8641-EE5C0DA6090F

The view from the top is amazing! We had a couple that were a little nervous to be up so high, yet is not our first time on the top of a lighthouse either!

60EE4098-A5E2-4ABA-8562-B8203F752DE7

Amazing view of St. Augustine from the top of the St. Augustine Lighthouse!! If you decide to come to visit St. Augustine, don’t forget to stop by the lighthouse!

B98A3E64-07FE-4191-8A89-030F09A60CD7

St. Augustine: Downtown Old City Gates & St. George Street 

The Old City Gates are a site to behold toward the north end of St. George Street. The Old City Gates were at one time the only entrance into St. Augustine. The two ancient columns made of coquina were built in 1808 as a line of defense for the city.

89B84589-FCF5-4723-84ED-632AB57DC397

After visiting the Old City Gates, walk through to enter St. George Street, which is a historic street, that is filled with galleries, shops, restaurants and popular St. Augustine attractions.


FDFD5C36-8878-4C00-8125-0141DF429460

St. Augustine: Castillo de San Marcos

The Castillo de San Marcos is the largest masonry fort in the continental United States and was built to protect Spain’s claim to the New World!

Unfortunately due to the Covid-19 pandemic, the fort was closed on the inside. We did walk around the exterior of the fort!

St. Augustine: The Fountain of Youth  

1C6A0D5C-086E-4CC3-8751-88ADF53903C9

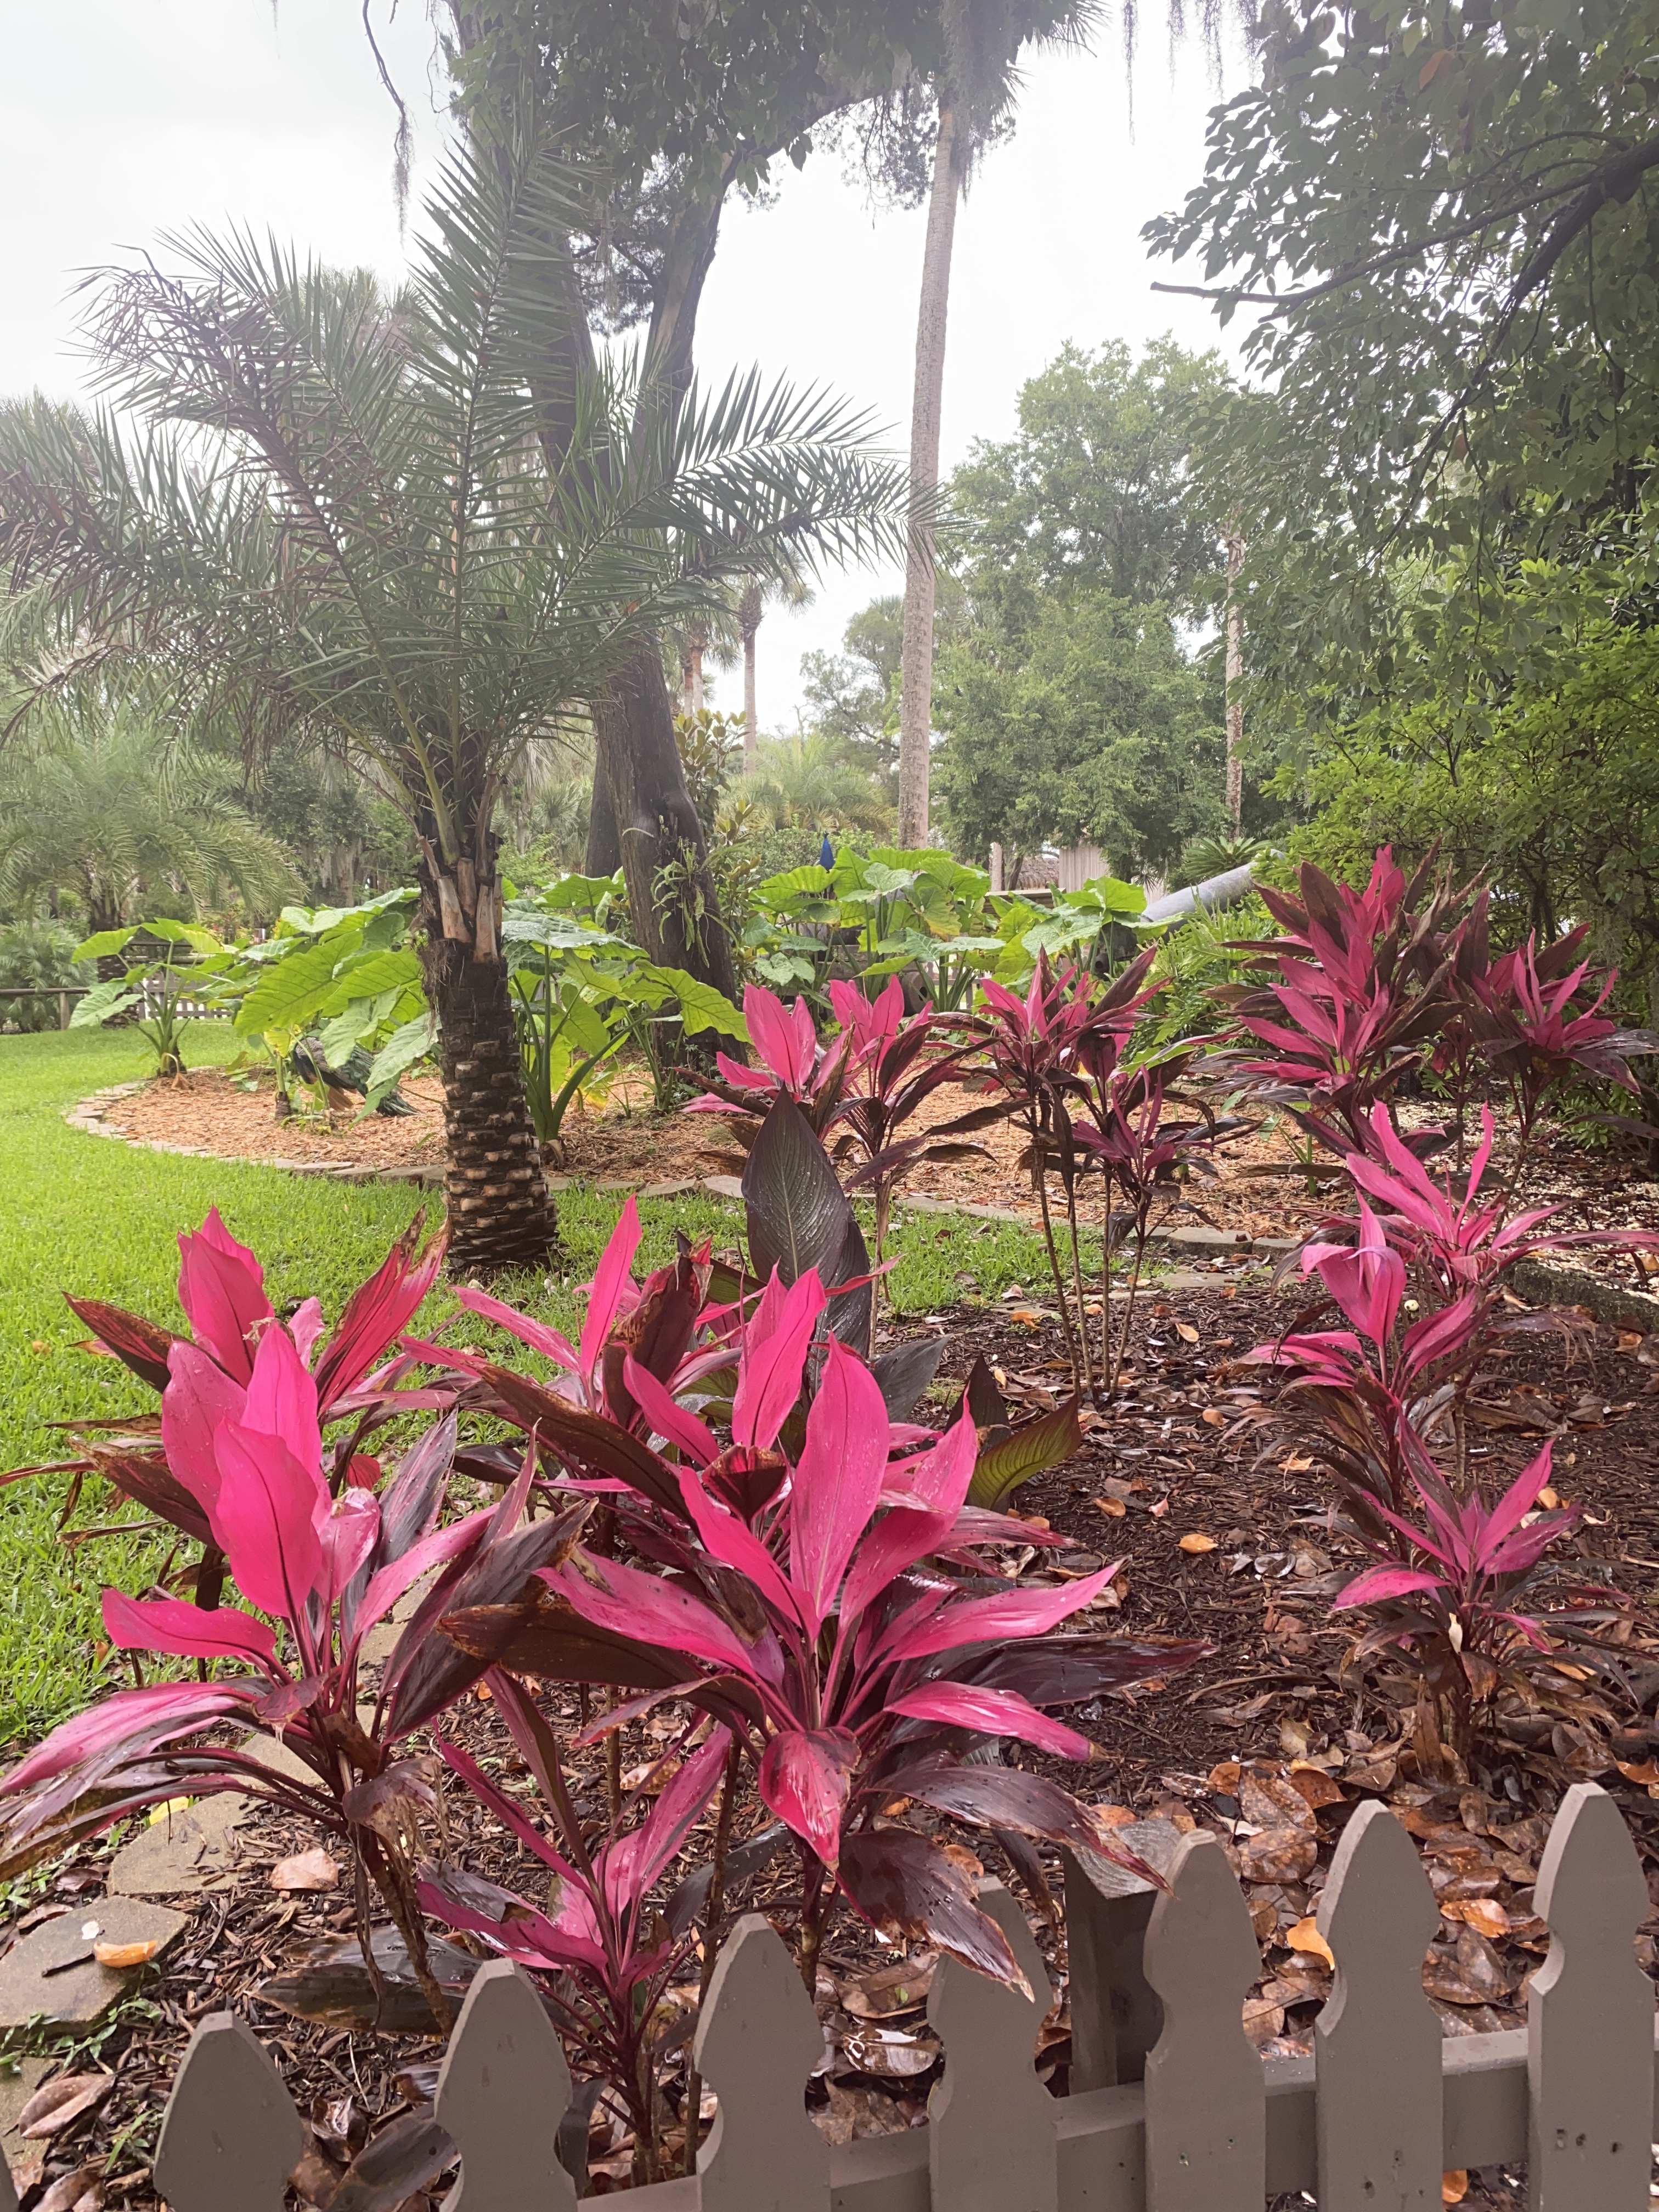
The Fountain of Youth was believed that anyone who drank from the fountain would have their youth restored. In 2,400 BC, the Native Americans, a tribe known as, Timucua, were amount the first to inhibit the land. Ponce de Leon was the first Spanish explorer to find the Fountain of Youth. The grounds at the Fountain of Youth are beautiful and you will also find several peacocks throughout the property!

B2F0DBEE-33DA-450A-8FDF-B89D289C2E7D

Drinking from the Fountain of Youth is wonderful experience that our family will never forget!

C82A31E8-DD50-47CA-8214-5BBB8843C20A

I could honestly go on and talk about St. Augustine for a long time! We love this city so much!  It is such a pleasure to visit the historical St. Augustine and we know we will definitely be back!

❤️~Shae


Refresh For Less Challenge with Kirklands

Refresh For Less Challenge with Kirklands

Refresh For Less Challenge with Kirklands

[This post contains sponsored links. The items featured and linked, in this post is provided by Kirklands; all opinions and reviews are my own.]

D4A3AF63-7E7F-4E87-9D49-3D4F56CD4A6E


Challenge Deets:

Kirklands challenge was to buy four items under $100 to refresh a space in my home!

Challenge Accepted: Shopping Time

When I arrived at my local Kirklands, I made a quick loop around the store then decided to do a refreshed space in my kitchen!

B394B1BC-B6D9-491B-A3D6-FCD80BDF2FCC

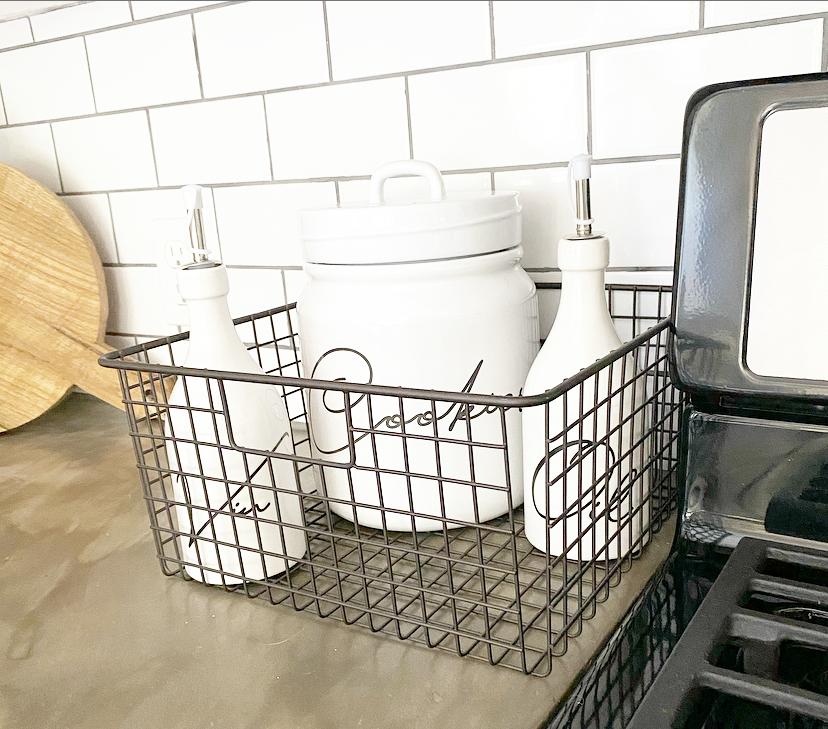
Ceramic Script Cookie Jar:

Since our kitchen is a Farmhouse style with whites and woods, I knew that the Ceramic Script Cookie Jar would be perfect in my kitchen! Plus, it was only $19.99!! If your kids are like mine, from the adults to littles, our family loves homemade cookies! What a  perfect way to savor that freshness with this cookie jar!

B394B1BC-B6D9-491B-A3D6-FCD80BDF2FCC

Ceramic Vinegar and Oil Dispensers:

As soon as I saw the  Ceramic Vinegar and Oil Dispensers for $19.99. I knew they would be perfect us! We love vinegar and oil on our salads, as we eat them almost every day! The dispensers match the cookie jar with perfection!

E3E3CECA-9F4B-4C76-920F-5DF7ACD88D88

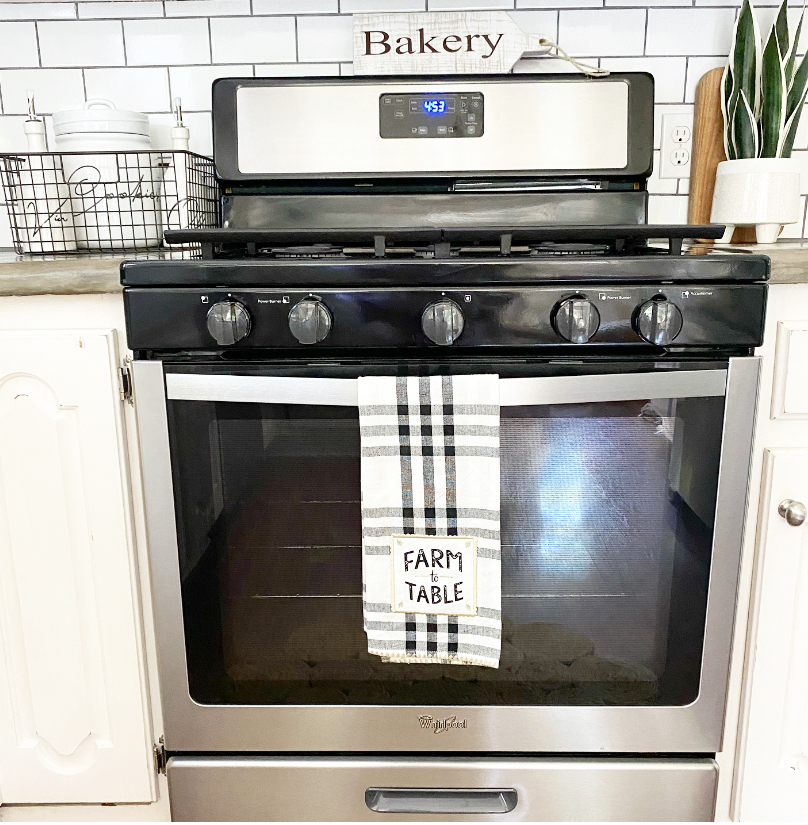
Sansevieria Snake Plant: Farmhouse Black Checked Kitchen Towel:

I think my favorite find is the  Sansevieria Snake Plant for $29.99.  I love that it looks so real!! It has a silk finish on the leaves and it’s planted in a ceramic planter! This would look beautiful anywhere in your home, from the bathroom to a bedroom or the kitchen!

0045FB50-92E3-4289-A427-17002FA70830

Farmhouse Black Checked Kitchen Towel:

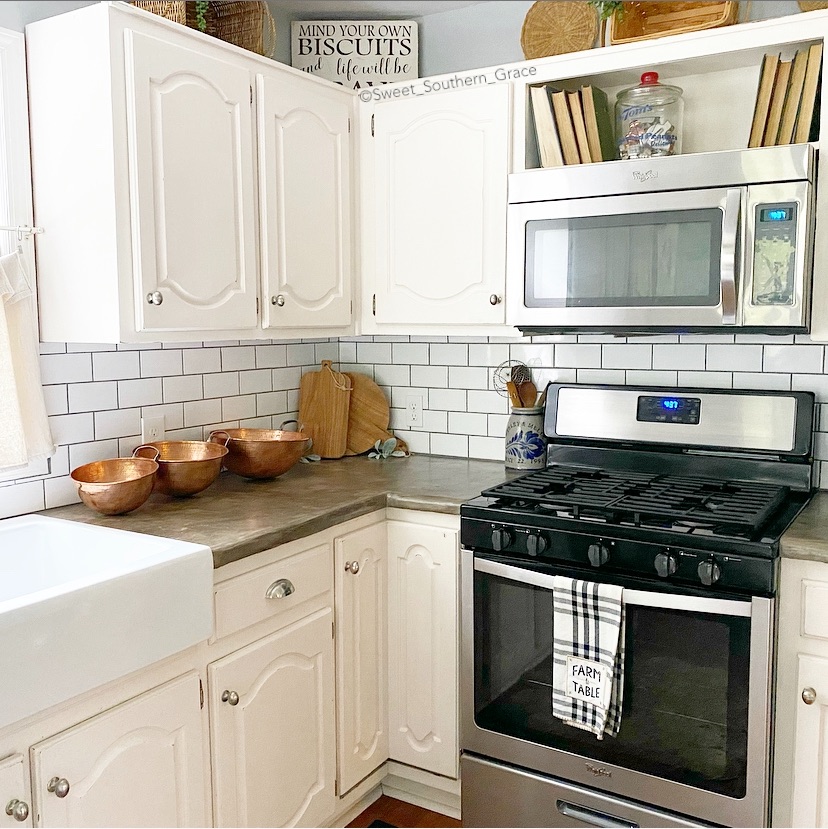
The latest item I picked up for the challenge was the Farmhouse Black Checked Kitchen Towel  for $8.99. It is so cute and farmhouse shabby chic! You could hang it over the handle of your stove like I have or over your farmhouse sink!

D4A3AF63-7E7F-4E87-9D49-3D4F56CD4A6E

Challenge Complete:

I enjoyed this Refresh For Less Challenge with Kirklands! All of my items were under $100!! Which item is your favorite? Let me know in comments! I hope you enjoyed stopping by!

❤️-Shae