“ This post may contain affiliate links, meaning I receive commissions for purchases made through those links, at no cost to you, through Amazon Associates program or Home Depot.”
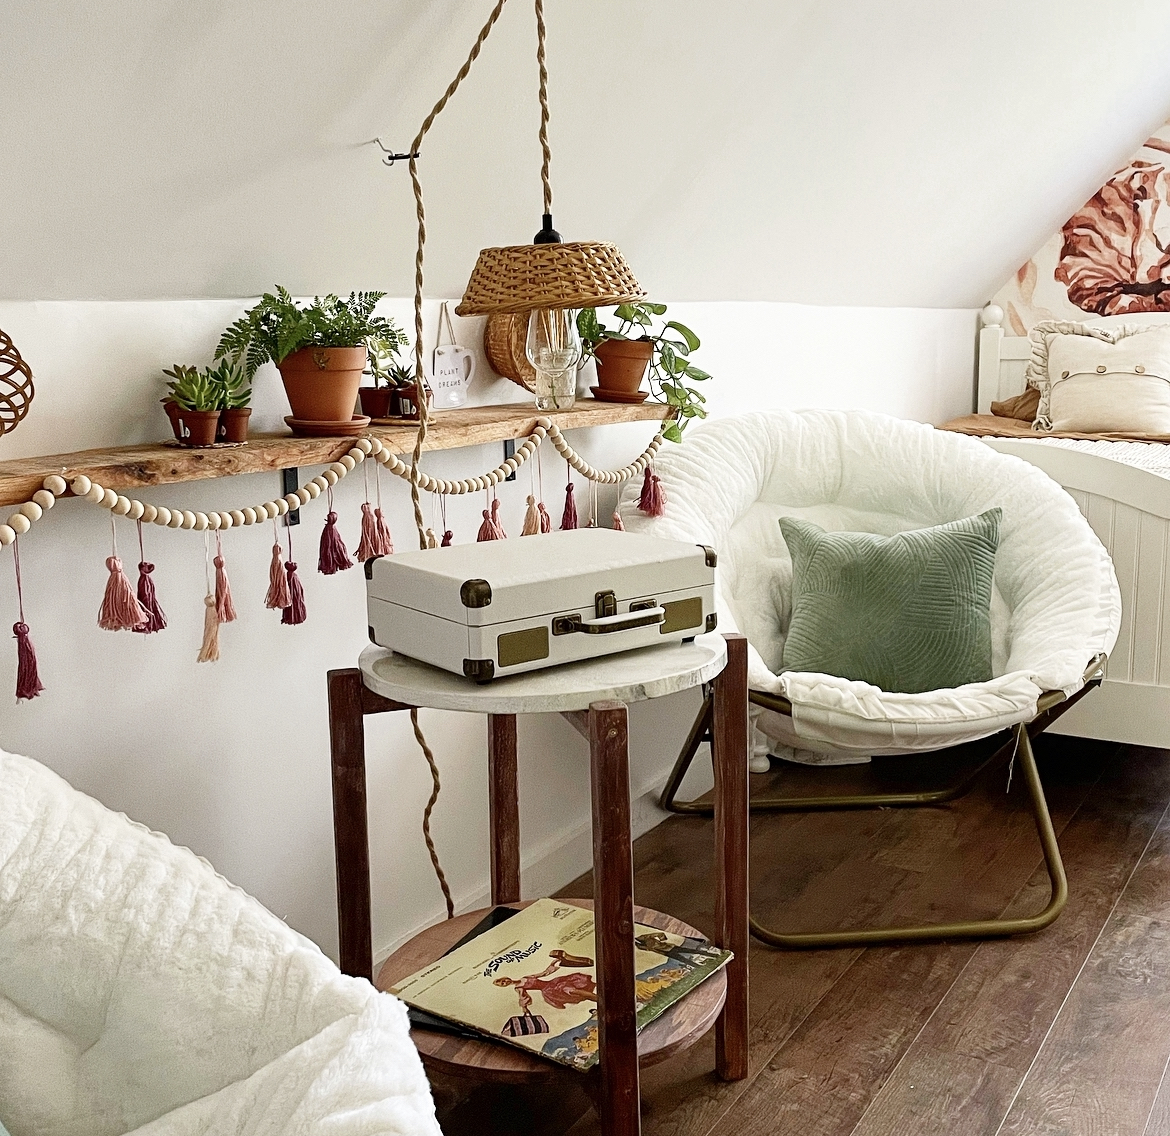
Anyone else love a good dupe?? This DIY Marble End Table is so easy to make and costs under $50 by reusing items you already have on hand! The Better Homes and Gardens version is priced at $100 plus!! Check out our IG Reel, pinned on IG!

That’s over a $50 savings!! We’ll show you how we created this dupe in about a weekend! My top tip is always use or reuse what you have on hand!

Six sweet bloggers have challenged ourselves to a DIY High End Dupe!! Be sure to check out each blogger at the end! Hosted by the very sweet and talented Terrie from Decorate and More with Tip!
What You’ll Need
- Round cut piece of quarter inch plywood. Our tabletop was a salvaged piece of wood from our daughters outgrown table/chairs set.
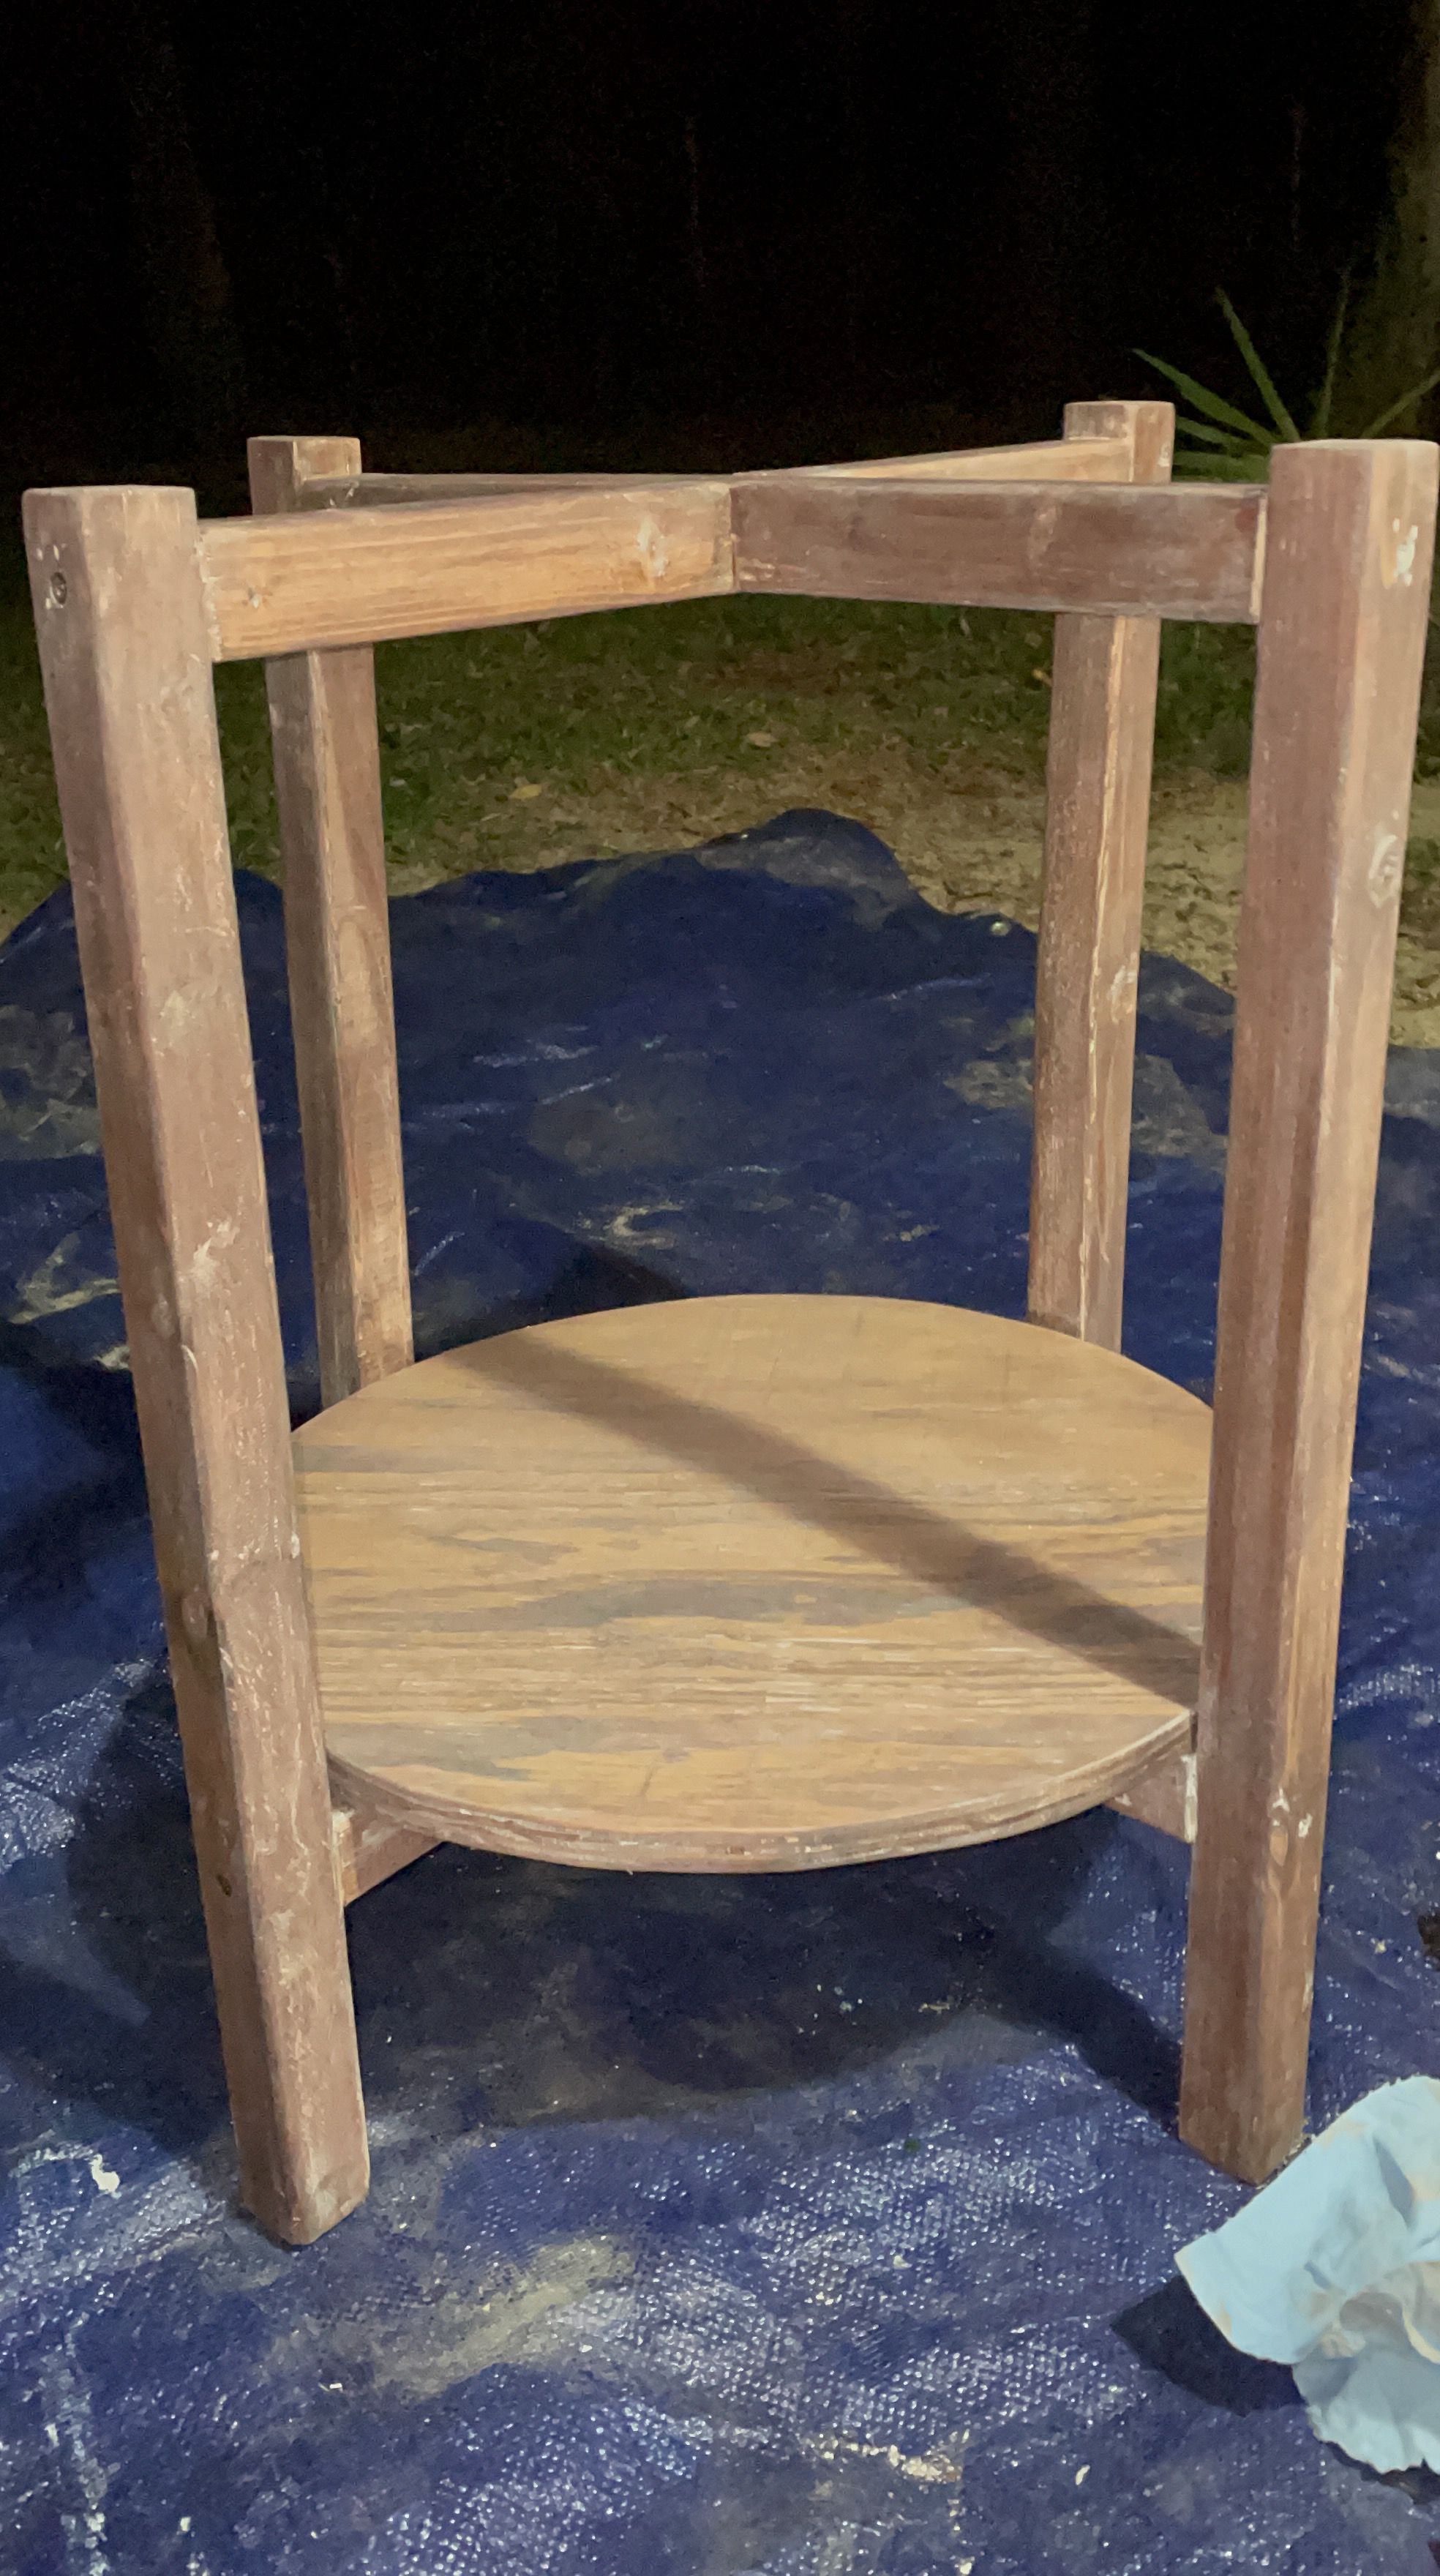
- 2×2 for the legs-We reused the table legs on the table. –
- Paint-We used white paint on hand from SW in Ibis White and SW Iron Ore.
- Stain-We used Minwax Seni Transparent in Red Oak, which we already had on hand.
- Wax-We used Minwax Grain Highlighting, which we already had on hand.
- Resin Kit-Linked in Amazon Store!
- Feather & Stick
- Paint Brush
- Sponge or old t-shirt.
- Spray bottle with water.
- Screws/Screw Driver
- Saw
- Sander/Sand Paper
How to Create your DIY Marble End Table
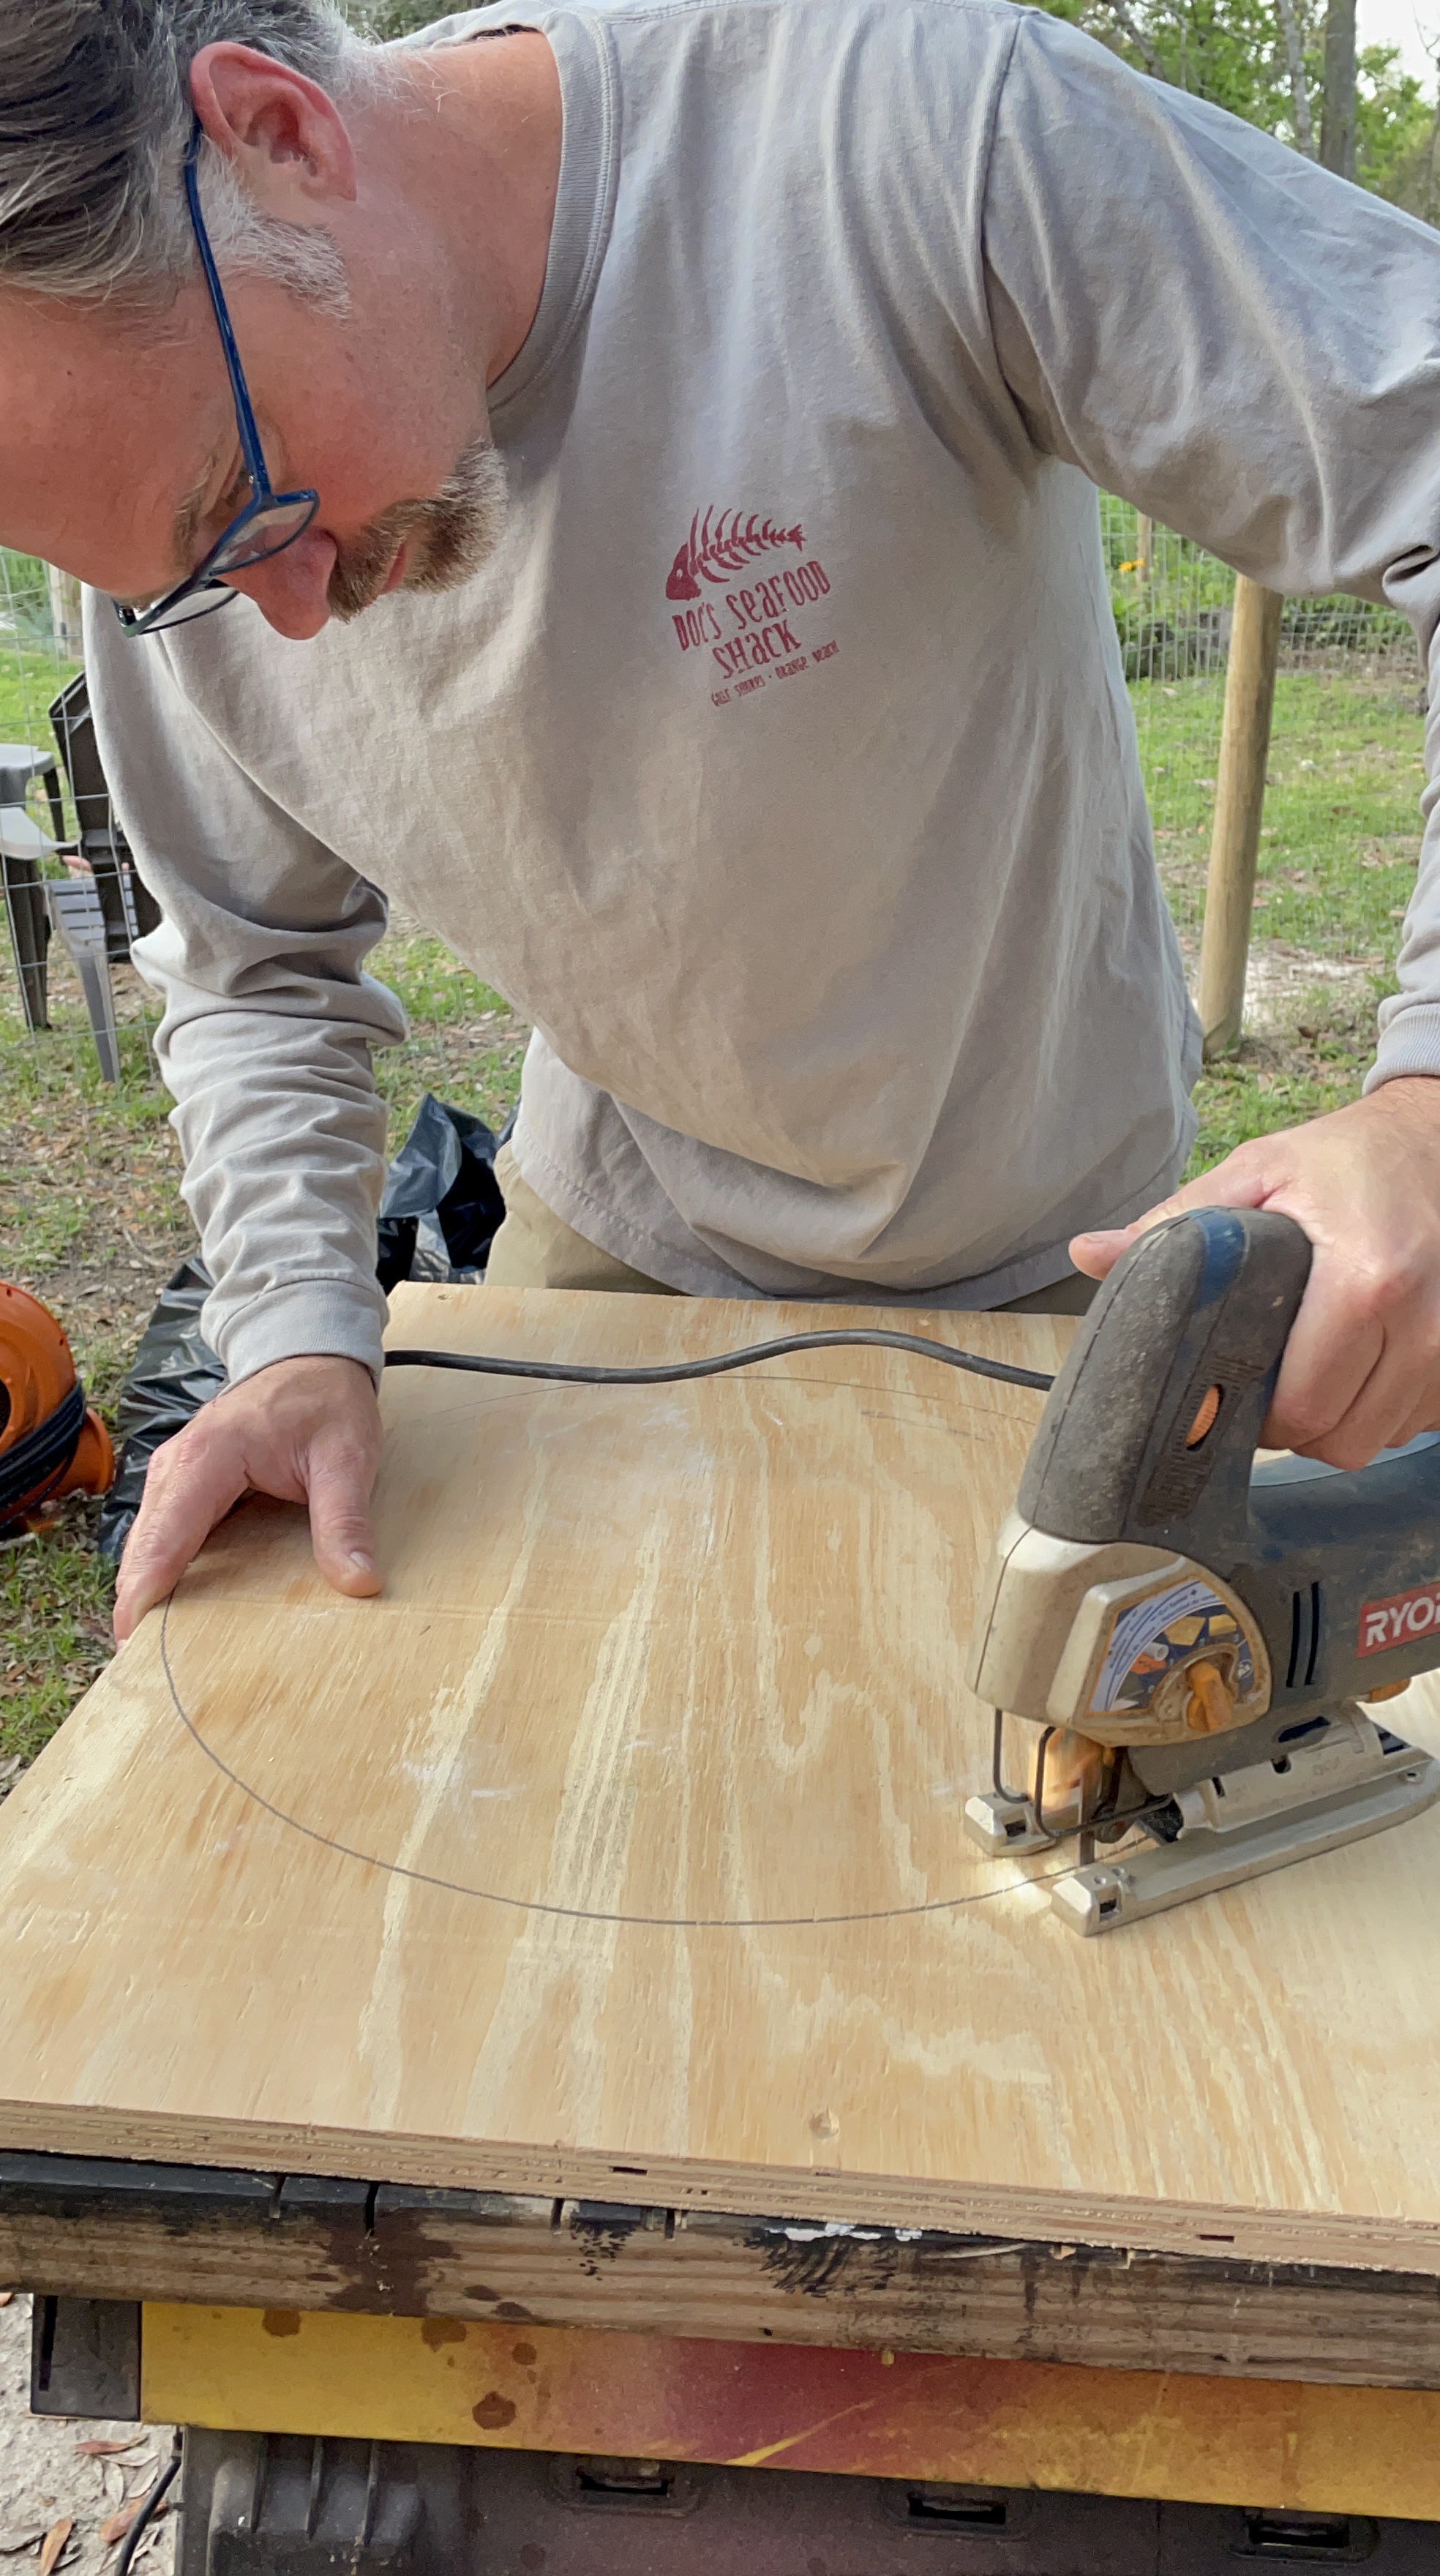
•Start by cutting your top and bottom boards of your table. Sand until smooth.

We repurposed the girls play table & chairs set into this table. Photo is circa 2014!! Our #4 was not even born yet!

We did purchase a piece of wood for the bottom round piece.
•Assemble the table legs with screws and sand!

•Stain your table legs, round board and cross top pieces.

•Paint your table top white.

Begin making marble lines with a grayish black color of paint with a feather or a stick.

As you make lines, immediately spray with water then begin blending with a sponge or old t-shirt, until you get the desired ”marbling”.

• Resin time- I let the paint ”cure” for 24 hours before applying the resin to the top!

When applying resin, this is a good time to follow the directions on package insert!

•Wax-After assembling the table together, add the wax and your done!
Once everything is dry and cured, style your new table! Now you have a beautiful DIY Marble End Table!
I hope you have enjoyed our Better Homes and Gardens Marble End Table Dupe! Check out my blogging gals dupe’s below!
Decorate and More with Tip – Terrie
Through a Vintage Door – Teresa


What a beautiful table you created. I have always wanted to do a marble technique but haven’t. You make it look so easy I am tempted to try it. Thanks for sharing your way to create the table. I love it!
LikeLike
Thank you Terrie! You should try it! It was so much fun!
LikeLike
Oh my, how stunning, Shae! I was amazed how you created the marble effect and using resin – a technique which is quite popular and trendy right now! You must be quite proud and I’m sure you’ll receive lots of wonderful compliments on your awesome looking table!
LikeLike
Thank you Gail! You are always so kind! I enjoyed working with resin and the marble technique was a fun learning experience!
LikeLike